Silencer Materials
1 ¼ inch PVC Pipe— 10 inches each
½ inch PVC Pipe— 11 inched each
½ inch Foam Pipe Insulator 3 inches each
½ PVC Coupler --4 –1 each
Procedure
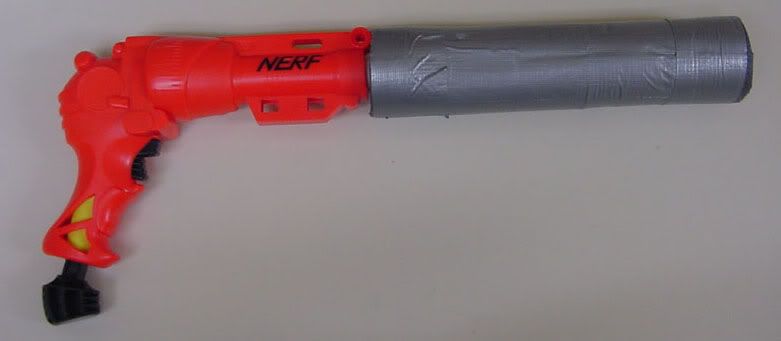
We cut the PVC into four equal sections with a hacksaw. We took the half-inch PVC segments and used a dremel to cut different patterns in the PVC for the air to escape through the silencer. Then, we cut up half-inch foam insulator into 1 inch segments to be placed on the PVC later. At the end of each PVC segment, there was a half-inch PVC coupler that would attach to the homemade air gun.
On silencer number one, the pattern of air holes was four straight lines of holes. This is where the air that propels the dart will flow through into the chamber. This will silence the noise by causing the air to come out slowly after the dart is shot. On silencer number two, the pattern of air holes were different from number one. Number two’s air hole pattern is drilled holes spiraling up the pipe. Number three’s pattern was a crevice that spiraled up the barrel. Number four’s pattern is four straight lines drilled out by a dremel. For all the silencers, we placed the half inch foam on the ends of the half inch PVC, and then slid the 1 and ¼ PVC over that. The silencers were then ready to be put on the air gun.
To test the silencer, one of us would shoot the air gun, and another would stand about 30-40 feet away, and face the opposite direction. Once it was shot, the person would say if they heard it. After they were all over, the person would write down which one was the loudest to them. This was tested over 4 people who were not involved in making the silencers.
Observations
We saw that this project was going to take a variety of supplies to complete. The PVC, which was used for the silencer, would have to have many holes in order to quiet the shot. We saw that in order to trap the air, we would have to use foam insulator within the silencer. To test multiple silencers, we would have to make them interchangeable, so we put half in PVC couplers on the end of each silencer. Silencer number ones pattern of holes was just four simple straight lines of holes. Silencer number two was a little more complex, with spiraling wholes going up the barrel. We noticed that number three didn’t use holes at all, but used a crevice that spiraled up through the barrel. Three was basically a rifled PVC barrel. We saw that number four also used a crevice, but it was just four straight crevices that went up the barrel. The test for the silencers was rather simple. One person would fire the air gun, and someone else would stand 25-30 feet away, turn, and would listen to each shot being fired with different silencers every time. We noticed that the silencers really did make a difference, and that silencer number two seemed to work the most efficient, and was coted to have silenced the air output the greatest by all of the observer's/test subjects.
Conclusion
This project was meant to test if there was a simple way to silence air output. We made simple homemade PVC silencers that had a great effect. It was tested by using regular people who weren’t involved in making the silencers, to judge which shot was the loudest. There is in fact an easy way to silence air output by an air gun. We have discovered that having a spiral pattern of holes gives the air much room to expand into and releases the air slowly after fired and therefore silences the air output the most.
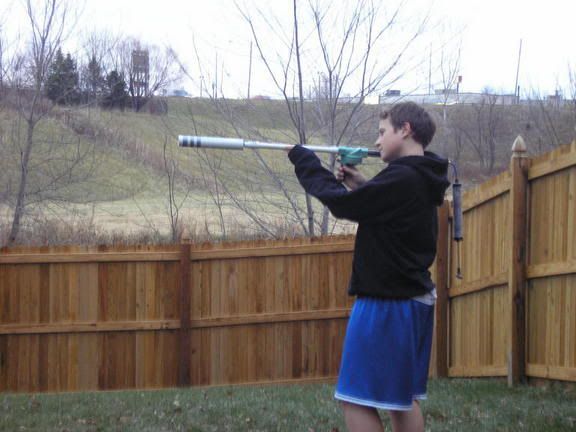
These silencer's were tested on a Homemade sprinkler solenoid homemade air gun made of the following parts.
¾ Solenoid Sprinkler Valve—1
¾ PVC Nipple, 12 inch—1
Car Tire Valve--1
Basketball Pump--1
½ PVC Pipe—5 inches
9/12 Brass Tubing--12 inches
17/32 Brass Tubing—5 inches
This gun fired 2 inch stefans made of the following materials.
½ Foam Backer Rod--2 inch each
.177 Metal BB’s—3 each dart
Glue—hot glue sticks

More pictures to be added soon, including pictures of our(Jester and I) Tri fold display board for this report/project.


