Jump to content


Photo

Bullpup Stampede

A new look for an old auto

8 replies to this topic

#1 Aeromech

Aeromech

    Member

  • Moderators
  • 434 posts

Posted 14 March 2013 - 04:14 PM

To preface this build: There very well may not be a point to this build. But I had an idea and some free time, as well as four Stampedes left over from a previous build. I was able to take off a few inches from the overall length of the stampede, as well as change the ergonomics of the blaster for the better. The handle and trigger are further forward, but it's not at all uncomfortable.

Let's get started.

Use a small saw or a rotary tool to remove the bulges of the battery compartment on the shell of the blaster. Make it look like this:

Posted Image

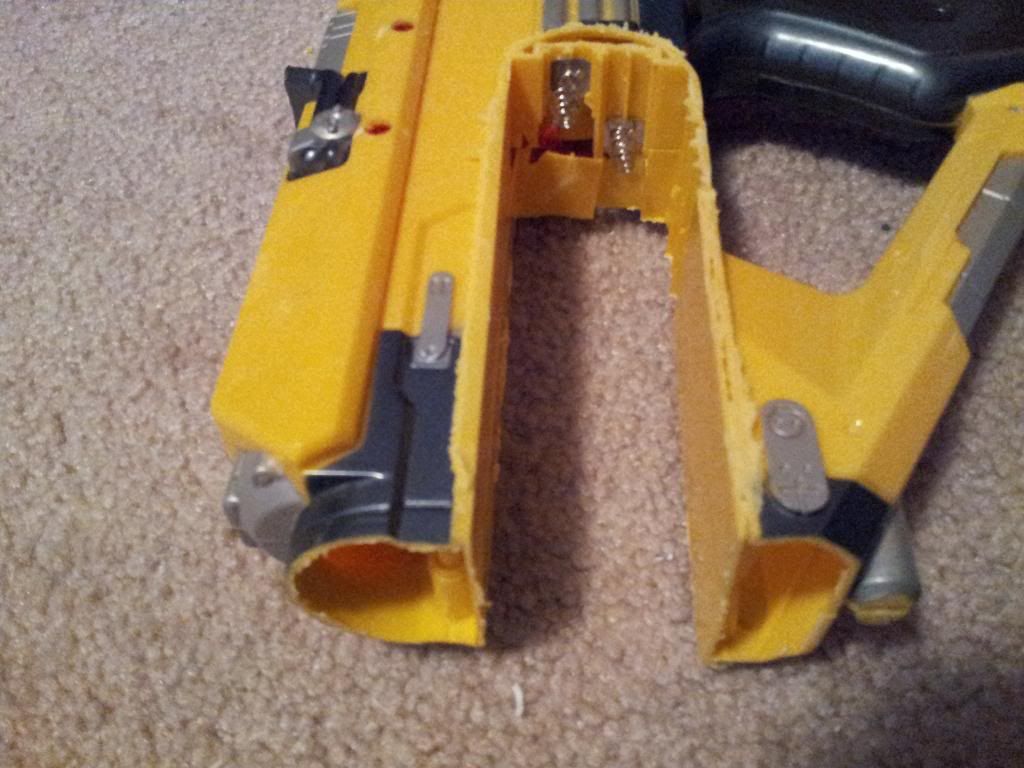
I could have taken off another half an inch, but I would have sacrificed the screw port behind the plunger assembly. I decided it was not worth the risk.

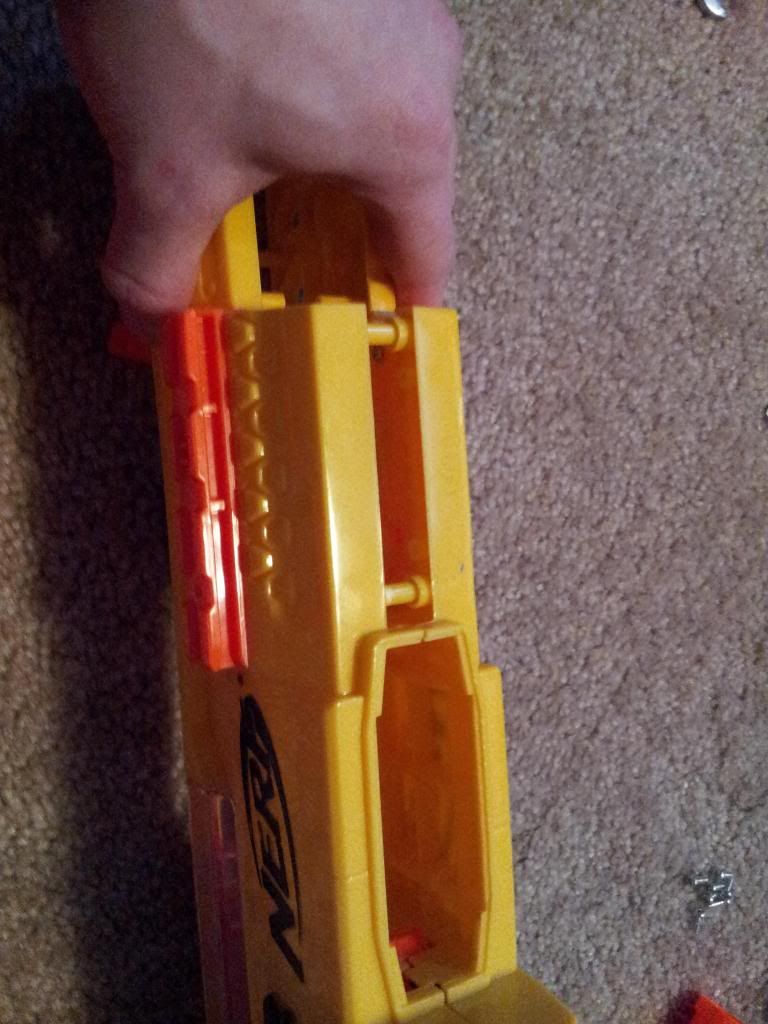
You'll be removing the springs that used to connect the battery tray. In fact, you can completely detach all wiring from the battery. Yes, this necessitates listening for when the blaster fires the round before the trigger can be released, but even with this removed, double feeding has been very rare. More on this later I can already hear the protests but bear with me.

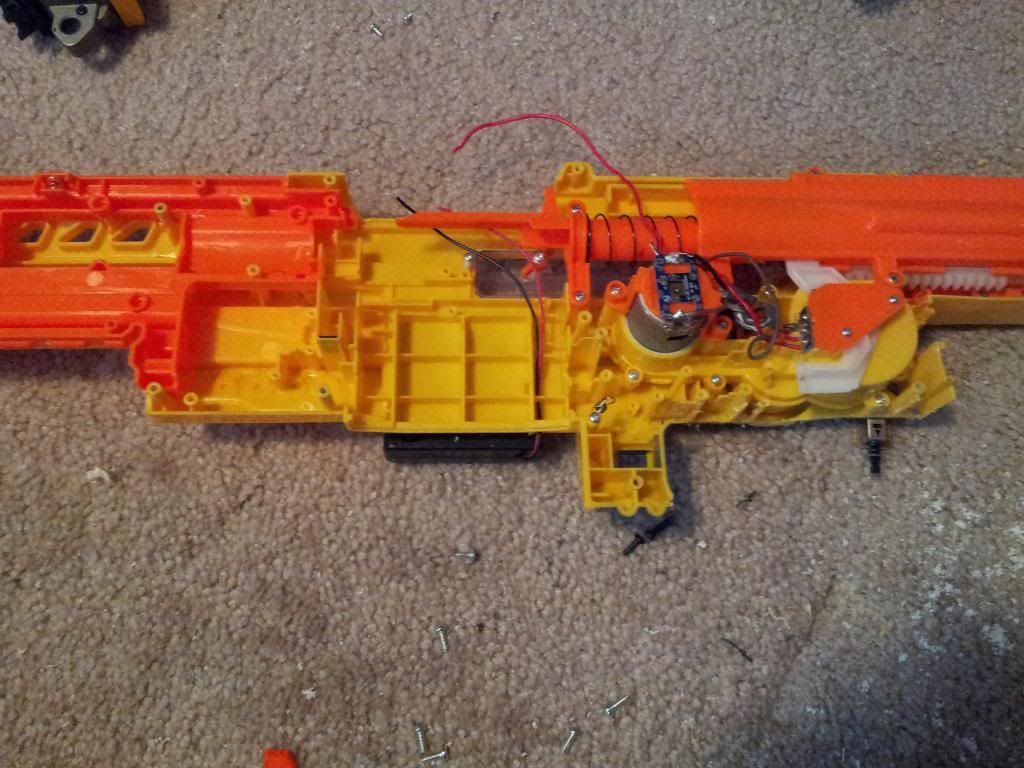
Pop it open and perform any modifications you want, AR removal, spring replacement, padding, whatever. There are writeups all over the place for that stuff. Just be sure to remove every single lock in this thing, it will save you a lot of trouble in the end.

Posted Image


Remove the bottom rail from the orange inside barrel assembly of the Stampede, as shown below.

Posted Image


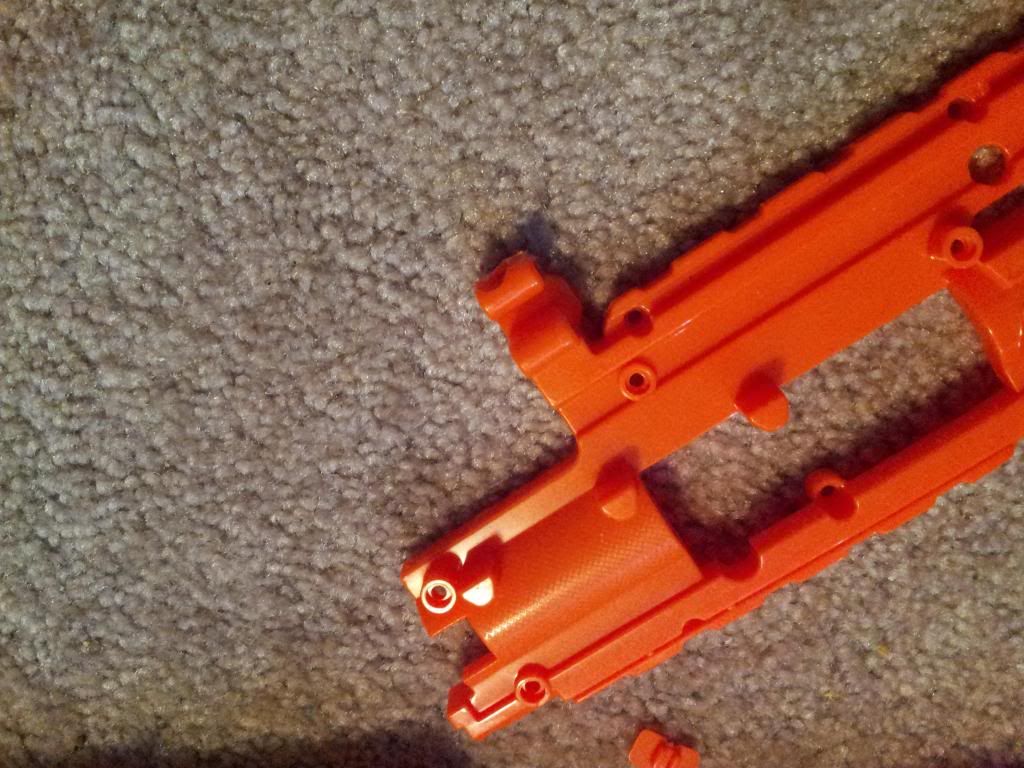
When you test fit the blaster back, you'll be left with this; the recess in the center of the forward end is necessary.

Posted Image


Oh Jesus, no turning back now.

Posted Image


The next part involves powering the blaster. The stock battery tray has been tossed, so two 4x AA battery holders have been replaced, with one on each side. Use two or three small screws drilled through each box to secure them onto the side of the blaster. This will yield a potential of 12V with standard AAs.

Posted Image


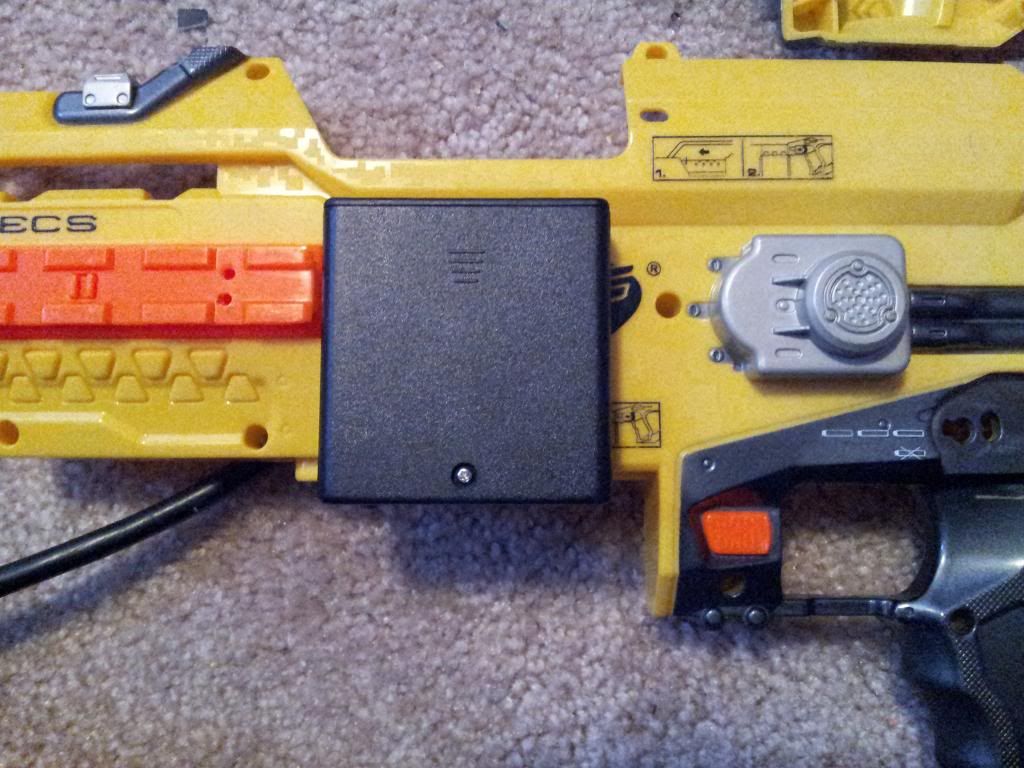
You should have this; the black boxes behind the magazine well are battery boxes that were just installed.

Posted Image


For the forward magazine release, a picture speaks a thousand words.

Posted Image


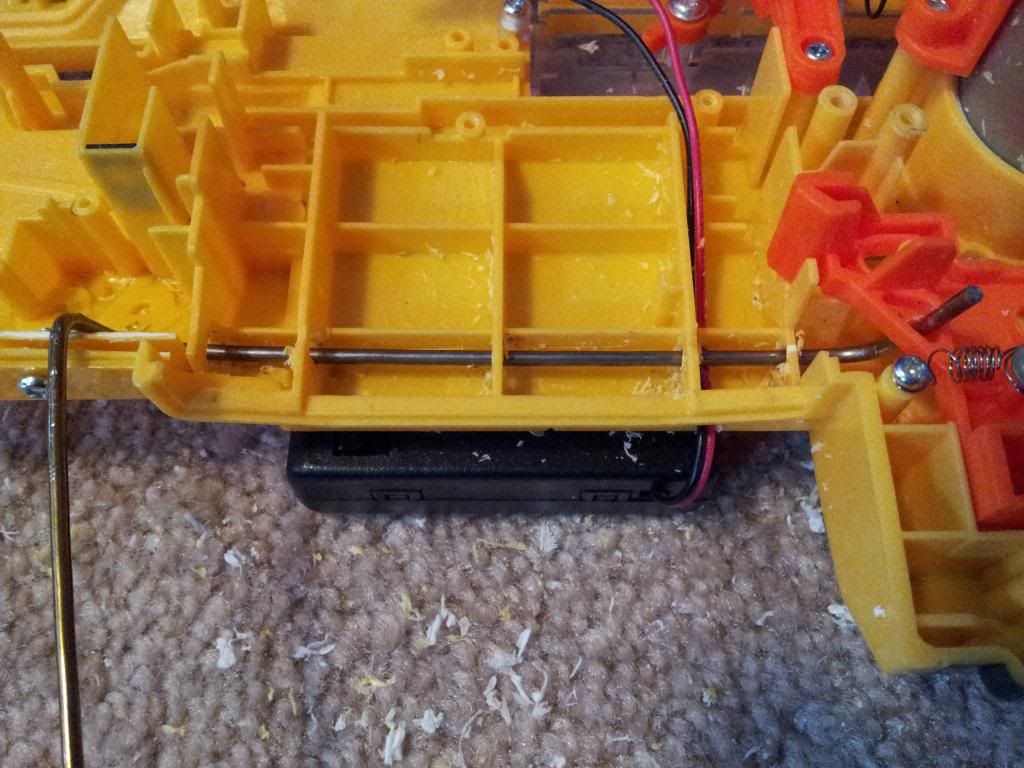
Drill through the inner walls of the magazine well, leaving enough room for whatever metal rod you choose to use for your magazine release. After the straight rod is inserted into the channel you drilled, then bend it at each end, and drill a hole through the orange magazine release. I only used a wire hanger, so it's a tad squishy, but if a beefier steel rod was used, this won't give you any problems.

As seen in the same image, the wires from the battery compartments have been run through the same recess in the magazine well. Cut another channel just above and parallel to the mag release rod, leading the wires to the front of the blaster, inside the space in the fore end. You will need to add extra wire for this, the wires with the battery boxes aren't quite long enough for this.

Now for the new trigger,

Posted Image


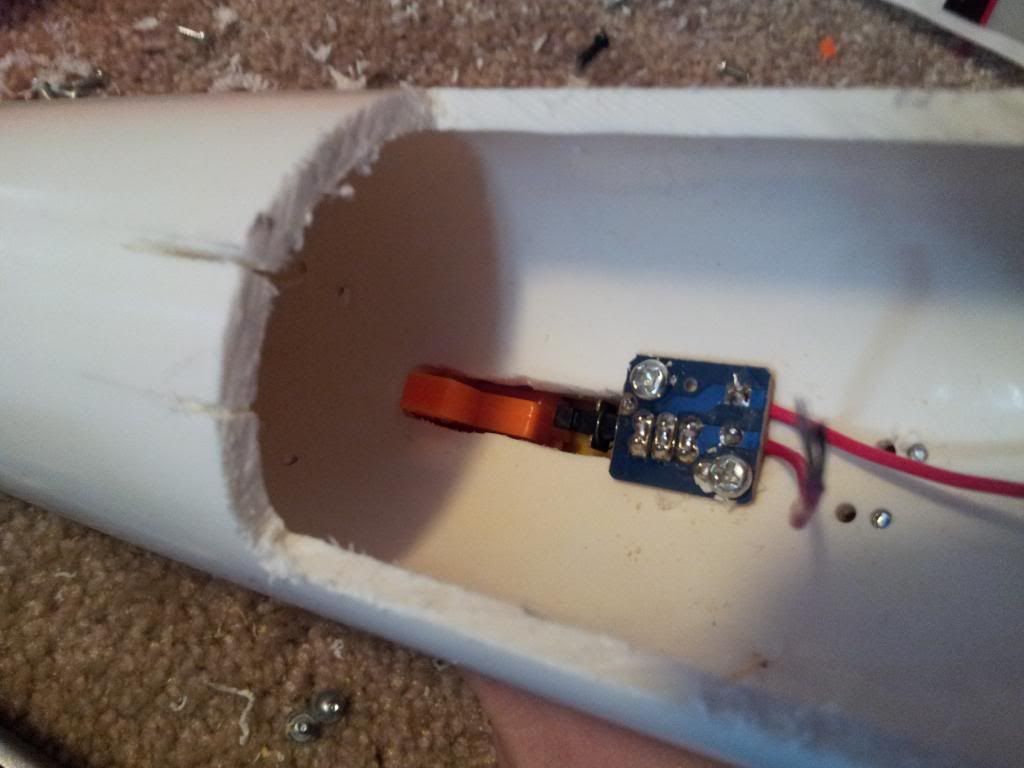
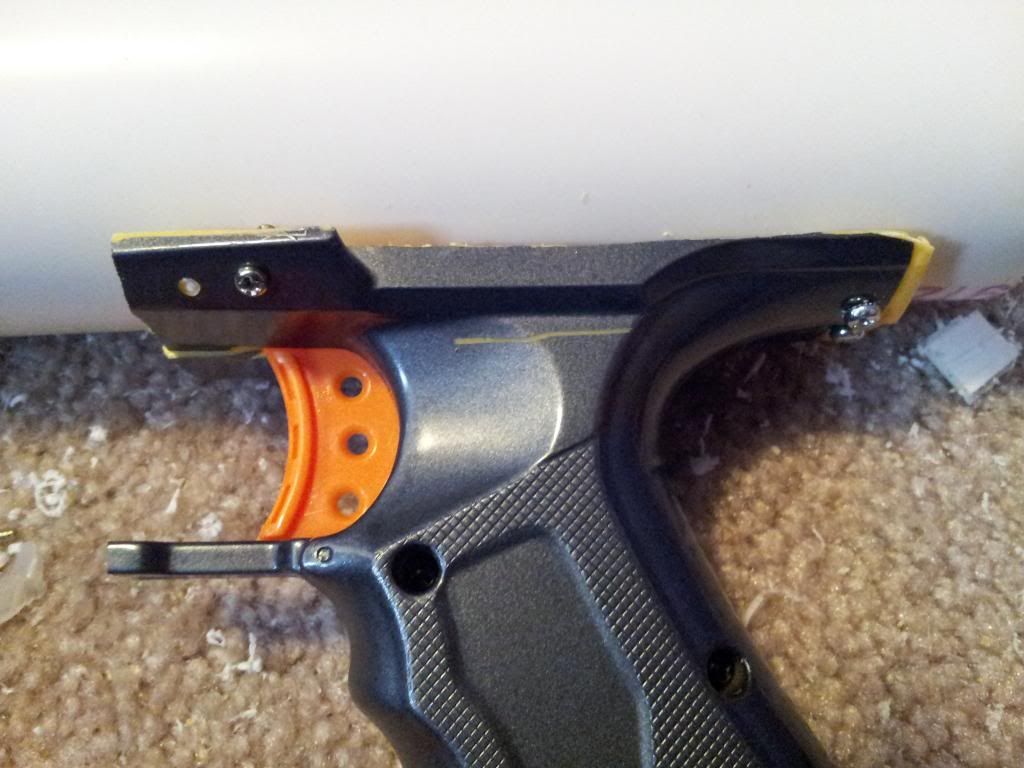
The Housing of the whole operation is 2 inch PVC, the momentary switch, salvaged from one of the locks, is held in place by two small screws. The Handle itself is secured with a few longer screws into the PVC. A small slot needs to be cut into the bottom of the PVC to allow the mag release wire to pop through.

Posted Image


Wire up the whole thing in series, and connect the motor into the circuit as well, remember that we cut of the original hardware from the circuit.

Here is a photo of the almost completed blaster; the duct tape on the bottom rear of the blaster is holding on a piece of plywood with epoxy curing, this wood covers up the recess created when we hacked off the handle.

Posted Image


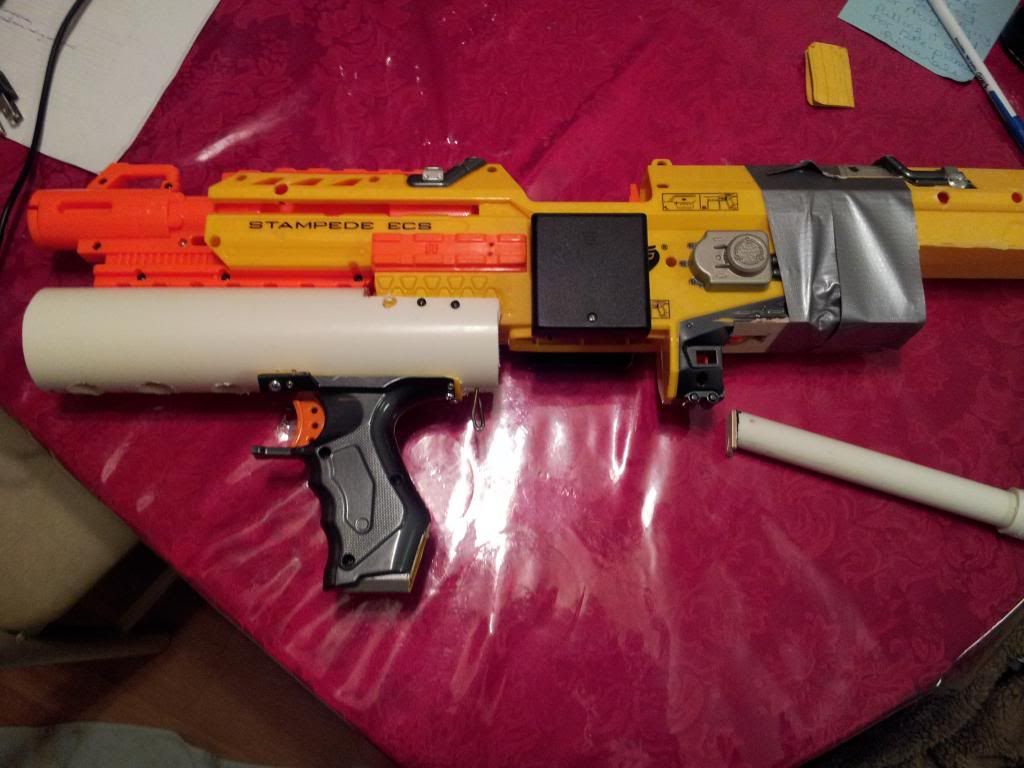
The PVC pipe itself is secured onto the orange "rail" of the blaster by several screws. The holes seen on the bottom of the pipe were drilled to allow my screwdriver to secure screws through the top of the pipe through the orange rail of the blaster. Four screws bolt the pipe to the yellow fore end as well, though only two are visible. The 1/2" PVC on the bottom right on the image is part of the stock, and a square of plywood is also secured onto the PVC using epoxy. Screws are then screwed into the corner part of the squares, and into the blaster shell. The next picture shows the nearly completed blaster.

Posted Image


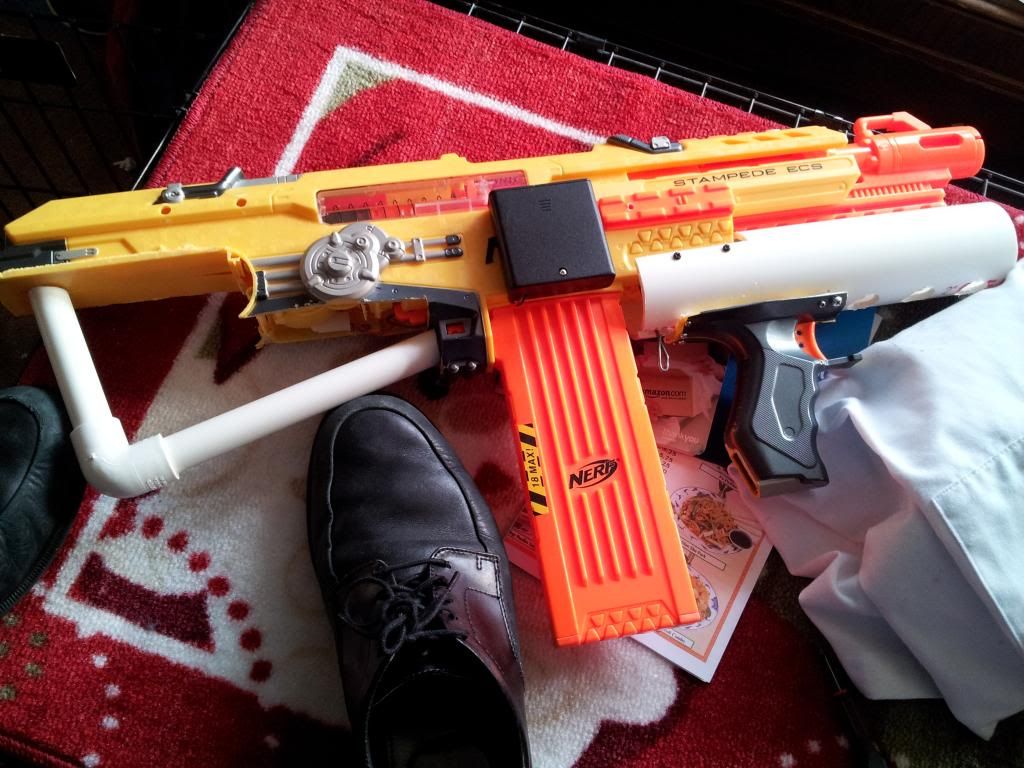
The above photo was taken before the previous one, so no epoxy or wood squares on the 1/2" PVC are visible, but this is what the profile view looks like now. I'm in school, so as soon as I return home, I'll upload another completed photo.

Results:
-Because of the removal of the original hardware, the blaster needs to have the trigger puled until the dart leaves the barrel, otherwise the dart tooth will retract and theoretically jam the blaster. Honestly though, this has not been a problem in my experience.
-Blaster is now about three inches shorter overall. Yes, it could be shorter, but I still want the thing to be visually appealing, (if that's still possible.)
-Ergonomics are alright, handle extends just a bit further than I would like, but when you're running around with this thing, you don't notice it that much. I'm also of a smaller stature, so a normal sized human should have no problem wielding one.
-Empty space in the 2 inch PVC leaves room for other additions like a tac light or series of infrared lights. Night vision, anyone?
-Yeah, there is nothing new in terms of ranges or functionality, but damn it is cool.

Video coming soon

Thanks for reading!
  • 0
Watch my shitty videos

This is so ghetto but so awesome.


#2 Super0dp

Super0dp

    Member

  • Members
  • 65 posts

Posted 14 March 2013 - 05:31 PM

This is really cool. You do a lot of cool things with stampedes.
Why would you use PVC to attach the handle instead of directly securing it to the shell or tac rail? I think this would save a lot of space and make it more compact.
  • 0
Got Tools?

#3 DartSlinger

DartSlinger

    Member

  • Members
  • 222 posts

Posted 14 March 2013 - 06:43 PM

Is it ridiculously heavy toward the rear?
  • 0

#4 Crater

Crater

    Member

  • Members
  • 91 posts

Posted 17 March 2013 - 12:10 AM

-Because of the removal of the original hardware, the blaster needs to have the trigger puled until the dart leaves the barrel, otherwise the dart tooth will retract and theoretically jam the blaster.

Why? You just relocated the batteries and trigger. I don't see anything that would cause the mechanical parts to behave differently.
  • 0
Crater is a combination of a box and a dent in the ground. (Thanks Tangerle)

I'll stand on my head and gargle peanut butter for 70 dollars.


#5 PBZ

PBZ

    Cap'n Whitebeard

  • Members
  • 142 posts

Posted 18 March 2013 - 09:12 PM

I would have to try this out before actually trying it, so i wont be doing this to my extra stampedes. interesting concept though... can you get a picture of you shouldering it? i would like to see how it lines up when being held, since its going to be going over the shoulder. visually, i would have taken a two-sided, 4 AA battery holder and placed it inside the front of the gun and run Trustfires in it instead of adding a battery pack to both sides.

as Crater said, removing the battery and the springs (which you worded as very important to the function of the blaster) wont change how it functions. in the stampede, it has to do with the trigger. When you pull back, it hits a lever that pushes on a switch. this lever interacts with the plunger tube to enable single fire. im guessing you were referring to this when you mention that you no longer have single fire by tapping the trigger since relocating the trigger would cut this interaction.

DartSlinger- not really. taking the massive D batteries out really balances out the gun, not to mention making it 6.3 metric shit-tons lighter.
  • 0
"There's nothing quite like hunting children." -VACC

#6 Samurai kidd

Samurai kidd

    Member

  • Members
  • 43 posts

Posted 18 March 2013 - 09:28 PM

Good god that stock looks uncomfortable. How does it feel? To me it seems like the weird angle would kill your shoulder.
  • 0

#7 Aeromech

Aeromech

    Member

  • Moderators
  • 434 posts

Posted 19 March 2013 - 07:52 AM

This is really cool. You do a lot of cool things with stampedes.
Why would you use PVC to attach the handle instead of directly securing it to the shell or tac rail? I think this would save a lot of space and make it more compact.


The PVC give me a flat-ish surface to work with that extends beyond the meager fore end on the Stampede. Plus it gives me room later to add a light or other attachments underbarrel.

Why? You just relocated the batteries and trigger. I don't see anything that would cause the mechanical parts to behave differently.


The entire original white lever that originally depressed the electrical trigger was removed from the circuit. The only switch in the entire blaster post-mod is the one behind the trigger. Originally, when the trigger is pressed, the plunger moves forward a quarter inch, and then depresses the white lever, therefore closing the circuit. The trigger can then be released and the blaster will continue the firing cycle on it's own. Not so after this lever is removed from the system.

FOR SOME REASON, putting the original switch in parallel with another one would not work. When the new trigger was pulled in this configuration, the plunger would just barely move forward until the plunger actuated the original switch. I've no idea why, so I removed the original.


Good god that stock looks uncomfortable. How does it feel? To me it seems like the weird angle would kill your shoulder.


Stock is pretty comfy actually. Your shoulder rests on the PVC.

Edited by Aeromech, 19 March 2013 - 07:53 AM.

  • 0
Watch my shitty videos

This is so ghetto but so awesome.


#8 nerfkill

nerfkill

    Member

  • Members
  • 4 posts

Posted 14 April 2013 - 09:51 AM

I don't like the look is this really but it sounds like a good mod
  • 0

#9 nerfkill

nerfkill

    Member

  • Members
  • 4 posts

Posted 14 April 2013 - 09:53 AM

I don't like the look is this really but it sounds like a good mod.

USER WAS WARNED FOR THIS POST


I find humor in that your content-free post with questionable phrasing on a topic that hasn't seen action in a month got double posted.

Don't comment in older threads unless you have something worthwhile to contribute.

Edited by Carbon, 14 April 2013 - 01:01 PM.

  • 0


0 user(s) are reading this topic

0 members, 0 guests, 0 anonymous users