We'll be modding the Lock N' Load so that the (really cool) yellow jet ski-looking priming slide on top will return to its rest position after prime but before firing. I've found that this increases accuracy, reduces recoil, and maintains the stock-look of the blaster. You will need only to remove the yellow shell - we will not be opening the main shell for this mod.
This photo here is what we're aiming for:
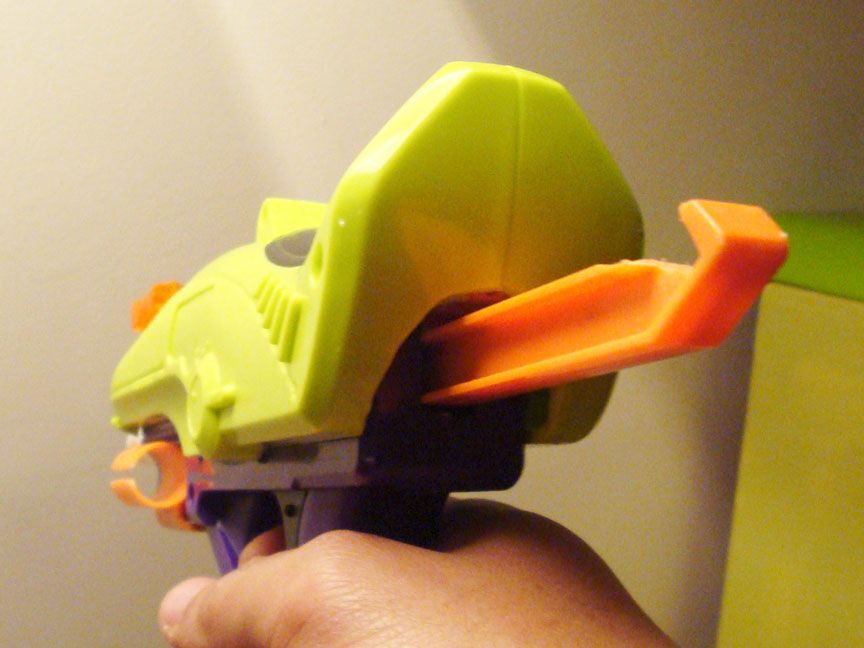
The blaster is primed using the slide but now it auto returns before firing
Tools:
Sandpaper/file
Dremel/power drill
Small flathead/phillips head screwdriver
small drill/dremel drilling bit
sanding bit for dremel
Materials:
Spare blaster shell screw (or any tiny screw/bolt/pin)
Super glue
Procedure:
Use you screwdriver to remove the three screws on the priming slide shell. I use a flat head screwdriver for these phillips head screws because there is less risk of stripping them. The screws are all the same size - save them.
First we'll make room for the plunger rod to extend out behind the gun. The priming slide shell is what keeps the slider from returning after the prime so we'll cut out a hole large enough for the plunger rod to stick out. See above photo and be careful not to cut so far up that you ruin the screw hole/plunger rod latch hook post. The photo below also show how far you need to cut to allow the rod to poke out. This step must be done first as you also cannot perform the other steps without the added work space that cutting the shell adds. I did a rough job with these cuts at first and cleaned it up later.
We'll now work on shaving down the plunger rod latch. You see it here running left to right hooked on the left to the plunger rod and rotating on the right to a screw post.
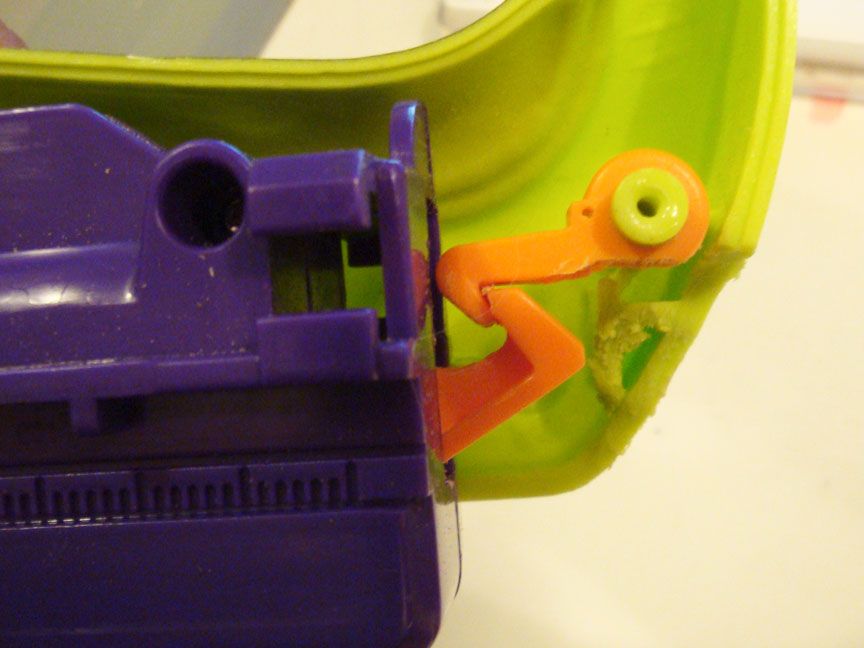
We want a nice transition for the plunger rod hook end as it snaps back into position so we'll sand down that latch and flatten out the bottom - use your sandpaper/dremel/file. I used some super glue on the rod/latch so it would stay put while I worked on it. Next I opened up the plunger rod hook area so that there would be no contact with the latch when the rod snaps back. You can see in the photo that there's more wiggle room between the plunger rod hook and the latch hook.
All that's left is securing the rod latch in its position. The superglue is not strong enough to secure the latch for normal usage and without it being secured the latch will disengage and you won't be able to prime your LnL. We're going to screw that latch in place.
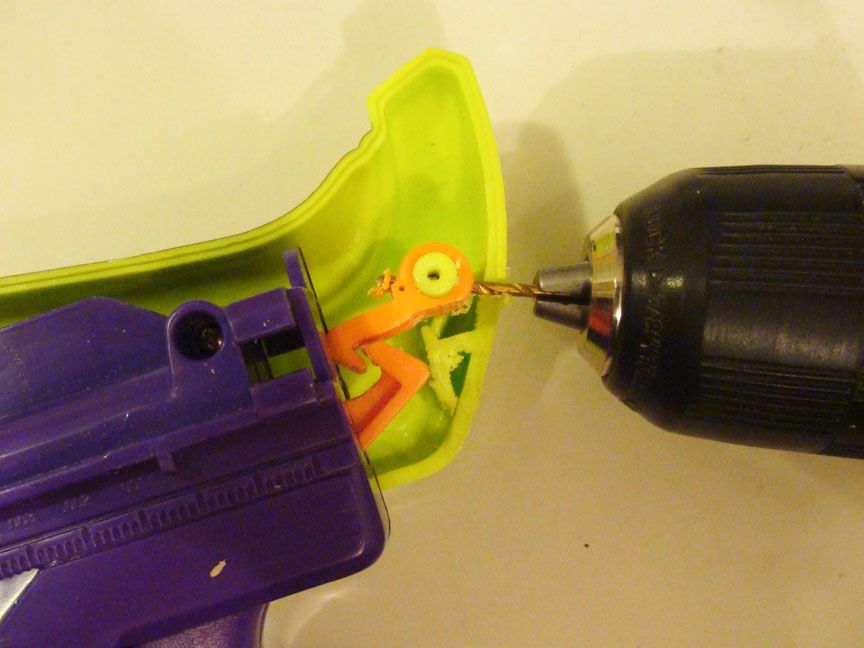
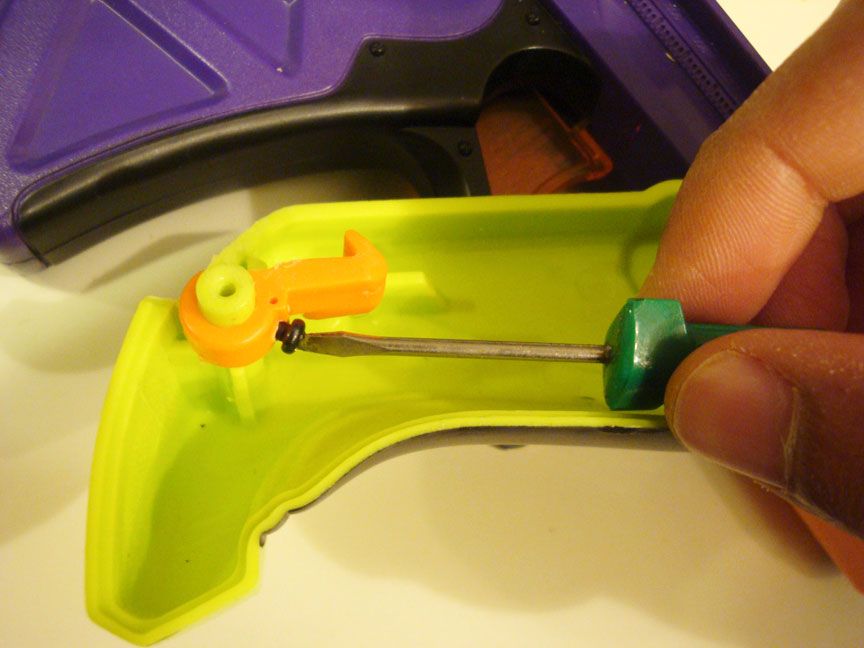
First, make a pilot hole with the appropriately-sized drill bit then screw in your bolt/screw. I had to really wrench the screwdriver in there as it's an unfortunate angle.
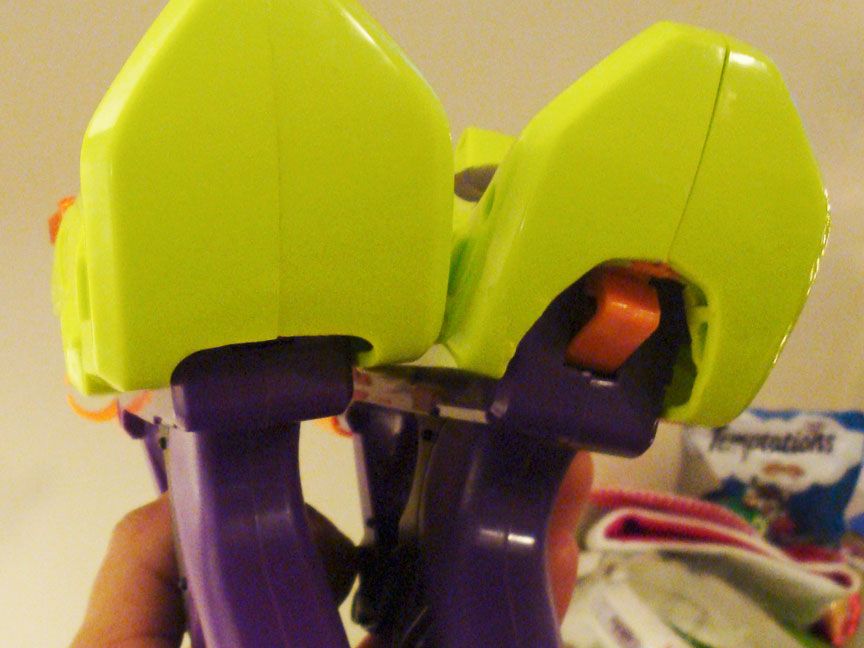
Put your blaster back together and now you have a stock-looking Lock N' Load whose recoil won't hinder your accuracy. Here's a shot of the rear with an unmodded LnL.