Introduction:
We built our first Nite Finder Rifle just under a year ago have built quite a few since. Over time we have improved up on our design and this is our most current to date
We understand this modification is not new and has been completed by many others long before we first attempted it. We’re just sharing our best method thus far in hope of helping any others who want to attempt a Nite Finder Rifle.
= = = = = = = = = = = = = = = = = = = = = = = = = = = = = = = = = = = = = = = = = = = = = = = =
Materials:
- (8”) 1” I.D Polycarbonate Tubing
- (8 ½”) 3/8” Square Nylon 6/6 Rod
- (1) [k26] Spring
- (½”) Catch Spring
- (1) ½” PVC Coupling
- (1 ¼”) ½” PVC
- (3) ½” 6/32 Machine Screws
- (2) 3/8” 6/32 Machine Screws
- (2) 1” 6/32 Machine Screws
- (1) Zip Tie
- Goop / Other Sealant
- PVC Glue / Primer
- LubricantTools:
- Screwdriver(s)
- Dremel
- Drill / Drill Press
- Pipe Cutters
- Scissors
- Ruler
- Pencil
- Band Saw / Scroll Saw / Jig Saw (Recommended)= = = = = = = = = = = = = = = = = = = = = = = = = = = = = = = = = = = = = = = = = = = = = = = =
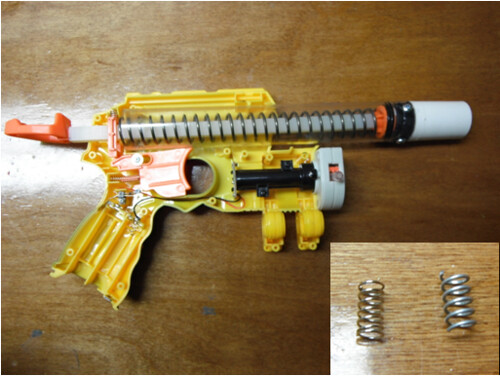
Step 1: Disassembly
Unscrew the Nite Finder and remove the plunger system. This will be necessary during shell modification to prevent the loss or damage of the internals. The plunger tube and spring can be omitted.

= = = = = = = = = = = = = = = = = = = = = = = = = = = = = = = = = = = = = = = = = = = = = = = =
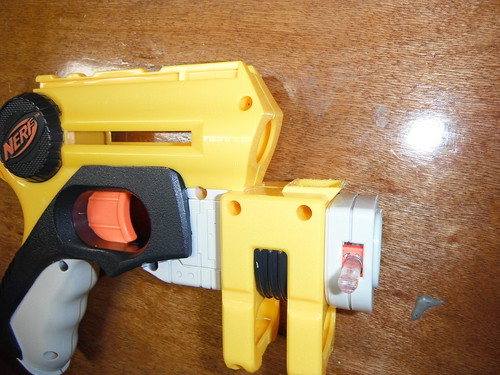
Step 2: Shell Modifications
First remove the area shown below, I prefer to use a Band Saw, but a variety of cutting tools will work.
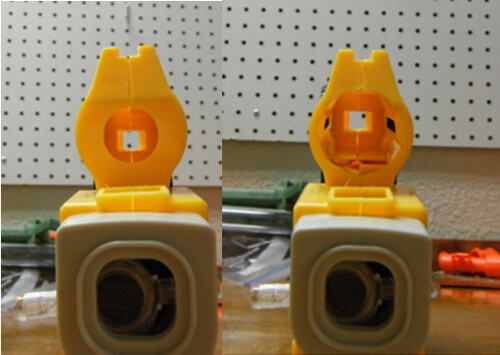
Then widen the hole shown below with a dremel for the polycarbonate tube to fit. It will remove the screw port. After this all major shell modifications have been completed and may put to the side.
= = = = = = = = = = = = = = = = = = = = = = = = = = = = = = = = = = = = = = = = = = = = = = = = =
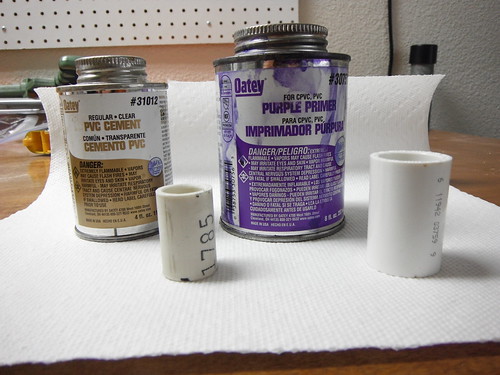
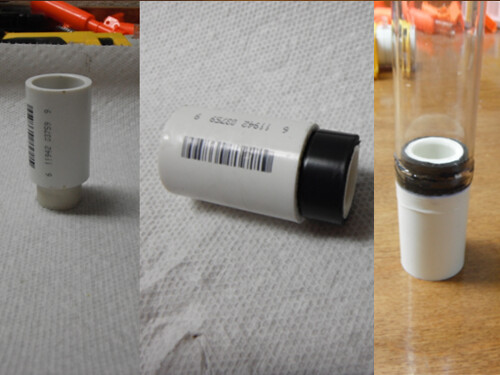
Step 3: Plunger Tube
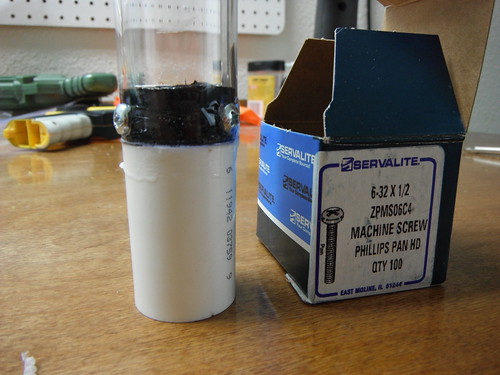
Take the 1 ¼” section of ½” PVC and PVC glue the stub into the coupling. The wrap about 13 layers of e-tape or until it has a tight fit in the 1” polycarbonate tube. Apply the goop or your other sealant and push the PVC into the polycarbonate tube.
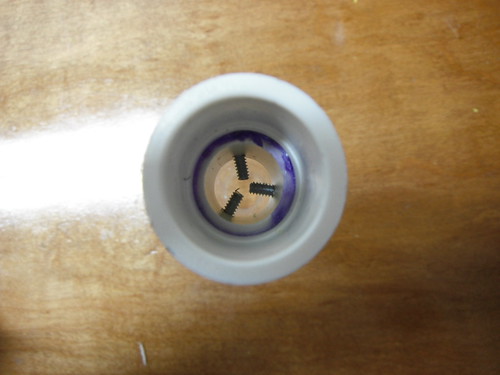
While the goop is still setting drill three 1/8" holes equal distance from each other around the polycarbonate tube into the 1/2” PVC stub. Take the ½” 6-32 machine screws and secure the coupling. These will also act as a dart stop.
Screw the shell together and take the plunger tube assembly and slide the end without the coupler into the shell. Drill a 1/8” hole on either side near the front end of the Nerf logo as shown. Make sure to note the correct orientation of the plunger tube from here on.

= = = = = = = = = = = = = = = = = = = = = = = = = = = = = = = = = = = = = = = = = = = = = = = = = = =
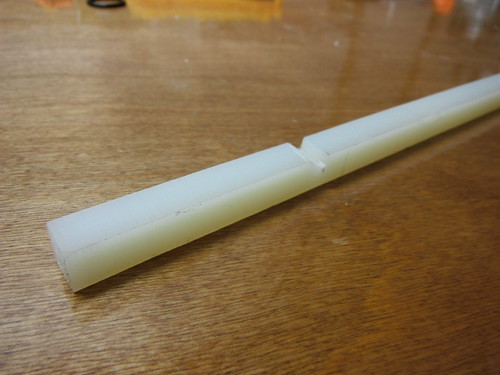
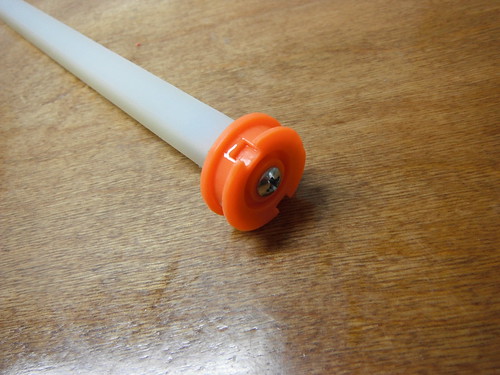
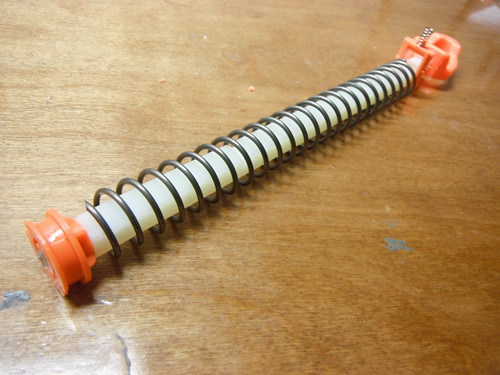
Step 4: Plunger Rod
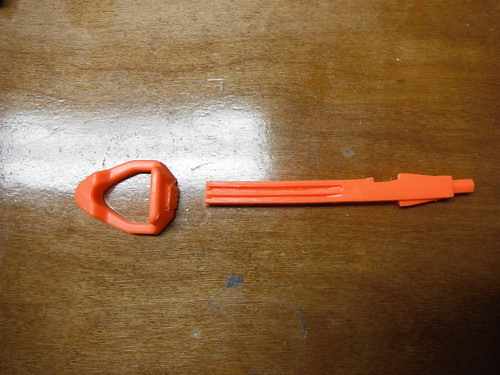
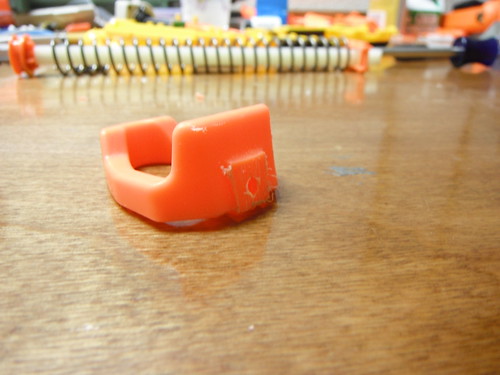
Now take the 8 ½” section of the 3/8” square nylon rod and measure 2 ½” from one end. Cut the catch notch as shown.
Next drill 1/8” holes about ¾” deep on both ends and using the 1” 6-32 machine screw secure the plunger head from the stock Nite Finder. Replace or double the o-ring with a few layers of e-tape beneath to improve the seal. (Not Shown)
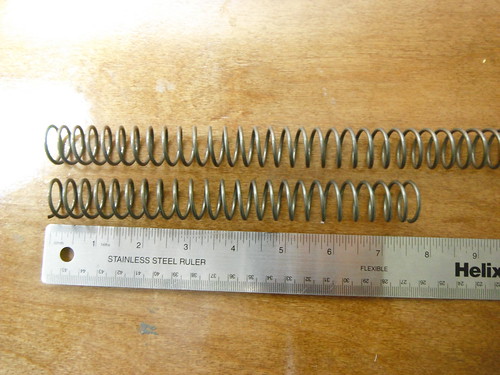
Cut down the [k26] spring to 7 ½” then slide the spring and catch onto the nylon rod making sure to orient the catch correctly.

Cut the plunger handle off the end of the stock plunger rod and drill a 1/8” hole through as shown below. Using the other 1” 6-32 machine screws screw in the plunger handle to the nylon rod.
= = = = = = = = = = = = = = = = = = = = = = = = = = = = = = = = = = = = = = = = = = = = = = = = = = =
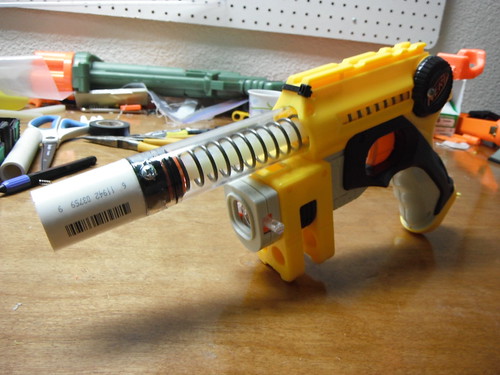
Step 5: Final Assembly
Unscrew the shell and put the internals into the shell as shown below. Thoroughly lubricate plunger head and plunger tube. Replace the stock catch spring with about a 3/8” of another suitable spring.
Screw the shell together then use the 3/8” 6-32 machine screws to secure the plunger tube into the shell.
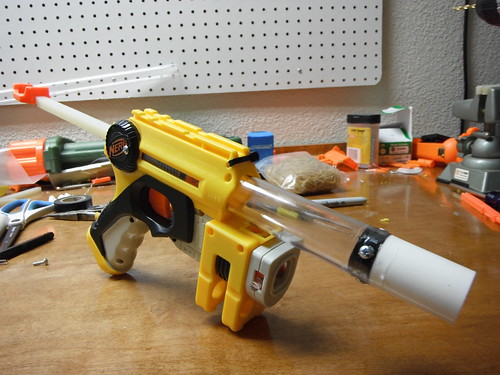
Finally drill a 5/32 hole on the top right corner of the shell as shown below. Slide the zip tie through and tighten to secure the front.
= = = = = = = = = = = = = = = = = = = = = = = = = = = = = = = = = = = = = = = = = = = = = = = = = = =
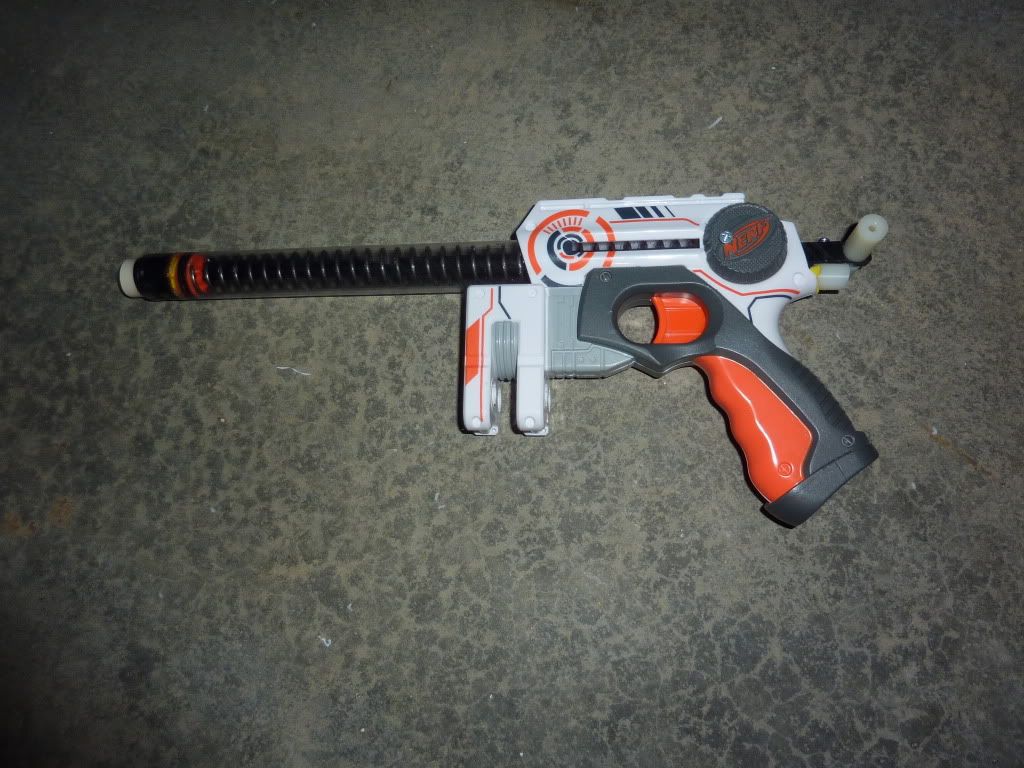
Step 6: All Done!
= = = = = = = = = = = = = = = = = = = = = = = = = = = = = = = = = = = = = = = = = = = = = = = =
Video Tutorial:
(Coming Eventually)
= = = = = = = = = = = = = = = = = = = = = = = = = = = = = = = = = = = = = = = = = = = = = = = =
This is our first write-up so constructive criticism is appreciated! If you have any questions we missed in the write-up we will do our best to answer them.