Materials needed:
Deploy x1
Nitefinder x1
Assorted small springs
Dremel x1
Hacksaw x1
cpvc coupler x1
cpvc
Hot glue gun x1
Hot glue
Assorted o-rings
Electrical Tape
Knife x1
First, you are going to need to open your nitefinder and remove the plunger tube.
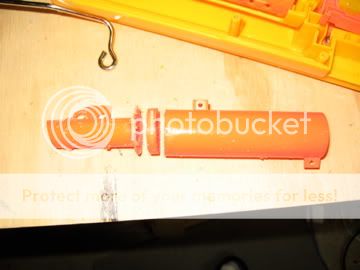
Cut it like so:

Remove the air restrictor spring rest, as well as the screw ports that kept the plunger tube in the nitefinder shell.
Now take the Deploy spring rest, cut off the screw port that used to keep it in place, slip it over one end of the plunger tube and glue it on.
Next, you want to cut off part of the original plunger about 6.2cm from the priming bar rest. Now add 2.5cm of cpvc to the end using whatever glue you like.
It should look like this:

To prime the blaster, I used half of a cpvc coupler.
Cut it like so:

Now give it a few wraps of electrical tape and put on two o-rings.

The one in the front should be slightly smaller.
Now put that piece in your plunger tube and attach it to the section of cpvc from earlier.
To have the plunger tube stay in the shell, pull the coupler as far to the front of the plunger tube as it will go.
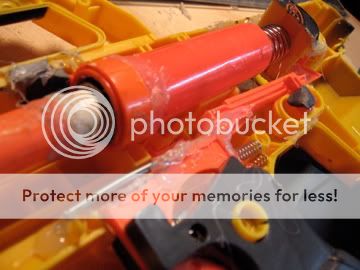
Now place the whole assembly in the blaster, with the flat part of the deploy's spring rest pointing up.
Use epoxy putty around the flat part like so:

Cut the handle off of the nitefinder plunger rod and insert it in to the assembly. You should not be cutting off any more than the handle.
To place the catch, you want to cut off the entire catch area in the nitefinder, including the spring rest.
Cut off the piece that the spring in the Deploy's stock wrapped around.
Proceed to glue the nitefinder catch piece in the Deploy's stock, 6cm from the back of the main part.
It should be around here:

So that you can add springs to the catch, you want to drill holes that allow you to reach the screw ports.
Like this:

Now to make this blaster actually fire!
Cut off the deploy's trigger ramp and move it far enough back that it is touching the new catch.
Put a nitefinder ammo holder under the trigger ramp to support it

Now just add some extra springs around the trigger to push it back in to position.
Adding that orange piece over the trigger arm just helps keep it in place.
You have finished! Prepare to strike fear into the hearts of you foes with your new Deploy!


Edit: It does still accept clips.
Firing video
Edited by nine, 20 January 2012 - 10:45 PM.


