Again, skip past this if you don't want to know about the design process:
The eccentric actually started out as my attempt at putting an Sm1.5k airtank into a maverick. After a lot of fiddling however I realized no matter what I did ranges would still be mediocre (since the barrels were more or less stock), and that you'd have to be superman, or use two fingers to overcome both the force of the release pin, and the immense friction in my less than ideal trigger design. Instead of following that train of thought, I looked into other feeding methods; finally looking into the RSCB system. Although I had had bad experiences with these in the past, with a bit more research I was able to add to the design, both incorporating the materials available to me, and making it more reliable (in my opinion).
I should also add that the name comes from this past. As it was originally designed to be a powerful "Maverick", "Eccentric" seemed like a name that would fit the bill well.
Pretty pictures, or at least important stuff starts about here:
As you may have gathered, this build is more or less putting an RSCB (Major props to those who developed it) on a pull-pin air tank (like the AT2K tank), but the difficulty was doing this in the most compact and efficient way possible. I believe that I succeeded.

As with most of my builds, it isn't super clean, or even very nice to look at, but its functionality and ease of use are very good.
The main idea that this build was based around was to get the air tank outlet as close to the RSCB input as possible, reducing dead space (or in this case getting rid of it entirely). I did this by putting the tank in a vertical orientation, so the air flows directly into the T and doesn't have to bend around a corner increasing efficiency.
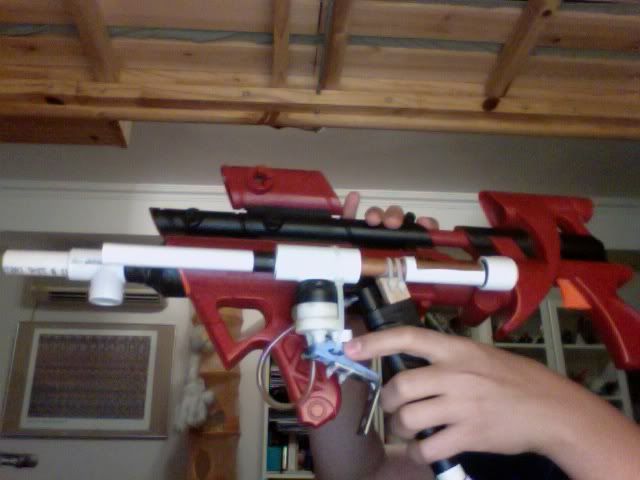
To make this setup possible I used a clothes pin to construct a lever trigger setup. This also makes the trigger pull exceptionally easy. To make this all you have to do is drill a hole in the clothes pin (as in a SNAP), and bend the tanks firing pin so it moves with the clothes pin. The rest is then assembled exactly like a SNAP trigger (with L brackets etc).
This way when the trigger is pulled the release valve is also pulled:

Securing this on is easy. I simply hot glued and Zip tied it on, and after several months of messing with it it is still rock solid.
I also used a bit of scrap to keep the trigger aligned properly with the SM1.5K tank I used:

Everything else on the build is simply logistics to get the thing to work. What makes this blaster so sturdy is that the RSCB is the main component that everything is attached to. This means that a shell, or brackets are entirely unnecessary as everything is anchored to one central component.
The handle was an interesting part of this build. Much like my homemade handles of the past, this handle is made out of a coat hanger (as explained in my PASnapbow-s writeup). It is securely attached to the RSCB with zip ties, and then slightly reinforced with hot glue:
The difference between this and earlier handles however is that the pump is incorporated into it. This means that to prime to blaster you automatically tilt it forwards to pump (as seen in the video) reloading the RSCB at the same time.

The pump is the same type that I used in my Tiny Tim build, however this time it is not cut short, and instead is fully reinforced with a nice pump handle made from scraps at the bottom:

The only difficulty with the pressure system in the blaster was reliably connecting the pump to the tank (I still haven't found barbed connectors anywhere). In the end I settled for using a smaller section of tube rammed into both sides, and then used zip ties as mini pipe clamps (sorry for the repeat image):
The RSCB was a fairly new thing for me, and after failing an RSCB'ed HAMP as my very first build (sad I know...) I went overboard on ensuring that this RSCB would never fail. Besides the normal practice of reaming out the dart entrance to the barrel I found what seems to be a foreign PVC T, and nested a section of electrical PVC that slides smoothly over by electrical PVC barrel material. I then drilled a hole SMALLER that the head of a dart in the large diameter electrical PVC to serve as an passage for air from the tank. With the barrel removed it looks like this:

The small hole in front of the dart leads to the tank. This way the dart slides smoothly past the hole, and nothing more than a mild tilt is required to put the next dart into firing position.
Then things were finished off with a simple breech for the RSCB:

And it was done.
This is the most effective and practical sidearm I have made. the 7 inch RSCB allows 3 streamlines to be held (with one in the barrel), or about 9 1" stephans (or 18 "Nano-stephans"
 ). It even gets better ranges than my standard overhauled SM1.5k (in the mods and PJ's thread) because there are absolutely no leaks, and there are no annoying turrets or moving parts to mess with (like in the original design with the maverick). It can fire off three darts just as fast as my speed loader'ed nitefinder, but each shot goes to around 100feet (it is tough to tell with streamlines, my bad stephans go to about 90 feet, but they don't fit the barrel or RSCB properly)
...And it does all this at less than 1/3 of the size of the original SM1.5K
Here it is next to a BBB
And just another picture for good measure:

It may not look so nice, but it works very well, mainly because it is so simple (unlike the complicated mess that Scrappy was)
And of course I wouldn't leave everyone without a Video!
This is the 6th out of my 7 part release... the next one is the prototype for the new Mirage!
Also, just as a final note, I'd like to mention the DCIT made by Split and Koree (I believe). I find it to be a very under appreciated homemade, and although I didn't come across it until after this project, I do think the two projects are fairly similar in concept (although theirs looks significantly nicer), and that the Eccentric is basically an air pressure powered blaster based off the same concept.
Again, please give me any feedback to improve these write-ups as after the first 7 I already have another backlog of projects...