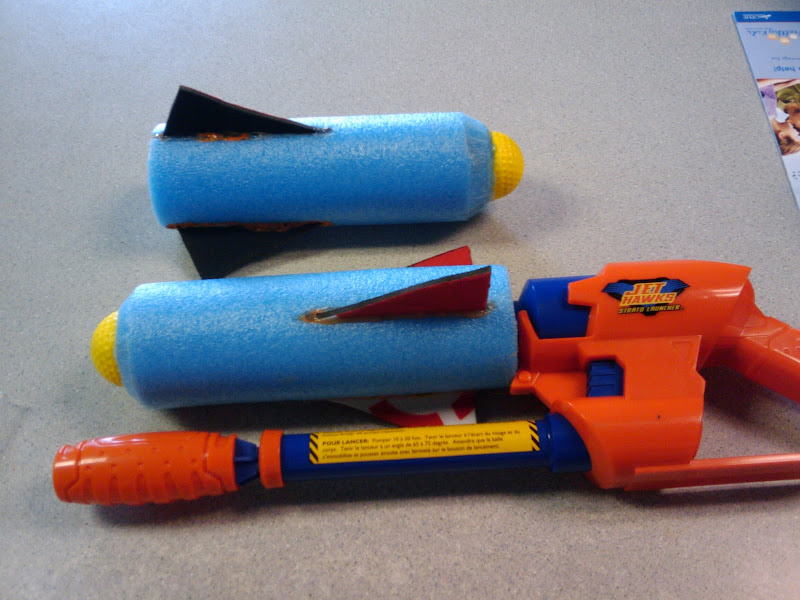
I realize there's another homemade arrow writeup but this way is a little simpler. There's no soldering, PVC sheaths precisely made with a bandsaw, or melting FBR into super hot clay. In fact, most of the materials, aside from the craft foam and insulator are already ready available to most nerfers.
Also, they fly incredibly well.
Materials:

1/2" Frost King pipe insulator foam (if you can find the stuff without the slit, more power to you)
1/2" FBR
Electrical tape
Craft foam
Hot glue + gun
Measuring device
Sharp knife/razor blade
The insulation foam comes in 3 foot lengths.
36 inches / 6 = 6 inches
Cut your foam into 6 inch lengths with a sharp razor blade, be as precise as possible.

Mark one side of your foam into thirds, eyeball it if you're confident enough.

Now, using these marks, wrap electrical tape in a helical fashion up the length of the arrow. Leaving a small gap for the fins to go, put another length of electrical tape parallel to the first one. Wrap the ends with electrical tape to secure them. It also helps to put your arrow on the barrel at this point, this will give the foam time to form to the barrel. Cut off any stray bits of electrical tape if there are any.


Now that you've made the slots for the fins, it's time for the cap and the fins themselves. Design the fins however you like, I simply cut a stencil from some scrap cardboard. I also used the inside ring of my electrical tape to make the cap. Consistency is important here. Start warming up your hot glue gun.

Use these to cut your pieces. 3 fins, 1 cap. Duh.

Hot glue the fins into the slots you made with electrical tape. Make sure they're standing up straight but also have a slight tilt, relative to the main body.


(I made this arrow a little different, not having the fins flush with the body. No difference in performance)
Coat your cap with hot glue, stick a small bit of 1/2" FBR in the middle, and press it on the other end of the arrow.

Done!

Edited by Fome, 23 April 2010 - 05:51 PM.


