- NerfHaven
- → ompa's Content
ompa's Content
There have been 1000 items by ompa (Search limited from 20-January 97)
#348592 Modification and Paintjob Pictures
Posted by ompa on 31 August 2015 - 01:13 PM in Modifications
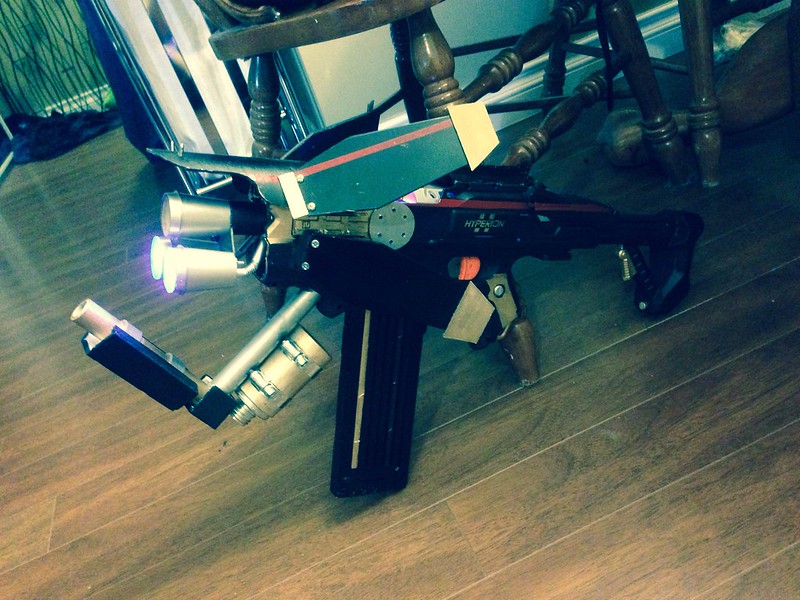
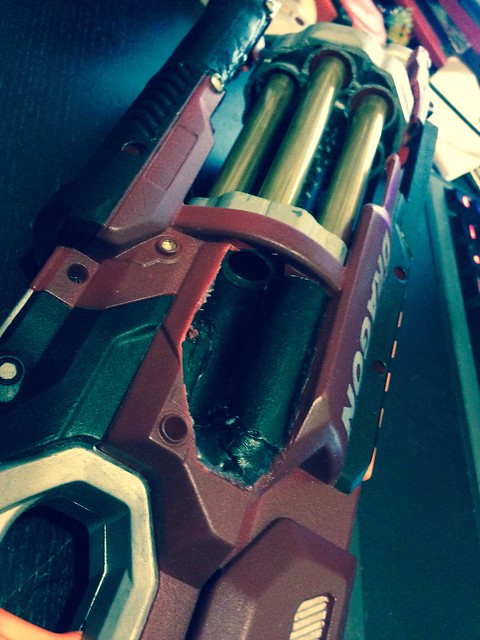
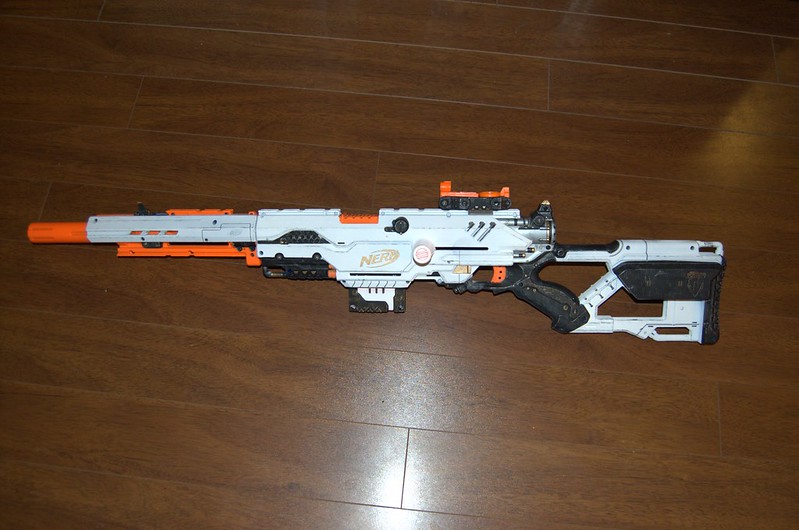
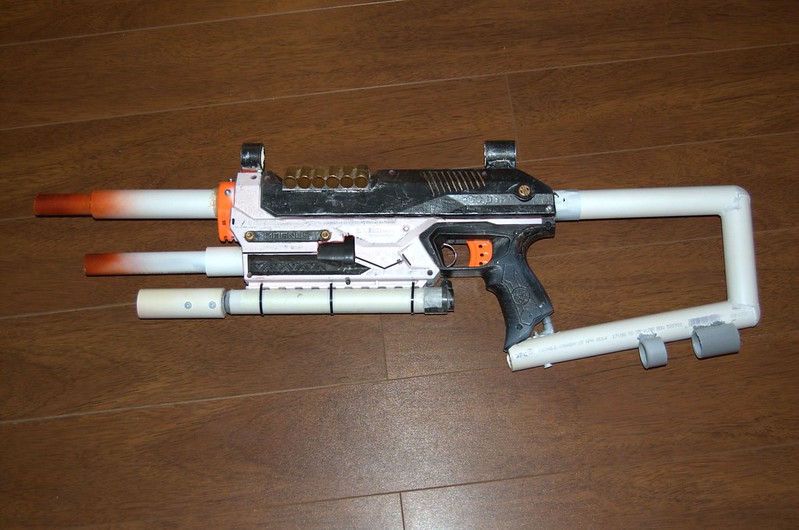
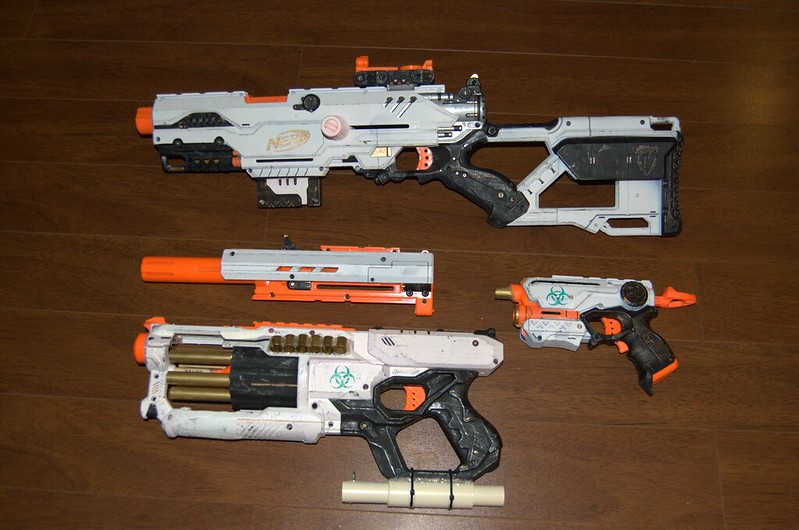
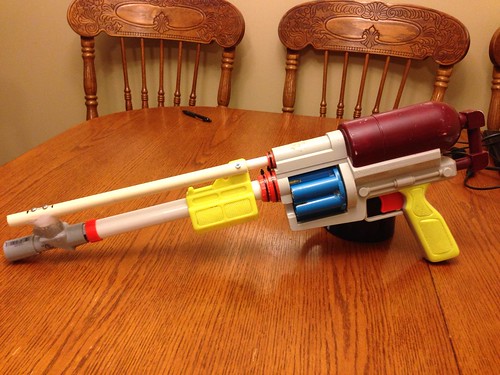
Almost complete minus some logos and minor work on the stock and front end of the gun, Borderlands 2 shotgun inspired Sledgefire:
#347986 Modification and Paintjob Pictures
Posted by ompa on 21 July 2015 - 10:20 PM in Modifications
Magnus internals in a Longstrike
Rapidstrike modded based off of a Borderlands Hyperion Plasmacaster
#347425 Cycloneshock Barrel extension and reinforcement guide
Posted by ompa on 24 June 2015 - 08:37 PM in Modifications
#347397 Cycloneshock Barrel extension and reinforcement guide
Posted by ompa on 23 June 2015 - 04:59 PM in Modifications
There you go, I was actually surprised how well they fit in there.
#347381 Meishel'd Rapid Red - Writeup (Very picture heavy)
Posted by ompa on 23 June 2015 - 06:58 AM in Modifications
#347369 Cycloneshock Barrel extension and reinforcement guide
Posted by ompa on 22 June 2015 - 10:00 PM in Modifications
Tools:
-Dremel (assorted attachments, but you will at least need a 1/8 drill and a conical tip, or preferably a multitude of drill bit sizes)
-Brass pipe cutters
-Hacksaw
Materials:
-~36" of 17/32 brass (or choice of barrel material)
-JB weld or epoxy of choice
-13/32" brass (or 3/8 Delrin round rod, 3/8 polycarb round rod, or whatever you can find)
-Choice of material for plunger crossbar (I used brass, but to be honest I don't remember the actual dimensions).
-3/8" square rod (I used poplar, but really you can use any material from aluminum to polycarb)
-Screws, at least 1/2" long
-1/2" PVC and coupler
First off, the Cycloneshock is large blaster to begin with. It's already skirting the upper limits of a pistol, and this mod will make it far larger than any reasonable, non-cartoon-based pistol and put it into the realm of a primary weapon. If you're looking for a pistol mod... this probably isn't going to be it. First step is to take the cycloneshock apart and remove the cylinder. You're going to want to cut out the center portion of the cylinder. To ensure straight cuts you can use a miter box, but I just eyeballed it. EDIT: Also, I do have to thank Gin for reminding me to chop up the cylinder, I constantly forget how much weight you can shave off.
Next, you're going to want to work on the extension aspect of the blaster. The key is to have 2 flat points on each side of the cuts on the top and bottom of the attachment so you can screw your square rods through the blaster shell. The following picture indicates where I cut the blaster, as well as where I used the square rods, but any flat point on the blaster can be used, as long as it runs along where the cylinder is, obviously.
Next you're going to want to put your screws in. I just drilled a hole through the square rod and the shell where I wanted the screws to go through, then just put them in. The ideal situation is obviously to put the holes in, tap the holes, and then put a nut and bolt through there, but I'm a smidge short on materials/tools, and putting the screws in and JB-welding the other side also seems to work well.
Anyways, while you're in there I removed the lock (small white piece right in front of the trigger assembly with the little round nub on it), and took apart the trigger assembly and hot glued the ramp that interacts with the lock that normally prevents the trigger from firing unless that lock is free by having the slide forward. You can also just pop off the cover on the opposite side of this (I used a hobby knife to do it on my other Cycloneshock) and the ramp/spring just pops right out.
Also, the catch itself has a hole in it. I have 0 idea why it is there, but it seems to me that it would only prove to be a weak point in the catch. I just filled it with JB weld. Make sure it is flush with the rest of the catch after it dries though or you might have issues.
Next, onwards to the cylinder. I have 5.75" barrels on mine at the moment, and this is the center post I used. It's a length of 1/2" pvc, and a coupler cut in half on either side. Oddly enough the coupler allows you to press-fit and glue the center post in place quite nicely. Make sure your top and bottom parts of the turret are lined up properly, and MAKE SURE that the turret FITS properly into your now-expanded blaster shell. It's easier to adjust the turret length at this particular stage than it is to keep drilling holes in your blaster if you don't measure it exactly. In the following pictures you'll also see that I put a bunch of holes in the center post, and this is simply to lower the weight. Install your barrels too. I used a bit of foam from mega darts to center the front portion, and tape/hot glue to center the back portion.
Next comes the plunger rod. This one is kind of a pain in the rear. As those of you who have actually broken the plunger rod know, it still doesn't come out after snapping the rear (smaller) plunger rod. I actually just took a small hacksaw, put it into the slot where the inner plunger rod slides, and cut directly parallel to the steel rod already in there. You can see (sort of) what I did in the picture. After the cut, you can slide/smack the steel rod out and remove the rear plunger.
Now comes a giant spam of pictures. You're basically re-creating the plunger rod out of brass/metal/whatever you choose to use, and below are pictures of measurements and how I created the plunger rod. MAKE ABSOLUTELY SURE that you DO NOT put in the smaller front pin UNTIL it is already nested in the larger plunger rod or you're kind of boned. I used JB weld to put everything together, and hot glue to fill some gaps. I'm pretty sure epoxy putty would do better here, but I don't have any.
I just stuck a single OMW 5kg spring in mine. I can't seem to get the OMW spring and the stock spring to nest properly, so I just ditched the stock one. I expect that when I get my chrono parts the numbers will reflect that. For now though, it definitely shoots harder than stock, and I'll update this
If you're curious, the black portion on the side of the shell is a rear-loading slot. I actually just took a small piece of 1/2" pvc, cut it in half length-wise, and glued them in sort of an S-shape to expose the rear of one barrel per turn. This way there isn't a gaping hole in the side of the blaster showing all the internals. I can take closer pictures if needed.
#347155 Need help getting back up to speed
Posted by ompa on 12 June 2015 - 01:08 AM in General Nerf
The general nerf camps seem to have split; those that do superstock (stock dart use), it seems in general flywheels have become the dominant force in this particular camp due to the absolutely monsterous RoF and ease of motor swaps. The longshot still makes a great springer primary, especially given the recent kits and 10kg+ springs that people have been putting into their reinforced blasters.
The other group is the NIC wars, and homemades seem to have more or less taken over. General dart usage is Stefans, and the velocities at these wars tend to be 2x or greater the velocity. Pump-action hopper-fed guns seem to have become the norm, and you're going to be hard-pressed to compete against them with modified guns without either massive reinforcement for heavy springs, or complete homemade internals.
In terms of your primary weapon, a Hyper/Furyfire may be ok but chances are you're going to be outclassed by the flywheel blasters out there. If you want a quick/easy SPRINGER primary to get back in the game, you could go back to your longshot or try a modded/spring replacement for a Rampage. If you can get your hands on a Rapidstrike though, that and the Stryfe seem to be 2 of the more popular flywheel blasters available, and have mod guides galore out there for them. In the end though, pick whatever you have the most fun with; having the best blaster in the world isn't going to make a difference if you don't enjoy playing with it.
#347153 Demolisher mod
Posted by ompa on 12 June 2015 - 12:58 AM in Modifications
In terms of painting, I would think you'd want to avoid painting the inner shell, just to avoid any potential issues with moving parts and shell fit.
#347135 Van Grip Retaliator Guide (VGR)
Posted by ompa on 11 June 2015 - 02:43 AM in Modifications
#347134 The Singledstrike
Posted by ompa on 11 June 2015 - 02:36 AM in Modifications
I also enjoy the extinct animal book followed by shots of the blaster on leopard print; I laughed.
#347132 Hand painting
Posted by ompa on 11 June 2015 - 02:30 AM in Modifications
#347057 Extreme air max one modification questions
Posted by ompa on 05 June 2015 - 01:24 AM in Modifications
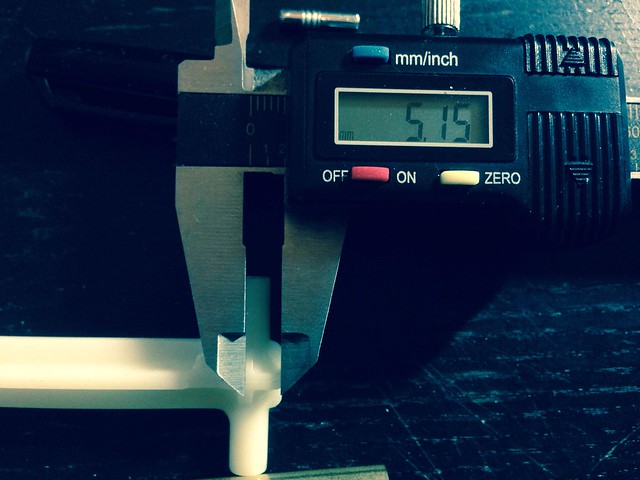
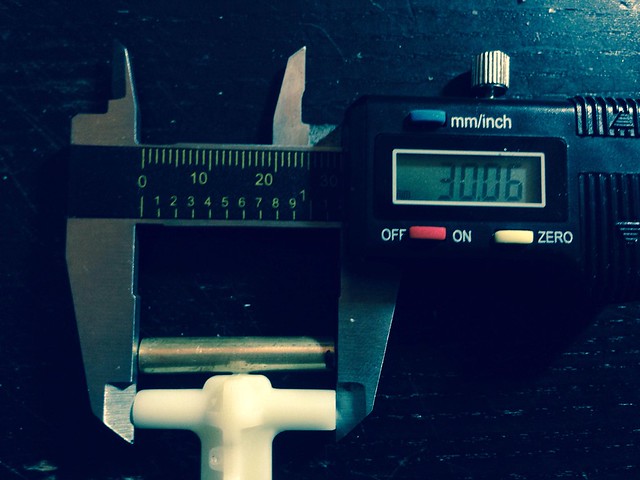
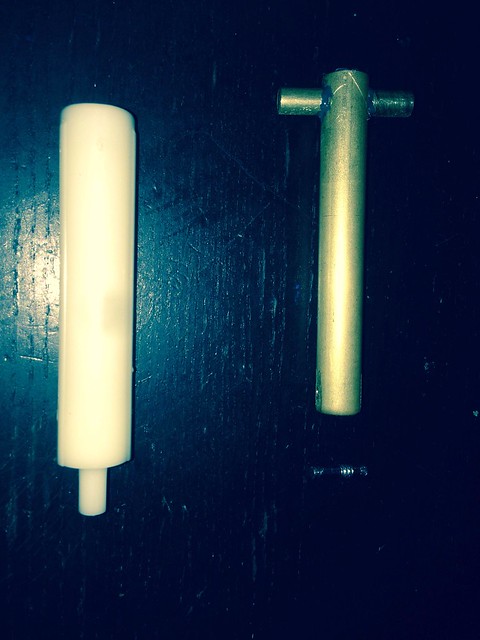
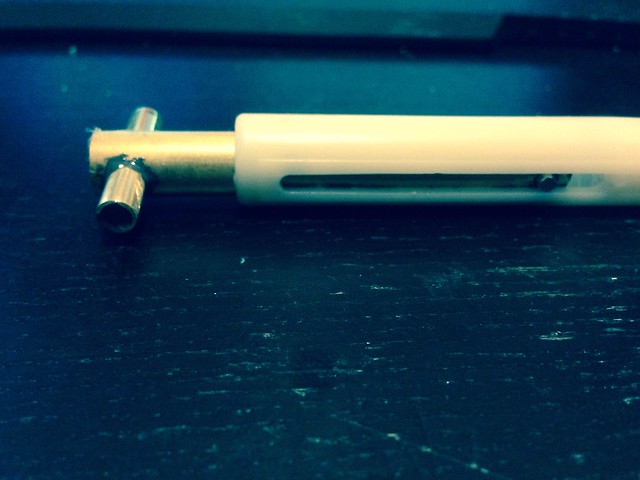
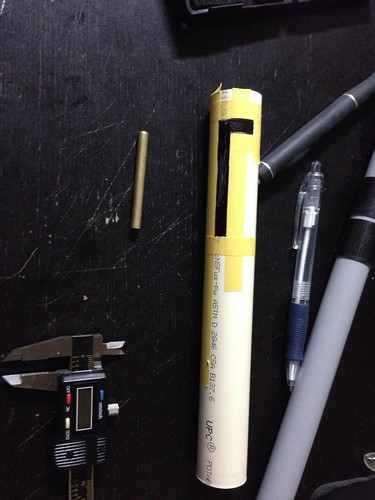
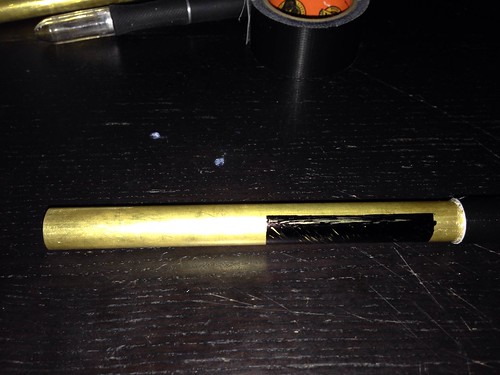
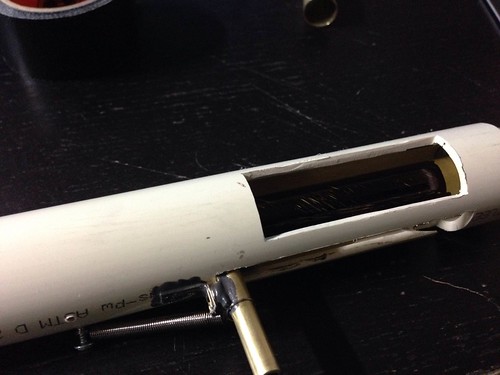
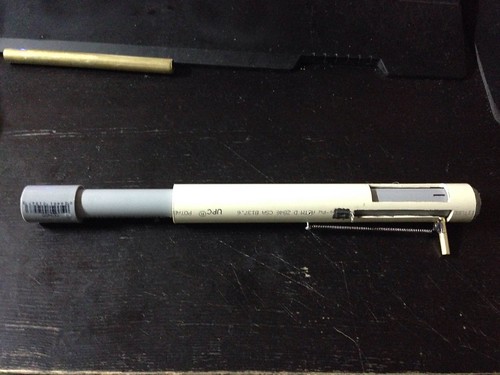
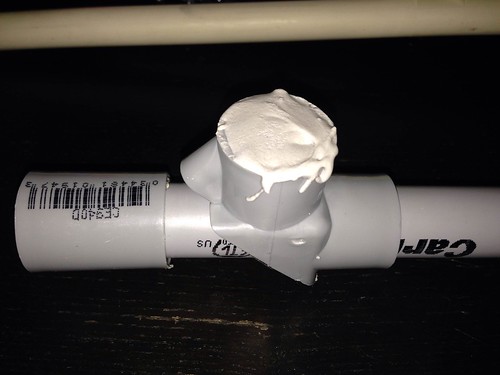
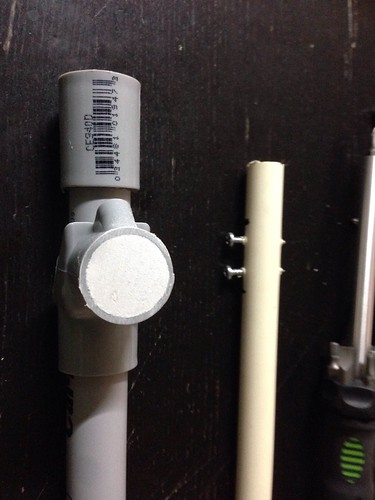
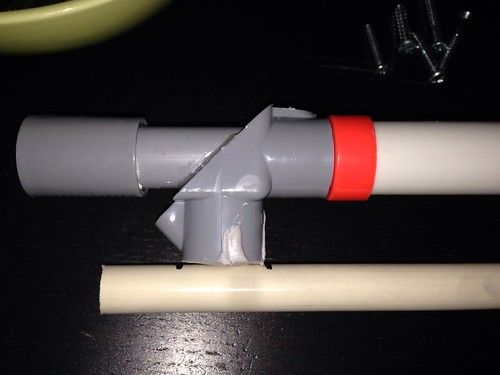
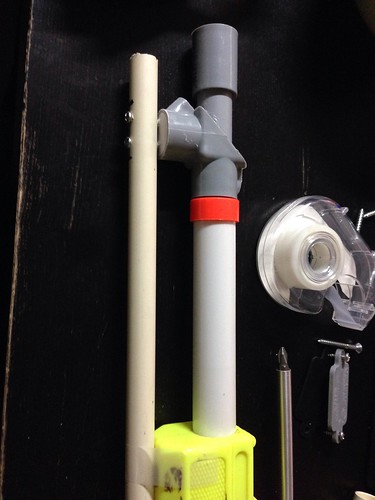
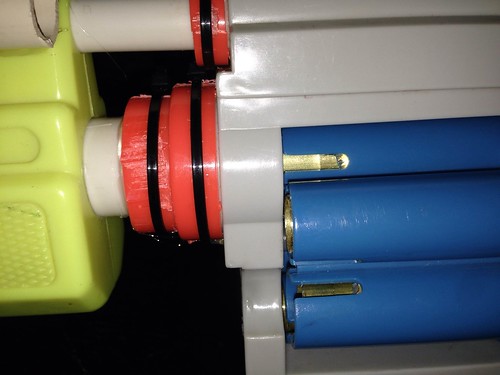
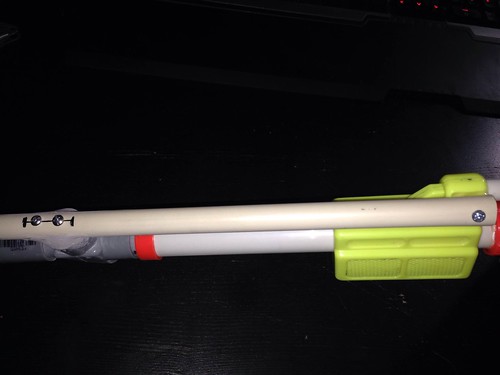
So I bought an extreme air max one a couple of days ago, and I want to make a brass breech for it. I want to know if I use a 3/4" to 1/2" pvc reducer, will it be air tight with 9/16" brass pipe? Here is the reducer and here is the brass pipe if it makes a difference. As an inner barrel, I wanted to use this. Is this an effective barrel setup? Is there anything I'm doing wrong?
Thanks a lot,
Mattakers
It should work. I THINK the OD is the same as the K&S branded stuff, you might want to double check to make sure they nest properly. As for the 1/2" pvc, generally it's a smidge loose. I generally have to run a piece of tape or two around the 9/16" brass, but it depends entirely on the pvc you're using. If you're doing what I think you might be doing, is this similar to your idea? Because if so, I can tell you it works very well, at least on springers. I'd be slightly concerned about using longer lengths of 17/32 on an air gun unless your darts are not too tight in it. Generally speaking you want a looser fit for air guns for your barrel.
#346971 Attention Wisconsin and Upper Illinois Nerfers
Posted by ompa on 28 May 2015 - 09:13 PM in General Nerf
Anyways, I think you'd be better off waiting until you were in a financially stable position, purchasing land in an appropriate area, and then billing it as an outdoor paintball/nerf/airsoft arena, letting people rent it out/use it. If you wanted to drum up more interest you could easily just host the nerf wars for free (seeing that you'd own the land anyways), and due to the nature of the clientele you MAY be able to draw some of the people from those crowds as well. If I recall correctly, airsoft and paintball are pretty popular among those parts, and if you're not looking to make any profit you wouldn't necessarily have to be quite as worried the whole thing. That being said at that point you're going to be running a business (something I have no direct experience with but I'm sure many members here can attest to the difficulty of it).
The real problem with community-based things that have a very high cost is that if at any point there's a funding issue (either to people not paying up/lull in interest/theft), the owner (I'm assuming it'd be you) would be essentially screwed.
#346917 Nerf 1995 Kenner Crossbow Sticker Replica
Posted by ompa on 24 May 2015 - 03:44 PM in General Nerf
#346868 Modification and Paintjob Pictures
Posted by ompa on 21 May 2015 - 06:14 PM in Modifications
Longstrike: Awaiting internals overhaul, I'll probably try to stick a Magnus (with upgraded spring) in there.
Cycloneshock: Awaiting internals reinforcement to accept new spring (probably not going to take much more than some epoxy support for the plunger head and a cut-out brass skeleton to support the outer plunger rod), and epoxy putty for slightly less ugly.
Magnus: Still awaiting a new spring, and epoxy putty to not make it look like a giant mess. kind of the red-headed step-child of the bunch since I have no freaking idea where I'm going with the blaster. It just kind of... happened. Also, I ran out of paint halfway through.
As for why they all look "dirty", frankly I don't always treat my blasters like fragile eggs, they get banged around sometimes. So I figured I might as well make them look used to begin with.
#346380 Flywheels at NIC
Posted by ompa on 22 April 2015 - 07:50 AM in General Nerf
I can hit that speed with a Mountain Dew and half an hour. But I can only ever fire that blaster /from the hips/.
You ass, I almost spit my drink everywhere when I read that.
Also, I tried filling the heads of the elite darts with silicone... just to see if it would improve the accuracy any. So far there seems to be some minor improvement, but they still suck. Not sure if my filling method is just crappy or that even with the additional weight the distribution of the weight itself is still strange.
#346379 Cycloneshock barrel extension
Posted by ompa on 22 April 2015 - 07:23 AM in Modifications
Also, interesting things I have noted:
-There is a spot when you open the blaster where it seems a spring should go; it's a location that sits between the plunger tube and the rotation mech. I've now opened two cycloneshocks and neither has the spring there, although some sites have internal pictures with it there. Putting one in would serve to push the plunger tube back, allowing the turret to rotate more easily. The force of the plunger moving forwards within the plunger tube serves to push the tube itself against the back end of the turret, but I imagine that there is still a bit of pressure loss due to the system in place. Really I don't think it's necessary and have no clue why there are little nubs where a spring would usually go there.
-The stock main spring is loose in the shell. This isn't really a huge deal, and a larger spring would just mean that the plunger tube would always be sitting up against the turret.
-You can stuff a magnus spring in there. This actually has a few interesting benefits, although I decided against it in the end because I don't want to stress the plunger system more than necessary, but it does result in more power and a better turret/plunger tube seal (since the spring doesn't sit loose in the shell and does a good job of pushing the plunger tube right up against the turret; although since the only time that seal REALLY matters is when the plunger starts its forward motion, having it sealed any other time than during forward plunger motion is probably more of a negative than a positive)
#346357 Cycloneshock barrel extension
Posted by ompa on 21 April 2015 - 08:31 AM in Modifications
If you really want to use a dremel though you can buy a dremel stand, attach the cutting wheel, and mark where you want on the turret and slowly turn the turret while the cutting wheel is doing its work. If you're not really careful though the lateral force might end up snapping the cutting wheel though, so I'd recommend a reinforced cutting wheel for that particular use. But again, a hacksaw or circular saw would probably make this much easier.
#346355 Brass barrel help
Posted by ompa on 21 April 2015 - 08:25 AM in Darts and Barrels
Unfortunately I can't really give you the actual coefficients of friction for pvc and brass, but I can tell you that it has been used with great success at least when I was more active.
#346354 Cycloneshock barrel extension
Posted by ompa on 21 April 2015 - 08:19 AM in Modifications
#346352 Cycloneshock barrel extension
Posted by ompa on 21 April 2015 - 08:03 AM in Modifications
EDIT: also, I'm fairly certain the turret comes in only 2 pieces, the orange piece which consists of the front and the barrels, and the grey piece which serves as a shroud of sorts and the backplate.
#346344 Cycloneshock barrel extension
Posted by ompa on 21 April 2015 - 12:54 AM in Modifications
The answer to your question is yes. It also I think would look awesome. However, the turret at this point is very weighty; I'm not sure how comfortable I'd be adding all that pvc as well. I think the IDEAL solution would be to use a lighter barrel material (like PETG), with 17/32 nested in the back, and then use the PVC. I believe that should lower the weight, although I don't have any PETG to actually do weight measurements so I'm operating under the assumption that it's lighter.
Also Langley, all the current mods center around brass breeches for clip systems and flywheels. I'm not a fan of clip systems and I haven't dipped into the flywheel arena. I'm really glad to see nerf producing some good old springers (rotofury, cycloneshock, the jolt iterations, the hammershot, and even that crazy flipfury. I'm excited to start working on some (or all) of them. I know that currently homemades with hoppers is all the rage right now, but to me nothing beats the feel of the blasters you can buy in a store. Come on, you know what I'm talking about. You can't hide that crossbow forever.
~ompa
#346337 Cycloneshock barrel extension
Posted by ompa on 20 April 2015 - 11:46 PM in Modifications
First and most importantly is the shell extension. Obviously the ideal situation is to be able to use plastic rods, and just use some plastic solvent or adhesive to make a nice, strong bond. For those of us who are less well off in terms of materials access or funding you can go the same route I did. I just used some square wooden dowels (I know the definition of dowel is round, but that's what it is called online) with screws, which ended up costing about $4 total?. Makeshift yes, but also effective. In order to retain the ability to take the blaster apart, you can use some parchment paper (or wax paper) when you're slopping the bondo on, as bondo doesn't stick to the surface of the paper. I ended up putting all the square dowels in place, putting the two halves of the blaster together, and then putting the bondo on both side of the parchment paper. After the bondo was dried I kept the blaster together, slid out the parchment paper, and then sanded it down.
The post in the center of the turret, or the nub that sticks out and supports the barrel at the front of the blaster, is slightly over 8mm in diameter and I used an 8mm round dowel that were being sold at the hardware store as an extension. The dowel itself at that diameter rotates quite well within the little alcove at the front in which the old center post used to sit. I just stabilized it with the shell of a pen which happened to fit the post/dowel junction better than any other piping I found, but really a screw would also work. The center of the turret is hollow, as is the center post, so a screw can be run straight down the center and attached to the center post that way.
Stabilizing and increasing the comfort to hold the bottom after you've lopped off that much of the shell is fairly easily accomplished by using Bondo. Someone with more patience could make it far better looking than I have here, but I'm not really styling these modifications to win any beauty pageants.
As for common questions:
-Yes, the turret still seems to be rotating fine even with all the brass. I obviously haven't put it through thousands of rotations, but so far it seems to be holding up. It doesn't feel like anything is going to break any time soon either.
-No, I have not replaced the spring or added one. I don't always have easy access to blasters and I'd much rather sacrifice a bit of power to reduce the stress on the harder-to-replace components.
~ompa
#346333 Boltloser: the Blaster
Posted by ompa on 20 April 2015 - 11:21 PM in Modifications
Also, I'm curious as to just how well that putty holds. I see you pretty much use it with everything, even at the more high-stress junctions (like putting a clip in and pulling it out repeatedly) and it makes me curious if you find you have to replace the putty every so often or does it really bond that ridiculously well to plastic.
~ompa
#346196 Detachable Breech
Posted by ompa on 15 April 2015 - 08:20 PM in Darts and Barrels
~ompa
#346193 Detachable Breech
Posted by ompa on 15 April 2015 - 08:00 PM in Darts and Barrels
~ompa
#346188 Detachable Breech
Posted by ompa on 15 April 2015 - 03:19 PM in Darts and Barrels
Here is a picture of the completed breech attached to my scuffed-up and poorly-painted maxshot (a product of my poor choice in paint. Kids, don't buy crappy paint.)
Materials list:
-small and preferably strong magnet (bet you didn't see that one coming)
-length of 1" cpvc
-length of 1/2" pvc
-2 different diameters of brass (I used 9/16 and 17/32, the key is that they are able to nest)
-hot glue
-JB weld or another very strong epoxy
-"Bolt" handle (use whatever you want; if you've got a plastic rod that would probably work better for the purpose of bonding, but I used a brass piece)
-random scavenged objects that are preferably metal and somewhat L-shaped (I cut up some hanging picture wall mounts I had sitting around).
Tools:
-Dremel
-Hacksaw
-Pipe cutter
-Hot glue gun
-Ruler (or calipers, finger(s), lengths of string)
-Tape?
***As usual, my guide will eschew any highly specific measurements, due to differences in darts, and preferred barrel lengths***
First, you're going to want to take your length of 1" cpvc. The minimal length requires this:
-length of pvc that will sit in coupler at base (a centimeter or two)
-length of the L-cut (determined by length of dart + 2x the width of your "bolt" handle)
-Length after the L-cut to allow for the inner barrel to be stable when moving, which will likely consist of the width of the collar used to allow the inner barrel to sit straight (but not snug) in the 1" cpvc, plus the travel distance of the barrel (this is to make sure that when the collar moves, it still remains inside of the 1" cpvc). In the picture, the collar I'm talking about is the black tape, but I replace this with something else later.
Measure and map out where you're going to want your "bolt" handle to be, and make sure it's long enough to be as long as the dart is + 2x the width of your "bolt" handle. Also while you're at it cut the breech opening. Next, take a piece of your 1/2" pvc, and take a cm or so (not so long that it appears when looking perpendicular to the breech. This is so that when the actual breech is closed, there is at least a little overlap of the nesting brass to create a solid seal) and glue it in the back. This little piece can actually end up being a somewhat high-stress area after repeated usage, so don't just jam it in there with some tape.
Next, take your 1/2" pvc, and drill a hole the width of your bolt handle at the base. The distance between the base of the barrel and the hole should be approximately equivalent to the small space you left above, between the 1/2" pvc stub and the actual start of the breech hole in the 1" cpvc. The whole reason for this hole (heh) is to give the bolt handle a little more support. I know a lot of breeches in the past have been plagued with problems of trying to attach two pieces of pipe at 90 degrees, and it causes some issues. This helps alleviate the stress a bit. Your larger nested brass barrel will go in here. I strongly suggest you glue it in here, but only after the hole is drilled; otherwise you risk hitting the brass, denting it, and ruining the whole project. I had my brass nearly flush, but it's ultimately up to you. You're going to want only the brass exposed if you want to take this further and do a clip mod, but for this project I do not do that.
Next, you're going to want to take your smaller nested brass length, and cut your actual breech. I used a bit of tape and glue to bridge and center the brass inside the 1/2" pvc stub, and you can see the black tape on the right side of the picture. I also sanded and polished all the edges to minimize friction between this piece of brass and the other piece of brass that will be sliding over it.
Next, you're going to want to put everything together. This part I'm sure is fairly self-explanatory; the smaller nested brass (with tape or whatever bridging material you used) is attached to the 1/2" pvc stub, and the barrel goes in the other side. This is where the collar comes in to play. I used some packing tape due to the slick surface, but Ideally you would use a bench grinder/lathe/even a belt sander to sand down a 1/2 coupler, and use that as a collar. Even more ideal would be just to prototype a part. Unfortunately, I have none of those things so I'm using packing tape. Next, put the bolt handle in. Make sure the joining surfaces are clean and rough, and use the JB weld to make that joint secure. I then took the two L-shaped metal pieces I had listed in the materials list and used them here. One of them is bonded at the junction of the "bolt" handle and 1/2" pvc junction for added support. The tiny magnet I used is also bonded to this spot. The other L-shaped piece is bonded to the 1" pvc. This serves as the point where the magnet attaches when the breech is fully open, preventing it from flopping around if you're moving. I know there's a spring in the picture, but after a bit of trial and error I don't think it's really needed if the magnet is being used. A spring strong enough to open the bolt by itself I feel just adds unnecessary stress on the bolt handle. Also I apologize for what looks like a somewhat sloppy JB-welt job, I haven't gotten around to cleaning up the appearance yet.
Anyways, at this point you should be all done. Here are pictures of the breech open and closed:
Unfortunately I don't have any range values or chrono numbers, although I hope to pick up a chronograph sometime before the year is over. Or maybe next year. It's a long-term goal really, since I'm never going to find an area I can safely shoot it in and measure the values any time in the near future. No it is not war tested, or stress-tested yet. I will of course revise the guide if I run into problems in the future, or ideas for improvement, but for now it stands as-is. It's certainly not a perfect breech setup, but it gets the job done.
~ompa
#346155 The TitanTurion
Posted by ompa on 13 April 2015 - 11:01 PM in Modifications
Also, I love the use of putty. I'm a huge proponent of "use whatever the hell you find laying around in your drawers", as I know a good chunk of us don't have access to more... advanced tools, and these types of mods just seem to be so much more accessible to people starting out.
~ompa
#346154 Supermaxx 1000 Mod
Posted by ompa on 13 April 2015 - 10:49 PM in Modifications
~ompa
#346012 Supermaxx 1000 Mod
Posted by ompa on 04 April 2015 - 11:21 PM in Modifications
Now, I have discovered one problem with this blaster, and pump blasters in general. When you're pumping, the act of pumping itself can mildly warp the frame. Given how exacting the brass/brass interface is, it CAN be a bit troublesome. Holding the trigger down so no pressure builds up results in a near-perfect interface every time, but once pressure starts building up it becomes more of an issue as the frame/faux barrel ever so slightly warps. I have not yet thought of a way to deal with this outside of just filling the entire inside of the shell with bondo in order to make it solid.
I'm going to start with a finished picture, simply because I know my explanations aren't exactly going to be the most clear (it's been a while), and having the final product for reference will make it easier.
Necessary materials:
-1/2 PVC (SCH40 or 80 depends on the darts you're using)
-1/2 CPVC, or just the same PVC from above
-1/2 PVC T coupler, or L coupler
-2 nesting diameters of brass tubing (I used 12" of 9/16 and about 12" of 17/32", but this of course will vary with your darts)
-Bondo and/or epoxy (if you decide to not use an L or T coupler to join the pump to the main barrel: this will be explained later)
-A few 1" screws, depending on where/how you mount various aspects of the gun
-Hot glue (honestly the stuff is terrible, but if you ever want to re-do or change mods like I do, it's easier to undo).
First things first, you're going to want to take your 1/2 pvc and shove it right down the barrel until it's nearly flush with the turret. It doesn't necessarily have to be perfect, because it's the brass/brass connection that's most important. I left about 3" after the tip of the faux barrel and chopped it there. I then took the L coupler (Or T, or whatever works for you) and sanded out the inner lip so I could push the pvc all the way through. At that point, you want to want to fill in the opening perpendicular to the direction of your barrel with Bondo or epoxy. You could ALSO just jam an L or T bracket onto/into the L/T bracket you already have attached to the main barrel; I did not do this because a.) I'm cheap and b.) the store I was at didn't have a CPVC L-coupler. Nor did it have a 1/2 PVC T-coupler (don't ask).
You'll then want to sand the bondo/epoxy until it's flat.
At this point, you'll want to start measuring the arm that will connect the barrel to the pump, as the whole assembly will move as a unit. put the pump at the rearmost position, and measure the cpvc (or pvc) so that it is at least long enough to go from the back of the pump to the vertical portion of the T or L coupler. Ideally you should then measure the diameter of the T-coupler and mark it accordingly onto the piece of CPVC (only if you didn't have a second T or L coupler available to you). As you can see, I was just lazy and instead just took a permanent marker and eyeballed it.
Assuming the bondo is dry (or you're using an L or T coupler like you should, provided the hardware stores around you aren't complete crap) you can either just attach the piece of pvc or cpvc to your coupler or screw it in like I did. If you look back at the final product picture I did add some bondo around the junction to smooth it out a bit, but it's up to you really, and you won't need bondo if you used an L or T coupler at that junction.
The last thing you'll need to do with this barrel is to take your larger diameter brass (for me I used 12" of 9/16" brass) and flare out one end of it. I honestly just take a larger pair of pliars and spin it around one end until I get a nice flared edge going and then smooth the surface with a dremel. This is so that even with the small amount of play present with the turret, ideally the larger brass will catch the smaller brass stubs and guide them into place. Afterwards mount it on the inside of the barrel leaving about 3/4" sticking out the rear end, assuming you left your pvc about flush with the front of the turret when you measured it. I just did this with some tape around the brass to center it, followed by some hot glue to secure it.
At this point you can take out the whole assembly and set it aside, now it's time to take apart the gun. P.S. taking the gun apart may make you utter a number of profanities. The two orange rings at the base of the faux barrel and the base of the pump are both glued on. I just heated up the rings to try to loosen them; it worked for the pump ring, but I didn't have as much luck with the one around the faux barrel. I ended up just scoring along the split in the gun itself and took the gun apart. The first thing you'll notice is that a bunch of pieces flew out. Fortunately, you really don't need many of them, because the vast majority of them make up the overly fragile and complicated rotation mechanism. Given the propensity of the rotation mech to break upon adding anything at all to the turret, it's best to just remove it now. Worst case if you want to undo everything, you can always put it back in. The one piece you will want to leave in is the little black piece at the bottom that acts as a sort of ratchet for the turret.
Given the lack of the rotation mech, the trigger pull becomes excessively long. You can remedy this with really anything, but my preferred choice is to just chop off a bit of the ink tube of a bic pen, slit it lengthwise, and wrap it around where the trigger would normally engage the (honestly I don't know what to call it) pin. In this particular picture, it's to the left of the large metal cylinder, and to the right of the smaller metal cylinder. A bit of superglue or epoxy will keep it in place.
This next part is kind of optional. The gun has a very unusual way of preventing the firing of non-approved darts (I'm looking at you marbles). At the rear end of every dart chamber within the turret is a small white pin and a spring. The dart depresses the pin, which then exits the back of the turret. This pin then serves to move the flap that is otherwise covering the air chamber, allowing air to pass from the air chamber to move the dart out. Once the dart is out, the pin resets, and the turret can continue rotating. It's actually a really nifty little mechanism, but useless for our cause. Thus, I just glued the cover into the "open" position. A more ideal solution would be to rip it off and replace it with a rubber washer to increase the seal between the air chamber and the turret, but I didn't have one on me at the time, although I might change this in the future if I ever find myself enjoying pump guns again.
This brings us to our next section, as well as oddity. While you still have the gun disassembled, look down the dart chambers within the turret. For the vast majority of nerf-branded weapons, additional pressure is placed on the darts via a constriction in the dart chamber itself. In this particular case, it's actually little ridges. Now these can be dealt with in one of two ways. The ideal way would be to have a nice drill press and just get rid of them entirely.
For those of you that don't have one (me), you'll have to improvise by wrapping some tape around the base of short brass barrels (these will be the smaller of your two brass diameters; in my case it was about 1.5" of 17/32"), pouring hot glue over the base, and jamming it in as fast as you can, praying that this fills in the space that will inevitably be left in the tape/ridge junction. Again, better with the drill press, but not all of us have that luxury. By jamming the barrel stubs in with the hot glue you also have another bonus; the hot glue helps to stabilize and center the barrel, which really helps improve the reliability when it comes to the barrel sliding over it. If you jam the brass back far enough, it's likely you'll engage those little white pins we talked about earlier. Given that the air chamber cover is now permanently open (either due to my method or the preferred rubber washer) this will inevitably interfere with the functionality of the blaster, so once you jammed the brass in there just chop off the pins at the back so they're flush. Then, hot glue the little holes on the outside of the turret. Assuming you placed hot glue around the outside of the brass stubs before jamming them in the turret the seal should be sufficient, but better safe than sorry.
When you assemble the whole thing, assuming everything has been centered properly, sliding the barrel down the tube should result in it sliding nicely over the brass stubs inside the turret.
Make sure that it slides consistently over the brass stubs for all chambers, and then decide where you want to link the faux barrel to the pump. I chose the top (as you already saw from the first picture), but really anywhere works as long as you fill in whatever gaps are present between the linking arm and the pump. Also, don't mind the differently sized screws, when I said that I just found random screws in my drawer I wasn't kidding.
Again, I apologize for the lack of ranges and/or chrono values at the moment. Once I get around to making some Stefans maybe I might risk trying to find a place where I can do some range testing, but until then I really do apologize for the lack of values.
~ompa
#220988 Dcno Spring 2009
Posted by ompa on 01 April 2009 - 12:50 AM in Nerf Wars
Basically, my plan hinges upon metro access and/or ride; so if anyone is passing through Baltimore, do let me know.
~ompa
#157585 Magstrike Help
Posted by ompa on 31 May 2008 - 05:31 PM in Modifications
~ompa
#157511 Sm750 Mod
Posted by ompa on 30 May 2008 - 11:03 PM in Modifications
~ompa
#157252 Big Salvo Bull Shit
Posted by ompa on 28 May 2008 - 09:11 AM in Modifications
~ompa
#157241 On A Personal Note...
Posted by ompa on 28 May 2008 - 12:16 AM in General Nerf
~ompa
#157240 Imitation Is The Highest Form Of Flattery.
Posted by ompa on 28 May 2008 - 12:14 AM in Modifications
Anyways, don't take too much offense to it; stuff like this happens. If someone comes out with something rather innovative or new on the boards, NH members tend to defend it like it's their own. It's just how the community works.
Welcome to NH, feel free to PM me with any questions you might have.
~ompa
#157238 Recon Modification
Posted by ompa on 28 May 2008 - 12:09 AM in Modifications
2.) "Fill the space in with hot glue and cut it flush with the plunger head:" So not really, there seems to be some hot glue at the other end, and plumber's goop "Put a bit of Goop on it and put it into the dead space" on the part with the tape.
3.) If the new barrel can fit snugly into the bolt, there is no real reason to cut the half-pipe out.
5.) From the looks of it, the Titan barrel is slightly larger than the place where the stock attaches to. The stock fits fairly snugly at that joint, so anything large would hinder the placement of the stock. In short, I don't think so.
6.) Yes. The Angel breech (if you want the brass version) will require the removal of the petg for starters. Secondly, unless you're using a very small size of brass, you'll need to chop off almost the entire stock bolt anyways, which wasn't done in this mod. Alternatively you could do a good amount of sanding on the inside of the bolt until the brass fits, but that will be rather difficult to do without the proper tools.
7.) If you plan on following his mod, all you really have to do is replace the barrel he's using with one that fits your darts. The stock bolt/barrel (while I don't have it in front of me, I'm working from memory here so feel free to correct me if I'm wrong) is somewhat tapered, so the dart fits tighter in the back of the bolt/barrel. A new bolt/barrel (if tighter) will provide more "tightness" over a longer section of the bolt/barrel, unless for some reason you have a tapered piece of brass/petg.
~ompa
#157237 Is There A Decent Dtg Mod Out There?
Posted by ompa on 27 May 2008 - 11:59 PM in Modifications
And do try to use proper capitalization. It's in the Code of Conduct.
~ompa
- NerfHaven
- → ompa's Content
- Terms of Service and Privacy Policy
- Code of Conduct ·