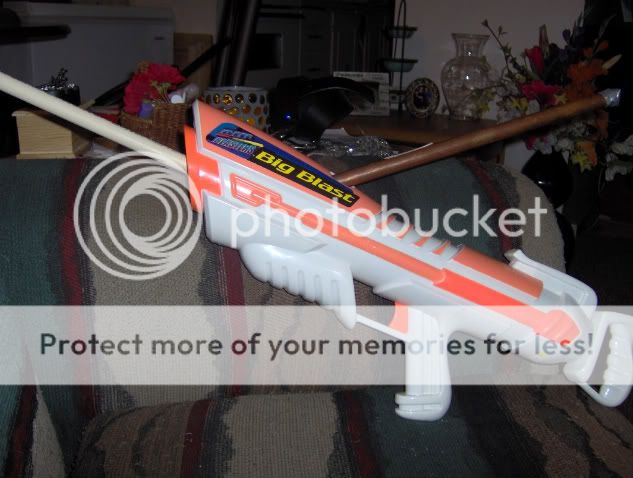
That sir, is one fine peice of work. Makes me wish I didnt smash mine some 15 years ago.
And props on the spatula and cigar.
cheyner's Content
There have been 215 items by cheyner (Search limited from 20-January 97)
#279792 Chainblazer Mod...singled?!?!
 Posted by
on 08 July 2010 - 10:47 PM
in
Modifications
Posted by
on 08 July 2010 - 10:47 PM
in
Modifications
#279271 Battle Max Markerball Sceptor V1.0
Posted by
on 02 July 2010 - 02:59 PM
in
Modifications
Son of a bitch, I have passed these up the last 4 times I have been to this liquidation store, $20 CND!
Now I have to go make sure they still have some, amazing find TantumBull.
Fuck, they sold the last one half an hour before I got there.
Now I have to go make sure they still have some, amazing find TantumBull.
Fuck, they sold the last one half an hour before I got there.
#277606 Litter Box Core
Posted by
on 13 June 2010 - 03:52 PM
in
Homemades
Special Kitty saves the day again. I knew there was a reason I decided to hold onto a few containers. Now they are useful, and not just the by-product of a pack rat.
#277462 Talos
Posted by
on 11 June 2010 - 05:53 PM
in
Modifications
Is the stock plunger small/bad so you went with integrations galore? Nice job.
It didnt have a plunger setup. It was origianally a laser tag gun.
Then what is the plunger rod and barrel for? And why is there a rocket?
He was half right, It is a lazer tag gun, with an AIR TANK on the bottom to fire the rocket. That is a pump handle, not a plunger rod. It even says in the video that he replaced the stock air tank with a Titan air tank
Words cannot describe the work you did on that blaster Angel. I look forward to trying to dodge this on the 26th.
#277107 Homemades Picture Thread
Posted by
on 07 June 2010 - 08:31 PM
in
Homemades
As fun as HAMP's are, they are a pain in the ass to transport, and mobility becomes an issue if you are not in a wide open space. I have an answer to this:

I call it the Mini Mega HAMP.
Only 2 feet long (back to barrel tip).
Shoot's 2-3 dart at a time.
20 shot hopper clip (it's as long as the HAMP).
Petg nested in red Pex.
Plunger tube is 3" PVC.
Homemade wye.
I call it the Mini Mega HAMP.
Only 2 feet long (back to barrel tip).
Shoot's 2-3 dart at a time.
20 shot hopper clip (it's as long as the HAMP).
Petg nested in red Pex.
Plunger tube is 3" PVC.
Homemade wye.
#276537 Homemades Picture Thread
Posted by
on 31 May 2010 - 09:24 PM
in
Homemades
What? No HAMP's yet?

5 minute $2 HAMP
Found at a dollar store (Dollarama for you Canadians), it is basically a foam covered plunger that was originally intended for water.
Has a plate on the front that lets you select from 1 jet of water, or 4 streams.
All you have to do is glue a coupler on the front and plug the 4 small hole's in the process.

No need to open, just glue on a coupler and you are done.
Not really a homemade, but it has the spirit of one, that, and it is bright green.
5 minute $2 HAMP
Found at a dollar store (Dollarama for you Canadians), it is basically a foam covered plunger that was originally intended for water.
Has a plate on the front that lets you select from 1 jet of water, or 4 streams.
All you have to do is glue a coupler on the front and plug the 4 small hole's in the process.
No need to open, just glue on a coupler and you are done.
Not really a homemade, but it has the spirit of one, that, and it is bright green.
#276478 Modification and Paintjob Pictures
Posted by
on 31 May 2010 - 08:41 AM
in
Modifications
Finished my SuperMaxx 3000.

-9 inch PETG barrels
-still auto-rotate's (better once the seal wears in a bit)
-craft foam seal
-plugged pump
-barrel spacer made from orange pex

-rear-loading
Shoulder stock and ranges to come.
-9 inch PETG barrels
-still auto-rotate's (better once the seal wears in a bit)
-craft foam seal
-plugged pump
-barrel spacer made from orange pex
-rear-loading
Shoulder stock and ranges to come.
#276476 Sm3k Help
Posted by
on 31 May 2010 - 08:25 AM
in
Modifications
Thanks for the help everybody, I plugged the pump and called it a day.
#276355 Vengeance #1 Video
Posted by
on 29 May 2010 - 05:46 PM
in
Nerf Wars
Another fine piece of work Angel. The clip of Slushi jumping Crooked was great.
Cannot wait to see your next piece of art.
Cannot wait to see your next piece of art.
#276351 Sm3k Help
Posted by
on 29 May 2010 - 04:00 PM
in
Modifications
The hole is in the end of the pump that attaches to the pump handle, so it is not effecting pump efficiency.
Thank you, one down.
Ok, still, not a vaccume issue. The leak was the same with the original o-ring, with the new one it just happens faster, this is what is leading me to belive that the OPRV has weakened over time.
I know that if water got in there it could have rusted a bit and that would have weakened it a bit.
I am going to rip apart my green Sm3k and try the pump shaft from that.
#276313 Sm3k Help
Posted by
on 28 May 2010 - 11:46 PM
in
Modifications
If there was a vaccume effect, I would not be able to pump it more than once without quite some effort. I can hear the air rushing into the pump tube as I pull the pump shaft out.
This testing is all being done with the internals in my hand, when I plug the hole in my picture with my finger it becomes pretty hard to pump in, but easy to pull back out.
The problem is the air coming out of the pump shaft, is this the OPRV kicking in? There is a half decent pop when I pull the pin on the tank, but I have never used a Sm3k before so I have no idea if this is normal.
Is it possible that I am indeed filling the tank with one full pump?
Or, because it is a old ass yellow Sm3k, could the OPRV have weakened?
Should I just plug the OPRV, or apparently for future refrence, the pump shaft?
#276305 Sm3k Help
Posted by
on 28 May 2010 - 10:05 PM
in
Modifications
So, I'm almost done my Sm3k and I'm down to one problem. Either my pump is leaking because they didnt put enough plastic on it, the OPRV is out of whack, or I am actually filling the tank on one pump. Does any of this make sence to anybody?

Should I plug this hole?
Or should I plug my OPRV?
I replaced the o-ring with a new one, does this grant me magical one-pump powers? Is somebody going to sig what I just wrote?
It's a yellow Sm3k, and I have never fired a working Sm3k to compare the air-output to.
Help? Suggestions?
Should I plug this hole?
Or should I plug my OPRV?
I replaced the o-ring with a new one, does this grant me magical one-pump powers? Is somebody going to sig what I just wrote?
It's a yellow Sm3k, and I have never fired a working Sm3k to compare the air-output to.
Help? Suggestions?
#276130 Make Your Own Wye
Posted by
on 26 May 2010 - 09:07 PM
in
Homemades
I only advantage that I see with a homemade wye is that you can customize the angle. If you have a mellower angle you can use longer darts with the system and darts should load smoother. Try a 40 or 35 degree angle next time. Nice job.l
Thank you, another very important factor for making wye's, is the fact that Flexpvc's shipping to Canada is crazy.
#276009 N-strike Barrel Break Ix-2
Posted by
on 25 May 2010 - 11:10 PM
in
News
Looks up you can break open the thing.. Look at the screws in the pictures....
Oh, you mean like a Barrel Break IX-2? That would be crazy.
It looks like it might even have 2 plungers in it, which would be interesting to see, reverse or not.
#275965 Diy: Hopper Clips
Posted by
on 25 May 2010 - 07:14 PM
in
Darts and Barrels
If you make your own wye, you could play with the angle to get streamlines to work, say a 35 degree angle. Also, on my MegaHAMP, I found that I NEEDED a dart stop, no way around it, otherwise on the pull I was sucking darts backwards.
#275877 Make Your Own Wye
Posted by
on 24 May 2010 - 09:58 PM
in
Homemades
Home made PVC wyes are not at all new to Nerfhaven, but I would say your method seems quite a bit cleaner than Carrtoon's method from 4 years ago. I still would highly recommend solvent welding instead of hot-melt glue OR electrical tape.
Thank you Bob, I was not aware of that. As for the glue, I agree completly with you, I'm just very impatient. This one actually is held together mainly by Loctite Gel super glue, with the hot glue for an extra bit of strength. I make sure there is no super glue showing before I do this as well.
#275872 Make Your Own Wye
Posted by
on 24 May 2010 - 09:15 PM
in
Homemades
Having successfully built my first wye for my MEGAHAMP, I decided to try building one for my 4B. Seeing as how it was going to be of a more suitable size for the community, I decided to document my fun with PVC for you.
Materials:
½ Inch PVC
Super glue
Hot glue
Dremel
Angle or mitre box
Knife of some sort
½ Drill bit
Sand paper
First you want to bust out your angle or mitre box and mark and cut a piece of PVC at 45 degrees.

Take your sand paper and wrap it around some ½ inch PVC. Sand your 45 degree cut on this until you get a nice snugish fit. You could also use the sanding drum on your Dremel if that’s how you roll.

Now grab some more ½ inch PVC and your ½ drill bit. Use whatever method of drilling you prefer, I just use a spade bit with a ratcheting screwdriver. Drill 2 close to overlapping holes or one if you have some time.
Now use your knife/Dremel and connect the holes.
The next part is pretty much trial and error. Widen the hole so that no PVC shows when you hold your 45 piece up to it and look in the PVC.

Time to trim your 2 piece’s down to size. You don’t want them to be too short, nor do you want them to be too long. Try to get them just long enough so that there is enough to hold the pipe going into the piece.


Now you need to make sure the ends of your wye can accept ½ CPVC.
This will be easiest with a dremel with a small sanding drum. Take your time and make sure to check your fit often.

All 3 ends should more or less look like this.
Time to glue the 2 pieces together making sure it is lined up at the same time of course. I like to use a drop or 2 of super glue to hold it together before I smother it in hot glue.


Now all you have to do is follow this very timely posted thread and then strap it to something big and powerful.
This design can easily be used to make wyes of all sizes, not just for ½ CPVC.
For my MEGAHAMP I used ¾ PVC, as it needed to accept ¾ CPVC and ½ PVC.
Materials:
½ Inch PVC
Super glue
Hot glue
Dremel
Angle or mitre box
Knife of some sort
½ Drill bit
Sand paper
First you want to bust out your angle or mitre box and mark and cut a piece of PVC at 45 degrees.
Take your sand paper and wrap it around some ½ inch PVC. Sand your 45 degree cut on this until you get a nice snugish fit. You could also use the sanding drum on your Dremel if that’s how you roll.
Now grab some more ½ inch PVC and your ½ drill bit. Use whatever method of drilling you prefer, I just use a spade bit with a ratcheting screwdriver. Drill 2 close to overlapping holes or one if you have some time.
Now use your knife/Dremel and connect the holes.
The next part is pretty much trial and error. Widen the hole so that no PVC shows when you hold your 45 piece up to it and look in the PVC.
Time to trim your 2 piece’s down to size. You don’t want them to be too short, nor do you want them to be too long. Try to get them just long enough so that there is enough to hold the pipe going into the piece.
Now you need to make sure the ends of your wye can accept ½ CPVC.
This will be easiest with a dremel with a small sanding drum. Take your time and make sure to check your fit often.
All 3 ends should more or less look like this.
Time to glue the 2 pieces together making sure it is lined up at the same time of course. I like to use a drop or 2 of super glue to hold it together before I smother it in hot glue.
Now all you have to do is follow this very timely posted thread and then strap it to something big and powerful.
This design can easily be used to make wyes of all sizes, not just for ½ CPVC.
For my MEGAHAMP I used ¾ PVC, as it needed to accept ¾ CPVC and ½ PVC.
#275013 Homemades Picture Thread
Posted by
on 16 May 2010 - 11:28 PM
in
Homemades
MEGAHAMP

"Naked"

Triple seal with wooden spacers on the plunger.

Homemade wye, as they are pretty much impossible to find in the great white north.


Notes:
Shit load of hot glue used (around 40 sticks), she's sturdy.
The seal is almost too good, you either need to be pretty strong, or fairly tall (leverage) to use this one.
Also, a tip for anybody thinking of making a MEGAHAMP, make sure it fits in your car before you finish it, this one was close.
Dollarama tape is better than Home Hardware's.
"Naked"
Triple seal with wooden spacers on the plunger.
Homemade wye, as they are pretty much impossible to find in the great white north.
Notes:
Shit load of hot glue used (around 40 sticks), she's sturdy.
The seal is almost too good, you either need to be pretty strong, or fairly tall (leverage) to use this one.
Also, a tip for anybody thinking of making a MEGAHAMP, make sure it fits in your car before you finish it, this one was close.
Dollarama tape is better than Home Hardware's.
#274876 Nerfers In Winnipeg?
Posted by
on 15 May 2010 - 08:20 PM
in
Modifications
If you are a Canadian, I hope you are a member here.
If not, please do.
If not, please do.
#274874 Nite Finder Cometic + Reanfocement And Extra Spring
Posted by
on 15 May 2010 - 08:17 PM
in
Modifications
You know, I really am quite entertained by this post.
He talks about these nice cosmetics, and there's not even a picture of the damn gun.
A fucking gorilla could've made a better post.
Agreed, I also enjoy the paragraph long sentence.
#274256 A Gift For The Milsim Lovers!
Posted by
on 07 May 2010 - 04:13 PM
in
Off Topic
I'm more concerned to learn from that page that we are slowly running out of rocks.
#274141 The Overkill: This Is What Happens When A Titan And A Longshot Have Ch
Posted by
on 05 May 2010 - 09:41 PM
in
Modifications
Isnt this the guy that taught Forsaken_Angel24 everything he knows?
And those are the re-sized pics?
And those are the re-sized pics?
#273580 Nerf Product Safety Question
Posted by
on 27 April 2010 - 10:47 PM
in
General Nerf
Really now? First of all, the gun is $180 and each shell is $60.
Why don't you buy yourself a ultimator or something...they're cheaper and you can still hit kiddies with big ass rockets. I assume that's what you want to do
I'm pretty sure he is planning on buying this for airsoft, as he states in his first post he is becoming more active in airsoft then nerf. And is wondering if he can get more use out of it by buying those foam slugs and then using it at a nerf war, if everybody was okay with it.
#273575 Nerf Product Safety Question
Posted by
on 27 April 2010 - 10:18 PM
in
General Nerf
It shows it in a Tan colour in one of the pics, which wouldnt be too bad.
As for the ammo, it depends, yes the one review said 20 ft range, but the "only" was refering to the 3 second fill. If that is as much as you can pressurize it, then I think it would be okay.
As for the ammo, it depends, yes the one review said 20 ft range, but the "only" was refering to the 3 second fill. If that is as much as you can pressurize it, then I think it would be okay.
#273574 Modification and Paintjob Pictures
Posted by
on 27 April 2010 - 10:08 PM
in
Modifications
Tetra-Strike

Only the one barrel is crooked, coincedentaly that tank leaks anyway.
No ranges as its snowing (what the fuck) and im not going out in that shit.
Only the one barrel is crooked, coincedentaly that tank leaks anyway.
No ranges as its snowing (what the fuck) and im not going out in that shit.
#273181 Homemades Picture Thread
Posted by
on 24 April 2010 - 04:11 PM
in
Homemades
DA MAMP (Dual Action Medium Airflow Manual Plunger)


Push the handle to fire a shot, then pull it back to fire another.
Uses 2 10 shot RSCB's that vaccume load.
Built to prove that the design works, fires in the 50 ft range.
Push the handle to fire a shot, then pull it back to fire another.
Uses 2 10 shot RSCB's that vaccume load.
Built to prove that the design works, fires in the 50 ft range.
#272593 Turrets Info
Posted by
on 18 April 2010 - 04:19 PM
in
Homemades
"Scouting" in this case means visiting regularly, over and over, for months and months.
I've been stopping by a certain Goodwill store (happens to be the one nearest to Blue's house) about twice a month for maybe two years, because it's on a route I need to travel anyway, and I find something interesting only once in a while.
Take this to heart, thrift shops such as Goodwill and Value Village (Canada) are goldmines. At least 75% of my blasters are second hand. They usually have an abundance of turrets in the form of Tek 6's. Some will even set aside nerf guns for you if you ask. I have a couple of guys doing that for me at Value Village and it has paid off. In the last month or 2 I have gotten a SM3K, a Big Salvo, 4 Big Blasts, a Magstrike, SM1500, and a Cyclone.
#272489 Question About Rscb Clip
Posted by
on 17 April 2010 - 03:32 PM
in
Darts and Barrels
If you can't find thinwall pvc try 3/4 cpvc. I use it for my mega (5/8) clips.
#272246 Finding A Blaster For A Friend In A Power Chair.
Posted by
on 14 April 2010 - 09:24 PM
in
General Nerf
That all depends on the turret really. If a Tek 6 turret were to be used, then yes, not good for one hand oporation. But if a Tek 10 and possibly a Fire Fly turret is used then he could just roll it on his leg to advance the turret. Now that I think of it, the Tek 6 turret could even be used with one hand. If the barrels are long enough he could poke his foot or something with it and give it a twist.
#271600 Automatic Design Question
Posted by
on 07 April 2010 - 05:48 PM
in
Homemades
If you build that, it has a 50/50 chance of breaking every time you let go of the trigger. There's nothing to stop the trigger from catching behind the plunger and totally fucking everything up.
There's a bunch of other problems too, probably, but none that would totally prevent this from working as much as your trigger design.
The trigger problem would be easily solved just by cutting the back of the trigger into a slant. That way if it does go "behind" the plunger, it will simply slide over and catch the right way.
#270154 Modification and Paintjob Pictures
Posted by
on 23 March 2010 - 11:04 PM
in
Modifications
Pistol Splat with a internal cpvc coupler.

Who needs a workbench when you have McDonald and Taco Bell trays.
Edit: And by Pistol Splat I of course mean Wipeout.
Who needs a workbench when you have McDonald and Taco Bell trays.
Edit: And by Pistol Splat I of course mean Wipeout.
#269393 Basic Sharpshooter Ii Mods/repairs
Posted by
on 16 March 2010 - 09:55 PM
in
Modifications
These blaster's are diffinantly worth holding onto. I did the same thing to mine with similar ranges.
Does anybody know exactly why the bottom barrel has more power? Is it because of the selector? Even stock the bottom barrel has more kick. Also, I'm glad you kept the 2 barrels, I hate seeing these singled if the selector works fine.
Does anybody know exactly why the bottom barrel has more power? Is it because of the selector? Even stock the bottom barrel has more kick. Also, I'm glad you kept the 2 barrels, I hate seeing these singled if the selector works fine.
#269291 Tek 6 Interchangable "clip" Mod.
Posted by
on 16 March 2010 - 09:11 AM
in
Modifications
You are probably going to have to do a rebarrel if you rip out the pegs. The barrels on Tek 6 turrets are much to big for most micro's to have a good fit. If you just rip out the pegs you are going to most likely get worse ranges than stock.
#269252 Ammo Question
Posted by
on 15 March 2010 - 09:51 PM
in
Darts and Barrels
Your range would probably suck hard, but you could try and make it like a ball shooter. By this i mean, put a lip on the end of the barrel. You could then use the barrel as an inline clip. Instead of balls use your footballs.
#269052 Doubled Recon With Twin Drums
Posted by
on 13 March 2010 - 07:27 PM
in
Modifications
The double Recon is a nice peice of work. That Raider though, holy shit, that is redicously clean.
#268930 Cpvc, Hard To Find?
Posted by
on 12 March 2010 - 06:42 PM
in
General Nerf
If you live in Canada go to a Home Hardware, or Home Building Centre. There's also Rona, in Kingston the Canadian Tires are useless, all 3 of them. Hell, Lowe's are starting to pop up like crazy too.
#267962 The 65-b 6 Barrel Buzz Bee Big Blast
Posted by
on 04 March 2010 - 12:17 AM
in
Modifications
Is the tek 6 turret piece actually stabilized in the 'end cap' of the BBBB? if not, would it be practical to move the entire turret assembly back to the very beginning of the BBBB tank and thus minimize the overall length of the gun by about 6 inches?
I don't own a BBBB so i'm not sure how narrow the actual internals are, but there seems to be a lot of unnecessary length of 'barrel' before the end of the blaster (in all BBBB's)
Once I get ahold of some e-putty it will be supported on the lip, it more or less just needs to have a slot built. It's literally like Buzz-Bee was going to do this themselves, the turret is a perfect fit.
And you could easily move this back with some more cutting, as is I can pull the whole thing off and stick it on any other gun with a 1/2 inch pvc coupler.
Sweet. Couldn't you stick some epoxy on the side of the street elbow cut (facing the rotation mech) to seal it better? It would suck if that redirection work was leaking out air. Also, at the turret seal, you could cut half of an end cap and stick it on the end, leaving an inner "lip" for a rubber gasket to be seated.
Foam was all I had handy at the time. I am deffinantly going to try that end cap idea, but instead of the end cap I'm going to move the pvc section up a hair. As is though, the foam slides much better over the glue then rubber would. I am hoping to eventually replace the glue with e-putty, or something similar.
On the topic of your barrells, I suggest PETG, possiby from OMC. All in all it seems very simple yet effective, you may.want to seal your rearloding slot so your not loosing darts into your gun. Do pics if you replace the barrells soonish.
Once there is room in my budget I will be shooting a pm to whoever is selling at the time, which would be Split at the moment. The barrels are a bit tight for an air-gun, so I'm not to worried about darts falling out.
Plus, the only things that are cut on the shell are the rear loading slot and the orange ring on the front, so darts wont go to far if they do fall out.
Once again, thanks for all the positive feed back.
#267729 The 65-b 6 Barrel Buzz Bee Big Blast
Posted by
on 02 March 2010 - 11:28 PM
in
Modifications
However, although I've never integrated a turret onto a non-turret blaster, I wonder if the added weight in front of the blaster will detach the coupler from the blaster or not. Is there something that will support the added weight or is it alright the way it is ?
The barrel is cut off at the first plastic wall with a nub sticking out flush with the inside of the coupler. The coupler is crazy glued and hot glued to both the barrel and the shell.
I took a shit load of pictures, but for some reason none with the shell open.
Thanks for all of the positive feed back so far everybody.
#267708 The 65-b 6 Barrel Buzz Bee Big Blast
Posted by
on 02 March 2010 - 10:39 PM
in
Modifications
Screw the spacer onto the rotation mech and start glueing on the barrels. While you do this, you have to make sure that the rotation mech stays in the tabs.

The main reason the rotation mech is not glued to the pvc is for fine tuning. For the seal I used a bit of arrow foam, glue the foam to the pvc/cpvc on the elbow. To stabilize the turret i cut a bit of the original barrel and notched it so that it fits the pvc rotation mech holder. Foam has been glued to this as well to help put a little bit more pressure on the top. Another thing I did to improve the seal a bit was fill the back of the turret with hot glue.


Cut the barrel off of your Big Blast and slap a 1/2" pvc coupler on there however you see fit.
Cut a hole in your Big Blast shell for rear loading the turret. Close the shell back up and insert the tee into the coupler.


Finished.
No ranges yet, as its too cold and windy to bother.
All measurements are guesstimates.
The barrels are temporary as well so I dont want to hear about how shitty they look.
Questions? Comments?
The main reason the rotation mech is not glued to the pvc is for fine tuning. For the seal I used a bit of arrow foam, glue the foam to the pvc/cpvc on the elbow. To stabilize the turret i cut a bit of the original barrel and notched it so that it fits the pvc rotation mech holder. Foam has been glued to this as well to help put a little bit more pressure on the top. Another thing I did to improve the seal a bit was fill the back of the turret with hot glue.
Cut the barrel off of your Big Blast and slap a 1/2" pvc coupler on there however you see fit.
Cut a hole in your Big Blast shell for rear loading the turret. Close the shell back up and insert the tee into the coupler.
Finished.
No ranges yet, as its too cold and windy to bother.
All measurements are guesstimates.
The barrels are temporary as well so I dont want to hear about how shitty they look.
Questions? Comments?
#267707 The 65-b 6 Barrel Buzz Bee Big Blast
Posted by
on 02 March 2010 - 10:38 PM
in
Modifications
Set these peices aside, we will come back to them after we have something to hold them.
Grab the tee and cut the top coupler off. Sand out the hole so that the street elbow will fit.
I found that the sanding drum dremel attatchment is a perfect fit.


Take the street elbow and cut a notch in it so air can still pass freely in the tee. Only on one side though.

Cut a section of cpvc (mine was roughly 2 1/2" it can be longer, or shorter) and glue it into the street elbow. Now glue the elbow into the top of the tee. I sanded them down on the top (tee) and bottom (elbow) so they would fit together better.

Grab your rotation mech and cut off the back half of the teeth-dealies. You can cut off all of the teeth, or leave 2 like I did. This is because the rotation mech with the teeth off is a tight fit in 1/2" pvc and I am not glueing it in, the teeth are just a little added assurance that im not turning the rotation mech in the pvc. Cut 2 notches big enough to fit those teeth in the end of the pvc. Stick the rotation mech in the pvc and cut the pvc down so that there is about half an inch of space behind the rotation mech.


Cut a bit of cpvc, around 1 1/4". Sand down one end so that it fits in the pvc. Fill it with hot glue and glue it into the tee. Now glue on the pvc.

Cut 2 rings of pvc about half an inch long. Cut a notch into one so that it will not hit the tee, glue this peice onto the end of the cpvc sticking out of the elbow. Cut a 1" section of cpvc and sand down one end enough so that the other pvc ring fits. Glue this onto the other end of the tee.

Now for the fun part, the barrels. Slide the turret base over the rotation mech and then slide the rotation mech into the pvc.

Grab the tee and cut the top coupler off. Sand out the hole so that the street elbow will fit.
I found that the sanding drum dremel attatchment is a perfect fit.
Take the street elbow and cut a notch in it so air can still pass freely in the tee. Only on one side though.
Cut a section of cpvc (mine was roughly 2 1/2" it can be longer, or shorter) and glue it into the street elbow. Now glue the elbow into the top of the tee. I sanded them down on the top (tee) and bottom (elbow) so they would fit together better.
Grab your rotation mech and cut off the back half of the teeth-dealies. You can cut off all of the teeth, or leave 2 like I did. This is because the rotation mech with the teeth off is a tight fit in 1/2" pvc and I am not glueing it in, the teeth are just a little added assurance that im not turning the rotation mech in the pvc. Cut 2 notches big enough to fit those teeth in the end of the pvc. Stick the rotation mech in the pvc and cut the pvc down so that there is about half an inch of space behind the rotation mech.
Cut a bit of cpvc, around 1 1/4". Sand down one end so that it fits in the pvc. Fill it with hot glue and glue it into the tee. Now glue on the pvc.
Cut 2 rings of pvc about half an inch long. Cut a notch into one so that it will not hit the tee, glue this peice onto the end of the cpvc sticking out of the elbow. Cut a 1" section of cpvc and sand down one end enough so that the other pvc ring fits. Glue this onto the other end of the tee.
Now for the fun part, the barrels. Slide the turret base over the rotation mech and then slide the rotation mech into the pvc.

