popatachi's Content
There have been 158 items by popatachi (Search limited from 05-January 97)
#306530 Shorty Maverick
 Posted by
on 25 October 2011 - 09:02 PM
in
Modifications
Posted by
on 25 October 2011 - 09:02 PM
in
Modifications
#306498 Shorty Maverick
Posted by
on 25 October 2011 - 08:01 AM
in
Modifications

@dizzyduck: I replaced the barrels with CPVC and they are flush with the each end of the turret. In hindsight it might have been easier to do your second option and make holes in the bottom to the inner diameter of the barrel, but for some reason I decided against it. I have added a picture in the original thread of turret opened so you can see the back of the turret.
@agc2k: Thanks! It will be fun to paint!
@Beaver: I'll add that too... Thanks! I knew I was forgetting something. The seal is really good... I just need to sand down a couple of the barrels as they are sticking up a bit past the bottom.
#306484 Shorty Maverick
Posted by
on 24 October 2011 - 10:12 PM
in
Modifications
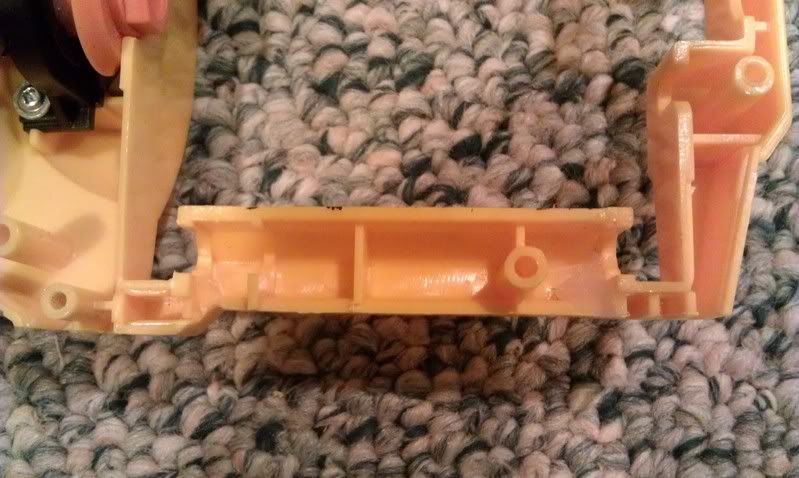
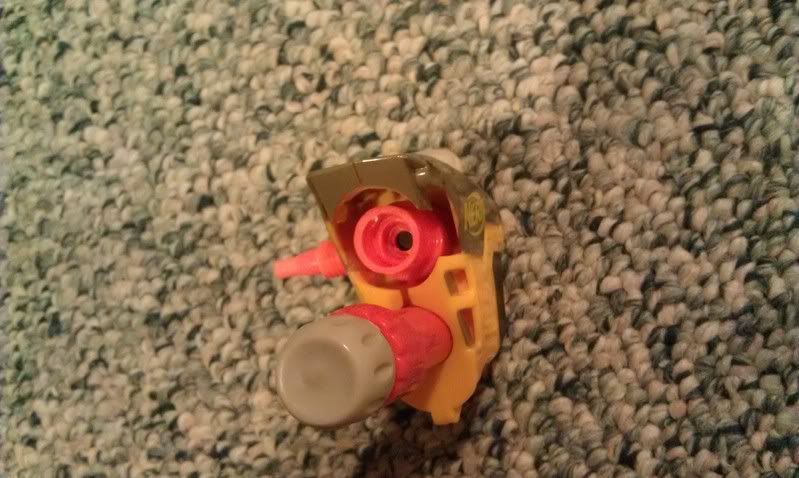
1. Turret
Start with the turret. This could probably be shortened even more. I was going to cut this down to be 1.5" long (the length of a stefan) but I also wanted to keep the front orange piece. It can be done, but I wasn't sure at the time.
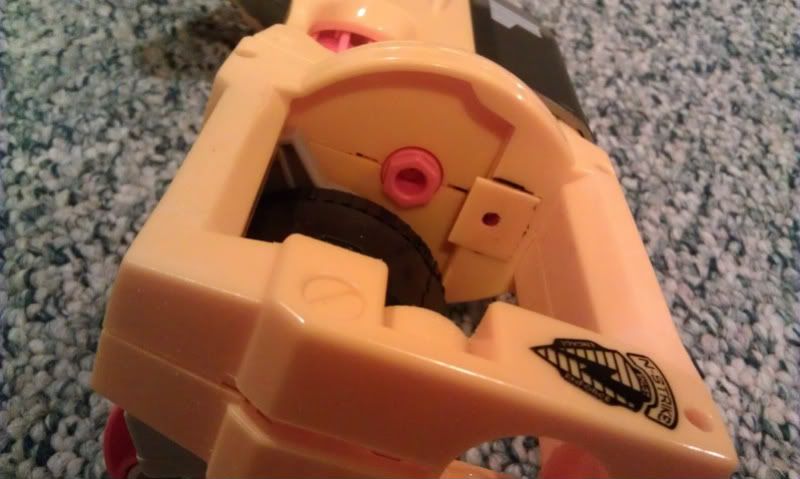
When you open the turret, the front is hollow until some guides in near the back.
Then cut the top of the main housing to cover the orange barrels.
In the picture below, the top ridge is resting on the guides from the back of the housing.
Test fit your barrels and get those to fit within the orange piece and the guides.
You will need need to open up the back piece to allow for rear-loading. And assemble everything together.
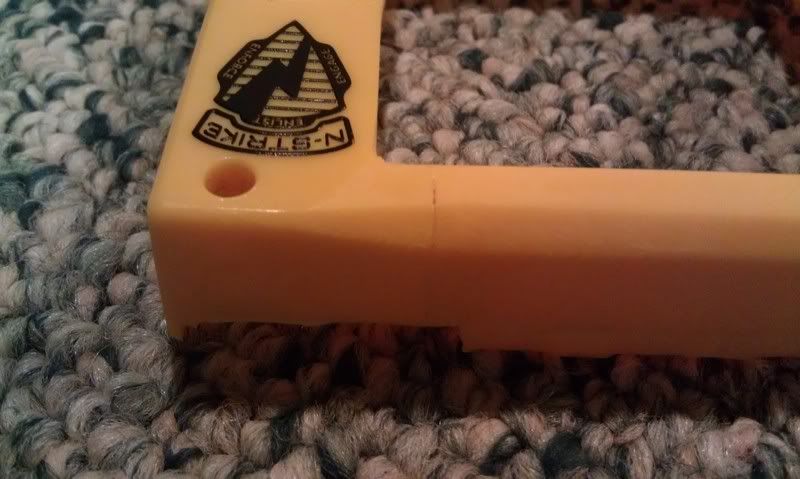
2. The Shell
I wanted to reduce as much space as I could so put the completed turret into the shell and marked where the front of the turret was on the frame and cut a little back from that mark. The front of the shell was then trimmed down to match the turret space.
I used hotglue to hold the two pieces together so that I could align the shell and glue it. When that was dry, I sanded and filed down the joining areas to make it smooth. There are still small gaps, but those can be filled pretty easily after I've done the final sanding.
The rest is just trimming off all the bits off the shell that you don't want. The styrene will help to support everything together.
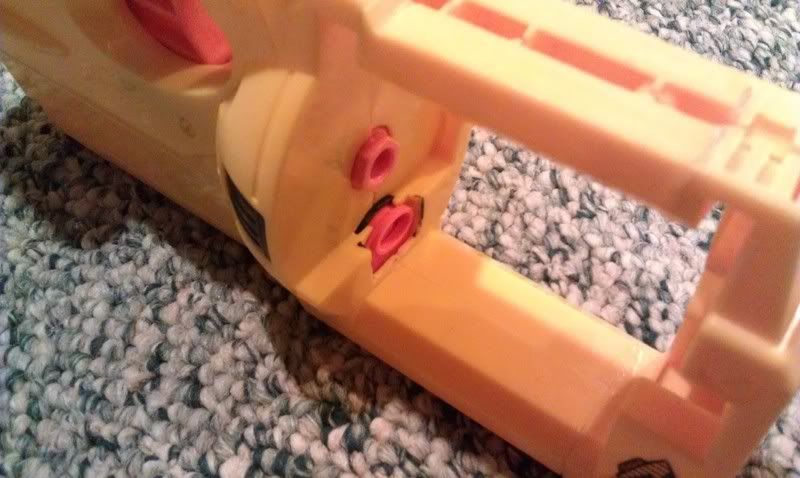
3. Plunger Tube
There are two parts to get the plunger tube to work with the turret.
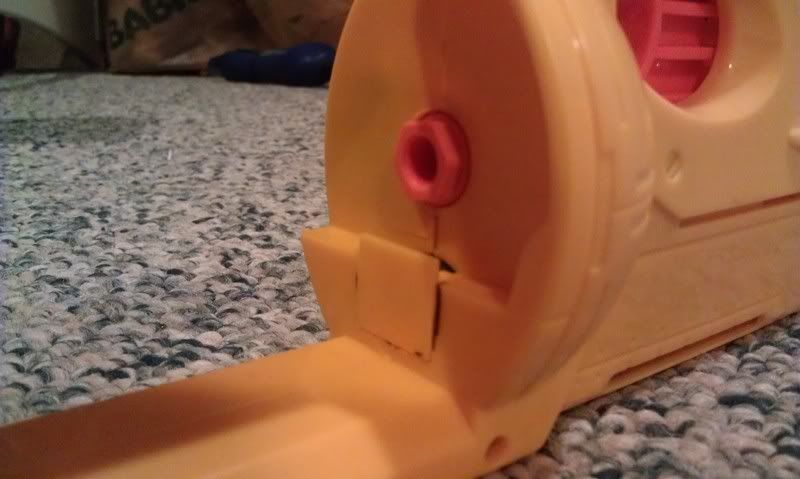
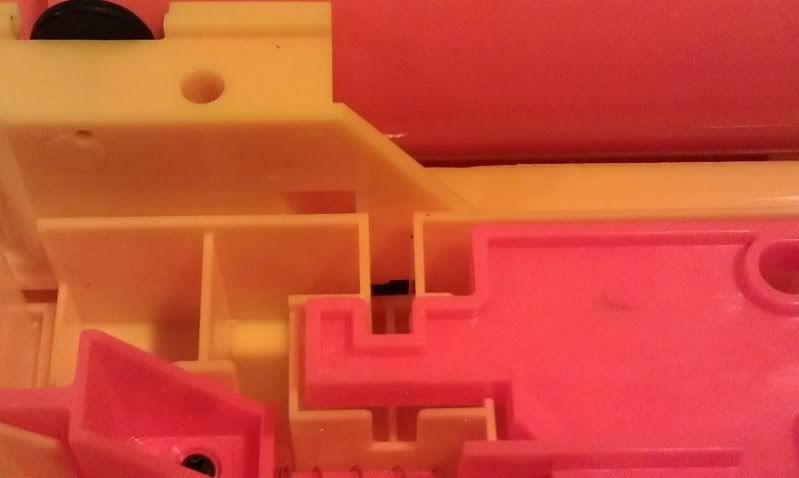
Trim down the back arm of the turret. There are two nubs that I needed to sand down so that the arm can pass under the new plunger tube piece and because these nubs were in the way of the new piece.
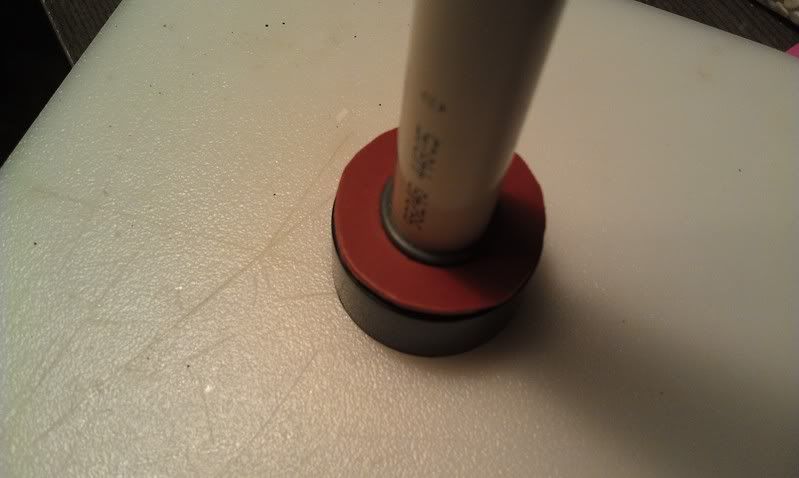
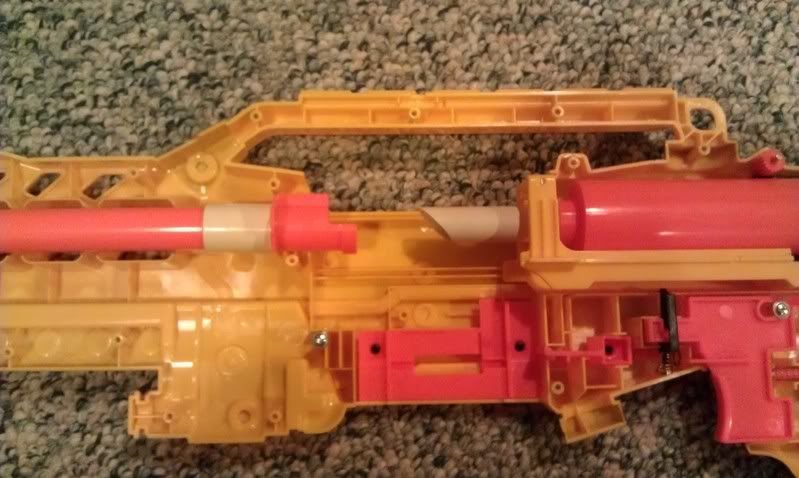
I cut a square out of a longshot jam door that was big enough to cover a barrel in the turret and cut out a matching hole in the shell. The lip of the plunger tube also needed to be trimmed down so that when pushed back, everything was flush. Make sure not to make this opening too large. The plunger tube uses that wall as a stop.
I glued the new piece in place and with everything together, I dropped a marker down the barrel to see where to drill a hole.
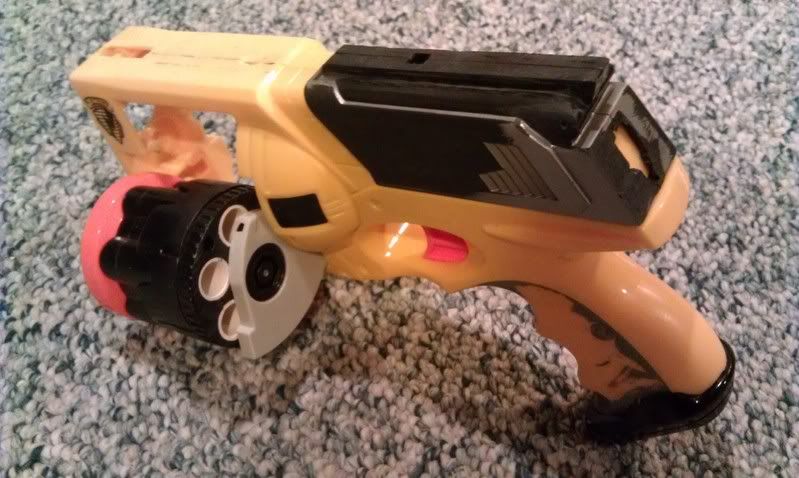
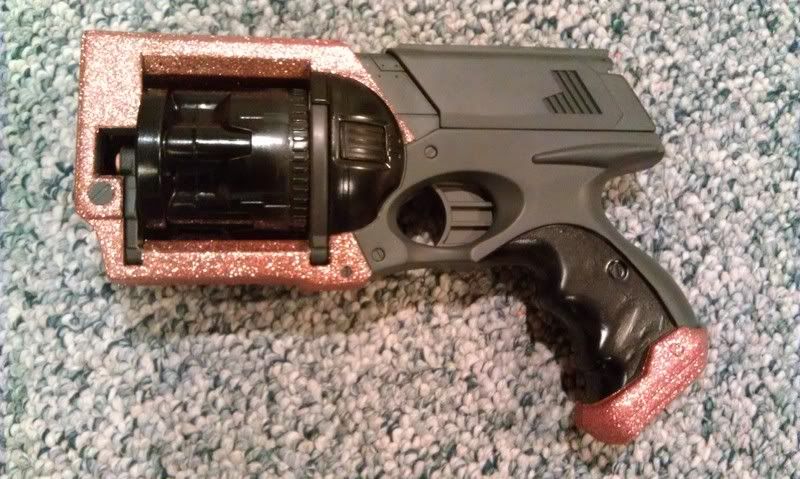
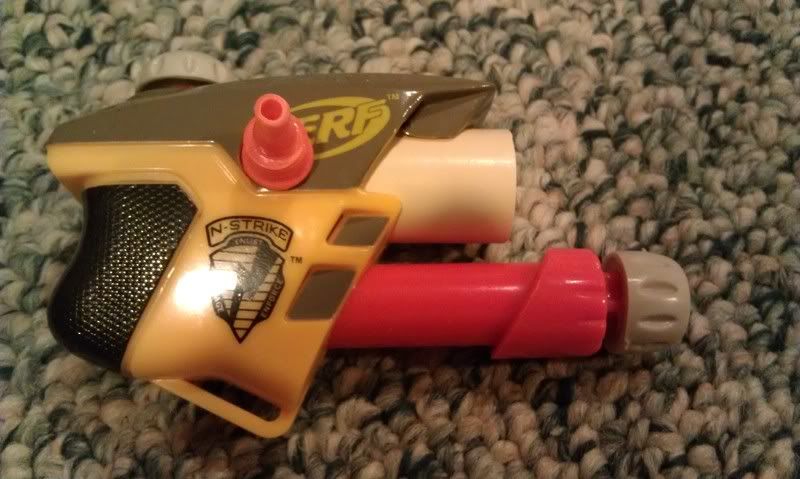
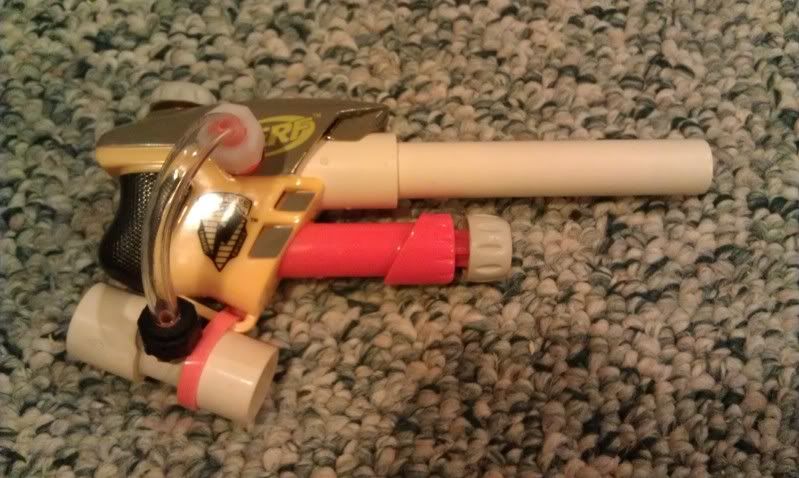
And all of that rambling will hopefully turn into this.
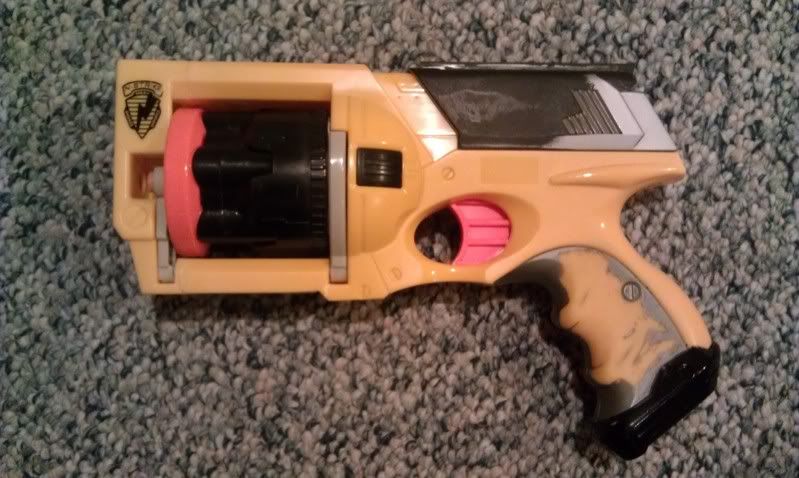
Questions? Comments?
And the youtube video
Shorty Maverick Youtube video
#306431 Modification and Paintjob Pictures
Posted by
on 24 October 2011 - 12:34 AM
in
Modifications
Youtube Link
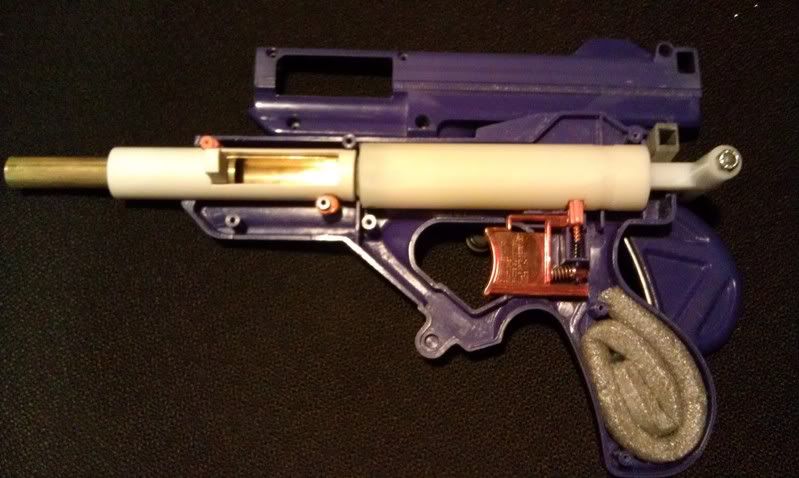
#305678 SSPB (Secret Strike Pocket Blaster) Expanded Tank
Posted by
on 10 October 2011 - 08:16 PM
in
Modifications
@KoRnEd: That would be difficult for me personally and I'm not sure about the water as it seemed the check valve was oiled and lubed but a little bit may not hurt. Good idea.
@Nate45: I can't honestly remember. I believe one was from an AT pump and possibly a hornet nozzle but it was in my parts bin for while.
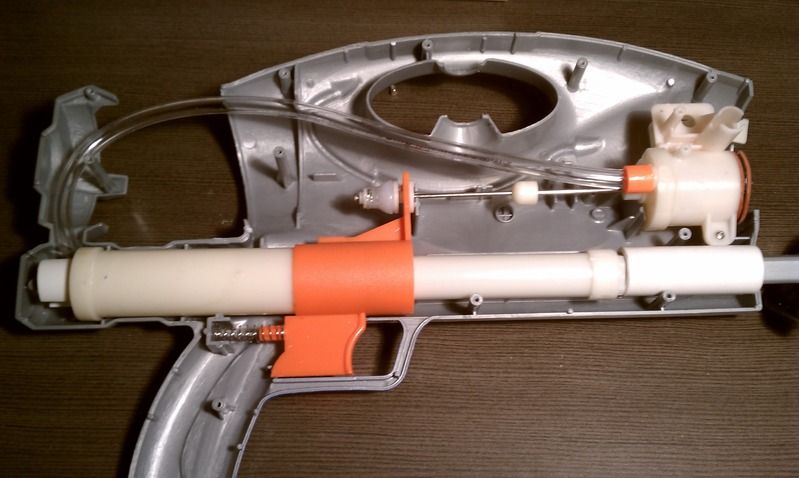
#305671 SSPB (Secret Strike Pocket Blaster) Expanded Tank
Posted by
on 10 October 2011 - 07:00 PM
in
Modifications
Thanks to BrokenSVT and TaerKitty for the pictures and original mod.
Youtube Video
Materials:
- SSPB
- Optional: CPVC Coupler / Barrel
- CPVC endcaps (2) / 1/2" CPVC - 1.5" length
- 1/4" OD hose
- Optional: 2 nozzles from Titan/Hornet/Air Tech blasters
- Optional: Zip tie
Tools:
- Dremel/Drill
- Files
- Glue (Zap-a-Gap/CPVC Cement)
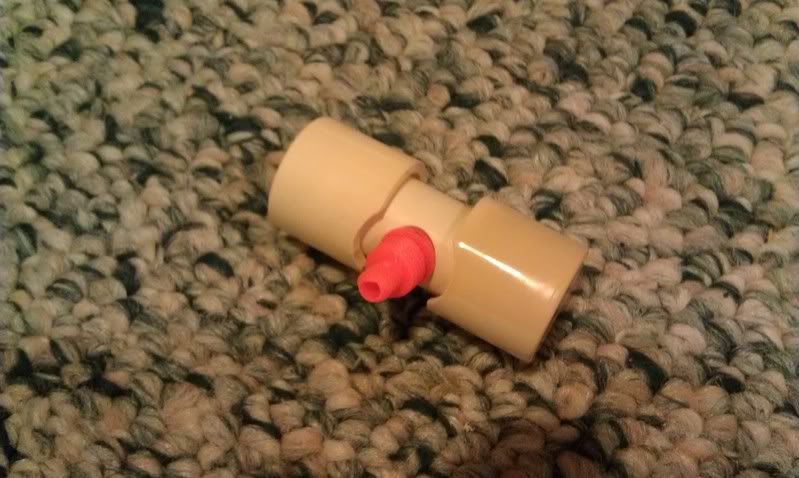
Step 1: External Tank
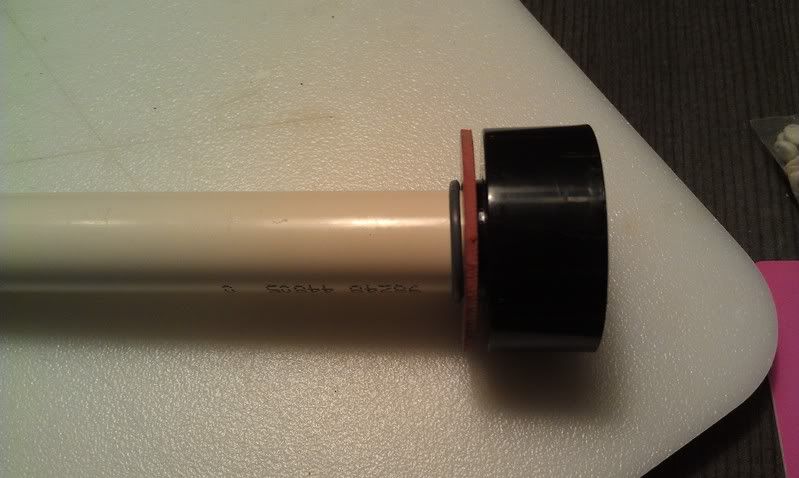
Take the 1.5" length of CPVC tube and create a hole using a dremel/drill for either your hose or nozzle in the center of the tube. If you are using a nozzle, make sure there is enough clearance for the nozzle cap when the CPVC end caps are attached. Glue the nozzle and CPVC end caps and check for any leaks.
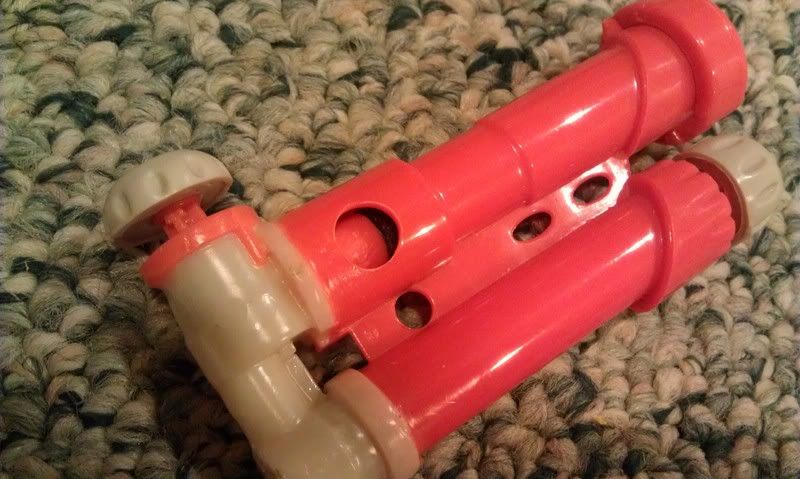
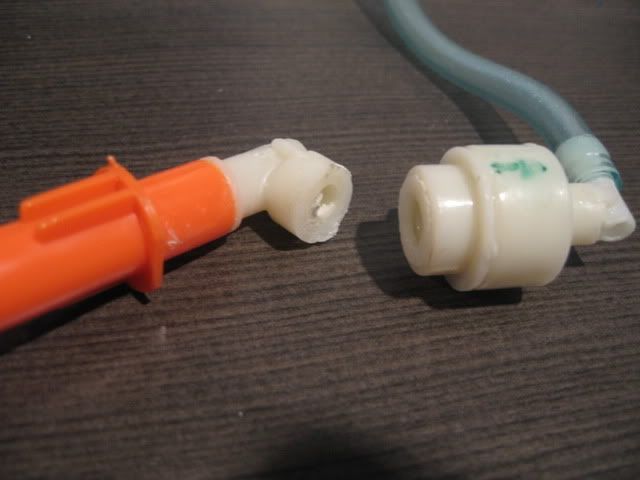
Step 2: SSPB Cutting
Using your dremel/drill, carefully create a hole in the SSPB tank. Do not drill very deep as the check valve is in the center of the tank. Once you have an opening widen the hole for either your tubing or nozzle. Make sure to clean the tank as possible from any filings and plastic bits.
Cut down the barrel according to the barrel you are going to use. I chose to keep some of the barrel intact to help support the CPVC coupler. Your setup may differ. Once that is cut, remove the support underneath the barrel and clean it up.
Step 3: ARR
Use your dremel or needle nose pliers to remove the AR and clean it up as best as possible. Try to not touch or get too close to the front of the check value and clean it up as much as possible.
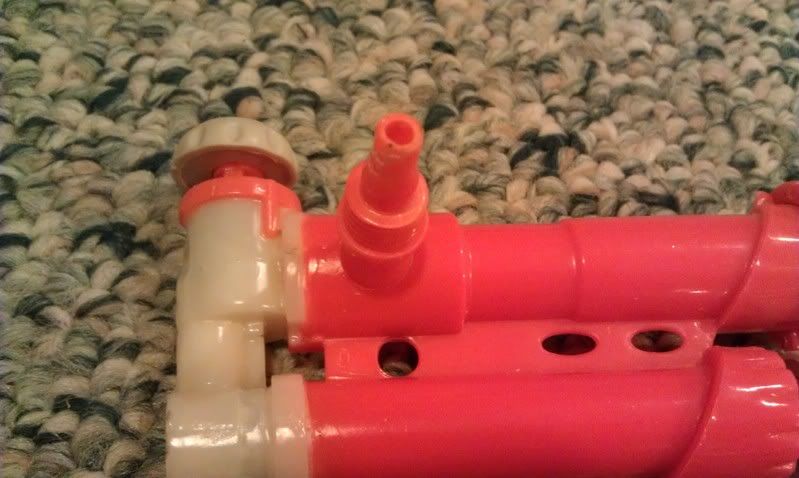
Step 4: Shell Work
Try to eyeball where the tank's opening is in the shell and create a hold that will align with the tank. If you are going to use a CPVC coupler, you will need to widen the original barrel opening. I had to cut open some of the side walls but I was able to not have to cut through the top screw port.
If you are using a nozzle, make sure that you can still remove the shell with the nozzle attached. The nozzle I used as a small ridge that I almost didn't catch.
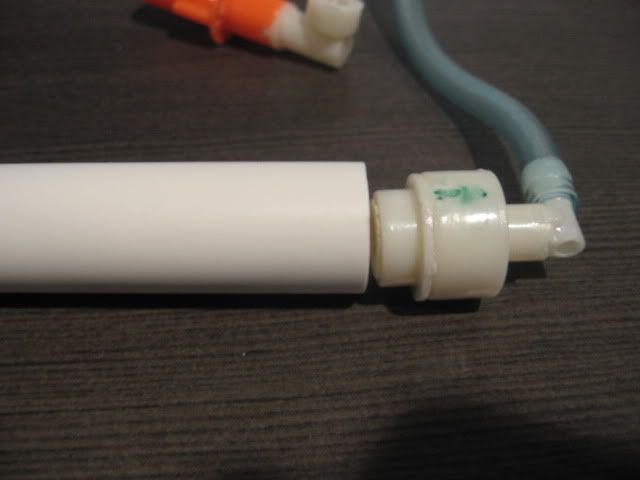
Step 5: Glue
Glue the nozzle/hose to the SSPB tank and the coupler/barrel to the SSPB barrel. And let that dry. Check for any leaks in the SSPB tank by plugging the barrel. Air may leak out a little as the check valve doesn't fully seal until there is a bit of pressure behind it.
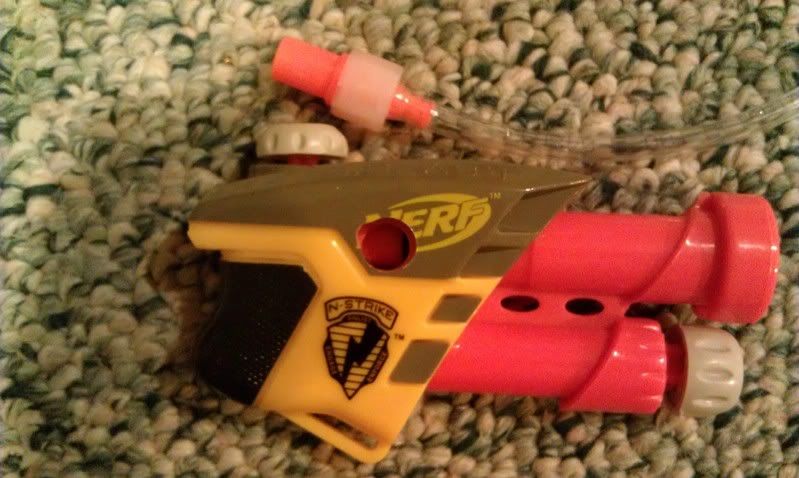
Step 6: All Done!
Assemble all the pieces together and zip tie the tank to the bottom of the SSPB and you're all done.
Youtube Video
Ranges: Average 85' flat.
Tank fills with about 20 - 25 pumps.
Overall, this mod is really easy and fun. Minus the drying time for glue and finding the right nozzle pieces, it was probably 4 - 5 hours to complete this mod.
If you have some time to kill or just want to have a secondary project going, I would recommend this one.
#305642 CPVC Breach (Sodizzle) Longshot
Posted by
on 09 October 2011 - 11:21 PM
in
Modifications
#305547 CPVC Breach (Sodizzle) Longshot
Posted by
on 08 October 2011 - 07:31 PM
in
Modifications
@windtex1: Good to know. Luckily I have couplers laying around and these are pretty cheap. I just used a sanding bit on my dremel.
Also I've updated the original post with an internal and firing video: Youtube Video
#305500 CPVC Breach (Sodizzle) Longshot
Posted by
on 07 October 2011 - 10:44 PM
in
Modifications
@Green Wing: Rarely jams. It feeds really well.
@chavez_guy: I can get you measurements that I used, but I wouldn't use those as the exact ones since on this one, I didn't get the connector in the correct spot. I knew that the barrel was going to be about 10" so I cut a length about 12" for the barrel and put that into the coupler and figured out where I wanted the coupler. Then I cut out a 7" length for the bolt and once that was glued into the bolt base, I marked where it would hit the edge of the coupler. Then I knew roughly where to do my cut to match the barrel. I hope that makes sense.
@spencerak: You should definitely use a coupler to get a good seal.
#305452 CPVC Breach (Sodizzle) Longshot
Posted by
on 06 October 2011 - 10:57 PM
in
Modifications
I have been wanting to try this out for some time and was finally able to get the project going. Overall, this is a fairly easy project where the most of the time spent is trying to find the correct measurements for the barrel and bolt based on where you want to put the coupler.
I also really like this setup as you only really need CPVC and a coupler as your only materials.
For tools, I used a dremel, files, scroll saw, hobby saw, and Zap-a-gap.
Youtube Mod Video
Youtube Firing Video
Either way here are some of the details that I changed in my tinkering.
Bolt assembly:
I added a circle of rubber gasket (or a suitable sized rubber washer) to the base of the bolt assembly. CPVC didn't fit as snug through the plunger tube and this is just to help give it an extra seal. I don't know if it really helps or not (I didn't try it with or without the gasket) but it can't hurt.
Dart Guide:
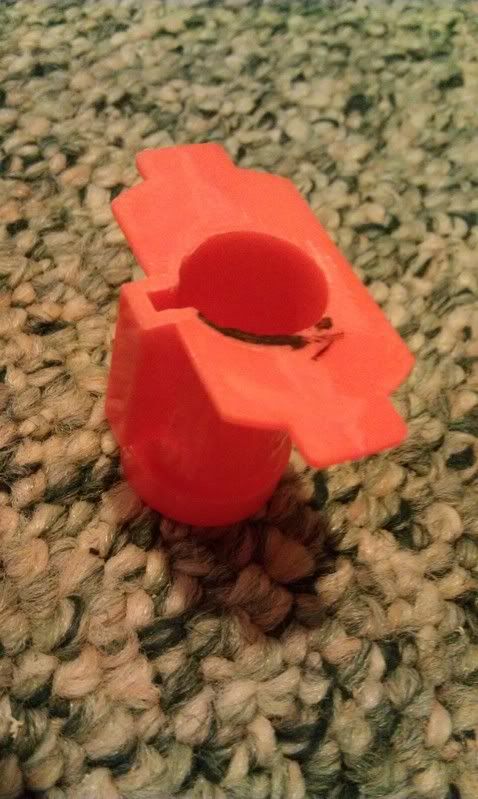
Sodizzle originally uses a piece of thin wall PVC to help guide darts into the barrel. I ended up using the dart chamber instead. This is the front of the chamber that connects to the barrel to the first wall that slots into the shell. Flip this around and cut it half and you have a guide for the bolt, the dart and have support for the clip as well.
Barrel:
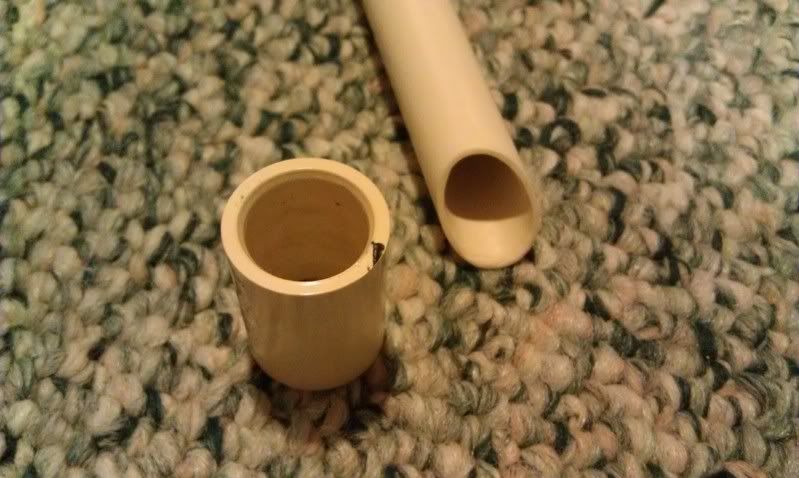
The barrel is glued to the coupler and uses the faux barrel as a spacer so there does not have to be any glue and everything can be shifted or replaced as necessary. Both the bolt and barrel were coned and smoothed so it is easier to feed and push darts.
OOPS:
When determining where to attach the bolt connector for the bolt sled I did not have the plunger rod attached which caused the alignment to be off due to the draw length being different. Here are some of the fixes to that mistake. (Rather than try to remove the connector and re-attach)
Basically the bolt was too far forward which meant everything needed to be shifted and so......
Plunger rod:
I originally thought that the priming draw of the bold sled went all the way to the plunger tube but that is incorrect. It stops before the plunger tube due to the priming indicator and the end of the plunger rod. Removing the priming indicator and some of the plunger rod allowed me to use the extra space to lengthen the draw enough for my setup. Make sure to bevel the end of the plunger rod to allow it to pass under the catch smoothly.
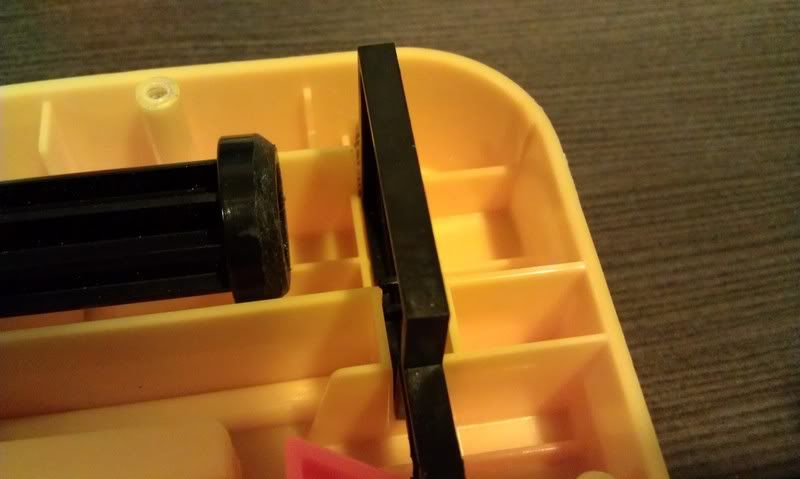
Bolt sled:
Remove the front nubs of the bolt sled to allow the sled to travel further forward.

Coupler:
The faux barrel was cut down to move the coupler forward and a spacer from another barrel was glued to the dart guide.
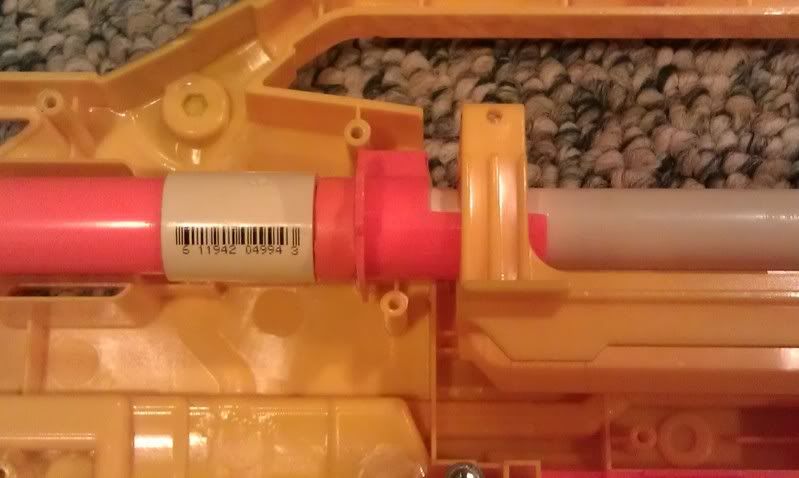
WAIT:
What I really should have done was just cut down the bolt. (DUH) I removed a small bit from the bolt and presto! I was able to move the barrel assembly back to the original position and loading darts worked great!
Youtube Mod Video
Youtube Firing Video
Range Tests:
LS + BBB Combo: Average 85'
K18 Single: Average 80'
K18 + BBB Combo: Average 115'
The K18 is slightly easier to prime than a [k26] and it doesn't feel like it will rip everything apart. This is a great spring for the LS.
Thanks to Sodizzle for the original build. This is a fun mod that I'll probably be doing to the rest of my Longshots.
#305425 Modification and Paintjob Pictures
Posted by
on 05 October 2011 - 10:55 PM
in
Modifications
#304843 Modification and Paintjob Pictures
Posted by
on 19 September 2011 - 11:18 PM
in
Modifications
#303059 Apocalypse 2011 recap thread
Posted by
on 08 August 2011 - 09:08 PM
in
Nerf Wars
Pros:
-------------------------------------
+ Meeting a lot of NIC members (new and familiar)
+ My blasters survived intact
+ Quick and easy drive down to NJ
+ Not a lot of downtime between rounds
+ Very organized with a lot of help
Cons:
--------------------------------------
- Too much wind!
- Driving back home in the rain
- Didn't get to hop into a gunslinger round!
#302252 Apoc Round Schedule and Sign Up
Posted by
on 25 July 2011 - 07:19 PM
in
Nerf Wars
U3 Objective
Full Roster Deathmatch
Pistols/GSH
U3 Objectives
Deathmatch
Deathmatch
Full Roster Deathmatch
Pistols/GSH
#301615 Near-Semi-Auto Rifle
Posted by
on 15 July 2011 - 06:35 PM
in
Modifications
#299147 Apocalypse 2011
Posted by
on 01 June 2011 - 06:56 PM
in
Nerf Wars
#296884 Modification and Paintjob Pictures
Posted by
on 30 March 2011 - 08:26 AM
in
Modifications
Edit: Still thinking of good ideas for the shell

Here's an overview video: youtube link
#296469 The Ohio Revolution
Posted by
on 22 March 2011 - 11:04 PM
in
Nerf Wars
It's not the best quality, but it is what it is.
#296327 The Ohio Revolution
Posted by
on 21 March 2011 - 08:27 AM
in
Nerf Wars
Pros:
- Meeting a lot of new people
- Nerfing with a lot of new people
- Not having chili after the war
- I now have red and pink foam (to go along with my white and grey)!
- Red Roof Inn giving me a free night when my booking got messed up
- Rest stop, triple strength, one dollar coffee!
- Fuel efficient car (400 miles per tank)
Cons:
- Brit needs to learn how to steer that tank on the right side of the road!
I've got some footage from the power ball round, though it's not very clear. I'll try to clean it up post later.
It was a great venue and people were all awesome! Thanks again!
#296218 The Ohio Revolution
Posted by
on 18 March 2011 - 10:21 AM
in
Nerf Wars
#296123 The Ohio Revolution
Posted by
on 16 March 2011 - 05:49 PM
in
Nerf Wars
I will not be able to make the war. Sorry guys.
#296103 The Ohio Revolution
Posted by
on 16 March 2011 - 12:55 PM
in
Nerf Wars
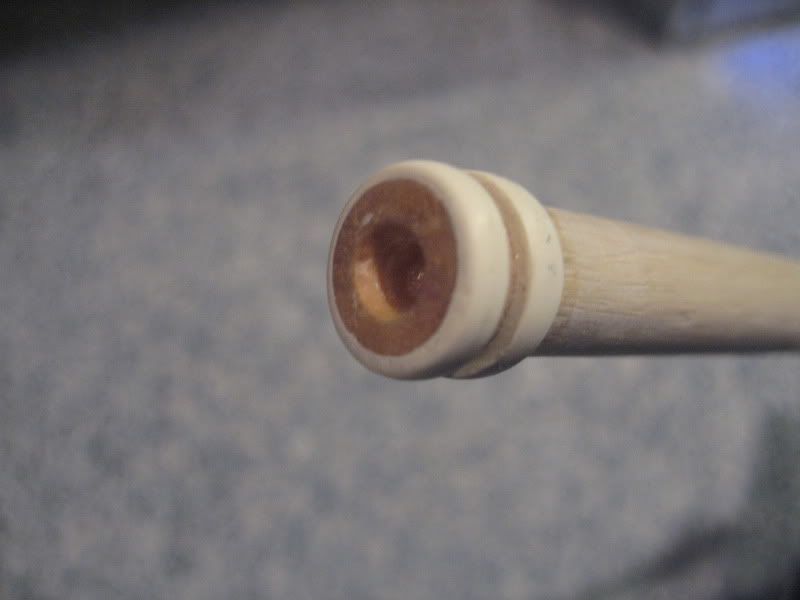
#294524 Homemade Pump
Posted by
on 15 February 2011 - 04:59 PM
in
Homemades
This works well for me.
hornet check valve
version 1 of pump handle

version 2 of pump handle
#294120 Big Bad Everbilt Bow
Posted by
on 07 February 2011 - 09:43 PM
in
Modifications
In the couple that I've had with [k26]'s, the catch sometimes slips... I've had to put in a better catch spring and tried to file down the rounded edges of the plunger rod to help it along.
#294057 The Ohio Revolution
Posted by
on 07 February 2011 - 10:42 AM
in
Nerf Wars
Heading down to Virgina is a bit too far out of the way.
And Brit,
I would recommend not going with the white felt pads, they unravel a bit too fast. I've heard the green and blacks ones are better.
#293978 The Ohio Revolution
Posted by
on 06 February 2011 - 07:40 AM
in
Nerf Wars
Slug darts... darn. I only have single BB darts at the moment... any chance I can use those or buy some darts at the war?
#293951 The Ohio Revolution
Posted by
on 05 February 2011 - 08:45 PM
in
Nerf Wars
#288637 Rear-loading At2k
Posted by
on 20 November 2010 - 12:02 AM
in
Modifications

#288633 Rear-loading At2k
Posted by
on 19 November 2010 - 10:15 PM
in
Modifications
#288591 Rear-loading At2k
Posted by
on 19 November 2010 - 12:14 AM
in
Modifications
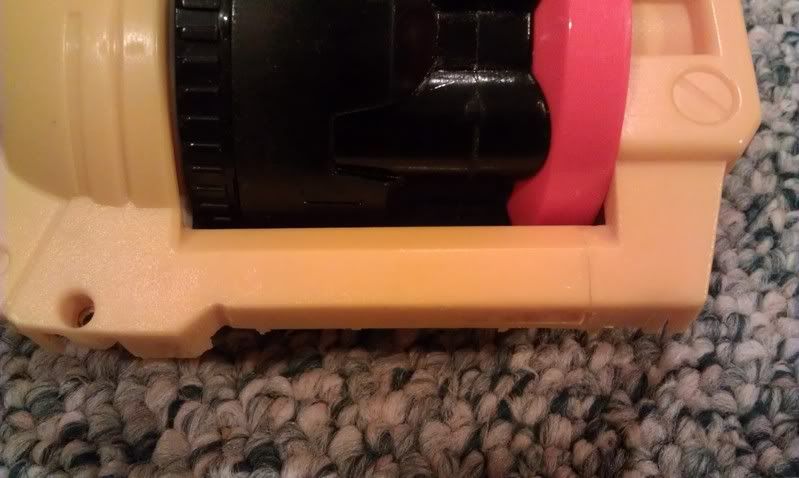
On both sides of the shell, there is a rest for the tank's valve. Use your dremel to widen this rest due to the PETG. Test fit this by closing the blaster shell around the assembly to make sure it closes properly.
Also, the rear-loading slot is partially obscured by the shell, trim that away as well.

Once the shell is able to be closed, cut a hole into the shell so you can access the turret.
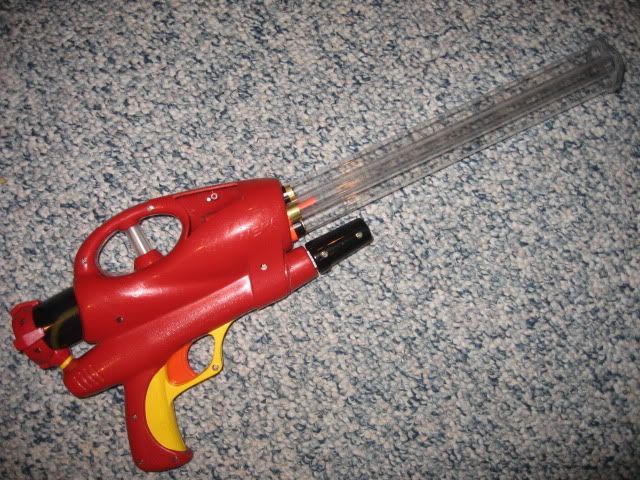
Step 8 - All Done
All that is left is to decide to plug the pump or not and add on a barrel spacer.
On my pump, I added hot glue to the top of the pump and once dry, pushed that down into the pump so there is a dimple in the pump. This will help to avoid popping off the check valve at the end of the pump.
Whew! A lot of work for a little blaster.
#288590 Rear-loading At2k
Posted by
on 19 November 2010 - 12:13 AM
in
Modifications
Props to TantumBull who made a write up for the basics of overhauling an AT2K.
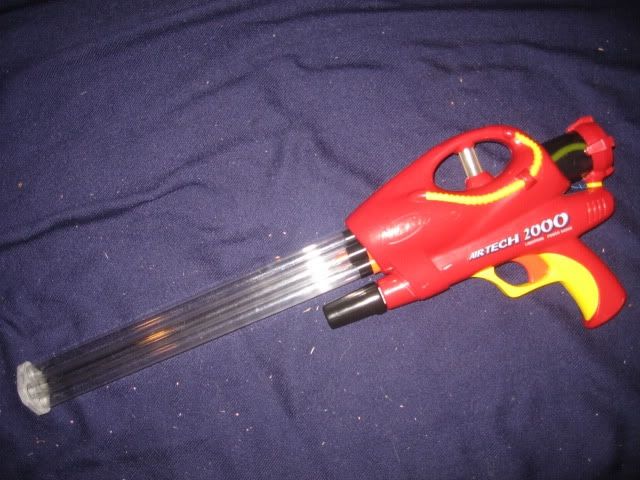
MaterialsAT2K
12" PETG (plus a shorter segment to connect the tank to the turret)
Craft Foam
17/32" Brass 4 1/2" segments (plus a small segment to help connect PETG to the turret)
Barrel spacer
ToolsDrill
3/8 Drill bit
1/2 Drill bit
Dremel
Screwdrivers
Plumber's Goop
Zap-a-Gap
Electrical Tape
Pliers
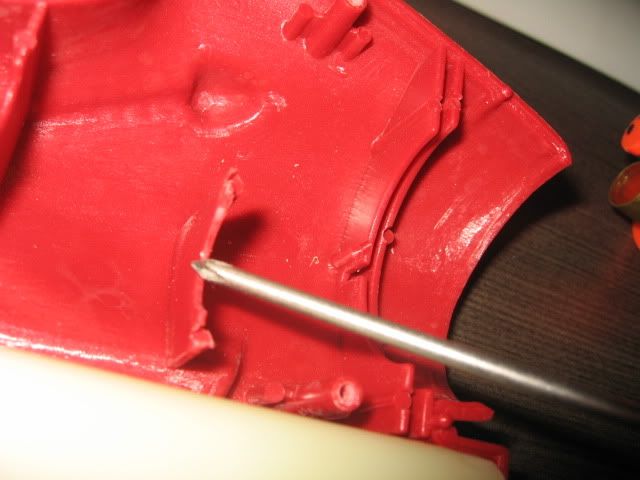
Step 1 - Open up the blaster
Remove the screws of the blaster and the cap for the pump. You can permanently remove this with a knife, dremel, or other tool, or using a knife, score around the gap slowly and carefully pry up until it pops off.
Once the cap is removed, the blaster can be easily opened.
Step 2 - Goo Gauge
Remove the tank from the blaster shell and carefully take out the pump rod, trigger, and clear cover from the assembly.
NOTE: At this point, you can replace the tubing between the tank and pump if you want to.
Now let's empty the goo gauge. First get to a sink and carefully remove the screws from the gauge. Separate the two sides and remove the small rubber membrane. Empty out the goo with water and gravity and wipe everything down. Back at your work station, fill the opening to the goo gauge with hot glue to seal it off. In the bottom chamber, I usually fill in the sides with hot glue being careful to leave an open path for the air to travel.
before you close this up, add goop all around the rim, close and tighten in the screws. Test to make sure there are no leaks!
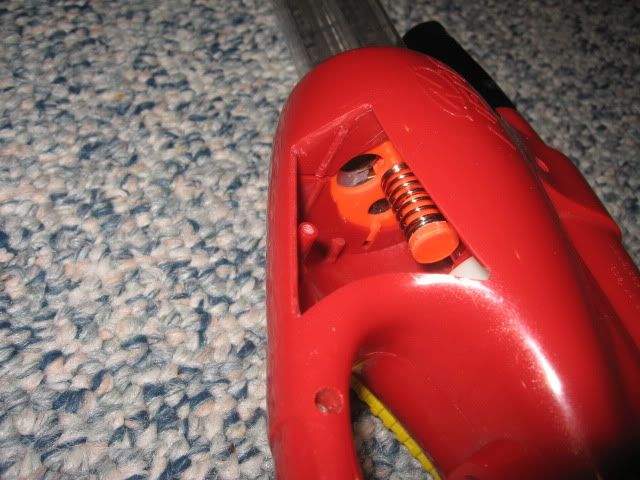
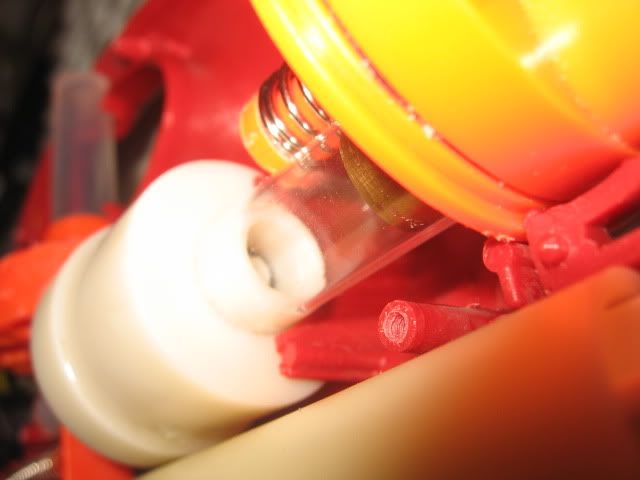
Step 3 - Tank Trigger Spring
The tank's pin as a spring that really should be a spacer. Get your hot glue and fill the area in the spring with hot glue.
On the trigger itself, part of the trigger nests inside the spring, so you will need to cut that off the trigger so it will sit correctly.
Step 4 - Tank Flow (Props to LouieC3)
AT2K Tank modification write up
NOTE: Just Some Bob noted that the pipe that connects the tank to the turret is one solid piece that goes into the tank valve. First try to twist and pop this out to save yourself the trouble of sawing and drilling in one neat step. If you are not able to, proceed with the rest of this step.
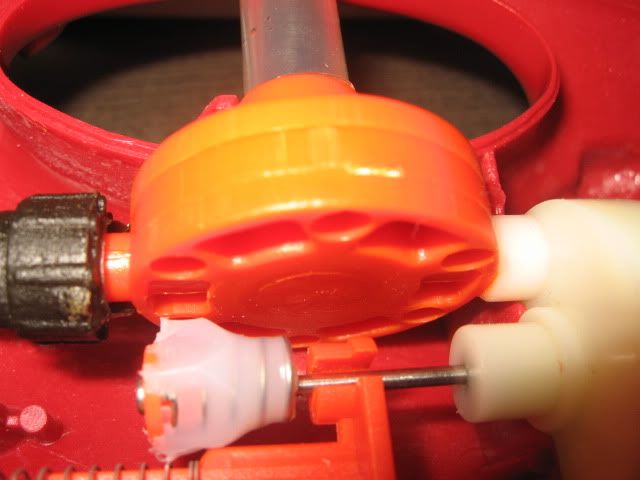
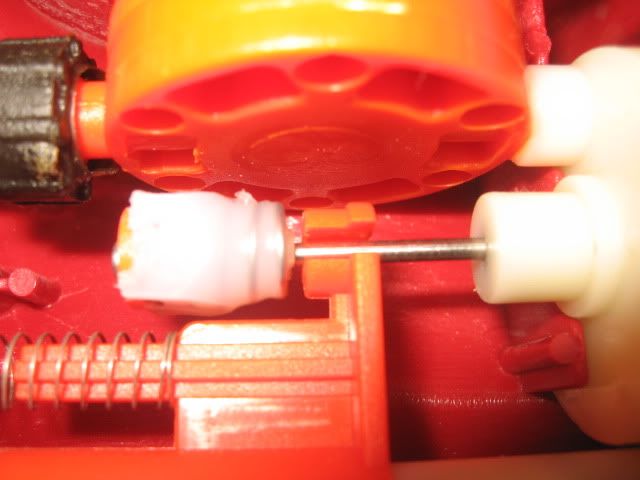
This can be tricky so you will need to be careful. But the point of this is to open the dump valve of the tank by making it larger.
First, cut the pipe that connects the tank to the turret. There's a natural division between the tank and connecting pipe where you should cut.
Once that is gone, get your drill with a 3/8" bit, holding the pin back, carefully drill into dump value to widen it. When this is complete, be sure to remove any debris that may have fallen into the tank and wipe away any dust.
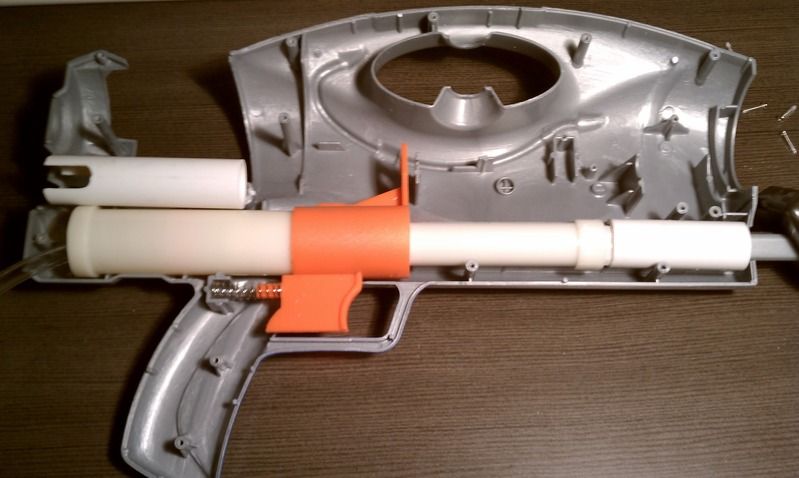
Step 5 - The turret (Props to RyanMc#'s)
Rear-loading 2k Turrets write up
The turret is definitely tricky so be sure that you work slowly through this.
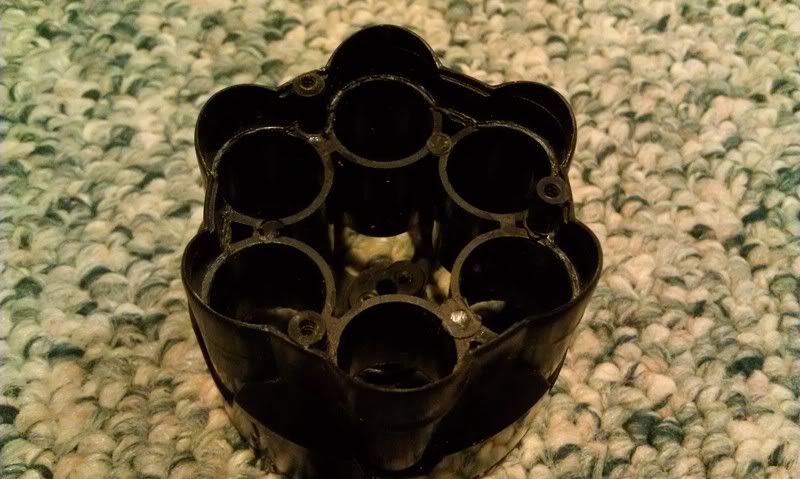
First, remove the stock barrels from the base of the turret. Dipping the turret into hot water will help to weaken the glue but you still might need to use a knife to help finish removing it.
Once that is done, remove the two halves of the turret by using pliers to grab onto the plastic stop and twisting it off. Make sure to keep the spring and put these pieces off to the side.
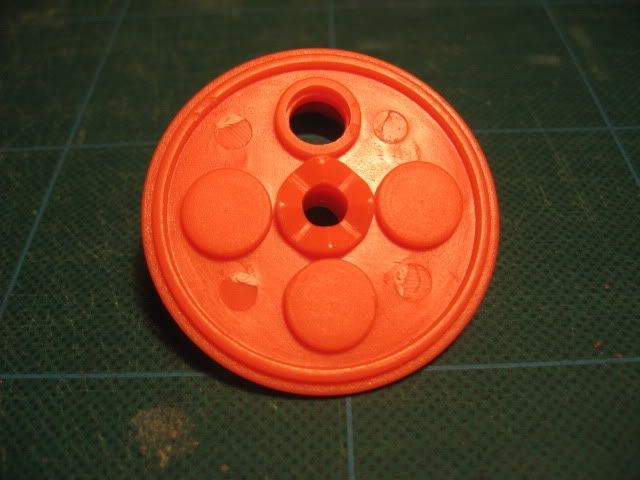
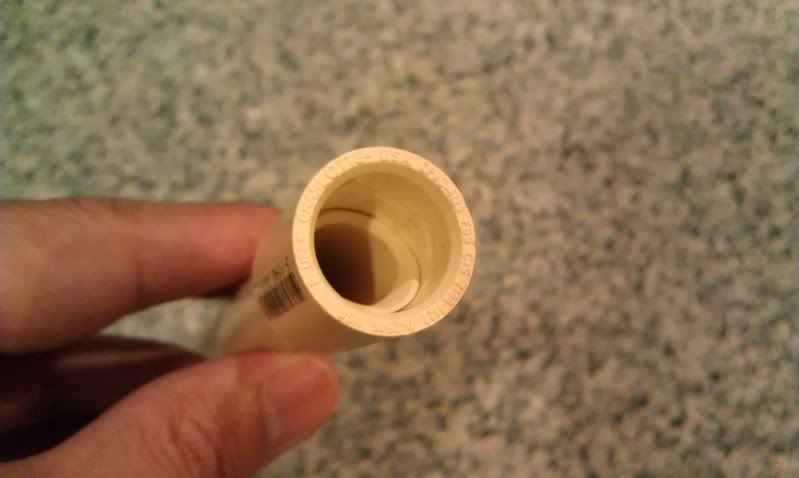
Take the bottom half of the turret and widen the inlet valve using your 3/8" drill bit. Be careful to keep the wall on the back intact. In the picture above the inlet valve is on the top.
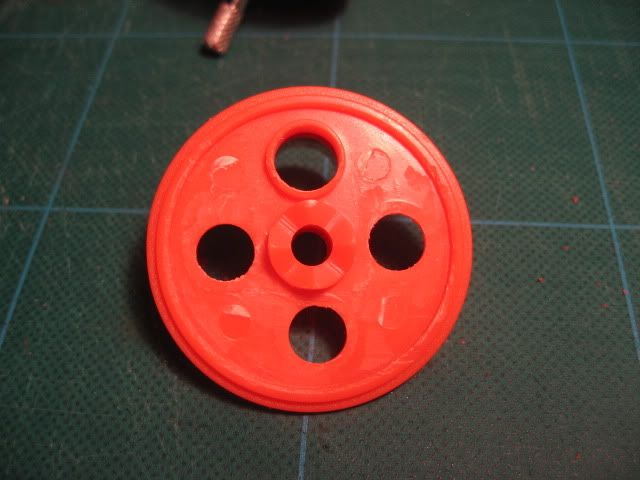
The two small nubs adjacent to this inlet must be removed to make it easier for the seal. Grind them down with your dremel.
The nub directly across from the inlet valve will be the rear-loading slot. This is different from Ryan's original write up and I found that it was easier for me to do.
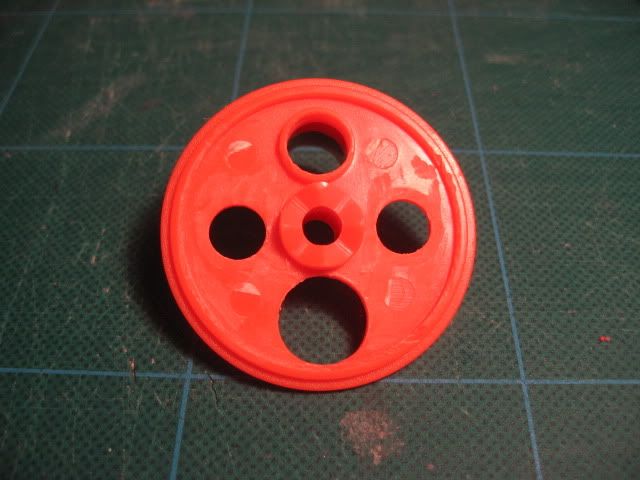
You want to drill a 1/2" hole in this area. If you don't have a drill press, drill a pilot hole and carefully widen it with your dremel trying to keep the shape as close to a circle as possible. Make sure the hole is wide enough for your darts to fit through.
Now take out your craft foam and press the bottom inner half of the turret into the craft foam. This will give you an impression and show you where to cut. Cut out the circle a little wider than the impression. Cut out the center (I used a bit of brass to cut the circle by pressing and twisting into the foam) and fit the circle into turret. Trim as necessary.
I opted to use craft foam instead of rubber sheets because the cuts on my PETG were not straight and I wasn't able to get a good seal on all the barrels. Craft foam helped to seal against barrels that's weren't cut straight.
Once you have a good and snug fit all around, make a second circle from the foam.
Once you have the two, apply goop and sandwich the two sides together. Be sure to cover the entire area with goop. Let this dry for a while.
Once dry, fit this into the turret again and cut the foam away from the rear-loading slot, but keep the cuts close. You'll want as much foam there to keep the two halves aligned correctly.
For the inlet value, carefully cut/drill a 3/8" hole into the foam. I used a drill to make the opening and used a sanding bit on my dremel to clean/melt the sides to make it smooth.
Once that is done, apply goop to the inside of the turret and secure the foam.

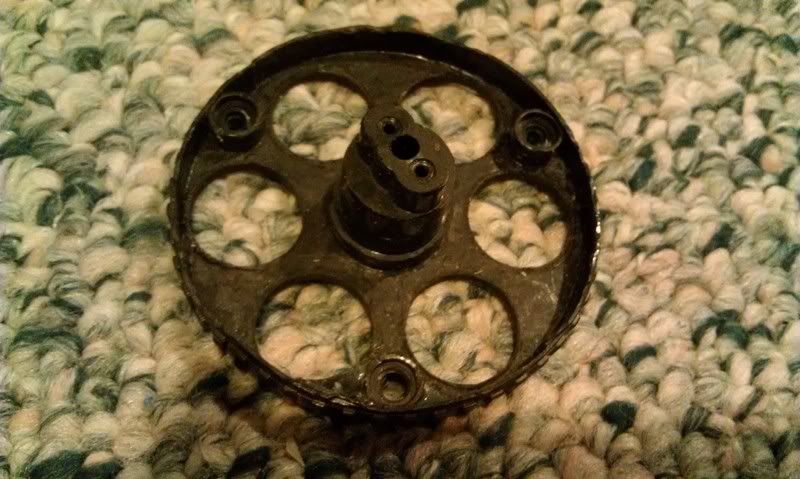
Top Half
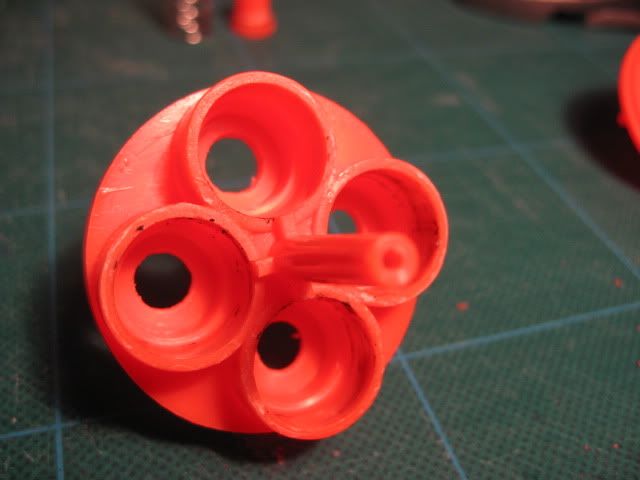
Set the bottom half of the turret to the side and pick up the top half. The holes in the turret will need to widened to be able to get PETG all the way through. So using your 1/2" drill or a dremel open them up.
You should wrap a couple layers of electrical tape around the PETG to help secure them to the turret, but don't wrap all the way to the tip! You don't want the tape to be seen inside the turret. The reason is because the PETG will rest almost directly on the teeth of the rotation mech, having extra layers will deform and/or push the PETG which you do not want.
You will also want to line up the PETG with the lowest point on the teeth of the rotation mech. Make sure the PETG is secure so that you can test the alignment of the barrels.
Close the two halves of the turret and add the spring and twist on the cap. Test the rotation of the turret and see how the seal works by plugging the inlet valve and blowing down the firing barrel. Adjust barrels as needed.
Once you are happy with the turret, separate the two halves again.
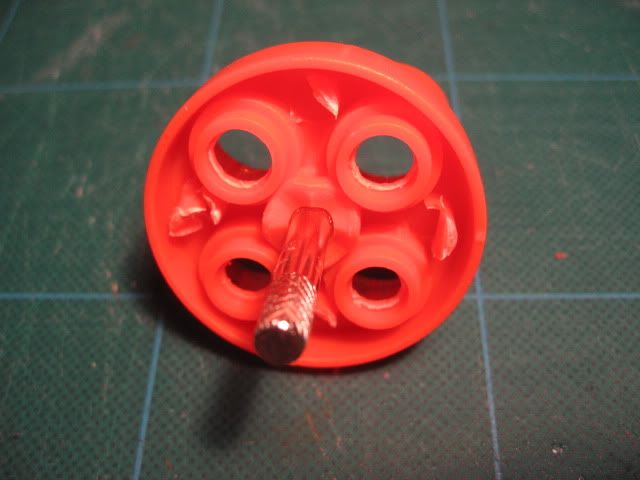
Now all hot glue into the space between the barrels of the top half of the turret to secure them. Be sure to not have glue go above the barrel's height or have glue in the teeth of the rotation mech.
You can optionally insert a segment of 17/32" brass into the back of each PETG barrel to help hold darts. Secure with a little zap-a-gap.
Close the two halves and take a break.
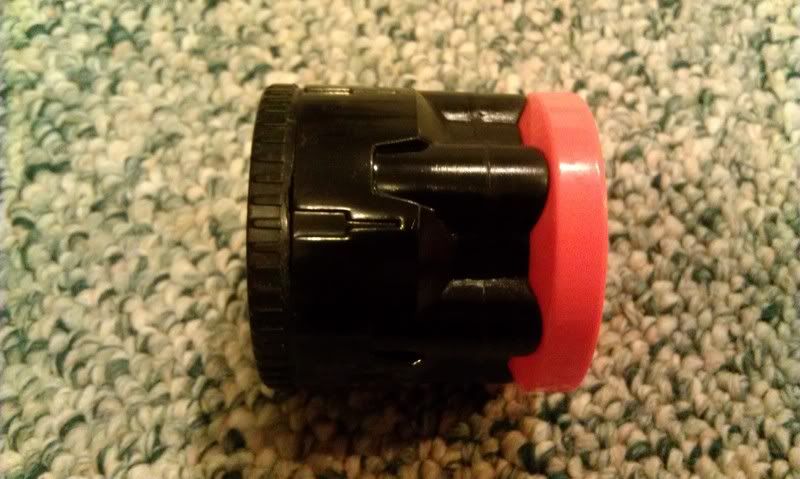
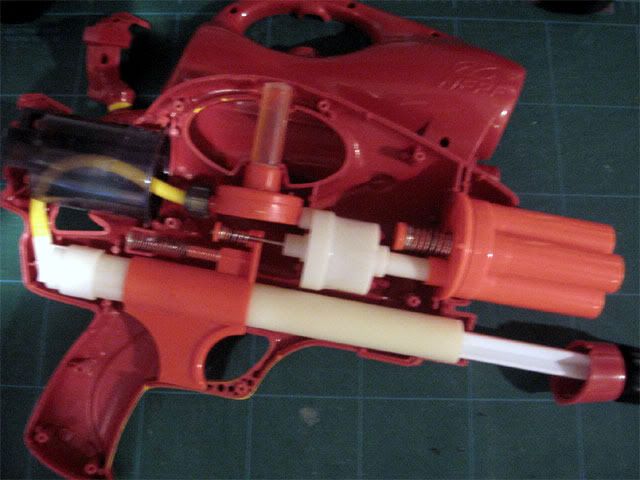
Step 6 - Tank to Turret
The difficult parts are over. Place the tank and turret back into the shell and measure the length between them. Make sure you are measuring from the actual tank (not the small wall) to the turret (not the inlet valve). Cut a length of PETG a little longer than that length and carefully twist it onto the tank's dump valve.
This should be a pretty tight fit already. Secure it by gooping around the base of PETG.
Slip a small piece of brass over the inlet value of the turret and secure that with zap-a-gap and goop. Then slip the PETG over that and test fit the assembly in the blaster as you may need to trim the PETG.
When that is good, goop the base of the PETG on the turret.
#288322 Modification and Paintjob Pictures
Posted by
on 12 November 2010 - 11:53 PM
in
Modifications
And successfully made a rearloading AT2K turret. Still needs a bit of brass in each barrel to secure the dart and then time to cut open the shell!! This turret loads from the top position rather than the side as done originally.
#288066 Modification and Paintjob Pictures
Posted by
on 06 November 2010 - 11:13 PM
in
Modifications
PAS is now sporting a LS/stock/BBB spring combo and a hopper clip.
#284543 Modification and Paintjob Pictures
Posted by
on 01 September 2010 - 10:58 PM
in
Modifications
12" PETG barrels/turret flow mod/valve flow mod/plugged pump (with dimple to account for the check valve)/plugged goo gauge
#282914 War Of The River 2
Posted by
on 12 August 2010 - 10:34 AM
in
Nerf Wars
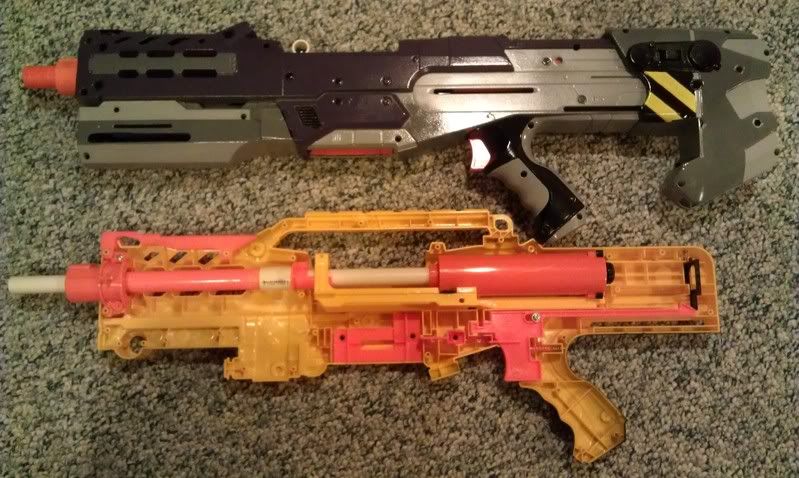
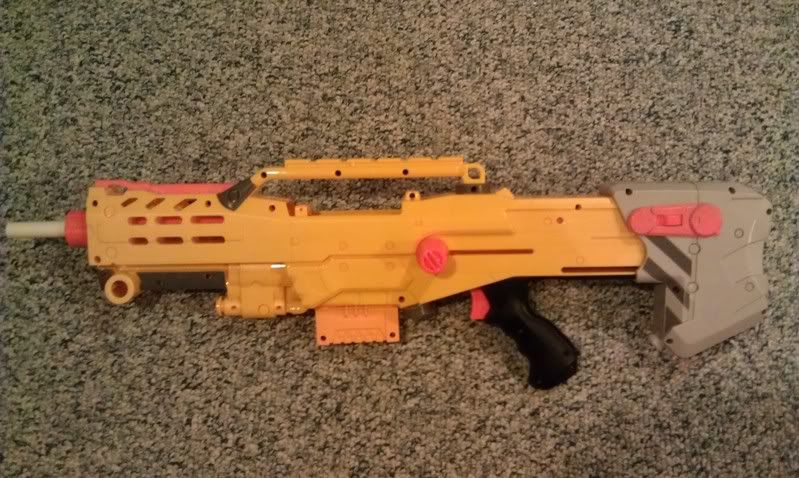
#281493 Raider - Replaced Internals (mega Missile) - The Mega Raider
Posted by
on 28 July 2010 - 12:33 PM
in
Modifications
#280042 War Of The River
Posted by
on 12 July 2010 - 01:06 PM
in
Nerf Wars
#279016 Tape Masking
Posted by
on 30 June 2010 - 06:50 AM
in
Modifications
On one of my earlier tests I tried this method, but didn't like the results as in places the cut went too deep and near the end of the design it had ripped just enough for the paint to leak through.
#278809 Tape Masking
Posted by
on 28 June 2010 - 06:49 AM
in
Modifications
#278749 Tape Masking
Posted by
on 27 June 2010 - 07:31 PM
in
Modifications
Materials and ToolsPainters Tape
Wax Paper (From Zorn: subway wrappers, cookie tin liners, etc will also work, just make sure to gently wipe off any grease or oil)
X-acto Knife
Printed design
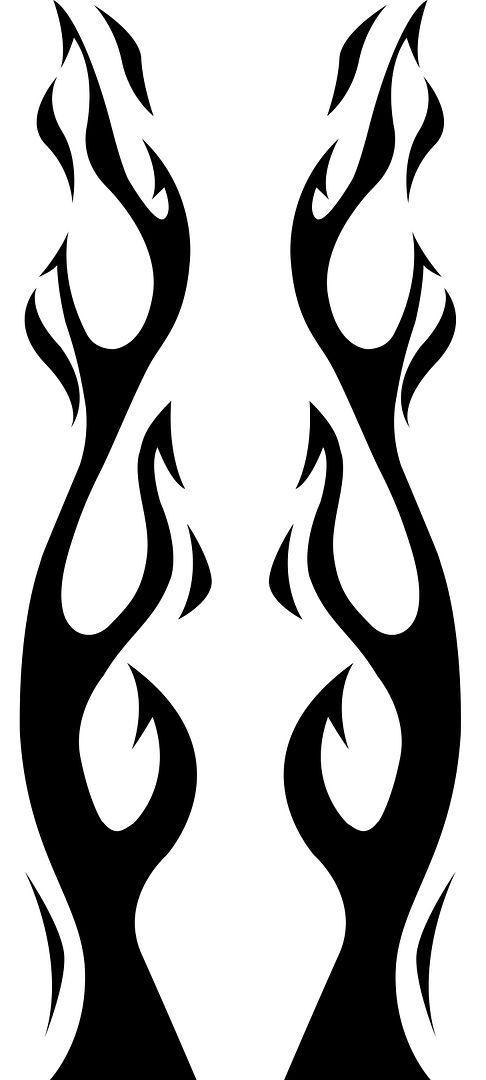
Step 1: Design Creation
Create or "borrow" the design that you want and using Photoshop or another program, get the design to the correct scale to fit your blaster. You may have to print it out a couple times to get the correct size and position if you want to duplicate it to be the same on both sides of the blaster. Once you have the design printed out put that aside.
You can download this specific design by right-clicking the link below and selecting the "Save link As..." option.
PAS Flames
Step 2: Create the mask
Take your wax paper and layout it down on a flat, smooth surface. Take a strip of painters take and put it across the wax paper. Then apply the painters tape lengthwise down the wax paper overlapping the previous strip. Take the time to flatten out each strip of tape to ensure there are no air bubbles or bumps. Use your design to make sure that you have the correct amount of space needed.
When you have enough space for the design, tape it down around the edges to the top of the mask.
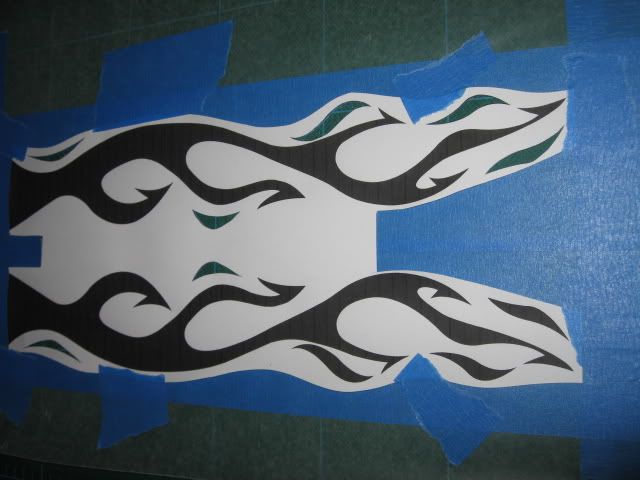
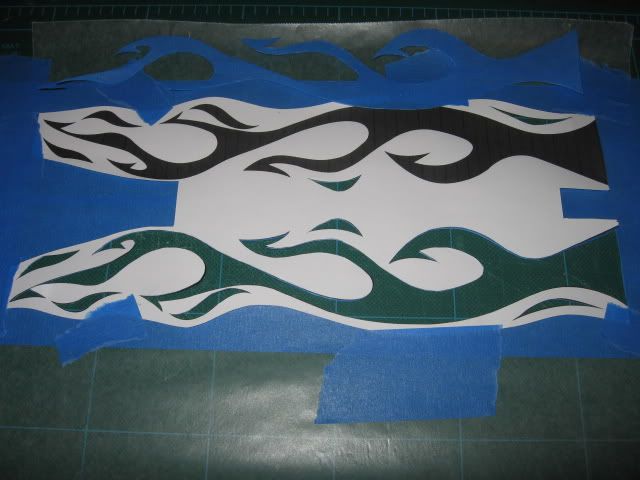
Step 3: Cut it out
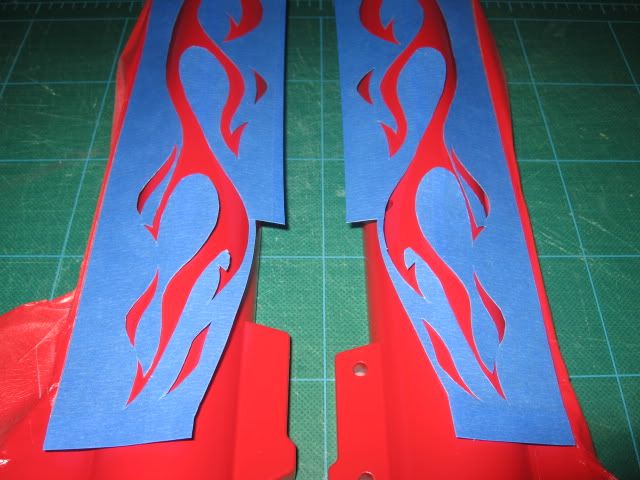
Using a very sharp blade, begin to cut the design out from the mask. Take your time when cutting to make sure that you get a clean cut and aren't ripping the wax paper or tape. When you are done, you should have a positive and negative cut of your design. You can use these as two masks or in conjunction if you want.
When the design is cut, trim the outer edges so that it will fit onto your blaster.
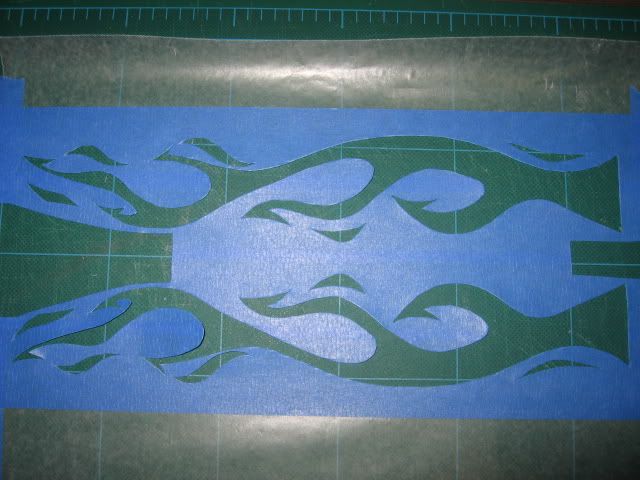
The finished negative cut
Step 4: Apply the mask
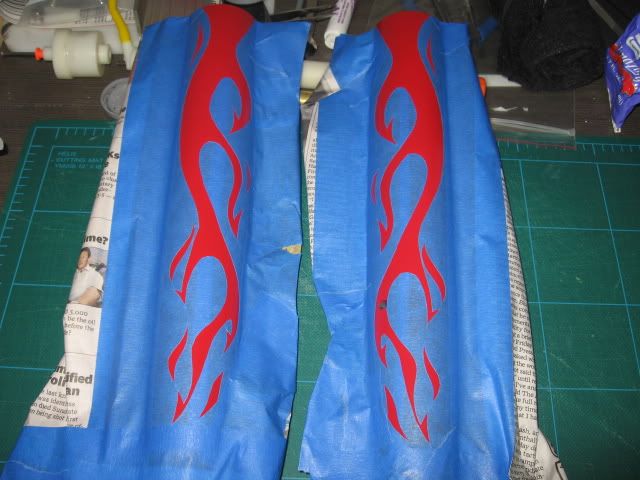
Using the positive cut: The positive cut is the actual design that you cut out. You will want to first paint the color of the design on the blaster, apply the mask, then apply the color of the blaster. You would want to use this if the design is a single color and you want the blaster to be multiple colors and shades.
Using the negative cut: The negative cut is the outer portion of the design that is left from the cut. You will want to first paint the color of the blaster, apply the mask, then apply the color of the design. You would want to use this if the design is multiple colors or shades and want the blaster to be a single color.
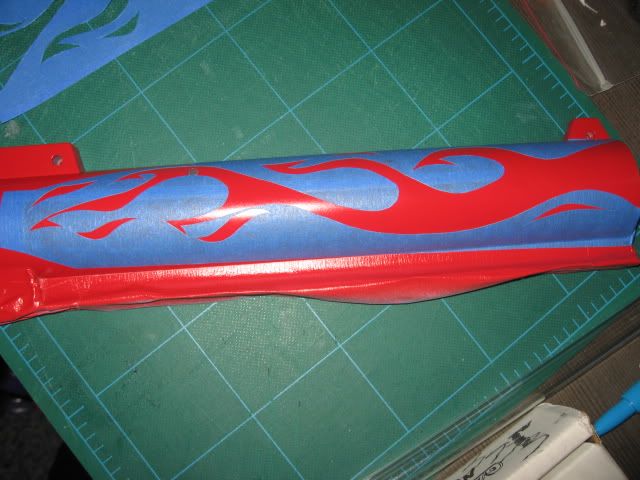
To apply the mask, carefully peel the wax paper away from the tape using your knife. Apply the tape of the blaster and slowly peel the wax paper away with one hand while carefully applying pressure with the other hand to ensure that the design is probably placed. Work in small areas and make sure to put pressure on the edges of the tape.
Once the entire design has been applied, use a roller to go over the tape again to flatten it to the blaster.
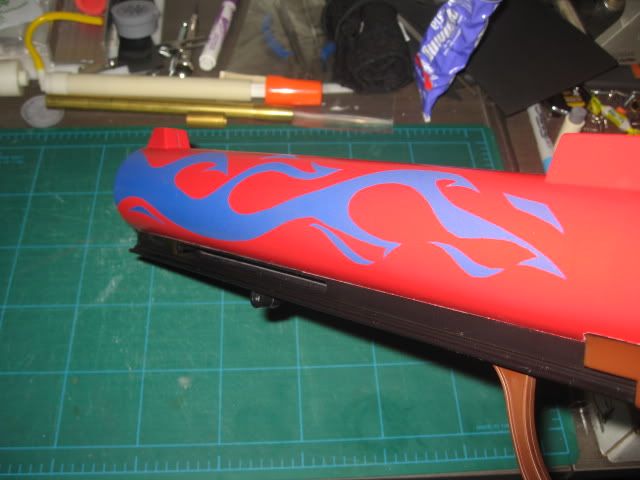
Test fit
Step 5: Paint and peel
Great tip from hoshiadam (paraphrased): Before applying the color of the design, if you're able to apply the base coat color first. This should help to seal any missed leaks and keep the edges sharp.
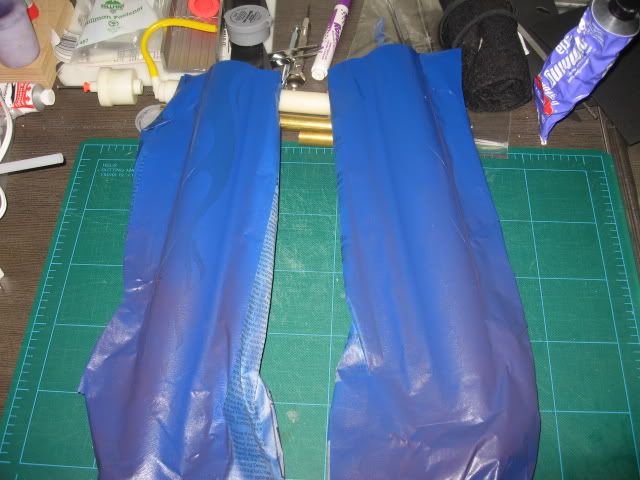
Paint the blaster as normal with as many colors and coats as needed.
When the paint as dried, slowly peel the tape off the blaster. I suggest peeling the tape back and parallel to the blaster rather than up and away from the blaster. Go very, very slowly. If you find that some paint is lifting, flatten it down and take your knife to carefully cut the edge back down and keep going.
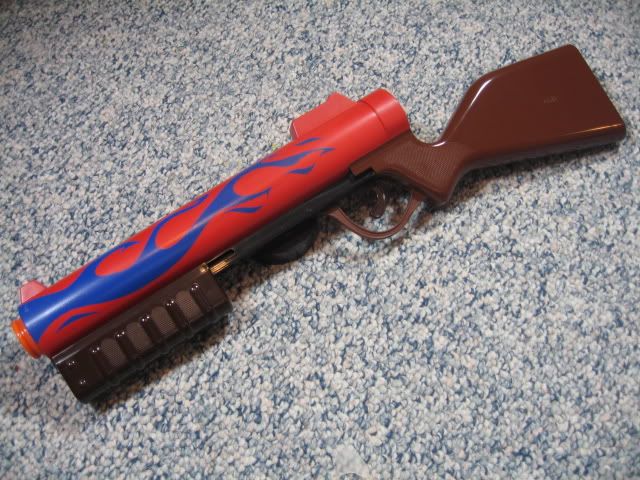
If you are lucky enough to have the same color paint as your design, you can go in and clean up any edges as needed.

Step 6: Clear Coat
As with any paint, use a clear coat of your choice to protect the paint.
All Done
Enjoy your hard work and shoot something.
Let me know if there's anything that should be included.

