| Forums | Death by Foam | Articles | Modification | Homemade | Links | Store | Gallery | FAQ |
|
|
|
|
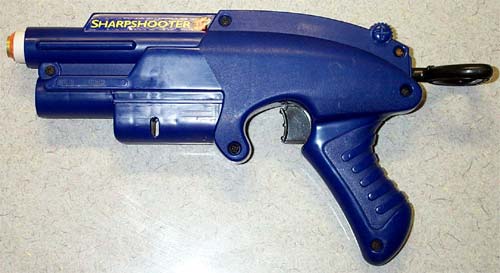
Nerf SharpShooter II
Nerf SharpShooter II Nested Brass Barrel Mod :
The SharpShooter II has a fairly interesting and useful gimick - a barrel selector located on the bottom of the barrel assembly. Mods for the SSII can be generally categorized into those which retain the barrel selector, and those which remove it in favor of a single-barrel arrangement. Since the valve assembly allowing barrel selection was broken on my SSII when I received it, this mod is of the second variety.
When I received my SSII I was surprised to find that it felt even more comfortable in my hand than my Lock 'n Load. The handle is large and comfortable and the gun is well-balanced. Upon opening it I was surprised again at the large piston tube and relatively strong stock spring.
The goals for this mod are to rechamber for 1/2" micro stefans, increase the accurate range to 50', and retain the gun's reliability and structural integrity. Given the large plunger tube, others have modded the SSII for maximum range. I opted to take a more conservative approach in the belief that accuracy and reliability are the most important qualities in a sidearm.
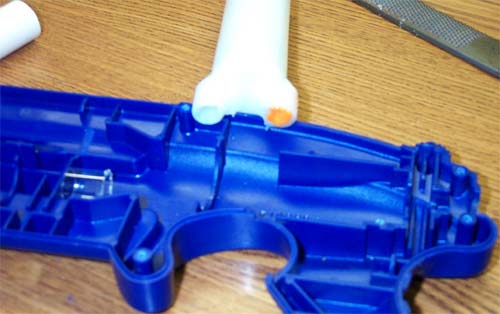
Here's a picture with the gun opened up and the barrels and selector assembly discarded. Without the valve attached to the front of it, the piston tube will slide back and forth in the case. There is also a rib of plastic immediately to the left of the top-left corner of the plunger tube that must be filed down to make way for the PVC.
Here I've cut a piece of PETG - anything will do really - that forces the plunger tube back against the rear internal support wall. I've also plugged the lower airhole with large amounts of hi-temp hot glue and rounded the square corners on the outside of the top airhole. The picture isn't ideal but if you have one in your hand it should make sense.
I cut two barrel sections, 4" of 9/16" K&S brass and 1" of 17/32" K&S brass. The smaller piece is epoxied into the back end of the larger piece so that it's completely nested and the rear edges are flush. When the dart is loaded, the smaller section of brass holds the back of the dart tightly until the plunger has overcome inertia and built up sufficient pressure.
Next I fit the brass assembly in a 3.75" section of 1/2" PVC and epoxied (Plastic Weld epoxy works great) it onto the plunger tube. Make sure it's completely straight before it dries or you'll have a hell of a time fixing it. After the epoxy has completely cured, usually 24 hours, run a bead of hot glue around the joint to make sure it's airtight and put the gun back together.
I range tested with no spring replacement or banding to see how the stock spring arrangement would fare with the new barrel. Fortunately it seems that I won't need to add to the gun's power since the range is more than sufficient.
Range testing was performed with .25" steel shot weighted micro stefans. All shots were fired parallel to ground from a height of approximately 4.5'. Average dart skip on concrete was approximately 2-3'. Here's the Modalizer screencap chock full of statistical analysis goodness.
| All images and content © Kevin Davis 2002, 2003 - Hail Eris! All hail Discordia! |