So here is a chance for all who are unfamiliar with Amazing Goop to learn from my mistakes.
This morning, I was using my goop in my bedroom. Normally, this would have been fine as I never miss what I am gooping and hit the carpet, and I had a window open. Somehow, the tube got clogged so I gave it a little squeeze... maybe a big one. But I never thought that the back would blow up and get Goop all over the carpet.
About 45 minutes later, everything is fine, but the point is the title:
Be gentle with your goop, and always use it outside.
Call me stupid, call me dumb, call me whatever, but I know there are at least 3 people out there who this helped.
- NerfHaven
- → Viewing Profile: Topics: precisionnerfer
precisionnerfer
Member Since 05 Jul 2007Offline Last Active Apr 09 2012 06:08 PM
Community Stats
- Group Members
- Active Posts 323
- Profile Views 5,654
- Member Title Member
- Age Age Unknown
- Birthday Birthday Unknown
User Tools
Latest Visitors
Topics I've Started
Be Gentle With Your Goop,
12 January 2008 - 12:31 PM
Pn's Long Awaited Nite Finder Write Up
06 October 2007 - 01:35 PM
Hey guys, here is how to mod your Nite Finder:
What you will need:
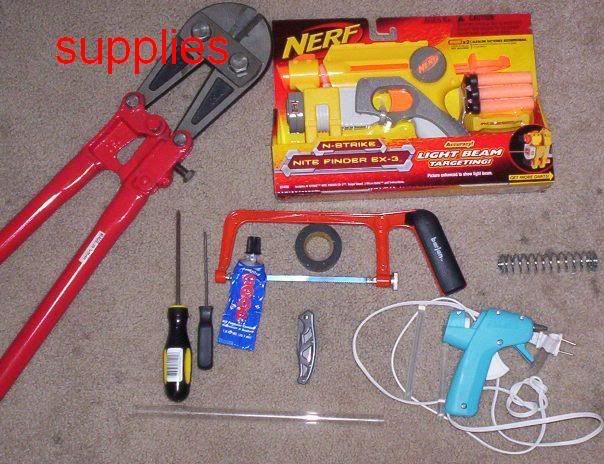
Cutting tool
Knife
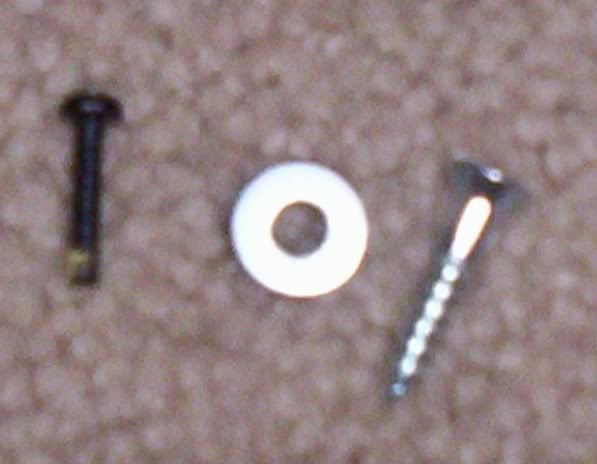
Tornillo Maderd wood screw # 6 X ¾ [Home depot]
Crown Bolt Stainless Steel # 6 cut washer. [[Home depot] Here are the washer and screw compared to a ammo holder screw:
Screw drivers
Hot glue and gun.
Super glue.
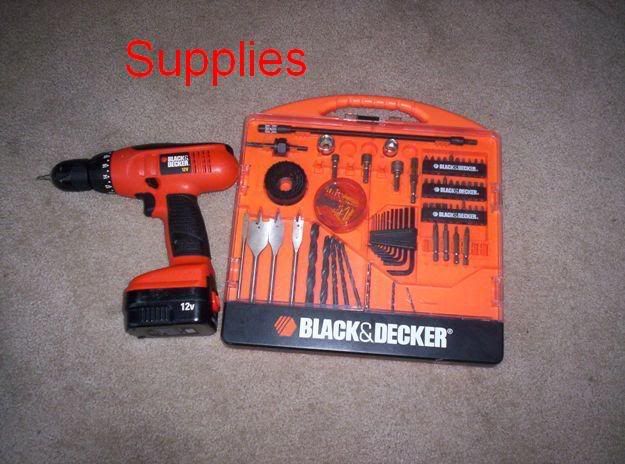
Drill with drill bits.
OMC PETG [one man clan]
Handyman spring [home depot]
Bolt cutters
E-tape
Lubrication
Paper towels
Here is the gun with all of the screws out of it.
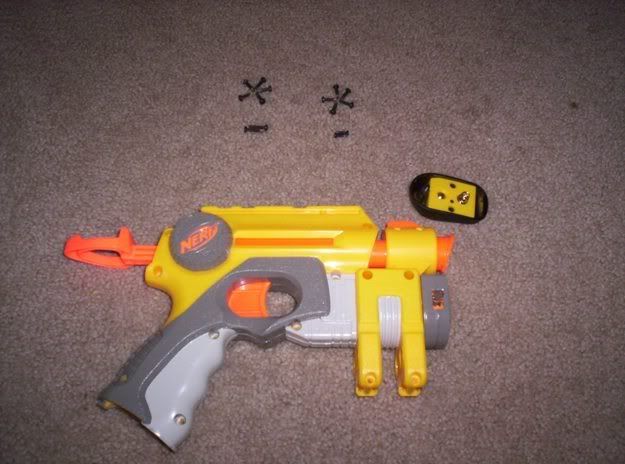
Here are the screws:
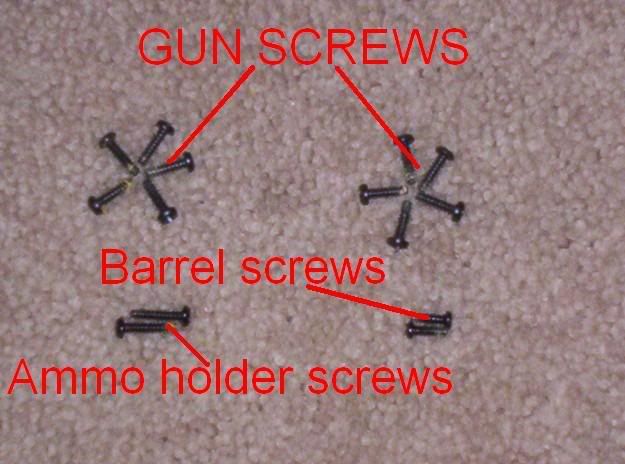
You have 10 gun screws, which hold the gun body together, then you have 2 barrel screws, which hold the barrel in place, and finally 2 ammo holder screws, to secure the ammo holders. The gun screws are of a medium length, the ammo screws are the longest, and the barrel screws are the shortest. Set the screws aside for a while, in little piles similar to in the picture.
Now you will want to look at the internal parts of the gun:
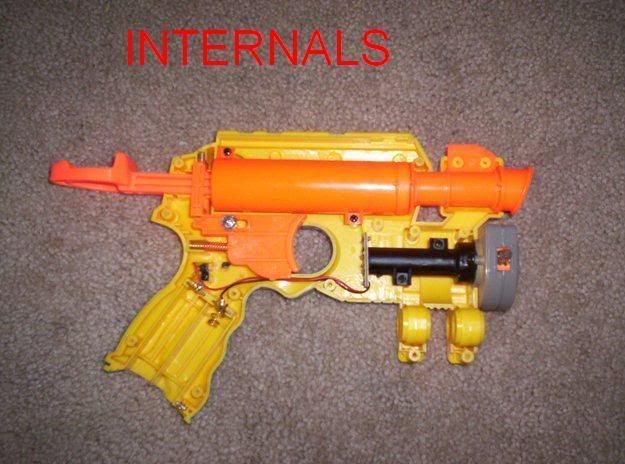
If you will notice, at the bottom part of the gun, on the right bottom corner of the handle, is a small metal square washer. This is a pivotal piece to hold the handle cap, [the black thing on the handle] in place. I would suggest putting that with your screws for now.
The long orange tube you see in the middle of the assembly is called the plugger tube, as it holds the cocking rod, which has the plugger head attached to it. When the gun is cocked, the plugger rod catches onto a rectangular piece with a spring on it in the top left corner of the gun called the trigger catch. Once the cocking rod catches on it, the gun is “primed” and the plugger head has the compressed spring behind it. Once the trigger is pulled, the catch is pushed up by the back of it and the spring/cocking rod is released, therefore pushing the plugger head through the plugger tube. The air in the plugger tube, being pushed by the plugger head, is directed around and through the plugger head stopper, through the air restrictor, through the air limiter, and finally to your dart, pushing it out of the barrel and to your target. When the trigger is released, the trigger catch moves back to it’s original place, and the gun is ready to be primed again.
Here are the internals:
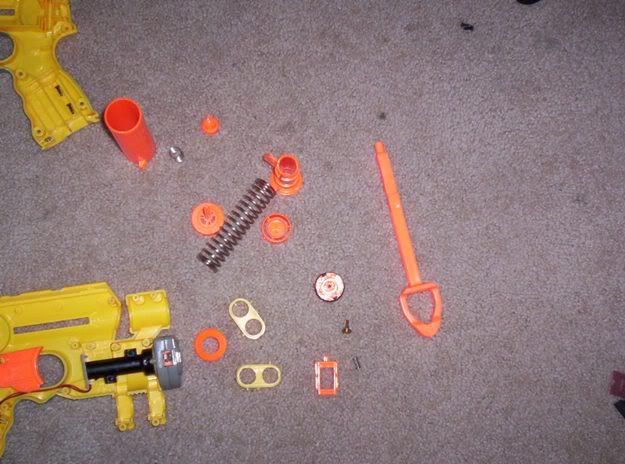
Unscrew the two screws on the top left and bottom right corners of the plugger tube, and then set them aside with the other screws. If you mix the barrel screws with the plugger screws it is fine, as they are the same size.
Before taking the shooting assemble out, make sure to cover the catch spring with your hand, as it could easily fly away. Gently take out the assembly, as brute force is never the way to go with Nite Finders.
Once you have the assembly out, set it aside and look at the other frame of the gun. On the top middle part you will notice two pieces; a spring and a rectangular piece. They are worthless to me but I think you can use them to attach two guns, so if you want, leave them in place. I find it easier to aim with them out though.
Next, pull out the cocking rod from the assembly. With it will come the trigger catch and spring, a quite weak main spring, and a plugger head with an o-ring around it. Your plugger head will either be black or orange. On the plugger head will be a small metal screw with a washer around it. Unscrew that and throw it away. If your plugger head is black, it will come apart in two pieces, mine was orange, so you will see an orange plugger head throughout the write-up.
Get your cocking rod, plugger head, plugger tube, and o-ring and put them in the sink with some water in it.
There is a piece that is attached to the front of the plugger tube called the plugger head stop, it is a circle with a circle in it, held up by three pieces. You will know what I’m talking about when you see it. Put that in the sink as well. The reason we are putting those pieces in the sink is due to the fact that they have stock lubrication on them, and we will let it come off a little in the sink so we can work with the pieces better.
Now turn back to your air restrictor and air restrictor spring. It is a three-pronged piece with a spring behind it. Throw those away. After that, grab your air limiter. It has a post sticking up out of it, and you call that a barrel post. Here is the air limiter:
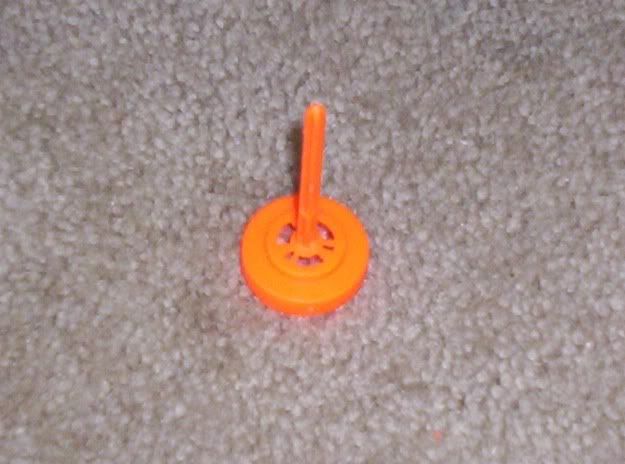
We don’t need all of that plastic in the middle, so take your knife to it and cut it out. It should look like this:
What you will need:

Cutting tool
Knife
Tornillo Maderd wood screw # 6 X ¾ [Home depot]
Crown Bolt Stainless Steel # 6 cut washer. [[Home depot] Here are the washer and screw compared to a ammo holder screw:

Screw drivers
Hot glue and gun.
Super glue.
Drill with drill bits.

OMC PETG [one man clan]
Handyman spring [home depot]
Bolt cutters
E-tape
Lubrication
Paper towels
Here is the gun with all of the screws out of it.

Here are the screws:

You have 10 gun screws, which hold the gun body together, then you have 2 barrel screws, which hold the barrel in place, and finally 2 ammo holder screws, to secure the ammo holders. The gun screws are of a medium length, the ammo screws are the longest, and the barrel screws are the shortest. Set the screws aside for a while, in little piles similar to in the picture.
Now you will want to look at the internal parts of the gun:

If you will notice, at the bottom part of the gun, on the right bottom corner of the handle, is a small metal square washer. This is a pivotal piece to hold the handle cap, [the black thing on the handle] in place. I would suggest putting that with your screws for now.
The long orange tube you see in the middle of the assembly is called the plugger tube, as it holds the cocking rod, which has the plugger head attached to it. When the gun is cocked, the plugger rod catches onto a rectangular piece with a spring on it in the top left corner of the gun called the trigger catch. Once the cocking rod catches on it, the gun is “primed” and the plugger head has the compressed spring behind it. Once the trigger is pulled, the catch is pushed up by the back of it and the spring/cocking rod is released, therefore pushing the plugger head through the plugger tube. The air in the plugger tube, being pushed by the plugger head, is directed around and through the plugger head stopper, through the air restrictor, through the air limiter, and finally to your dart, pushing it out of the barrel and to your target. When the trigger is released, the trigger catch moves back to it’s original place, and the gun is ready to be primed again.
Here are the internals:

Unscrew the two screws on the top left and bottom right corners of the plugger tube, and then set them aside with the other screws. If you mix the barrel screws with the plugger screws it is fine, as they are the same size.
Before taking the shooting assemble out, make sure to cover the catch spring with your hand, as it could easily fly away. Gently take out the assembly, as brute force is never the way to go with Nite Finders.
Once you have the assembly out, set it aside and look at the other frame of the gun. On the top middle part you will notice two pieces; a spring and a rectangular piece. They are worthless to me but I think you can use them to attach two guns, so if you want, leave them in place. I find it easier to aim with them out though.
Next, pull out the cocking rod from the assembly. With it will come the trigger catch and spring, a quite weak main spring, and a plugger head with an o-ring around it. Your plugger head will either be black or orange. On the plugger head will be a small metal screw with a washer around it. Unscrew that and throw it away. If your plugger head is black, it will come apart in two pieces, mine was orange, so you will see an orange plugger head throughout the write-up.
Get your cocking rod, plugger head, plugger tube, and o-ring and put them in the sink with some water in it.
There is a piece that is attached to the front of the plugger tube called the plugger head stop, it is a circle with a circle in it, held up by three pieces. You will know what I’m talking about when you see it. Put that in the sink as well. The reason we are putting those pieces in the sink is due to the fact that they have stock lubrication on them, and we will let it come off a little in the sink so we can work with the pieces better.
Now turn back to your air restrictor and air restrictor spring. It is a three-pronged piece with a spring behind it. Throw those away. After that, grab your air limiter. It has a post sticking up out of it, and you call that a barrel post. Here is the air limiter:

We don’t need all of that plastic in the middle, so take your knife to it and cut it out. It should look like this:
Arrowstorm Modification
03 September 2007 - 06:18 PM
Here’s a little arrowstorm mod I did:
Here is what you will need:
Hot glue/gun
A fine tooth hacksaw or some other clean cutting device
A small knife
OMC PETG
Grab your PETG, [two feet will do] and then make a mark with a a knife at 3 3/4 inches on the PETG. Grab the hacksaw or whatever and cut it, then grab your knife and if necessary, trim it to make it straight.
Now, after you’ve done it with six pieces, grab the hot glue gun and do a sort of air restrictor around the bottom of the PETG with the glue. This is to keep the dart from slipping back and the gun jamming up:
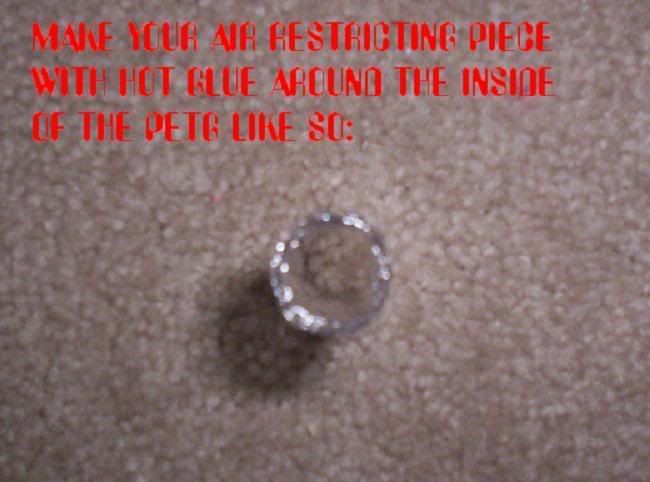
When you have done that to a piece of PETG, push it down halfway to the barrel and put a ring of hot glue around the part that sticks out:
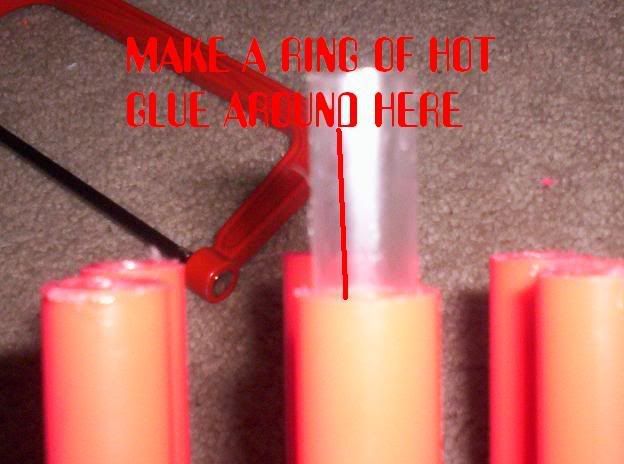
Finally, shove it all the way in. If you cut right, you should have a perfect barrel replacement.
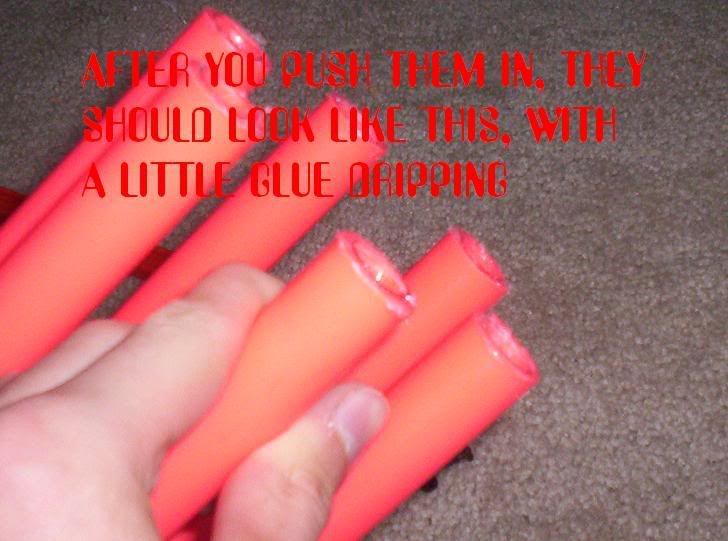
I’m getting 60-70 flat with each shot now, so when modded this gun is a force!
Here is what you will need:
Hot glue/gun
A fine tooth hacksaw or some other clean cutting device
A small knife
OMC PETG
Grab your PETG, [two feet will do] and then make a mark with a a knife at 3 3/4 inches on the PETG. Grab the hacksaw or whatever and cut it, then grab your knife and if necessary, trim it to make it straight.
Now, after you’ve done it with six pieces, grab the hot glue gun and do a sort of air restrictor around the bottom of the PETG with the glue. This is to keep the dart from slipping back and the gun jamming up:

When you have done that to a piece of PETG, push it down halfway to the barrel and put a ring of hot glue around the part that sticks out:

Finally, shove it all the way in. If you cut right, you should have a perfect barrel replacement.

I’m getting 60-70 flat with each shot now, so when modded this gun is a force!
Unkown Gun?
16 August 2007 - 01:49 PM
I was digging at my friends house and we stumbled upon some Nerfing gem:


I'll get some gutsy internal pics later.
I looked around but couldn't find any ID for it. Could someone help me?
It is from 1993 and has lots of scratches. I modified it a little, just with basics like AR and barrel upgrade. [only on two of them though] The spring is weird and big, and there are little pieces that couldn't take a bigger one so I skipped that. After a nice paint job I'll lube it and see how that works. At first, as you might guess, it shot arrows, but OMC PETG fits perfectly down the barrel. This gun is amazing! It can get 70ft flat. I'll show you internals later but for now I need a name for it.
Thanks
-PN
When You Break A Magstrike....
05 August 2007 - 09:03 PM
If you break a magstrike, like I did today, {the little thing that makes the cartridge move up] and you didn't break the bladder or pump system, then here is a little way to turn it into something useful. I assume that you broke it by trying to mod it, like me. I don't know how mine broke and I sat for an hour trying to work with it with no avail.
So grab these materials:
Hot glue, epoxy, or other strong glue.
Strong tape of some kind.
Canola oil or some other lubricant.
Electrical tape. [e-tape]
A drill with some bits or a Philips head and a hammer.
A saw or very sharp knife of some kind.
Some barrel material and darts that go with it.
A sharp knife.
From the totaled magstrike:
The pump handle and rod.
The chamber which the rod fits into
Okay. There will be some tubes in your way to get out these pieces, so either rip them out or slash them. Also, if you don't have the green nub near the pump handle out yet, hack it out or gently pry it off with a knife or a flat head. In the end, you should have two plastic pieces, with one that fits in to the other. The rod is recognizable with an o-ring around it, kind of like a plugger head on a spring gun. The air chamber that the rod fits into will look like a giant plugger chamber. You will only want these pieces.
You will notice the green nub and another grey piece on the rod. Grab a screw driver and take out the two screws on the handle and split the handle in two halves. Now remove the nub and other piece. Re assemble the handle.
On the chamber, or, plugger chamber in this case, go to the side that has the nub deal sticking out and cut it off with your tools. Now grab your drill or hammer and screw driver and blow out the piece that is in the chamber until you can see through it. Now, grab your barrel material and stick it on the place where the nub deal used to be, and then glue it on nice and straight. Re-in-force it as much as you like.
Now grab your e-tape and plugger rod. Take off the o-ring and wash the rod and ring off, and then dry. Now rap 3 layers of e-tape where the o-ring used to be. Now put the ring back on, and drench in lubricant.
Now insert a dart in the barrel, stick in the rod and you can use it sort of like a pop gun. It can be pretty powerful if you use the right combination of glue/barrel/dart. I used PETG/ CDTS/ Hot glue, so it was bad, about 15 or so flat, but if you use something like PETG/ red FBR Stefan/ epoxy, you have a little weapon now instead of a completely totaled gun! Sorry I have no pics, but I may put them up later.
-PN
- NerfHaven
- → Viewing Profile: Topics: precisionnerfer
- Terms of Service and Privacy Policy
- Code of Conduct ·


 Find content


