Jump to content


Jlego

Member Since 19 Apr 2004
Offline Last Active Mar 18 2022 06:02 PM

Topics I've Started

Happy Holidays!

25 December 2012 - 01:09 PM

Happy Holidays from (*most of*) the Mods at Nerfhaven! (Definitely not Ice9, he won't be wishing you a happy anything)
Usually around this time of year, we have a thread or two pop up and get closed for some silly reason, so he's everyone's chance!

GROUND RULES

-This topic will be open and pinned for one week, for everyone to wish everyone a lovely holiday and festive new year and all that.

-This topic is also for the inevitable boasting of Nerf and modding related gifts.
Past that? NOBODY CARES. Don't be that guy, blasters and modding tools ONLY.


Annnnnyway, I do hope everyone has had a wonderful go of this holiday season and I hope we'll be seeing you all just as much as ever in 2013.

Serious Arrowstorm Improvements

21 February 2011 - 11:52 PM

This mod was originally created before Apoc '10 in Split's workshop in an effort to make the seal on the plunger tube perfect, as this is the absolute biggest issue on the Arrowstorm. The original idea was to completely replace the plunger tube, but that seemed like such a waste, as the original plunger tube has such ample volume to work with. By chance, I realized that the ID of the plunger tube is VERY similar to that of the +bow, so I grabbed a spare skirt seal I had and went to work. The results were pretty fantastic, and I decided to purchase another one to do a write-up for. (shoutout to Ubermensch for a good sale)
Posted Image
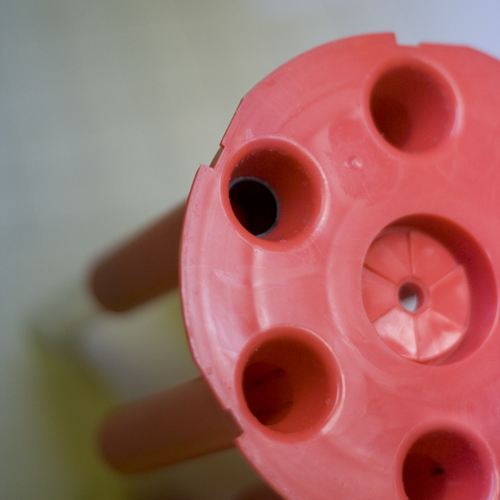
The airflow between the plunger tube and the turret is pretty sad, for what it is. It can be widened to 7/16" without compromising the seal to the turret. This can be done with a dremel/drill/exacto/sandpaper, just be careful, alright?
Posted Image
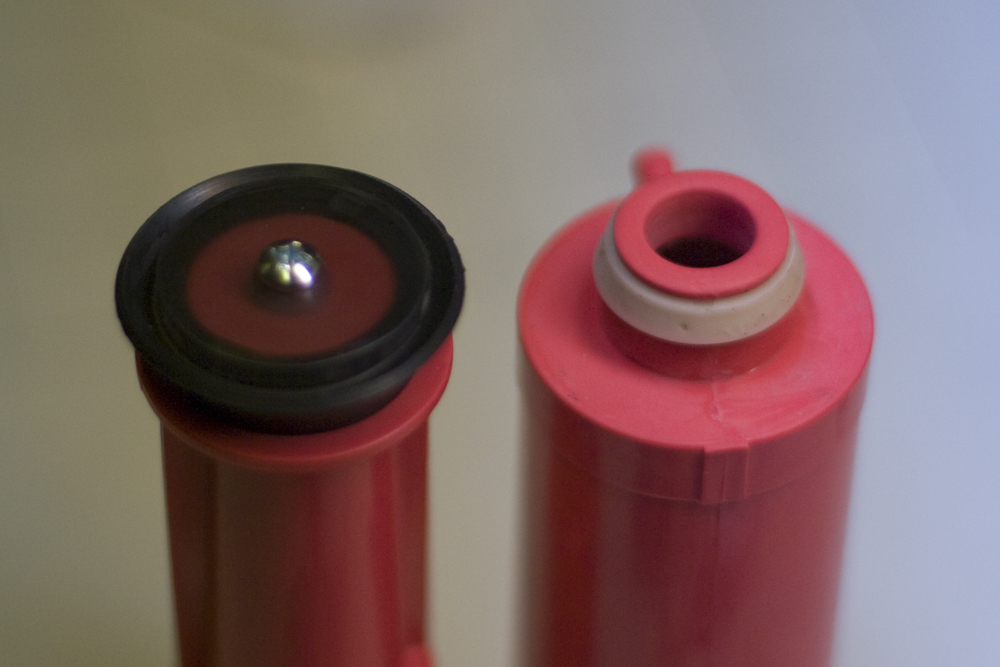
Here is the stock Arrowstorm plunger head assembly, great, but the existing seal only makes a good seal for the last inch or so of travel, WHICH IS UNACCEPTABLE.
Posted Image
So just rip off the old seal, which is garbage. You'll notice that either a U-cup seal or skirt seal will work, however the skirt seal seems to have less friction towards the end of travel.
Posted Image
Drill a hole in as close as you can get to the dead center of the plunger head (diameter of 27/32" if you really needed to know, 7/8" if you don't wanna go to nuts)
Posted Image
Next, cut a circle of 1/8" polycarb, between 1" and 1+1/8" in diameter with a 1/8 hole (up to 5/32, if you care) in the center. I chose to put a 1/16" thick washer in the middle of the plunger head to relive stress on the skirt seal.
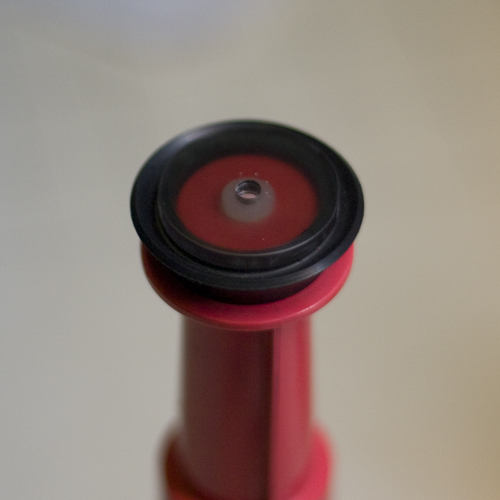
Then use a 6-32 bolt to assemble your plunger head, doesn't matter if the phillips head is on the outside or inside, you can do whichever if you have a longer screwdriver or socket wrench. You can check to make sure it's airtight by blowing air in the back of the plunger head assembly and see if any air escapes. If you've done all of this right, you should have something like what you see below. Throw a bunch of silicone lube/whatever you want on the inside of the tube and on the skirt seal.
Posted Image

That is what most people need, the rest of this write-up to show how to make perfect rear loading ports.
Posted Image
First off, choose your barrel material and length, cut all 6 barrels, and add enough electrical tape to secure them in place right up against the taper for the plunger tube's nesting point.
Posted Image
You can glue them in place, but if you use the electrical tape properly, it's not necessary.
Posted Image
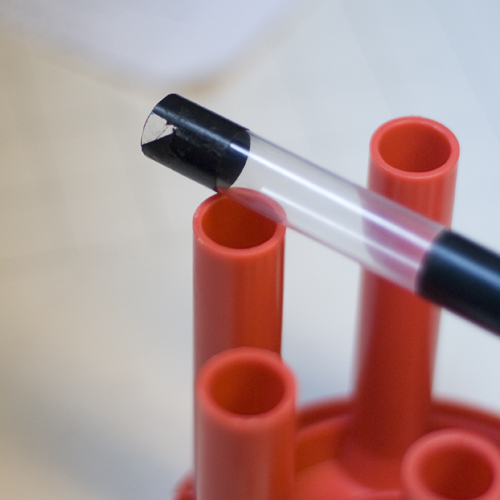
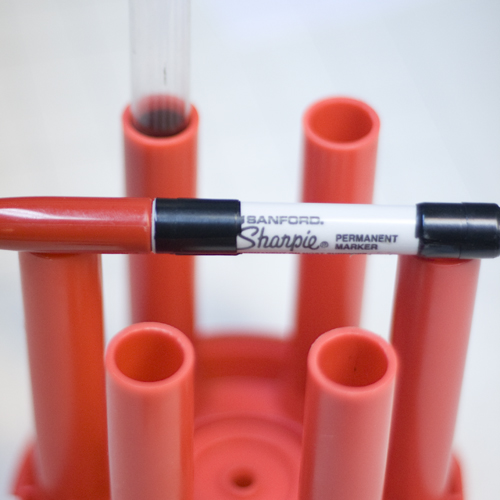
Once the barrels are mounted, take a sharpie and put electrical tape on it so that both sections of electrical tape on the marker are the same as the ID of the barrel material (it should slide in and out fairly easily).
Posted Image
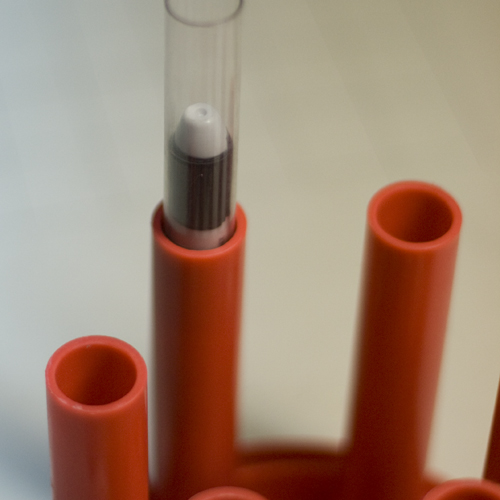
Assemble your Arrowstorm completely now, and drop the sharpie down the four barrels that should be rear loading (make sure they hit bottom) Now disassemble your Arrowstorm once more!
Posted Image
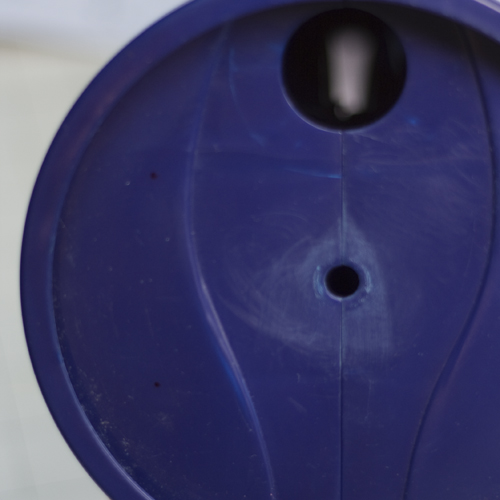
Now use the sharpie mark for the center of the rear loading holes.
Posted Image
A good way to do that is to drill a 7/64" hole and tap it with a 6-32 bit. Use a screw to attach a washer, I used a 1" diameter washer with a 1/8" hole in the middle.
Posted Image
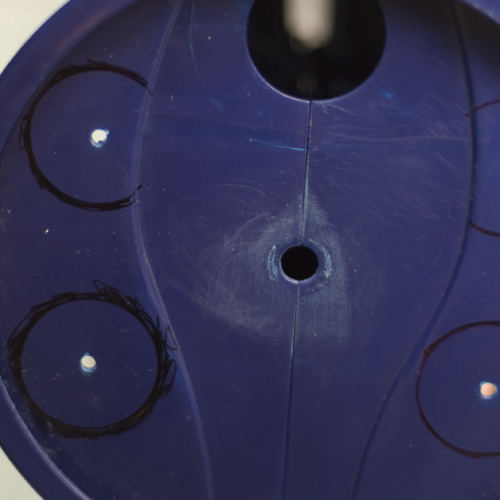
Trace around the washers with a sharpie and then remove the washers.
Posted Image
Dremel/drill/whatever until you're up to the sharpie mark. Seems to work quite well, all the holes were just the right size for the washers to fit though. Finish with sandpaper, I used 400 grit, seemed to work great.
Posted Image
Looks off center in the pic, but it is quite well centered.

That's about it, I have a couple more ideas, but it's gonna be a while before I get around to them, so I figured I'd post this for you all to enjoy in the meantime. Also I don't think I cursed enough in there, fuck it all, props to my boizzzz over at #nerfhaven.
Questions? Shoot!

EDIT: Picture links have been corrected, thanks to WSU Cowboy and LordNikonX for bugging me to get this fixed. I may have an addendum to this mod at sometime in the future.

The Most Importantest Birthday Ever!

18 September 2010 - 02:02 AM

Super happy birthday to grz, our resident movie star, may Ellen Page show up oh his door inexplicably!

See you today with any luck, you beautiful so-and-so <3

Jlego's Hybrid Breech System (somewhat Picture Heavy)

24 October 2009 - 02:39 PM

I’m not a huge fan of breeches, although I’ve never really used one in a war. However, I got a good idea to make one, so I decided to make it and post a write up. So here we are.

To help get the idea of what this is, here’s a link to an LARGE cross section image of what this breech looks like. It’s pretty High res, or I’d just imbed it here.
This beautiful png right here!
The idea is that it’s a breech that can be used with high volume springers. I’ve been using 5” of 17/32” nested in PETG with amazing results in my xbow’s speedloader, but unfortunately with a breech you can’t really twist the dart in. So with 1” of unconstricted 9/16” before the 17/32” you can push the dart 1” into the 17/32” if you’re using shorter darts that 2” there could definitely be some adjustments made. If people are interested, I can make a plan like the above for 1.5” darts or whatever, just ask.

To make this, you will need:
A dremel – don’t even bother if you don’t have one
A rubber mallet – this is the only good way I’ve found to nest petg over 17/32” brass
Utility knife
Duct tape or painters tape
Sandpaper (I used 400 and 600 grit)

8.5” of PVC (not sure if it’s just my PVC, but 19/32” brass makes a perfect seal inside my pvc, this is important)
4.5” of 19/32” brass
4.5” of 9/16” brass
4” or 5” of 17/32 brass (it doesn’t really matter all that much, really)
A foot section of PETG (medium wall I think? Whatever.)
A small section (only like ¼”) of 3/8” brass
A single aluminum standoff, such as the kind used to make a +bow
JB weld glue or superglue

First off, you can prep your PVC for being breech-ified by cutting out a bit of duct tape to be the same size as the hole you want to have for the dart slot, in this case 2.5”x1.375”. then put it on the pvc exactly where the hole should be, 1” from the back in this case. Then outline it on the edge of the duct tape with a permanent marker, as pictured below. Then remove it, also pictured below. Use this marking as a guideline for dremeling a dart slot.
Posted Image
Posted Image

Then repeat that for where the bolt will be, as shown below, this time with the duct tape being .375” wide and 3.375” long.
Posted Image
Posted Image

Once this is cut, also use the sanding barrel of the dremel to make a point for the bolt to lock into at the back, as shown below. The thinner of the sanding barrels is close to 3/8”, which is a nice coincidence.You can sand down any sharp corners on the PVC a bit with the 400 grit sandpaper, but I suggest doing it by hand as any power sanding will take off way too much. What it should look like after all that:
Posted Image

Now, you want to take your 4.5” of 19/32” and use something like a ½” steel rod or drill bit to flare out one end just enough so that it fits perfectly in the pvc (assuming it doesn’t) and flare out the other side just a bit more, but not too much, put the less flared end into the back of the breech and lightly hammer it into the back of the breech until you have this:
Posted Image

Then do what you will with the dremel to cut that piece of brass into the same slot shape as the PVC it’s nested inside. Make sure to use some of that nice 400 grit sandpaper to take off the brass’s sharp edges on the inside, and finish it with the 600 grit if you have it.

Now you want to take your section of 17/32” brass, and nest it as much as you can by hand, and then stick it inside a longer section of pvc, vertically with the brass on the bottom as shown:
Posted Image
Then hit that bitch with your rubber mallet, figure a:
Posted Image
Swing your mallet hard, but carefully, and give it a solid hit. Doing this carefully is important, when you make contact make sure the mallet’s head is even on the top, if you hit the PETG on one side more than another, there’s a good possibility you’ll bend it real bad or crack it. Repeat the beatings until only 2.5” or so of the brass is exposed. Mark the PETG with a marker 3” up from the back of the brass. Also mark the 4.5” of 9/16” ½” from an edge, both pictured below.
Posted Image

Now comes some fun, you want to drill 2 tiny holes 1/8” apart at the 3” up mark on the PETG you just made, only you DON’T want to go into the 17/32”.Tthen use a utility knife to cut the long way around the PETG and down towards the brass so you have a 1/8” strip of just PETG, as always, as shown below. Throw away that piece of PETG, it’s not needed again.
Posted Image

Now drill 2 holes 1/8” apart like you just did on the PETG, but at that .5” mark on the 9/16”. Then use your dremel to cut it the same way as you cut the PETG. This piece of brass can also be discarded.
Posted Image

This is pretty much what it’s going to look like lined all up together right now. Also in this picture are the ¼” spacer you’re going to want, and the ¼” section of 3/8” brass. Both of those, it’s important to dremel down one side to have the same radius as the PETG (approximately, since that is what it gets glued to and you want them to be flush with the surface they’re being glued to).
Posted Image

Connecticut War

19 April 2005 - 05:00 PM

This has been on NHQ for a while now, and I decided that if there are any CT nerfers here they should know.

Where: Here
When: Saturday, April 30, 11AM - whenever
Who: Currently ? people, including One Man Clan and Evil

Be there, we've had too many people drop out. Anyone who wants to come, go for it, it's looking to be awesome.
Any further questions to be posted here or PMed to me.

-Jlego