Hell of a trip logging back into this website, happy to see so many folks that I grew up modding blasters with also followed a similar path into industrial design/mechanical engineering. Absolutely mind blowing how much this hobby has advanced, especially with all of the use of FDM printing. It's a little sad seeing how inactive this site is, and doubly sad to see the other forums completely gone, but I suppose that's what time does. I feel old.
This isn't much of a modification in the classical sense; no hacksaws, glue, or duct-tape. I tried attaching the step file of the shells I modeled up, but that seems like a no-go.
A little bit of an overview:
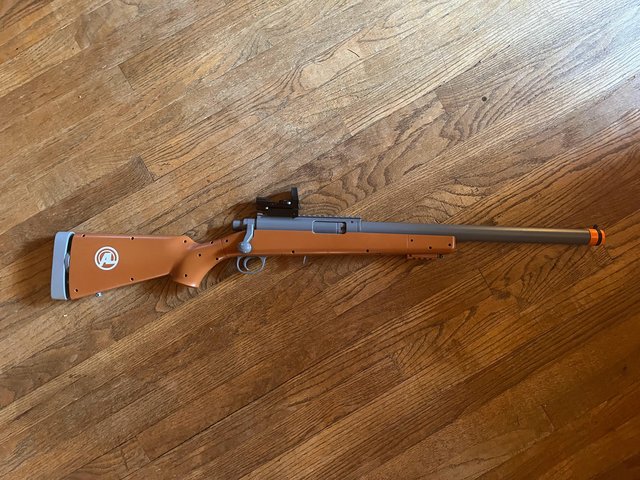
The blaster is very 'gun' like; it'll need some more bright colors before I take it outside. You snap the body of it together from 3 main pieces. Once snapped it, they don't easy come back out. It's shell fed from a detachable 4 shell magazine. Two mags were included. Shoots about 50ish feet with the included darts.
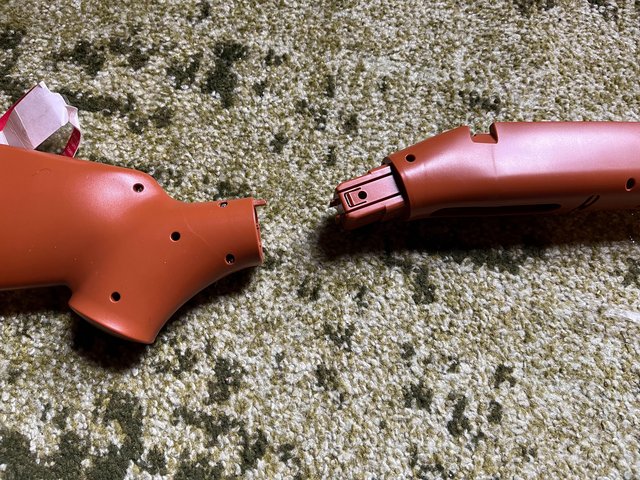
The 'barrel' is all fake, you can quickly detach it to reveal a smaller, orange tipped, faux barrel.
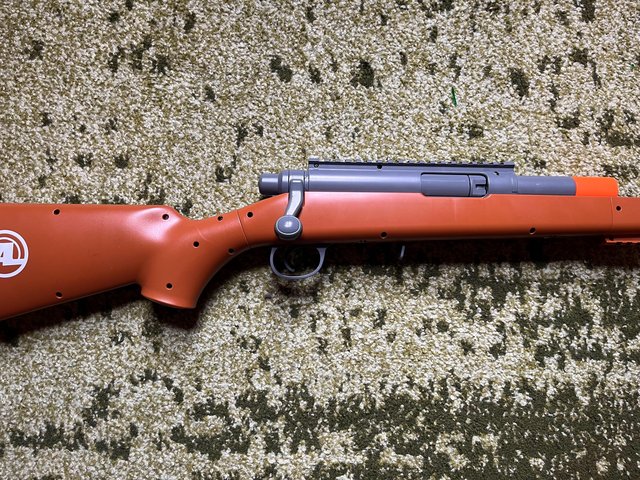
While there seems like a LOT of screws, you actually only need to remove 2 hex head machine screws on the bottom to separate the actual internals shell from the stock. Neat
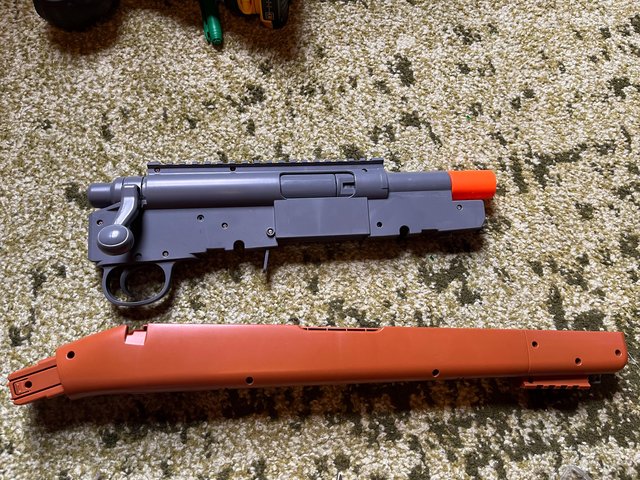
From there, you can open it, up. The stock shells that come with it don't have any pegs or air restrictors; neither does the bolt/plunger
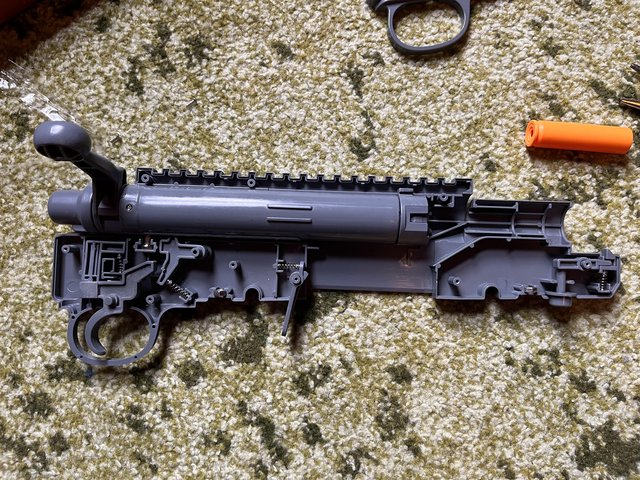
Internals are pretty solid, I didn't want to remove the pin in the back, because I felt like I'd have a hell of time putting it back in, or risk loosening it up too much. The spring is uncomfortably beefy, and the usable plunger volume seems pretty similar to what I remember from a nitefinder, maybe a little more. There is a functioning safety too. As you can see, there's no barrel; the shell is effectively the usable barrel for this blaster. I had contemplated adding some brass, but more to that later.
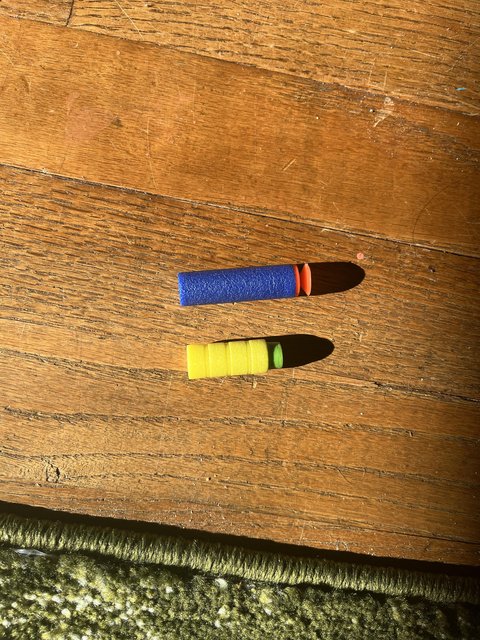
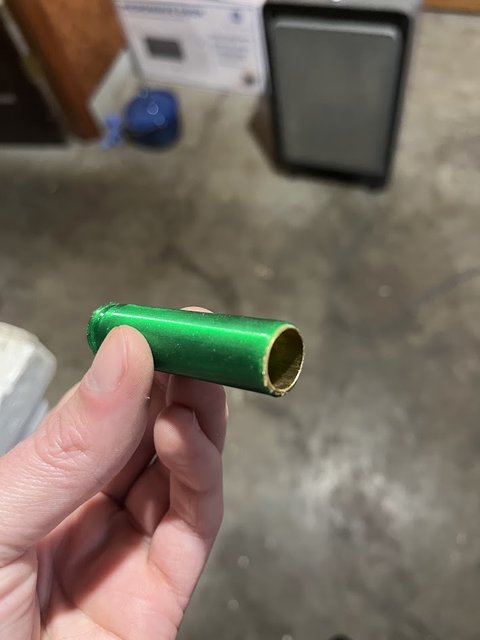
One of the biggest problems with this thing was just how bad the included darts were. They're about 3/4 of the length of a standard nerf dart (in the same elite blue color too) but have very inconsistently sized suction cups. The shells also fit the darts pretty poorly, not like buzzbee shell poorly, but like stock nerf barrel tightness. I swapped out the stock darts with some Ekind bamboo darts. Feels great to not buy a roll of FBR, cut it up, and then make darts. With the plunger limited volume, and 0 intention of me trying to increase it, I settled on making new shells. Again, I had wanted to attach a .step file, but here's a bad drawing (in mm) instead.
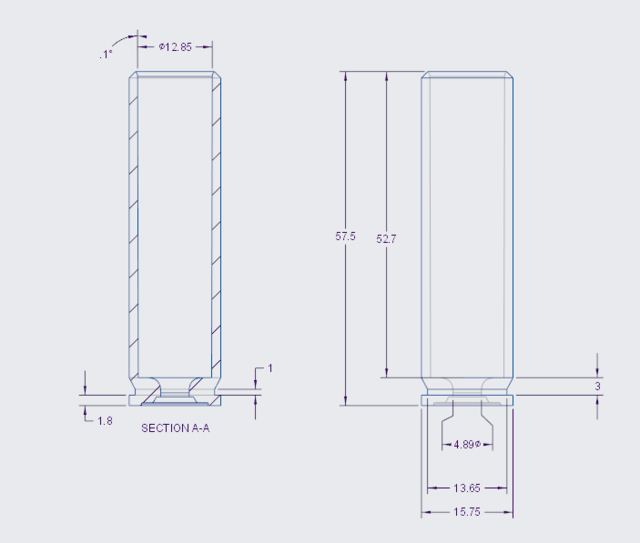
So, after quickly modeling up replacement shells with a bit of a taper that hugs the darts better, and new darts, I loaded up a magazine.
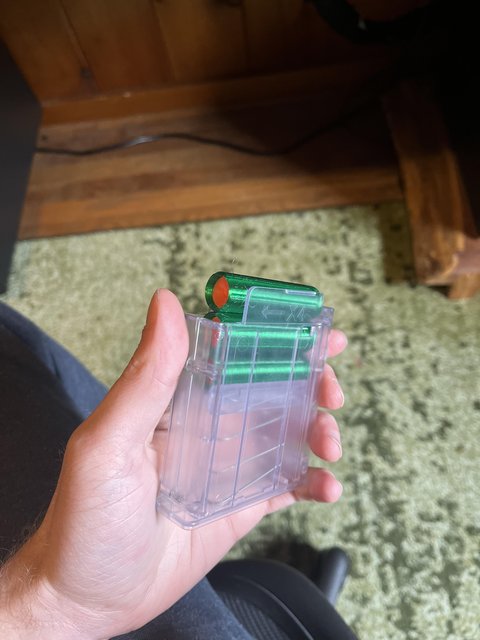
With the new darts, and new shells, it's shooting much further, flatter, and more consistently, I don't have any way to measure performance past 50ish feet, but now can consistently nail cans from about 20 feet.
I also made one with a wider inside diameter so that I could put a 17/32 brass insert, but there wasn't much of a noticeable performance gain between it and the regular printed shells.
- NerfHaven
- → Viewing Profile: Topics: The lord of fish
The lord of fish
Member Since 27 Nov 2010Offline Last Active Apr 29 2024 05:17 PM
Community Stats
- Group Members
- Active Posts 76
- Profile Views 11,875
- Member Title Member
- Age 33 years old
- Birthday November 14, 1992
User Tools
Latest Visitors
Topics I've Started
AGM MASTECH M24
12 April 2024 - 08:38 PM
ZombieStrike Stormfire Plunger Replacement
24 August 2014 - 05:27 PM
Preface: I stopped building guitars as I found the atmosphere to be pretty negative. My earlier posts reflected such negativity and as much as I'd like to apologize for the asshattery, its a few years too late. Now I'm back to just doing cad for hire.
I never saw/used the original dart tag stormfire. Its a night finder with much improved ergonomics and no gimmicky light. It's also a good deal bigger.
Materials needed:
Epoxy/Super glue/ solvent weld
1x Everbilt spring (or a spring of your choice IE cutdown [k26])
1x 1" drain plug
1x 1" small screw
1x 3/4" to 1/2" PVC reducer/bushing
1x 1 1/4" drain extension.
A fine tooth saw, or your favorite cutting tool.
a screw driver.
Optional:
some grub screws
thread locker
and a drill bit that corresponds with whatever grub screws you bought.
It comes with a gimmicky acog looking hollow tube of a scope. I threw that away. Stock I was hitting about 40 feet barely.
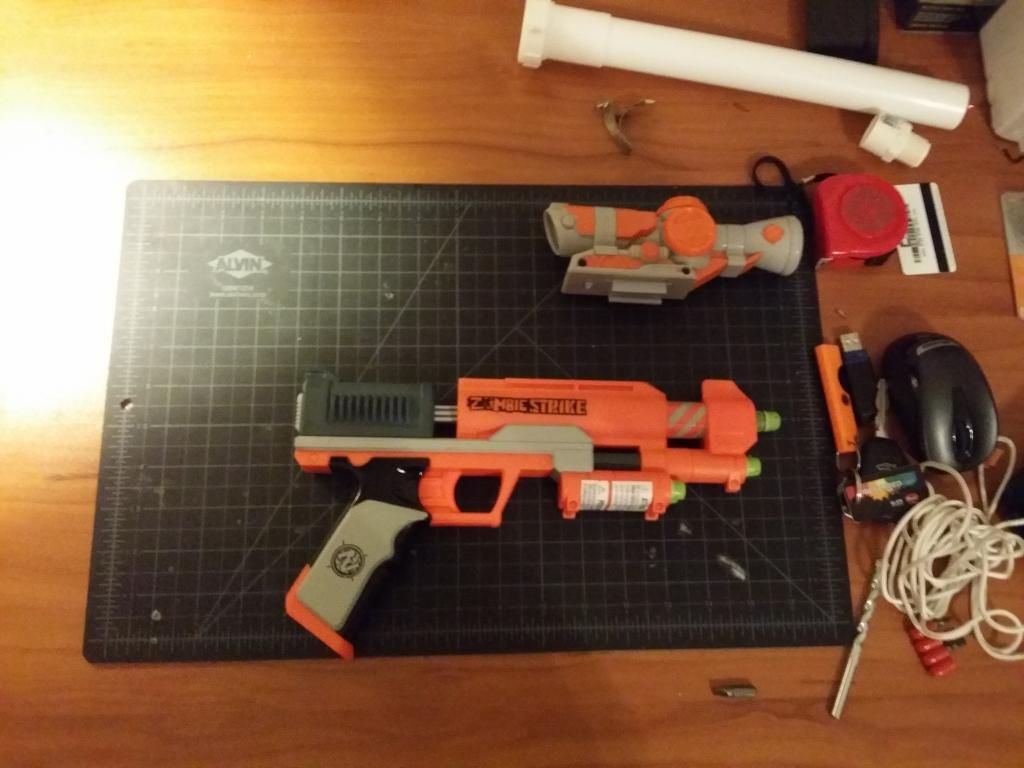
First start by unscrewing the orange muzzle cap
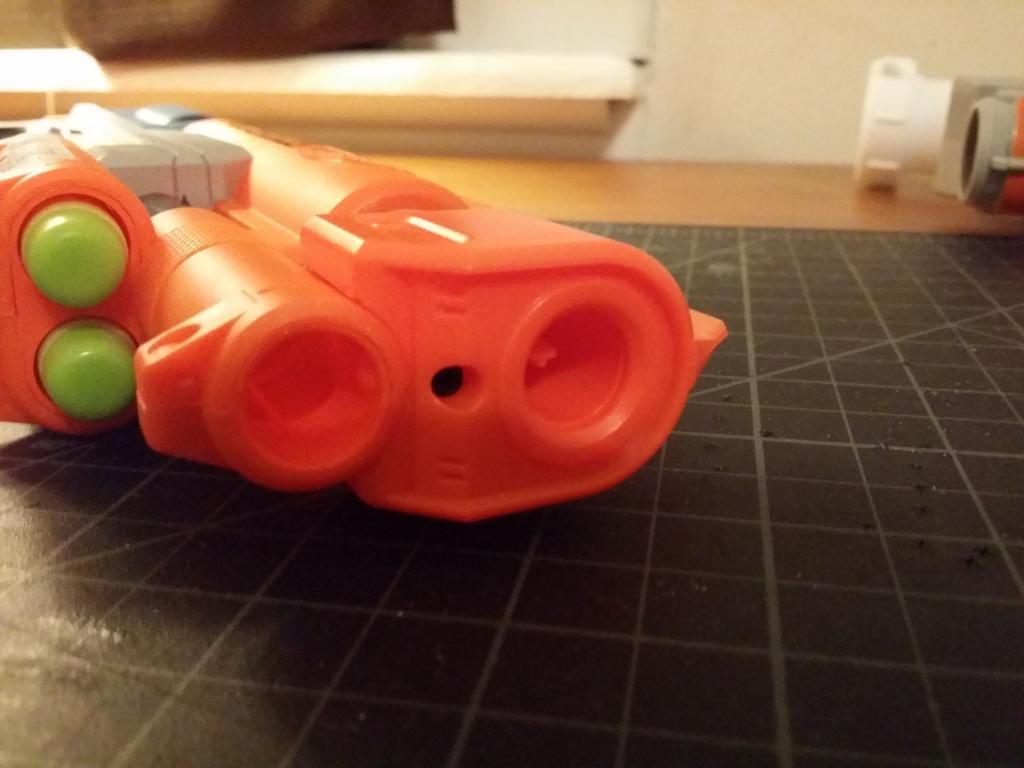
Then unscrew the slide.
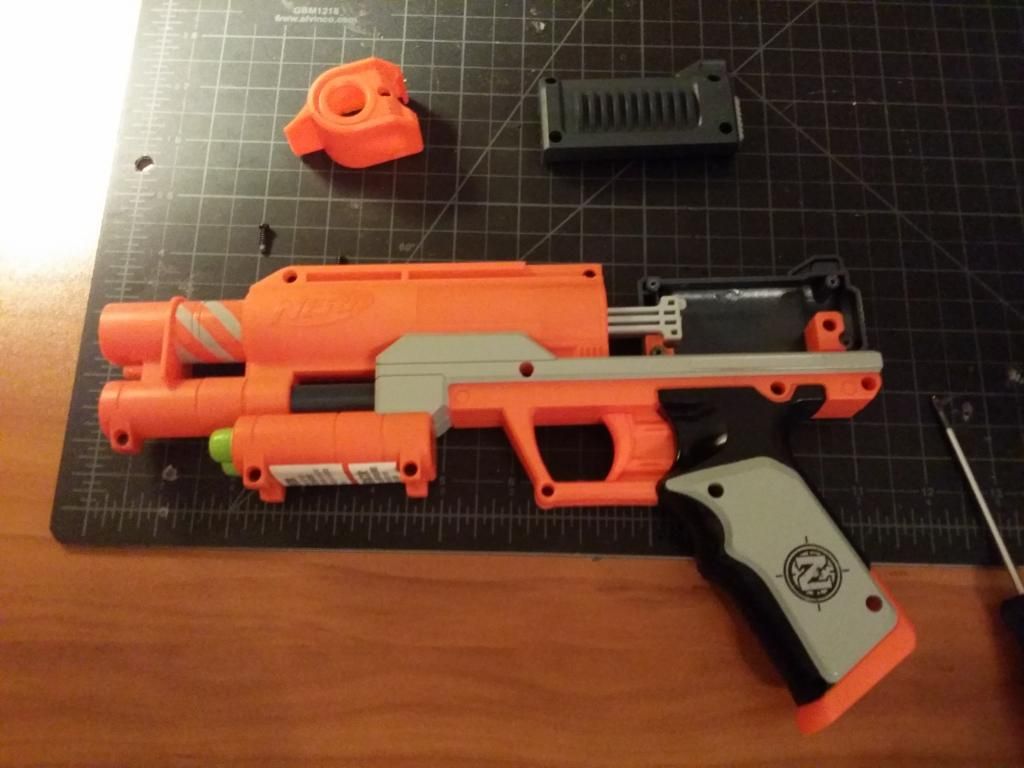
Now unscrew the gun, the catch spring might fly out, so be careful.
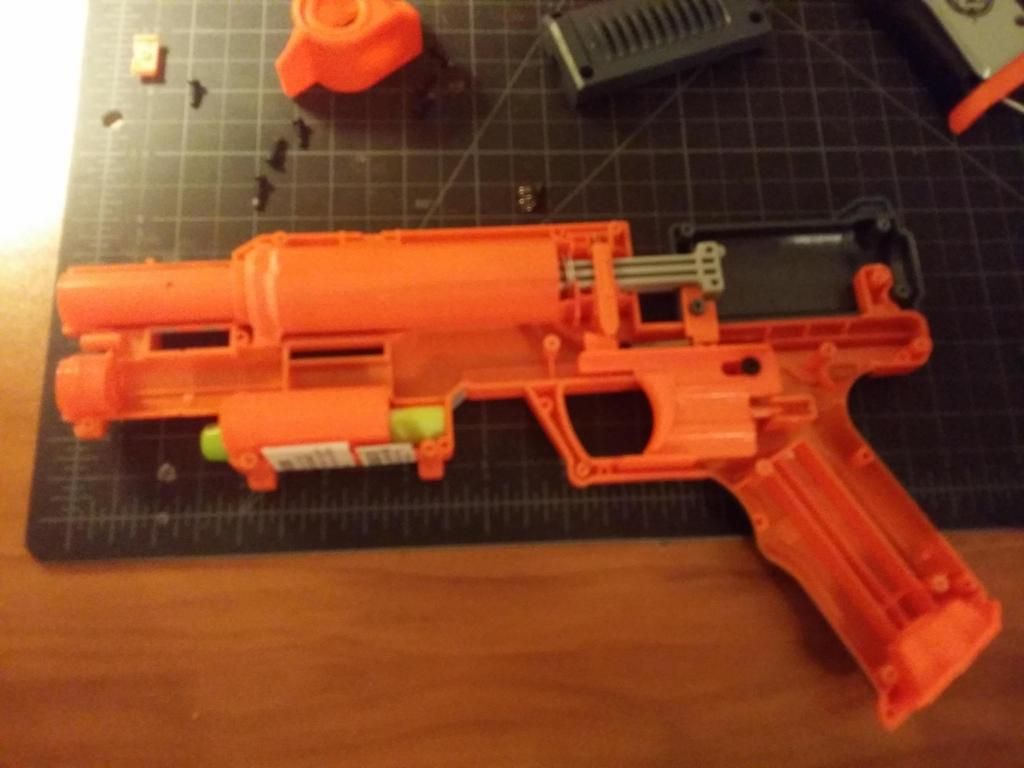
Remove the internals, and sand the muzzle end of the shell until there are no more ridges
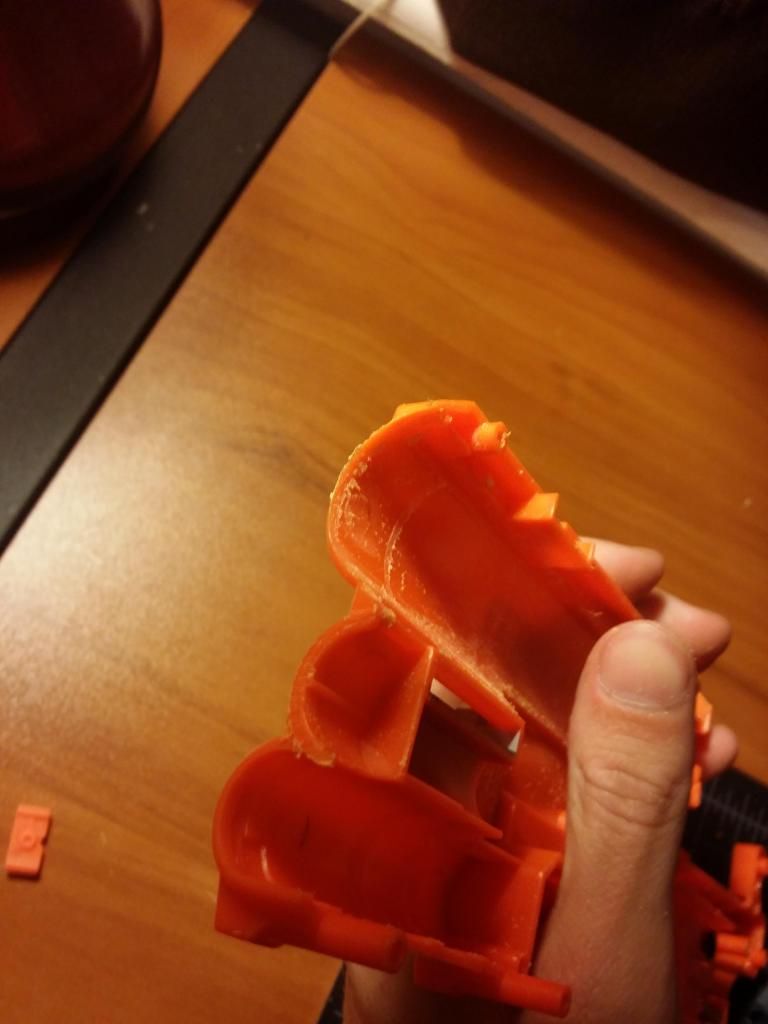
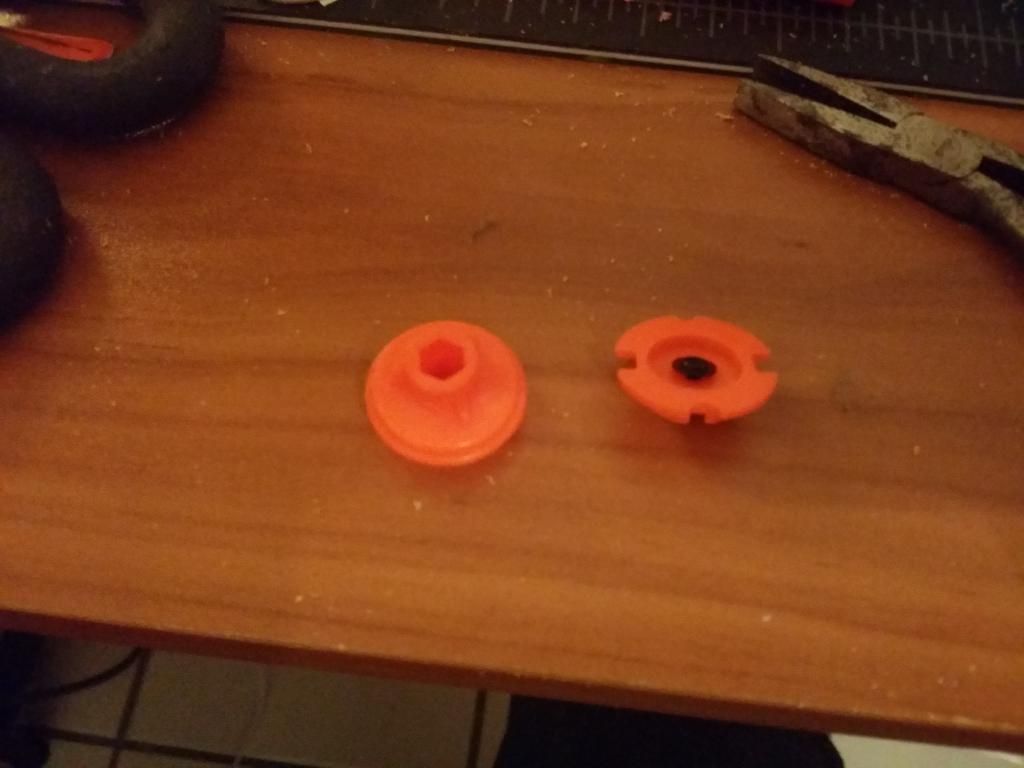
Now unscrew, and take apart the plunger head.
take your drain plug and cut the keyring tab off with a razor or sharp knife. I punched a hole in the center with my screw driver.
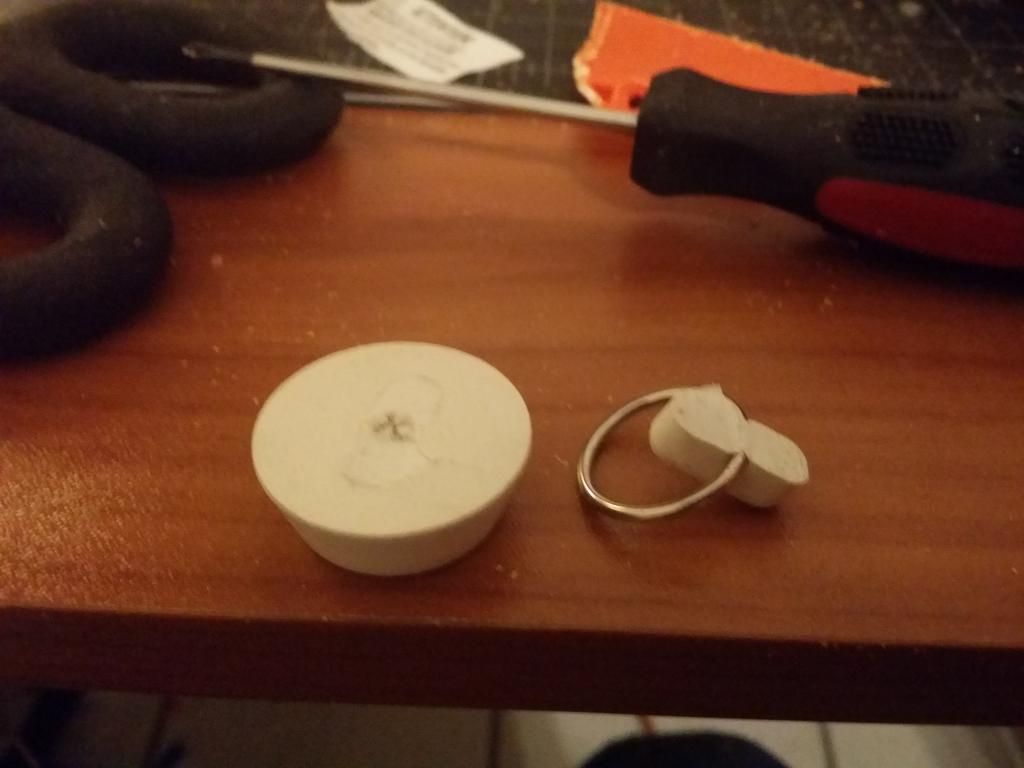
slip the bottom section of the stock plunger head into the drain plug.
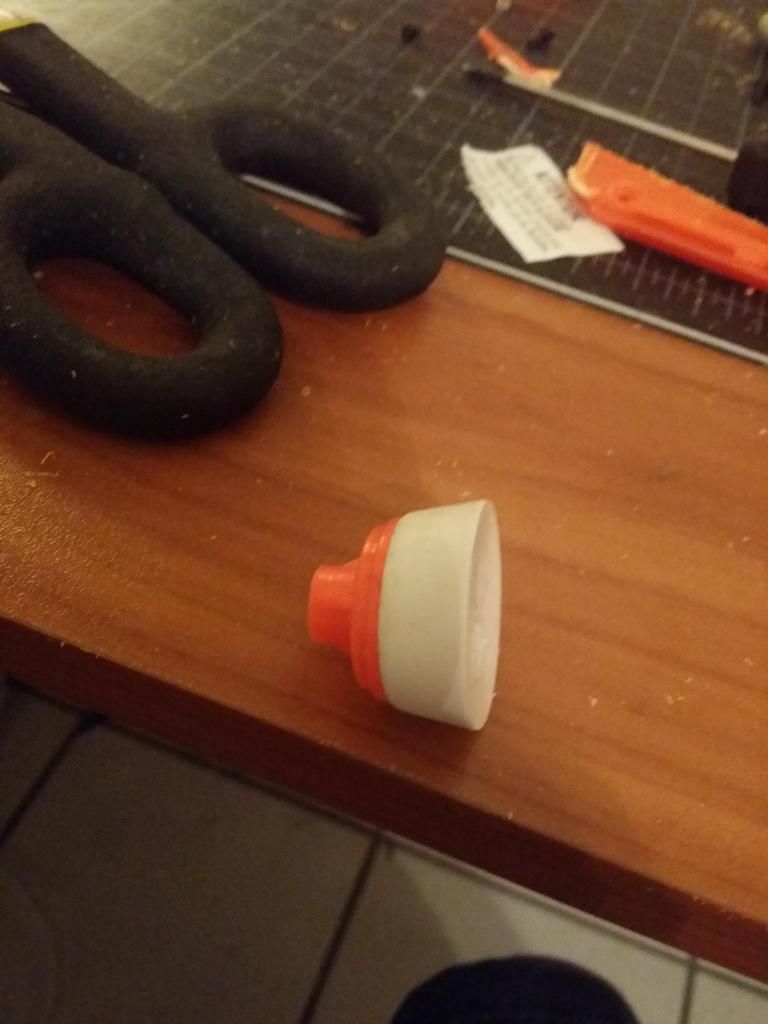
Slide your everbilt spring and then screw the new plunger head on using a small screw, I used a 1" wood screw.
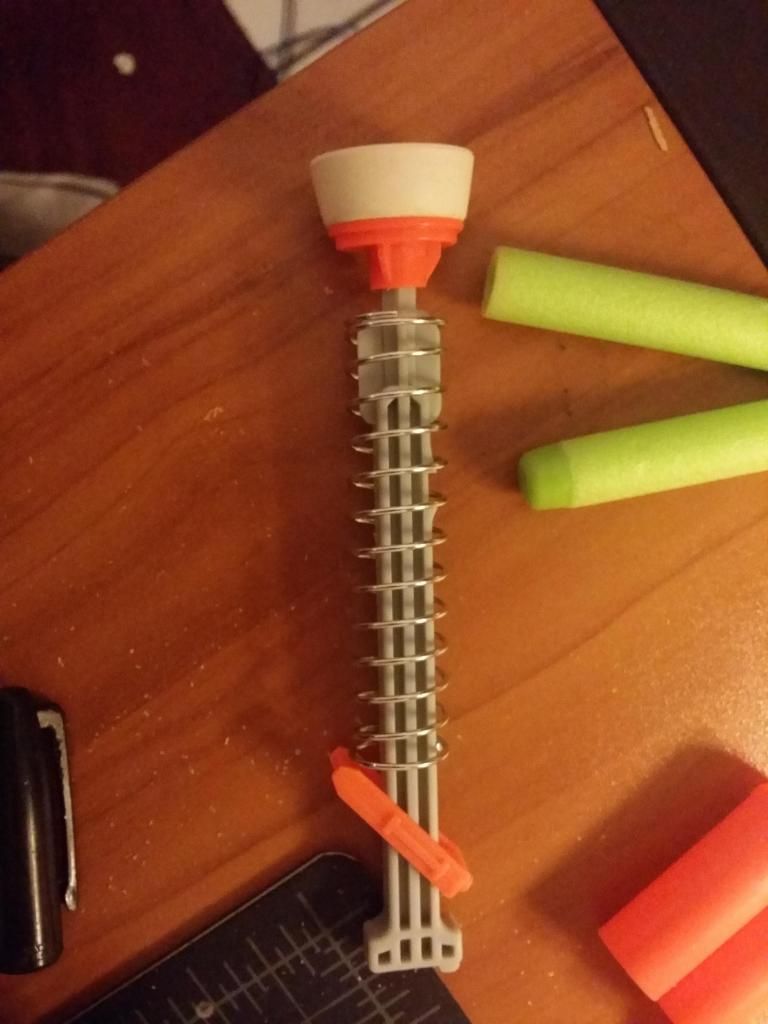
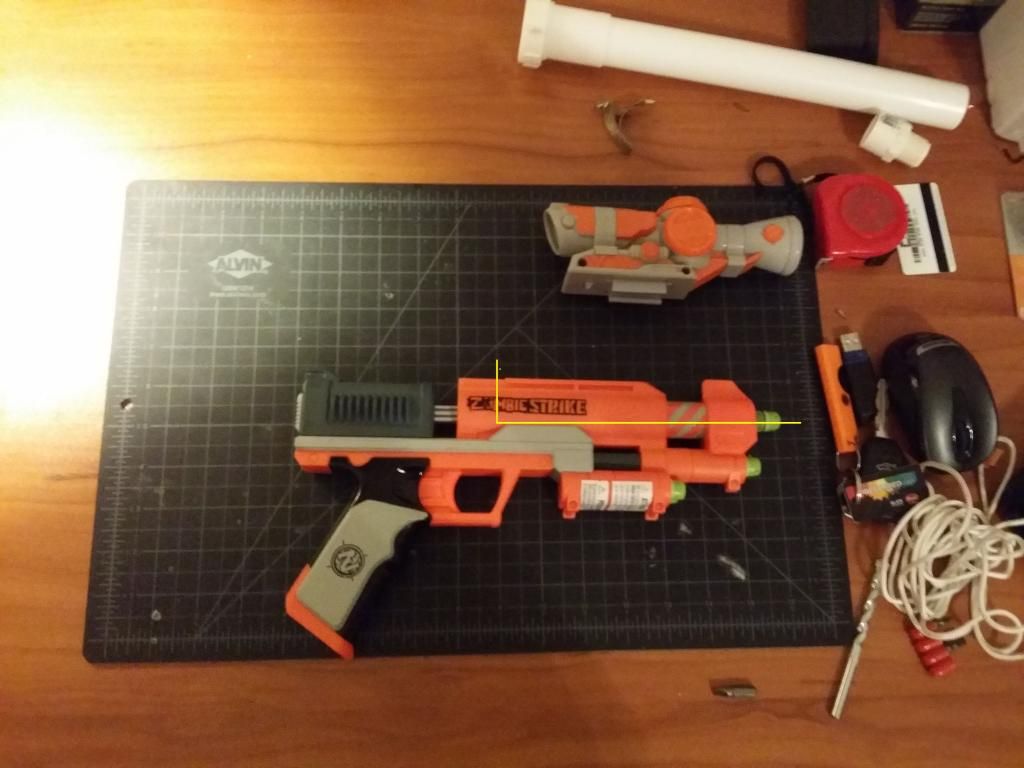
Cut the shell along these lines, right before the top rail thickens for nstrike attachments, and along the gray horizontal.
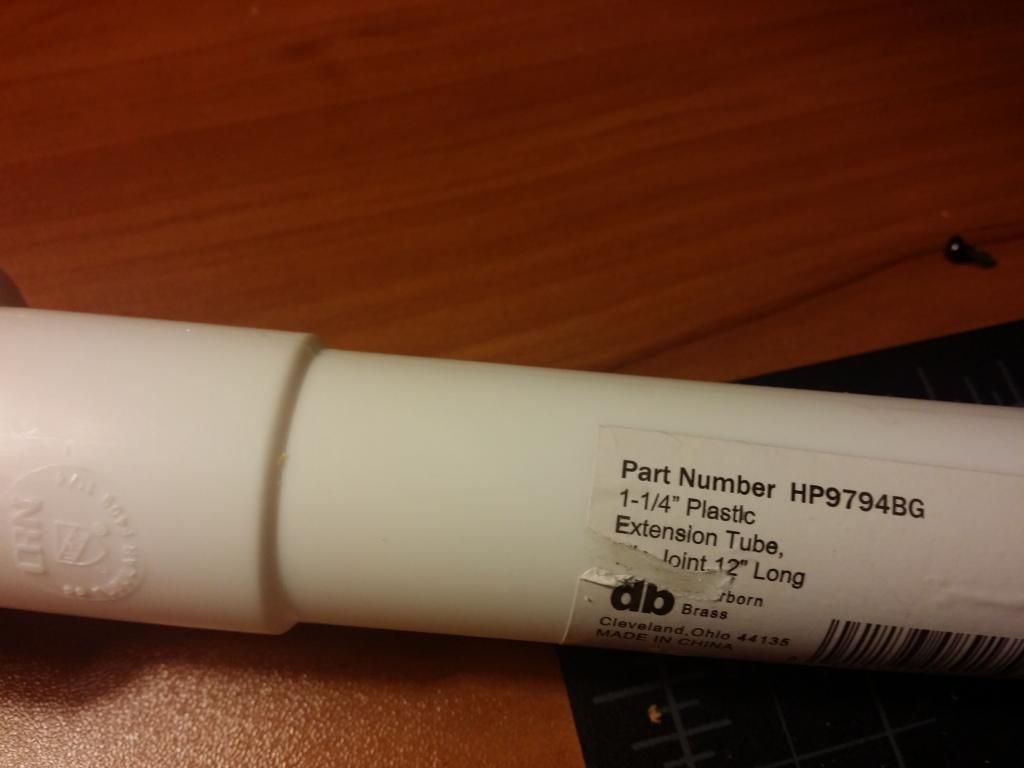
Cut the drain tube to 4"
Apply silicone grease/ your lube of choice and slide it over the plunger rod. Then glue the plunger tube directly to one side of the shell.
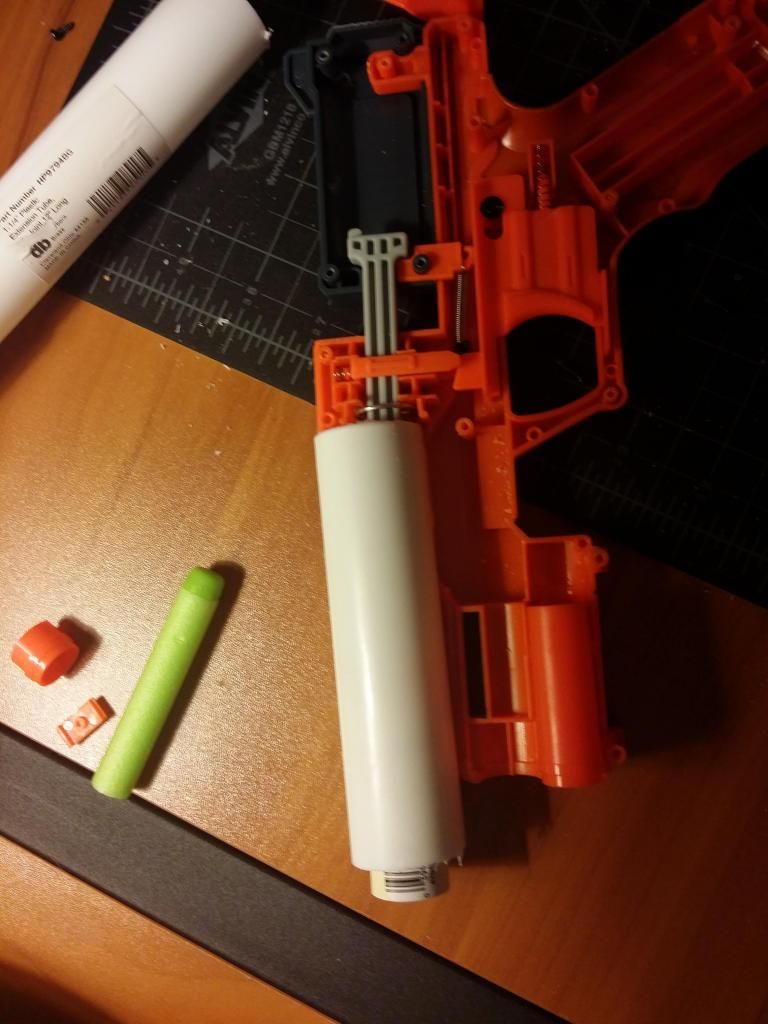
You can close it all up now. I like the slide over the standard pull handle of a NF, so I kept it on, otherwise you could leave the slide off and attach a key ring if you fancy.
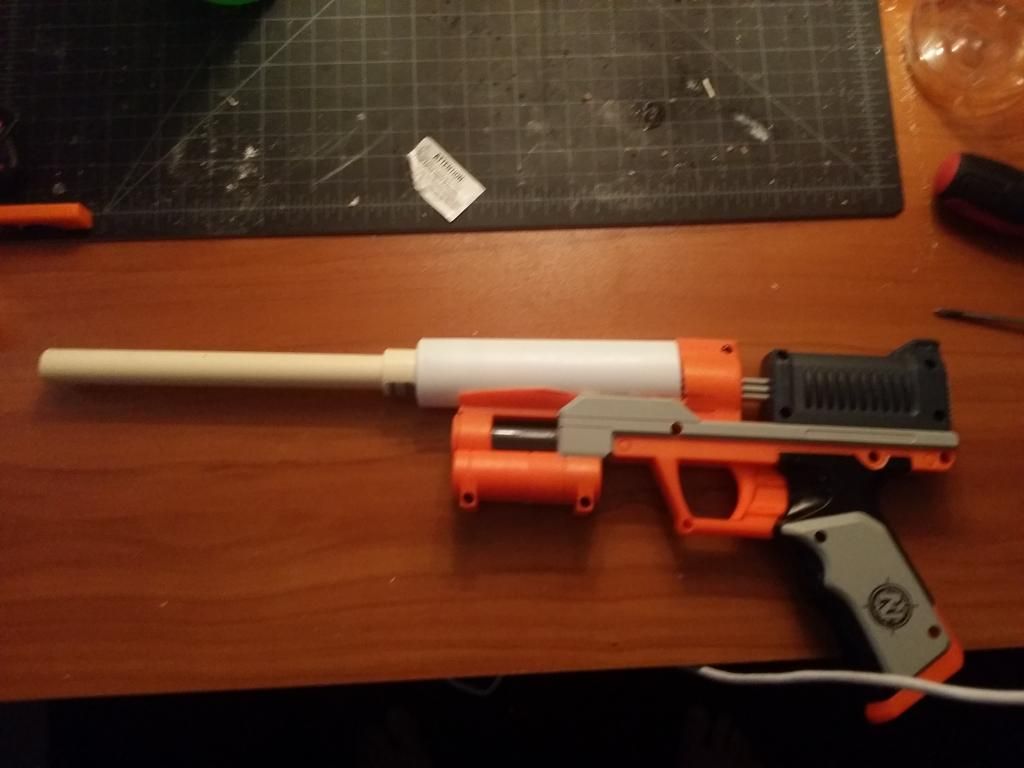
With a 5" cpvc barrel I was hitting between 85 and 93 feet out of 4 shots.
I'd recommend screwing the plunger tube to the shell as well, but I didn't have the materials. My old NF rifles from 2011 have held up being solvent welded to one side of the shell, but mechanical attachment is definitely more convenient and allows for easier maintenance
I never saw/used the original dart tag stormfire. Its a night finder with much improved ergonomics and no gimmicky light. It's also a good deal bigger.
Materials needed:
Epoxy/Super glue/ solvent weld
1x Everbilt spring (or a spring of your choice IE cutdown [k26])
1x 1" drain plug
1x 1" small screw
1x 3/4" to 1/2" PVC reducer/bushing
1x 1 1/4" drain extension.
A fine tooth saw, or your favorite cutting tool.
a screw driver.
Optional:
some grub screws
thread locker
and a drill bit that corresponds with whatever grub screws you bought.
It comes with a gimmicky acog looking hollow tube of a scope. I threw that away. Stock I was hitting about 40 feet barely.

First start by unscrewing the orange muzzle cap

Then unscrew the slide.

Now unscrew the gun, the catch spring might fly out, so be careful.

Remove the internals, and sand the muzzle end of the shell until there are no more ridges

Now unscrew, and take apart the plunger head.

take your drain plug and cut the keyring tab off with a razor or sharp knife. I punched a hole in the center with my screw driver.

slip the bottom section of the stock plunger head into the drain plug.

Slide your everbilt spring and then screw the new plunger head on using a small screw, I used a 1" wood screw.

Cut the shell along these lines, right before the top rail thickens for nstrike attachments, and along the gray horizontal.

Cut the drain tube to 4"

Apply silicone grease/ your lube of choice and slide it over the plunger rod. Then glue the plunger tube directly to one side of the shell.

You can close it all up now. I like the slide over the standard pull handle of a NF, so I kept it on, otherwise you could leave the slide off and attach a key ring if you fancy.

With a 5" cpvc barrel I was hitting between 85 and 93 feet out of 4 shots.
I'd recommend screwing the plunger tube to the shell as well, but I didn't have the materials. My old NF rifles from 2011 have held up being solvent welded to one side of the shell, but mechanical attachment is definitely more convenient and allows for easier maintenance
Tek 4
29 July 2011 - 02:24 AM
I went on a quest to buy a bunch of blasters that most people turn their heads away. My journey started with the tek 4. I also wanted to cram in as many mods as I could before I leave for 4 weeks. I also apologize to anyone I may have insulted, I mean no harm.
Materials needed:
Glue of choice
cpvc coupler
pliers
stock it has a manual rotating turret, and shoots a pitiful 15 feet. I was expecting to see at1k internals
Open your tek 4 up, Wow thats much different then a at1k.

Heres the plunger, Its rather interesting.

the seal on my turret sucked, I'll try turreting my other one, so snip it off.

The end of the plunger tube should now look like this:

Glue a coupler on

Finished internals

Closed up:
It vaguely reminds me of the phoenix in perfect dark, but only ever so slightly
ranges(with the darts included are averaging in the mid 40's with an occasional dart that lands in the low 50's. This is in feet, not temperature.
This blaster is not something that should be called crap, its not amazing but its getting 50 foot ranges with stefans, theres 2 in a pack and its only 10 dollars (can be found on clearance for way cheaper). I'll try later with the other one.
Materials needed:
Glue of choice
cpvc coupler
pliers
stock it has a manual rotating turret, and shoots a pitiful 15 feet. I was expecting to see at1k internals
Open your tek 4 up, Wow thats much different then a at1k.

Heres the plunger, Its rather interesting.

the seal on my turret sucked, I'll try turreting my other one, so snip it off.

The end of the plunger tube should now look like this:

Glue a coupler on

Finished internals

Closed up:

It vaguely reminds me of the phoenix in perfect dark, but only ever so slightly
ranges(with the darts included are averaging in the mid 40's with an occasional dart that lands in the low 50's. This is in feet, not temperature.
This blaster is not something that should be called crap, its not amazing but its getting 50 foot ranges with stefans, theres 2 in a pack and its only 10 dollars (can be found on clearance for way cheaper). I'll try later with the other one.
NF with wooden grip.
19 June 2011 - 11:22 PM
So after the wooden rod on the cockfinder wore down, I wanted something slightly more practical. Its going to be very much the same as the other writeup, so feel free to go back and look at that one. I'm sort of saving my nicer wood for instruments, and I found a 2x4 with some holes drilled in it. If I were to do this again with the intent on this looking good, I'd probably choose something else. Also its sort of a WIP
Materials needed:
A 2x4
a really hacked up NF shell
band saw
epoxy
wood strength hotglue
2 inch ID PETG
a cheapie balloon pump (once again see Makeitgo's balloon finder)
1' of 3/8 square nylon rod.
a scrap piece of 1/2" cpvc.
So heres what you need.

the 2x4 will be your stock, Don't do what I did, just cut it so you have a stock and grip, then cut a U channel out to fit your cut down NF shell

cut your shell like so:

First epoxy it on, then use copious amounts of wood specialized hot glue (which is probably just normal hotglue)

Now move onto your plunger rod, take the balloon pump head and drill a hole in the center, then screw it into the nylon rod.

Cut a few notches, I went from 3 inches to 4 (from the plunger head) for a total of 3 notches with odd spacing. Now take a steel washer that has ID of 1/2" or greater and cut it like so

Slide it on your plunger rod

For the plunger tube, cut a 12" piece of 2" PETG, and cut a slot in the back thats about 2" deep. Then screw that to the sides of the NF nerf symbols. At this point you can attach a foregrip to help support the plunger tube.

Assemble everything

I need to do some sanding and some wood putty work in a few places, but its functionally working. Its ugly as balls right now, but I'll work on it tomorrow.
Shoots 120's, the cock finder had a bad seal, I fixed that by using the proper lube(not dry teflon).
I'll update later with the finished product, its kinda late.
Materials needed:
A 2x4
a really hacked up NF shell
band saw
epoxy
wood strength hotglue
2 inch ID PETG
a cheapie balloon pump (once again see Makeitgo's balloon finder)
1' of 3/8 square nylon rod.
a scrap piece of 1/2" cpvc.
So heres what you need.

the 2x4 will be your stock, Don't do what I did, just cut it so you have a stock and grip, then cut a U channel out to fit your cut down NF shell

cut your shell like so:

First epoxy it on, then use copious amounts of wood specialized hot glue (which is probably just normal hotglue)

Now move onto your plunger rod, take the balloon pump head and drill a hole in the center, then screw it into the nylon rod.

Cut a few notches, I went from 3 inches to 4 (from the plunger head) for a total of 3 notches with odd spacing. Now take a steel washer that has ID of 1/2" or greater and cut it like so

Slide it on your plunger rod

For the plunger tube, cut a 12" piece of 2" PETG, and cut a slot in the back thats about 2" deep. Then screw that to the sides of the NF nerf symbols. At this point you can attach a foregrip to help support the plunger tube.

Assemble everything

I need to do some sanding and some wood putty work in a few places, but its functionally working. Its ugly as balls right now, but I'll work on it tomorrow.
Shoots 120's, the cock finder had a bad seal, I fixed that by using the proper lube(not dry teflon).
I'll update later with the finished product, its kinda late.
Nite Finder 3foot PT replacement
17 June 2011 - 04:29 PM
I make instruments for a living now, and don't have time for nerf. Most of my guns are gone, but I still have a bunch of shells. In no way should you bring one of these to a war, this is mostly just for fun.
Materials needed:
cheapie dual action balloon pump (see makeitgo's balloon finder)
2" ID PETG (I used a broken fish tank python)
3/8" square rod (I used white oak)
some small set screws
2" of 1/2" PVC
2.5 [k26] springs
ace #2 spring
hot glue and gun
Grab a NF shell, I had a clear one. It needs to have a catch, a trigger and well the shell..

Cut to the spring rest and right above the second ridge on the trigger (yes you are cutting down the trigger)

Mark on your PETG where the shell touches the tube, and cut about 2" into the PETG

test fit it, it should slide over the nerf signs, giving you plenty of room to attach it with set screws

Moving over to the soon to be plunger head. I had used a balloon pump head as a plunger head on my longshot Xbow. simply pull/ or snip it off

take the O ring out and you will notice this gap, that will not be good for our seal, so fill it up with hot glue and foam.

snip the tabs on the pump head

Now rough up the PVC and the plunger head, and apply some CA glue, clamp it and let it set.

Dump about a 1/2 a stick of hot glue into the PVC, and jam the 3/8" square rod, trying to keep it centered.

now drill, and screw in 4 set screws, be careful if you are using wood, you dont want it to split.

Now make your catch slots, I set mine about 6-7" back from the PVC. they should be no more than 1/8" deep.

Slide your springs on, and re assemble.

almost full compression.

Shoots way too far, can't be shouldered, but its worth it. I don't have a barrel long enough for it at the moment, so I used a really long RSCB to compensate for the massive amount of air this puts out and a 14" barrel. Shoots further than my BBUMB.
Is this necessary? No shit its not. but definitely scores big on the "Whatthefuckisthatandwhyisitsobig" scale.
Materials needed:
cheapie dual action balloon pump (see makeitgo's balloon finder)
2" ID PETG (I used a broken fish tank python)
3/8" square rod (I used white oak)
some small set screws
2" of 1/2" PVC
2.5 [k26] springs
ace #2 spring
hot glue and gun
Grab a NF shell, I had a clear one. It needs to have a catch, a trigger and well the shell..

Cut to the spring rest and right above the second ridge on the trigger (yes you are cutting down the trigger)

Mark on your PETG where the shell touches the tube, and cut about 2" into the PETG

test fit it, it should slide over the nerf signs, giving you plenty of room to attach it with set screws

Moving over to the soon to be plunger head. I had used a balloon pump head as a plunger head on my longshot Xbow. simply pull/ or snip it off

take the O ring out and you will notice this gap, that will not be good for our seal, so fill it up with hot glue and foam.

snip the tabs on the pump head

Now rough up the PVC and the plunger head, and apply some CA glue, clamp it and let it set.

Dump about a 1/2 a stick of hot glue into the PVC, and jam the 3/8" square rod, trying to keep it centered.

now drill, and screw in 4 set screws, be careful if you are using wood, you dont want it to split.

Now make your catch slots, I set mine about 6-7" back from the PVC. they should be no more than 1/8" deep.

Slide your springs on, and re assemble.

almost full compression.

Shoots way too far, can't be shouldered, but its worth it. I don't have a barrel long enough for it at the moment, so I used a really long RSCB to compensate for the massive amount of air this puts out and a 14" barrel. Shoots further than my BBUMB.
Is this necessary? No shit its not. but definitely scores big on the "Whatthefuckisthatandwhyisitsobig" scale.
- NerfHaven
- → Viewing Profile: Topics: The lord of fish
- Terms of Service and Privacy Policy
- Code of Conduct ·


 Find content


