
 Find content
Wow. That is a very impressive blaster; I especially like the homemade pump design. Would it be possible to put one of the check valves in the head of the pump, or do away with it in favor of the "sliding o-ring" method used in stock blasters? Also, what size o-ring did you use in the pump? I couldn't seem to find it in the writeup, but I probably just missed it.
Again, mad props. This will no doubt be a finalist in the contest.
TheRedRanger
Member Since 19 Sep 2009Offline Last Active May 29 2014 11:11 AM
Posts I've Made
In Topic: Community Snap Thread
25 August 2010 - 08:57 PM
I have also been thinking about a solid-plunger-rod pumpsnap. My idea involves using a 1"to 1/2" bushing in place of the cpvc tee. You could shave the edge down so it fits in 11/4" pvc, and add a short length of 1/2" pvc ground out to slide freely over the plunger rod. I was going to try this when I make my first batch of snaps, but with school starting that probably won't be for a while 
In Topic: Dartsmithing Tips Archive
19 August 2010 - 04:26 PM
Thanks for the advice taerkitty.
-The mold is 1/4" deep, so adding a weight after filling the mold with glue leaves about 1/8" covering of hot glue on all sides-- plenty of padding. My concern with washers is that they are exposed around the edges, but they seem to work well for you
-If you put enough lube (I use ACE brand silicon grease) in the mold, the darts come out easily with a little bit of twisting. I have not made that many darts yet, but having to re-lube frequently might be a problem. The sphere trick is good to know, though.
I have been experimenting more with this since I took the pictures last night. I am hopefully going to make a better mold later this week, this time with more than one ?slot? so I can make multiple darts at one time. I forgot to mention this, but the added depth from having to chip through the plaster to get to the mold made it hard to gauge the amount of hot glue, and so most of the darts have come out slightly crooked.
You may want to drop the weight after filling your mold with glue, else you'll be hitting your target with almost-unpadded metal.
Instead of a BB, if you use a #8 washer, you will likely be able to keep it just on top of the mold.
-The mold is 1/4" deep, so adding a weight after filling the mold with glue leaves about 1/8" covering of hot glue on all sides-- plenty of padding. My concern with washers is that they are exposed around the edges, but they seem to work well for you
If you have a flexible mold, you'll have a much easier time getting the darts out. For example, the people who make Splats also make a version that shoots hollow rubber spheres. Said spheres can be cut in half, filled with hot glue, etc.
-If you put enough lube (I use ACE brand silicon grease) in the mold, the darts come out easily with a little bit of twisting. I have not made that many darts yet, but having to re-lube frequently might be a problem. The sphere trick is good to know, though.
I have been experimenting more with this since I took the pictures last night. I am hopefully going to make a better mold later this week, this time with more than one ?slot? so I can make multiple darts at one time. I forgot to mention this, but the added depth from having to chip through the plaster to get to the mold made it hard to gauge the amount of hot glue, and so most of the darts have come out slightly crooked.
In Topic: Dartsmithing Tips Archive
19 August 2010 - 01:40 PM
My hot glue gun is a crappy low-temp one that you have to unplug every 15 minutesor so so that it doesn't overheat. It is almost impossible to craft reliable stefans with it, and so I went looking for alternative ways to make consistent, reliable darts. This is what I came up with:
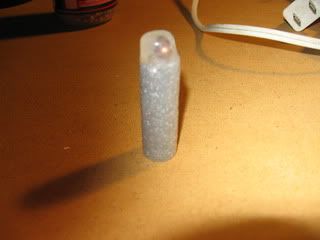
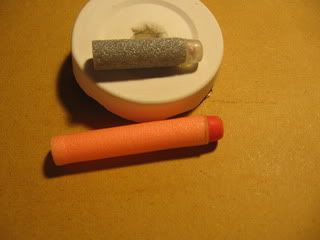
I started by cutting the head off of a streamline dart and taping it (bad idea) to the bottom of a plastic container. Then I took some plaster and filled the container. Once it was dry I removed the container and had a perfect cast of the streamline head. (This did not work out exactly as planned, because the tape came unstuck and the plaster filled in around the streamline tip, so I had to chip it out.) After that I lubed up the newly-created mold, filled it with hot glue, stuck a weight in it, and added my foam.
Pros: fly straighter than my regular stefans, require minimal skill to reproduce uniformly
Cons: use more hot glue than traditional stefan domes (more expensive)
This is only a proof-of-concept; more testing is required to determine how effective this method is compared to other types of darts.

