Jump to content


Buffdaddy

Member Since 30 Jul 2009
Offline Last Active Nov 16 2023 02:33 PM

Topics I've Started

Ohio Hell Before Halloween

20 September 2016 - 08:13 PM

Date: October 22nd, 2016
Time: 11:00am - 5:00pm
Location: Columbus, OH
Venue: Goodale Park
Facebook page: https://m.facebook.c...157733878011101

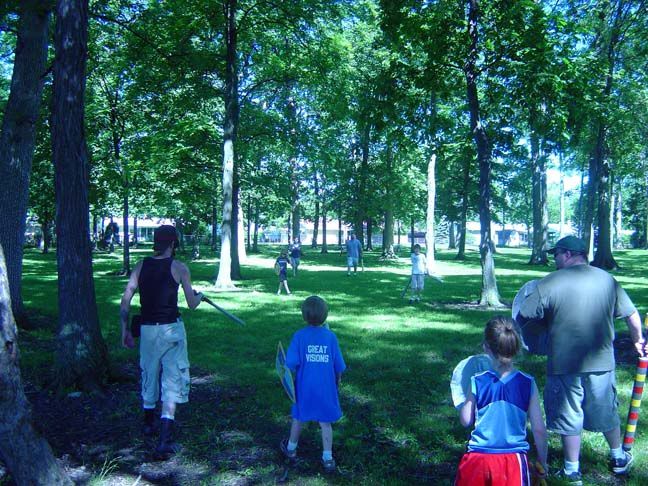
Join me for a fun day of Nerfing, with scary good games, raffles, and all manner of creatures from your very worst nightmares.

This event will be open to all classes of modified blaster, from super stock to homemades. There will be plenty of opportunities for users of stock blasters who are new to the hobby, as well.


Ages: This is aimed at players 13 and up. Anyone younger than 13 must be accompanied by a PLAYING ADULT. This is a war, not a babysitting service.

Potential game types:
3:15 Deathmatch/TDM
Carpe
CTF
Zombie Holdout
Payload
Wingman
VIP
Defend the Core

Darts: Both stock and homemade darts are acceptable. NO EXPOSED METAL. There will be a community stock dart bin, but bring your own steams or preferred dart type.

Ammo larger than a Mega dart (3/4" diameter) or a HIR may have special rules in certain gametypes. E.g. Titan Missile hits take all lives, arrows and missiles are worth extra points in Defend the Core, etc.

Restrictions:
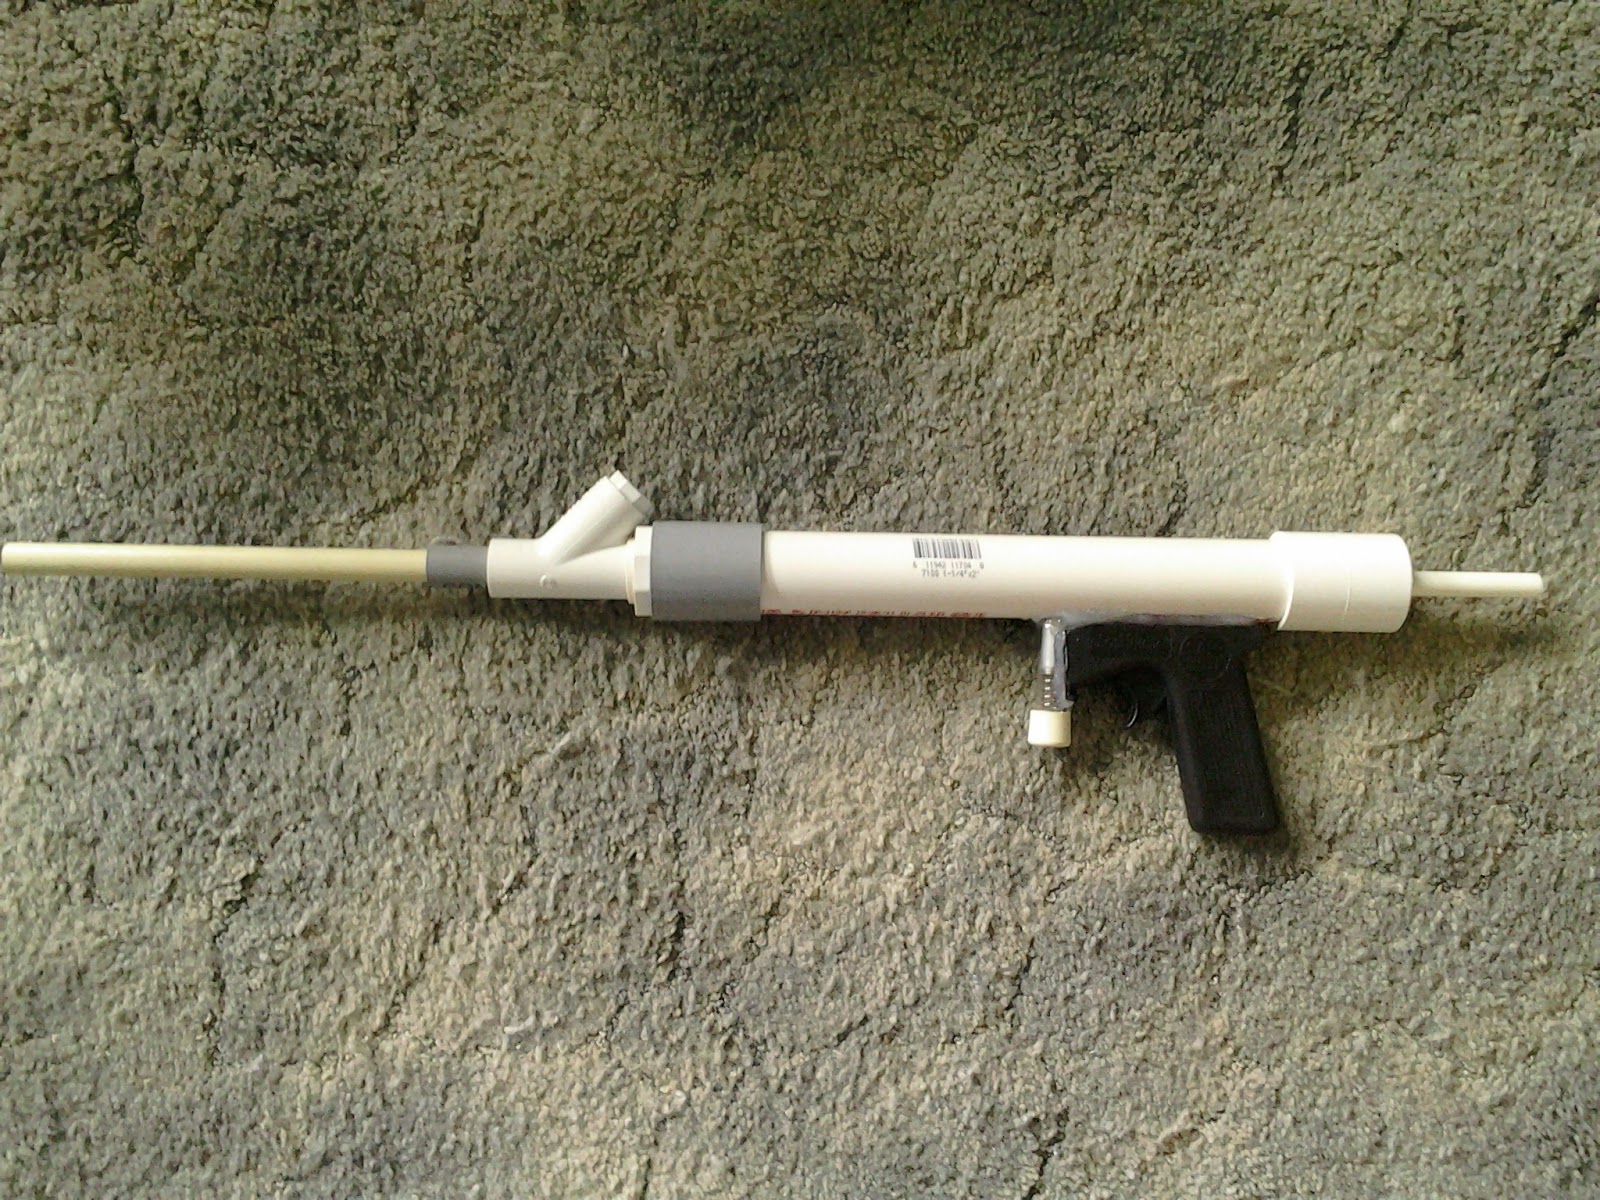
-Most blasters should be fine. Any air blaster larger than a Big Blast must fire at least three darts at a time, or large ammo (ball, missile, etc).
-You must be willing to be shot point blank with any blaster you use.
-Eye protection is MANDATORY. Bring some with you.
-Respect other people in the park. This is a public area.
-Nothing that looks realistic and is liable to get you shot.

DON'T BE A DICK. HAVE FUN!


Confirmed attendance:

Buffdaddy + 1

Nidoking + others from C.A.N.E.

CA99 + 1


Interested:
RzRider + 1

Vexal


Easy Backpressure Blaster & Foam Launcher Of Wonder

01 July 2016 - 07:49 PM

On my recent trip to go warring in Canada, I got an idea in my head, and discussed it briefly at dinner with a few of the other Nerfers. Piston valve (or "backpressure") tanks rely on a small piston or poppet moving back and forth to let air into the tank, and then to let it out. The piston has to be able to slide freely. Kinda like those darts we put down our barrels at every war...

Let's get started, then!
 
Parts List
 
(1) 1 1/4" PVC tee

(2) 1 1/4" x 1/2" PVC slip bushings

(1) 1 1/4" x 1/2" PVC bushing, slip to threaded(f)

(1) 1/2" x 1/4" metal NPT threaded bushing (plus OPRV or gauge) (optional)

(1) 1/2" OD x .385" ID x 1" nylon spacer

(1) BoomCo dart (preferably new)

(1) Sch.80 1/2" PVC (only a few inches)

(1) 1/2" PVC adapter, male threaded to female slip

(1) 3/4" slip x 1/2" threaded PVC bushing

(1) 3/4" PVC check valve

(1) Hand air pump

(1) Shower diverter valve

(1) Thread tape

(1) 1 1/4" x 1/4" rubber washer

(1) 7/8" x 3/8" rubber washer

Solvent Weld and Superglue
 
Estimated cost: $25 - $35, depending on store sources used and setup. The bottom leg of the tee can just be a 1 1/4" plug, if you don't want to worry about having a gauge and you're using a pump setup that renders having an OPRV unnecessary. The solvent weld and thread tape can be used for other projects, but they're included in the cost here.


Build Guide

The Piston
 
Attached File  20160701_175740.jpg   174.88KB   250 downloads
 
After debating what darts to use and how to properly mount a rubber seal on them, I decided to go a different route. I superglued a brand new Boomco dart inside a 1/2" x .385" x 1" nylon spacer. In terms of mass and dimensions, this is actually almost functionally identical to the piston within an XBZ. And with most of the weight (what little there is) in the back, this will always travel straight and seal against the outlet.
 
Pump Assembly
 
Attached File  20160701_175428.jpg   131.52KB   263 downloads
Attached File  20160701_175504.jpg   135.27KB   249 downloads
 
There are several options available. Five Below has hand pumps at $5, with telescoping handles and a 1.05" OD, the exact same as 3/4" PVC. That combined with a PVC check valve can eliminate the need for an OPRV, with dead space before the valve setting the maximum achievable pressure. Some Bell Airstream dual action pumps can also go into PVC fittings, but being dual action, you're forced to add on an OPRV for safety since every stroke adds more air.

Trigger Valve
 
Attached File  20160701_175533.jpg   163.39KB   262 downloads

This is a shower diverter valve, found in the plumbing section of the hardware store. It can handle typical home water line pressures, and in our case is being used to vent the pilot volume. It has 1/2" IPS threaded fittings. The female fitting (the common line) will lead to our tank, while the pump and check valve will go on one of the legs. Depends if you want your blaster set up like a pistol or an XBZ.
 
Tank Assembly

Attached File  20160701_175637.jpg   80.69KB   250 downloads
 
In front of the trigger valve, add your threaded fitting, then carefully push the 7/8" diameter rubber washer. This acts as the rear seat for the piston, just to keep it from going back too far. Next, insert a stub of Sch.80 1/2" PVC. Add your 1 1/4" x 1/2" PVC bushing to that.

Attached File  20160701_175707.jpg   82.71KB   261 downloads

You can slide the piston into the Sch40 at this point. THE NYLON GOES FIRST.

For my firing tank, I used a 1 1/4" PVC tee, with a bushing assembly at the bottom to reduce the outlet to 1/4" threaded, so that a gauge or OPRV can be added.
 
Attached File  20160701_175817.jpg   123.77KB   253 downloads

The front PVC bushing had a 1 1/4" OD, 1/4" ID rubber washer glued in place. This is the surface the rubber on the dart head seals against.
 
Attached File  20160701_175905.jpg   149.3KB   254 downloads

And after that, you're done! Be sure to use solvent weld on the PVC, and thread tape on the trigger valve and various threaded fittings.


Finished Blaster
 
Attached File  20160701_183439.jpg   132.81KB   235 downloads


So far, it's been very easy to hit 90' consistently with a 4 dart hopper, and an operating pressure of 30psi.


To operate, make sure the diverter valve is in the correct position (the end of the switch sticking out indicates which leg is connected to the common). Pump up the blaster, then depress the valve switch to fire.


Improvements: spring-loading the diverter valve, and adding a real trigger.


Foam in the Fort Redux

26 April 2016 - 08:00 PM

Due to a breakdown in communication with Ft Wayne, this event is postponed until further notice.


When:

Saturday, May 28, 2016
10:00 am until we are beat (probably around 5:00-6:00 pm)

Please try to arrive a bit early (~9:45) so that the first round can start promptly at 10:00 am.


Where:

Glenwood Park Elementary School in Fort Wayne, IN

FITF10.jpg

This is simply an awesome location for a war! As you can see in the above image, there are lots of trees to use for cover, but spread out enough to allow for lots of room to maneuver. There are also two different playground areas that might also be usable for CTF or other objective games.

What to bring:

- A Primary, and a pistol (more than one is a good idea - in case you have breakage!)

  •           While I plan on this being an NIC-type event, don't be afraid to bring stock and superstock blasters. I plan on doing many types of rounds.

- Darts. Stock darts, large ammo, stefans of any type. NO EXPOSED METAL.

- Eye protection - MANDATORY. If you do not have it, you will not play.

- Lunch / Money - There are lots of fast food places within a 10 minute drive. You are of course welcome to bring a bag lunch and eat on the field during the lunch break.

- Water

- Proper clothing - Dress for the weather. Also, don't be a moron and show up in camo unless it is neon pink or something.

- Any and all missle/rocket/ball shooting weapons you might have access to. You might find they come in handy during some of the game-types, and they are always useful for breaking shields.

- Melee weapons and shields will be permitted - see below...


What not to bring:

- Dangerous blasters/darts/etc - i.e. no metal spikes, wooden "gunblades", etc. Blasters will be banned if they are deemed unsafe for any reason, including firing way too hard. No blanket bans will be imposed, but it is unlikely that your singled Titan will be used unless it is fairly underpowered. (No, "I will only pump it X times" will not be acceptable!)

- Blasters or other gear that could be mistaken for actual weapons (i.e. black-painted blasters, silver "knives", etc.). These should definitely be left at home.

- Participants under 13 years old are welcome, but MUST be accompanied by a parent or a responsible adult (18+) who will assume full responsibility for their spawn's actions, attitude and safety. NO EXCEPTIONS.


Miscellaneous Information:

- We don't do "barrel tapping". Please don't shoot someone from five feet away with your high-powered primary if you can help it (we all know things happen when you surprise each other around cover). If you have a melee weapon, use that. If you have a weaker side-arm, use that.

- Beyond that, we do allow you a "mercy shot" if you are very close - fire your primary into the ground near the feet of your target and tell them they are "out". (Judgement and the honor system are needed here.)

- If you act like a 3-year-old, we'll send you home like a 3-year-old.

- Please clean up after yourselves - a trash bag will be provided, and everyone is expected to participate in dart-sweeps.

- Please note that there are no restrooms at the war site. Go before you get there, and go during lunch. You have been warned!

- Please keep the loud outbursts and swearing to a minimum - we will be playing in a schoolyard with nearby residential areas and don't need any residents or passers-by to have reason to complain about us.

- We will break for lunch some time around 12:00 or a bit later, probably for 30-45 minutes.

- I have not set up a specific game schedule. Gametypes will be determined mainly by popular opinion - but we will likely be playing mostly objective-type games (CTF, Sieze the Balls, etc). Meatgrinder will most likely be used as the first round and the post-lunch round - it is just a great way to get warmed up! I have the gear for the following objective games:

Sieze the Balls
Capture the Flag
Team Powerball
Defend the Core
Infection
Melee-only rounds

(Details for these gametypes can be found later in this thread.)


Melee & Shield Rules

Melee weapons will be allowed, though they should conform to a few basic rules.

- No metal should be used in the construction of the Melee weapon.

- All striking surfaces should be covered with a sufficiently thick layer of foam.

- Unmodified, store-bought plastic toy lightsabers will be permitted without regard to the above two rules. Lightsabers are cool. Bonus points if you use them with batteries for that lovely hum & glow. smile.gif (Polycarb-bladed "Force FX" sabers are not included in this - those blades are HARD!)

- Anything I deem ridiculous or dangerous will not be allowed.

- Melee weapons can be used for blocking darts just like shields (see below) - but only if they are in your hand. If your Melee weapon is holstered, a hit on it counts just like a gun hit.


You'll be limited on the maximum size of your shield depending on what blaster you're wielding. This will be the standard ruling for most gametypes. Here is the breakdown. (Your most powerful blaster is what counts here.)

Melee Only = 3 sq/ft
[The largest blocking face of the Melee weapon(s) counts as part of the maximum shield area.]

One Single shot pistol, ranges < 50' - 2 sq/ft

Anything else, ranges <50' - 1 sq/ft

Blasters shooting over 50' will not be allowed to use a shield.

Shields may be used to deflect darts - hits on shields do not count as long as the shield is in your hand, strapped to a blaster that is in your hand, or strapped to your forearm. A shield strapped/slung anywhere else will not block hits - it will count the same as a gun hit.

Balls, missiles, rockets, etc. (basically any ammo larger than a Mega dart) may not be blocked by shields or Melee weapons - a hit on a shield or Melee weapon with ammo of this type will count as a normal hit.

Shields can be made from whatever, cardboard should be reinforced with duct tape. Shields that do not meet the specifications for Melee weapons may not be used as such. (i.e. Don't go whacking people with a large wooden shield!) Shields that are deemd unsafe for any reason will be disallowed.


PMS - Poor Modder's SNAP

02 April 2016 - 08:03 PM

Since "Poor Man's Rainbow" was already taken, I had to go with something else, and get a funny name to boot.


Parts List


1 1/4" S40 PVC

1 1/4" S40 PVC Cap

1" x 1/2" S40 PVC Bushing

1/2" CTS CPVC

1/2" CTS CPVC Cap

1/2" CTS CPVC Tee

3/8" PEX Tubing (1/2" OD)

1/2" OD Aluminum Tubing

1" x 1/2" CTS CPVC Bushing

5/8" x 1/2" x 1/2" Nylon Spacer

3/8" x .171" x 1" Nylon Spacer

1" x 1/4" Nylon Washers

1 1/4" x 1/4" Nylon Washers

#10 Pan Head Screws

1 1/4" Rubber Slip Joint Washer

9 1/2" x 11/16" x 0.72" Compression Spring (Hillman #62)

1/2" Diameter, Short Spring


Estimated cost: $30 (When excess material is taken into account, you only need to spend $20 to build an additional two blasters)

Estimated assembly time: Under an hour


Part I: Plunger Construction


Cut 14" of PEX tubing, and use a deburring tool of some sort to clear the inside of any obstructing plastic pieces. Then grab your 3/8" OD nylon spacer, and hammer it inside the PEX.


0325161150.jpg


If you can't get the spacer to go in, ream more plastic from the inside of your PEX. Once you get it started, hammer away until the spacer is flush with the end of the tubing.


0325161359.jpg


For the plunger head, take your nylon washers and glue them together. If you wish, you can take a short piece of 1/4" vinyl tubing and place it in the center to assist in lining up your washers and orienting them on the plunger rod, but it isn't necessary.


0325161155.jpg


To be clear, the 1" washers go between the 1 1/4" washers. If for some reason nylon washers just aren't available in your area, you can use fender washers of the same size.


Take a #10 screw (3/4" to 1" long) and put it through the middle of your washer sandwich. If you used the tubing piece, you'll have to screw it in.


0325161159.jpg


Screw the whole thing into the nylon spacer embedded in your PEX tubing. It will take some strength, as you're using a spacer that's one size too small - this is on purpose. We want the threads to dig into the nylon to keep it secure.


0325161400.jpg


After all that has been done, slide on two 5/8" OD nylon washers from the back of the PEX. When they get to the end with the plunger head, they will be difficult to finish moving. You'll probably need to slide some 1/2" PVC (Sch80 is better) over the plunger rod and use that to hammer the spacers the rest of the way down. Once there, the spacer and tubing sandwich will be tight enough that no fastener or adhesive will be needed.


Slide on the CPVC bushing. If you like, you can remove the end of the fitting to shave some weight. You can leave it there if you like though, especially if you have a beefy spring that can fit inside and would benefit from having a place for the end to sit.


0401161317.jpg


The ridge on the CPVC bushing is close to, but not quite the same as the plunger head diameter. This makes it ideal for use as a catch plate in a SNAP-style blaster.


At this point, you can add the spring. Hold off on adding any spacers behind your spring until the rest of the blaster is complete - it's easier to adapt the plunger to the tube than the other way around.


0328161056.jpg


Part II: Plunger Tube Construction


Cut a 13.5" length of 1 1/4" PVC for your plunger tube. Due to a shortage of parts at the time of prototype construction, I did a few things different than I'm now instructing you to do. Remember that as we look at these pictures. Measurements will be 1.5" or so off of what you will be doing.


0327161436.jpg


Drill a 5/8" diameter about 8.5" from the front of the pipe. Depending on tools available, you can use a drill press (a good investment, even if it's the cheapest model at Harbor Freight you can find) or a power drill. The first is far easier in terms of lining everything up, though. Make sure to take steps up to 5/8", and not try to drill it all at once!


0327161420.jpg


You will need a roughly 2" spacer sitting behind your spring and ahead of your cap/spring rest. The placement is important, because it allows room for proper trigger placement later on.


0327161552.jpg


For the back of your blaster, use a 1 1/4" PVC cap, with a 17/32" hole drilled in the middle.


In my blaster, I ended up throwing a thick, 1 5/8" diameter nylon washer between the pipe and a coupler (didn't have any caps on me), and then drilling some 11/64" holes for the #10 screws.


0401161413.jpg


Also, I didn't have any shorter screws available at the time. You should use 1/2" long screws


0401161417.jpg


Finally, after putting your cap/end setup over the plunger rod, you should put a small stub of CPVC in the middle leg of your tee. Throw it onto the end of the rod and drill a hole for a screw.


0401161417a.jpg


Finally, there's another option that can be used in place of both the PVC cap and the plunger rod spacer: cut a 1" CPVC coupling to a length of 2", and put another 1" x 1/2" CPVC bushing on one side. Then hammer it into the back of the plunger tube, and secure with screws. I recommend this option for those interested in making this blaster pump action.


Don't forget to wrap the 1" PVC bushing in a little tape, throw it in the front of the plunger tube, and drill screw holes. Like you would any other homemade of this size plunger tube.


Part III: Handle and Trigger Attachment


This part is lacking in pictures because there's already a writeup for this part. However, there is one change you will need to make: cut the top of the aluminum tubing at an angle. We're putting the ramp on the catch instead of the plunger rod, something that's not possible with more traditional SNAP setups like clothespin triggers. In the end this will save plunger weight.


Note that there's only a 1/2" gap between the face of the CPVC bushing and the plunger head. As such, you'll need to use a spacer to adjust plunger position until you reach full compression directly over the catch. No need to mess up the plunger seal by pulling it past sliced up aluminum tubing.


0401161418.jpg


Finished Product


Here's the end result! As you can see, my prototype is simply a pullback model. Following the above instructions, you should have plenty of room to add pump action priming. You can also throw a few lengths of CPVC on the back to make a proper stock.


0328161301.jpg


With a hopper and 1.5" glue dome stefans (from my Canada trip supplies), all of my shots are hitting 180 to 190 fps out of the barrel. I'll bring this to a war and see how it holds up under abuse! I'll also have to fiddle with barrel length and material to see how fast I can get darts to go using this spring.


Buzz Bee Air Max Tyrant Mod Guide

31 July 2015 - 09:28 PM

The Buzz Bee Air Max Tyrant is a capable blaster in stock form, launching Mega darts a considerable distance. It also brings back the Mega dart clip that Nerf abandoned. If you're only interested in stock testing and a basic overview of internals, you can see my blog post HERE.

Posted Image

This guide is meant to provide a bit more power, change the method of priming, and make a breech for either Megas or Micros. This, of course, means modifying the magazine well to accept standard streamline clips.

PARTS AND TOOLS LIST (As I used in this writeup)

Dremel
Mini phillips screwdriver
Tubing cutter
Sharpie
File (for deburring aluminum after cutting it)
Electrical tape
JB Weld
Hot glue gun & hot glue
Super glue
Epoxy putty

7/8" OD, 3/4" ID aluminum tubing
3/4" OD, 5/8" ID aluminu tubing
1/2" CPVC
3/4" CPVC
1 1/2" PVC sink drain tubing
5/8" OD, 1/2" ID polyester tubing
1/2" OD polyester tubing
1 3/8" OD, 7/8" ID machine bushings (hardware section, parts drawers. It's a common part, actually!)
.093" thick polycarbonate sheet
1/2" wide plastic or wooden square rod.

PUMP GRIP CONVERSION

This section involves somewhat major shell work. REMOVE ALL OF THE INTERNALS BEFORE YOU DO THIS.

You need to cut the blaster cleanly in half, turn the front piece over, then reassemble. The easiest way to do this is to mark a straight line down the side of the shell and use a band saw. However, a Dremel cutting wheel will also suffice.

Take some electrical tape, and wrap it around the blaster in a vertical fashion. See those curved portions on the shell, in line with the barrel and the plunger tube? You need the edge of your tape to sit a the back edge of the largest bulge, where the Air Max sticker sits. Take a marker and trace a straight line along the tape, then make your cuts. I elected to keep the tape on, but it isn't necessary.

Posted Image

You should be left with two clean halves.

Posted Image

At this point, you can then line up the blaster halves, with the priming grip now on the bottom. Put your internals back inside (except for the safety lock box, which now has no place to sit), and use the plunger assembly as your guide for orienting your blaster.

Posted Image

Posted Image

If you're an idiot like me and you've modded the blaster prior to this, take some 1" CPVC and a 3/4" x 1/2" CPVC bushing and insert them into the end of the plunger tube. Wrap a tiny bit of E-tape around the 1" CPVC to get a snug fit in the plunger tube, and position the bushing so that it rests inside the slot for the stock breech. Believe me, it's easier doing the shell changes first - otherwise, you have to be VERY careful not to screw up your alignment.

Posted Image

Use generous amounts of hot glue to reconnect the shell pieces. This is a temporary measure; if it turns out you can't put the shell back together because of an alignment issue, you can remove the glue and try again. After you're satisfied, you can slowly begin replacing the hot glue on the outside with putty.

Posted Image

Congratulations! You've dramatically improved blaster usability by turning the priming handle into a shotgun-style pump grip.

PLUNGER MODIFICATION

There really isn't a lot to do, other than take a piece of 3/4" CPVC (or a 7/8" OD, 5/8" ID spacer) and place on the spring post. A piece 5/8" long should allow near-full compression of the stock spring while still being able to use the stock catch.

Posted Image

Note that even with the modified shell, the plunger area is wide enough to fit 1 1/2" PVC inside. Wider plunger tubes are a possibility.

MICRO DART BREECH

First, we need to modify the existing magazine well to accept straight clips. Take your thin polycarb sheet, and measure two rectangles as shown (90mm x 73mm). These will fit in slots within the shell perfectly. This simply makes loading the magazine easier, having flat surfaces on either side.

Posted Image

Then use 1/2" wide rectangular rod to fill in space and the front and rear of the well. Dowel rods work great, as do plastic rods. When arranged in this fashion, regular magazines should now fit perfectly in the well. Note that since the polycarb sheets have eliminated all sideways movement, you only need to attach the square rod pieces to one half of the shell, not both.

Do not worry about using the stock magazine release mechanism; the new breech will be wide enough for you to slip on the magazine (with some force) and have it stay there until you pull it out (again, with some force).

Posted Image

For the breech, I used 5/8" OD tubing as my barrel material, and 1/2" OD tubing as the dart pusher. If you wish, you can also set up a brass breech in here, as you would for a Longshot. There are some changes to be made, though, especially since the entire front wall of the plunger tube moves when you prime the blaster. I'll show what I did, and you can adapt it however you wish.

Cut off the stock breech completely, AR and all. Leave only 1/2" or so of the stock breech tubing on the front of the plunger wall/piston. Then take your tubing and cut these pieces:

1/2" OD tubing, plastic or aluminum.
Posted Image

1/2" CPVC
Posted Image

Nest the CPVC inside the remainder of the stock breech; there are ridges inside which will hold it tight. Then put your 1/2" tubing inside the CPVC for a REALLY tight fit. This will push your darts out of the clip and into the barrel.

You will also need to take a 5" long piece of your 7/8" OD aluminum tubing, and cut it like this, with a 1/4" wide strip remaining at the top. This won't be used as a dart tooth/dart stop within the breech, but it still needs to be narrow enough to clear the space withing the lips of the magazine. Nest it over 3/4" OD aluminum.

Posted Image

For your barrel, cut a half-circumference slot into the side, as you would for a CPVC breech.

Posted Image

This part is important for barrel alignment and making the entire thing work. The stock "barrel" piece is an oblong shape, but the curves themselves are 1 1/2" in diameter. Use tubing of that size, either from your drain plumbing material or your +bow plunger tube supply, and glue it in place. Use spare dart blanks to fill in the remaining space. From this point, you can devise ways of using bushings or spacers to narrow the passage down to 5/8". In my case, I used 1 3/8" x 7/8" machine bushings and 3/4" CPVC tubing, liberally applied adhesive, and then just put an extra wrap of E-tape around my barrel material before insertion.

Posted Image

Put these pieces together, and get this! Yes, I realize I'm using this picture twice. But we're focusing on a different part of the picture :P

Posted Image

You use the leftover tab from the stock breech and JB Weld it onto the aluminum, similar to how you would attach the plastic nub from the boltsled of a Longshot to the new breech. (Example seen HERE) Let cure for 24 hours, and reassemble.

Using 1 1/2" micro slug darts, with a 3/16" steel ball bearing as weight, I easily hit 90' flat. Nerf Elite darts went just as far, but flew more erratically as expected.

Next post will be for setting up a Mega breech.