Jump to content


alextwin007

Member Since 11 Feb 2009
Offline Last Active Oct 15 2015 02:13 AM

Topics I've Started

Nightraider

12 March 2010 - 04:03 PM

The purpose of this mod was to take a raider and swap its reversed plunger out replacing it with one from a nightfinder. I lost the pictures for the first part so I will try to explain what I did the best I can.

This is a finicky mood and will most likely need tweaking after your done.

Materials:
Raider
Nightfinder
½” PVC
17/32 brass
9/16 brass
19/32 brass
Disk of hard plastic (I’ll get into why latter)

Open up your raider and take out the plunger, catch mechanism, slam fire ability and the parts that hold the plunger in straight, we will not be using them

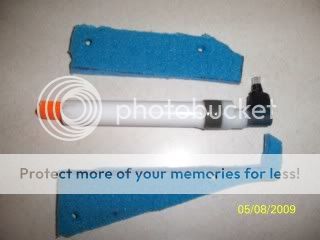
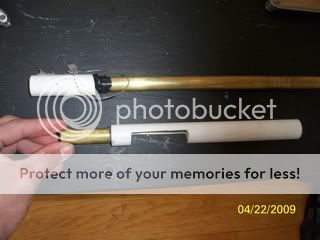
Cut the barrel so that it looks like this (sorry I don’t have exact measurements). Hammer a 3-3/8” piece of 17/32 into the barrel.
Posted Image

Cut the 17/32 brass so that it follows the curves of the front of the original barrel.
Posted Image

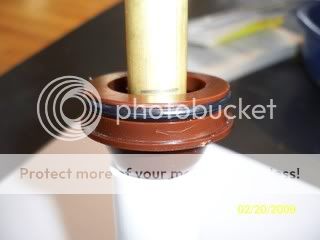
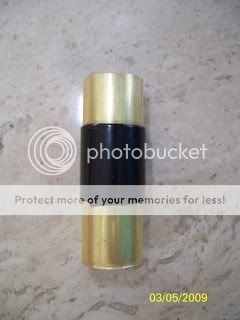
Cut ¾” pieces of the 9/16 brass, 19/32 brass, and the ½ PVC. Glue the 9/16 brass into the 19/32 and using some e-tape glue the 19/32 brass into the PVC.
Posted Image

Hammer and glue the PVC into the plunger tube like shown. I used a dist shot plunger tube taking advantage of the glued ring, but a nightfinder plunger tube would work fine as long as you make sure it’s straight.
Posted Image

Now for the shell. First we will have to cut of this small part of the shell as shown.
Posted Image

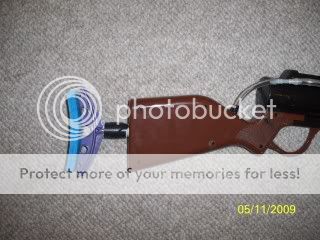
Now to allow the nightfinder to fit around the back of the gun you will need to cut it at the nerf logo as shown.
Posted Image

It should fit around the back of the gun like this.
Posted Image

Next cut off the handle of the nightfinder just below the trigger.
Posted Image

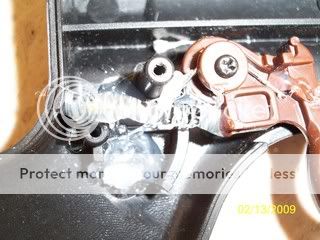
Place the nightfinder trigger directly behind the trigger of the raider and mark were on the shell the trigger make contact
Posted Image

You will have to sand theses parts down so that the trigger can move freely.
Posted Image

All of the steps above to the shell must been done to both sides of both the raider and nightfinder.

When the nightfinder is placed around the raider, the two triggers should line up as shown.
Posted Image

To make sure the triggers stay in line cut the back of the raider trigger so that it’s flat.
Posted Image

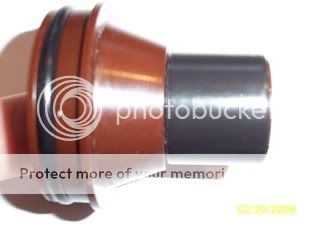
One problem that we have to tackle is to allow the boltsled to slide over the new larger plunger tube. Originally, there is a lip on the bolted in the very back.
Posted Image

You will have to sand this lip down so that it is flush with the inside of the boltsled like below.
Posted Image

I’m not sure if this part is necessary, but it helps allow everything to run smother. What you have to do is sand down the inside of the boltsled so that it slides over the plunger easily. It wont take allot.
Posted Image

Pas Intergration

11 May 2009 - 06:05 PM

As promised here is the write-up for my pas with integration. I decided to use a hornet tank out of simplicity and based on what I had. All I did to the tank was attack a small piece of PETG as a barrel.
Posted Image
For a pump I had a random water gun pump just laying around.
Posted Image
The first thing that I did was drill a small hole in the back of the gun to accommodate the pump.
Sorry, no pictures.
Realizing that the pump was too big I shortened it.
Posted Image
Then I cut out the foam I used for silencing so that the pump could fit in the gun and glued it in.
Posted Image
Next I drilled another hole in the front of the gripe so that I could put the tubing for the hornet chamber into the handle. This will only work with the top two chamber of the hornet.
Posted Image
The chamber should fit in like the picture below.
Posted Image
Next I drilled two more holes into the grip, one in the back and one on the bottom.
Attach the hornet chamber to one of the blast buttons, using a T as shown
Posted Image
Finally attach the open end of the T to a pump in whatever is comfortable for you. I attached mine as shown.
Posted Image
Now for making this gun more comfortable. I found another pump for a water gun with a U shape on the back of it.
Posted Image
I cut the pump and attached the end of the pump to the pump in the stock and added some camping foam.
Posted Image
Now the finished product you have a backup shot to complement your PAS.
Posted Image
Posted Image

Pas Mod

22 April 2009 - 07:18 PM

This mod will give you a breeched pas capable of high rof and great ranges.

First cut a small circle of camping foam (used in bedrolls) to attach to the end of the plunger head. This eliminates dead space and cushions the plunger head.

Posted Image

I added a BBB spring along with the stock. You may want to improve the seal with Teflon tape, but I had no need to. Here is a picture of the plunger assembly.

Posted Image

Next reinforce the catch spring. I found a large spring from a pen and just glued it to the trigger.

Posted Image

For this mood you will not need the orange piece on the end. Get the brown funnel piece and wrap electrical tape around it until a PVC coupler can fit over it snugly and glue in place.

Posted Image

Posted Image

Take the 5/8 brass and wrap electrical tape so it fits in the back of the brown funnel piece. Do this ½ inch from the end of the brass.

Posted Image

With a piece of PVC in the other end of the coupler, push the 5/8 brass into the brown piece as far as it goes and mark the brass.

Posted Image

At the mark you made cut the brass. With the PVC still in the other end of the coupler push the brass in until it stops. Fill up all the dead space inside the brown funnel with hot glue.

Posted Image

The only other internal mod in the gun is silencing, and lots of it. I put camping foam in every place possible.
Posted Image

Now you have to start work on the barrel. First get a 5 1/2” piece of 19/32 and cut it so that 3” of the piece is half. Similar to this picture but with different dimensions. 2 ½” of the brass should still be whole.
Posted Image

Now work on the PVC sheath. The length of the PVC doesn’t matter, it is whatever is comfortable for you. Cut a slot in the PVC ¾” away from one end. The slot should be larger then your dart, I used a 2 ¼” slot. I only have a picture of this steep with the brass in, but you get the picture.

Posted Image

Now just like the picture above attach the 19/32 brass into the PVC sheath so that 2” stick out the back. To do this wrap electrical tape around the brass and then glue it in place.
To make a stopper I got the pronged part of the air restrictor cut of the prongs and made a larger hole.

Posted Image

Wrap e tape around old air restrictor and glue it in the back part of the protruding 19/32” brass.

Next make the barrel portion of the breech. Take the 9/16 brass and put tightening rings on one end. Now get a small piece of PVC, I used 2 ½”. And attach it to the end of the brass without the tightening rings.

Posted Image

Now you’re done. You now have a great gun with high rof and range. Here is a picture of the completed gun.

Posted Image

Edit: As diamondback said I attached a fishing line to the two parts of the breech so that you cant pull the breach out too far, one less thing to think about during a war.