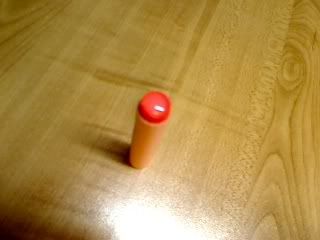
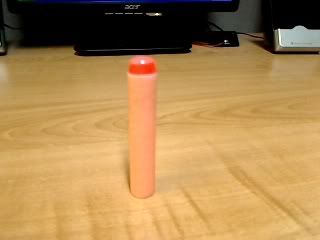
We all know that Streamlines are widely considered the worst of stock darts. Unfortunately, more recent Nerf blasters have been cursed with only being able to use the streamline. So I decided I was going to fix that after I got my Raider.
I had gone through two different versions of this before settling on this one, both of which combined create this final product.
This streamline mod increases the weight of the front of the dart enough so they fly more accurately without reducing (and might even help) ranges. It gets rid of the hole in the head of the dart which caused fishtailing and gave the dart a mind of it's own in the air, and (with some skill) keeps the heads of the dart almost a perfect dome. Of course they can still be used with LS, Recon and Raider clips.
Materials:
Streamlines
Scissors
Hot Glue
Take your streamline and cut through the head about midway through the hole in the head (I tried bigger and smaller but halfway through that hole seemed the best).
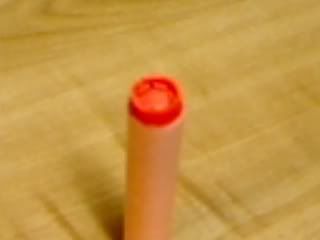
You should now see the base of the head, as well as still have some walls around the edges (very important).
Now create a hot glue down inside the walls as you would with a stefan. Keep adding glue until it's filled up to the walls and also creates a bit of a dome above. Place the dart in an upright position (such as a Magstrike clip) and allow the hot glue to dry, allowing the walls and gravity to settle the hot glue into a dome.
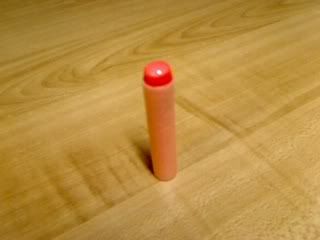
And there you have it. A close-to-perfect dome which adds needed weight to the front of the dart.
I decided not to add a BB or fishing weight as most "CDTD's" have, as when people just shoved a BB into the head of a streamline it seemed to decrease ranges. I think the weight the hot glue itself adds is sufficient.
My first attempts at this, I completely trimmed down the walls so it was just the base of the streamline. After that I added a dome of hotglue on the base. This keeps the weight of the hot glue, but also keeps the dart more aerodynamic.
I hope this helps some people out with some streamline problems.
Now it's up to someone to stefan mod the Raider clip...
- NerfHaven
- → Viewing Profile: Topics: Glint
Glint
Member Since 01 Dec 2008Offline Last Active Dec 14 2010 04:00 PM
Community Stats
- Group Members
- Active Posts 315
- Profile Views 5,956
- Member Title Member
- Age Age Unknown
- Birthday Birthday Unknown
User Tools
Latest Visitors
Topics I've Started
Improving The Streamline
27 August 2009 - 06:38 PM
Breech Questions
14 May 2009 - 05:28 PM
I have a couple questions about the functioning of breeches. More importantly, how to get mine working well and how it should.
So first off, let's say I'm working with a pull breech. How do I keep it do I can't pull the inside barrel material all the way out of the outside material?
And how do I make it so that the inside material can't twist and turn when jiggled around, in case you open the breech and the slot/opening isn't facing the way it's supposed to?
And thirdly, what advantages does a breech have over a speed-loader?
Blastfire Help
04 May 2009 - 04:56 PM
Alright, so I recently picked up a Blastfire at a local thrift store (lucky, lucky me) and PETG barreled it. I'm just having a bit of trouble putting it back together properly.
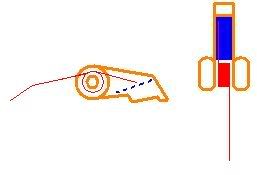
I'm having the trouble with this lil' thing right here:
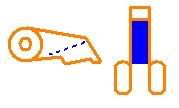
I don't know where/how to place it on the rod. Here's a sketch:
Blue = little ridge inside. It's not hollow.
I've tried a couple things and none seem to really work well. Here's the closest thing and what I think it should be like:
Red = torsion spring
But the problem with that it that the spring doesn't have anything to push/rest against, so it just goes up and down with the little tooth orange thing unless I hold it up against the top of the shell (which ) can't do when it's closed).
So could someone please show/tell me how this is supposed to be?
UPDATE:
After taking a glance down the plunger tube I found this:
I don't know if you can see that, but there's a little rubber nipple-type thing at the end of the plunger tube that seems to have ripped off a little at the end. I don't know if that's a problem or not. It seems like it pushes down the OPRV when you fully push the pump down (which I haven't plugged). It still feels like it's working somewhat, but when I pump the gun with the white tooth-like piece extended (with the insides only, not put together) it doesn't actually pumped. This had happened a bit before I had opened it up and it was stock, but I had it working fine and shooting before I opened it up. now it's just as if the white piece isn't extended out and it's just letting the air pump through everything (for those of you who knows how a Blastfire works)
Is this a problem, or should I just leave it? Also, why wouldn't the pump be properly working even when the white piece is extended?
Doomsayer Problem
26 April 2009 - 03:09 PM
Alright, so I am a tiny step away from compleing my Doomsayer. I just have one small (well, hopefully small) problem.
When I put it together and shoot a dart, the dart comes partway out of the barrel and then just stops. I just can't figure out what it is. Here's what it can't be:
- Can't be rotoation. The turret's rotating perfectly
- Can't be dart fit. if anything, my darts are a bit loose.
- Can't be plunger head seal. I have a great plunger head seal with the E-Tape
The only thing I can think of would be plunger tube to turret seal. But that doesn't make any sense. I have a rubber washer in there that fits perfectly. Before the washer I had an O-Ring that was too thick so it pushed too hard against the turret, so I had sanded down part of the plunger tube. It still didn't work. Then when I put on the rubber washer, the plunger tube moved back and forth. So I built up the end with epoxy putty then sanded it down until the plunger tube length was practically good as new (lengthwise).
So the only thing I can think it would be would be the seal (which doesn't make any sense to me) and the plunger tube may be too long or something (but I don't want to sand down the putty too much and then have it too short again). Can someone pelase help me?
I can post internal pics if needed.
Bbb Coupler Writeup
24 April 2009 - 08:33 PM
Alright, so my friend (hardshot, if anyone knows the name; he's new to the Haven) and I were modding a BBB and realized that we couldn't find a coupler mod in the directory to go by. Me being the person I am, I said screw it, it can't be that hard. So I just took some existing knowledge and mixed it up with some existing mods, and voila! A BBB coupler writeup!
Okay, so starting off I want to make it clear that I'm using ¾ CPVC in this writeup. Or at least it looks that way. Really, I have PETG nested inside the CPVC using electrical tape and some plumbers goop, and the CPVC is there for speed loading and couplers. I've heard this called a bone marrow-style barrel, so that's what I'll refer to it as. If you are using ½, it's the exact same thing except your finished product will look a touch different.
I'll be running through some basic mods here that I collaborated from existing ones, just for the sake of actually knowing what I did.
First off, you want to saw/shave down the existing orange barrel part until it's flush with the big orange part that holds the AR.
Next sand/cut down the inside of the AR ring itself until it's just a ring, with no ridge on one side or anything. The inside should be completely smooth.
Now you can take your CPVC coupler and cut it in half (if you want, not necessary. It just makes for a smaller more compact look, and you get two couplers for the price of one). Sand down the side you cut with a Dremel sanding bit until you can eyeball it's fairly straight, then manually sand it until you know it's perfectly straight (shove a piece of CPVC in there and let it rest on the orange barrel part we trimmed down before then take a ruler to it). It is extremely important this side of your coupler is perfectly straight, or else the whole barrel itself winds up crooked, and that's a practically completely useless gun right there.
Here comes the part where my writeup differs a bit from the rest. This might be the way people did this, but I don't exactly know so I'll show you what I did. We'll be getting rid of all the dead space in the barrel/AR area and creating a new, safer place for the the plunger head to hit so your gun can be durable over time.
Stick your AR ring inside the barrel area the way it should go. Now take a piece of PETG (or CPVC might work better, the PETG was a little wobbly but worked nonetheless) lube it all over one end. When I mean all over, I mean go crazy. Get like 5 or more inches of the barrel insanely lubed up, and a bit inside just for safe keeping. Go absolutely nuts without worrying. Once that's done , put that lubed side of the PETG in the barrel area and hold it there with your hand like this:
So that the lubed side of the PETG is all inside the barrel area, and some it protruding out also.
Now completely go to town with hot glue in there. Keep on pouring it all in there until you have a hot glue that's flush with or a bit above (enveloping the top) of the AR ring. Leave the hot glue to dry for a while, as multitudes of hot glue take longer to dry upon themselves. Once it's dry, pull out the PETG barrel. I had a really hard time with this and had to spray some lube on the top of the hot glue plateau and hope it got down in there. After a lot of pushing my PETG finally same out, leaving behind a fairly clean hole down the centre of the hot glue. Just to make it cleaner I took a sanding bit of a Dremel and put it as far as I could down both sides of the hot glue/barrel end so make it perfect.
Here's the final product:
Warning: I had to cut off about 4 inches of the end of my PETG because there was hot glue still stuck to it that I couldn’t get off. So if you're sexually attracted to your PETG or something and don't want to waste like 4 inches of it, find something else to use. Just warning you.
Now all you need to do is add your coupler on the top of the barrel end with all the hotglue in it now. On the end where the old, arrow barrel used to be is where it goes. Epoxy it down, and then spread some Plumbers Goop around the edges where it meets the barrel end. Leave it to dry.
In the meantime do whatever other mods you want/can find. The only other thing I did was reinforce the washer on the end of the plunger rod:
Even though I didn't add a new spring, I just did it to be safe and to keep the gun stable and durable.
Now would also be a good time to make your speedloader and bone marrow barrels.
Once you're all dried up slap 'er all back together and you've got yourself a clean, durable and great working BBB with a higher RoF than most. Simple mods that don't really deserve a post this big, but they have it anyways.
I'd like to thank boom13 and joeyaglr444 for their BBB mods, and FA24 for his post in joeyaglr444's mod showing a better way to use the hot glue mess. His way of hot gluing a spring in the Doomsayer mod also gave me the idea to sue PETG to keep the hole in the barrel end amid all the hot glue.
Hope everything was clear. Sorry if the pictures were a bit blurry, my camera's not the best. But hopefully my explanations got the point across.
- NerfHaven
- → Viewing Profile: Topics: Glint
- Terms of Service and Privacy Policy
- Code of Conduct ·