Jump to content


Radio

Member Since 29 Oct 2008
Offline Last Active Oct 08 2014 03:30 PM

Topics I've Started

New Member Grace Period

17 December 2008 - 02:41 AM

I know this is an incredibly hot topic, so I'd love to address it with the utmost grace and finesse.

Pros to the Quick-Ban
  • Nipping COC violators in the bud.
  • Keeping the board full of thoughtful posts rather than having to sift through mindless questions, assertions, bad grammar etc.
  • A sense of pride knowing that you didn't make that mistake.
  • A more time effective solution to violators.

Cons to the Quick-Ban
  • Many new members are banned before they can correct their behavior.
  • NHIC stagnates because of a lack of incoming youngsters.

I would love to edit this post to be more inclusive of extra pros and cons, if you have a suggestion to help please post.

Black Friday Debrief

28 November 2008 - 09:51 AM

How many people did you slay trying to get to the outdoor toy section? Did you hit Walmart, Toys R us, gamestop, or kohls? Most importantly for next year, approximately how many were stocked?

I managed to snag some at2ks from kohls online believe it or not, I didnt even have to leave the house! I'd be more than happy to ship one to someone along with 5$ for a blue at3k. I tried walmart.com but they were sold out within seconds of 5:00.

Speedloader/at2k Integation: 'sploder

27 November 2008 - 03:00 PM

I figure a at2k powered primary with a built in springer secondary trigger is more alluring than an auto rotating turret with abysmal ranges.
Materials
Speedloader
Pump plugged At2k internals
1/2" PVC fitted with whatever barrel material.
2 half inch PVC couplers
3rd gen Nf spring
Electrical Tape
Hotglue
1/4 Vinyl Tubing
Connectors for 1/4 Vinyl Tubing
Drill with 1/16 bit
GOOP
Keyrings
1/16 cable
1/16 cable Crimps (3-double) (1-single)
2 sets of pliers
hobby knife
Dremel
PVC cutters
(any time I goop I wait until it sets before performing the next step)

Directions

At2k Pump Plugged Internals Modding
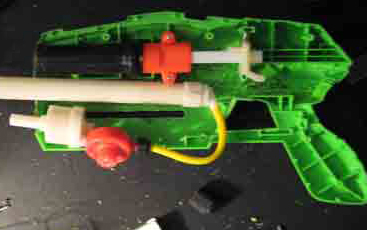
Open up your Speedloader, and remove the turret, and all the auto advancing garbage in the bottom of the gun, Dremel out anything that has to do with the auto advancing turret on either side so you are with a plunger tube, plunger, trigger, and trigger mech.

Posted Image
(Pay no attention to the location of the at2k internals)

Cut off the stem of the at2k within about 1/16 of an inch of the airtank to increase airflow. Cut off the Goo Gauge and Goop it to seal. snip the yellow hose an inch away from the Goo gauge and install 3-1/2" inches of the 1/4 vinyl tubing with the connectors. Goop the two connections to seal and e-tape them to make sure. Cut your 1/2" PVC connector an 1/8" away from the middle and put the smaller half aside. Goop the cut end of the PVC coupler directly to the Airtank.

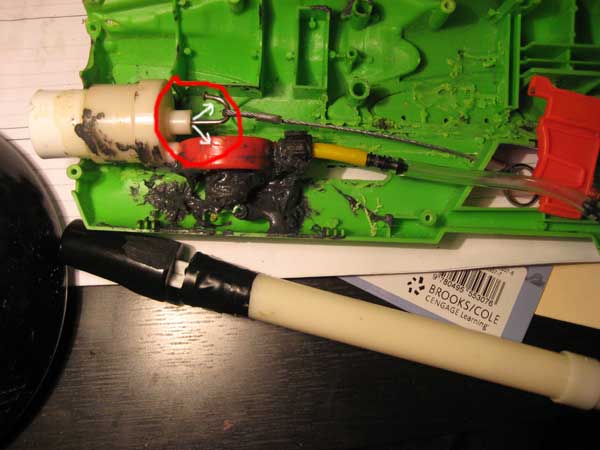
CRUCAL TRICKY PART: Use one pair of pliers {A} to stabilize the firing pin and use the other pair {B} to bend the pin into a U shape. If you do not stabilze Pliers A you will be majorly fucked. It will leak like a bitch and you will either have to open it up and replace the seals, or goop the connecting part of the pin to the maxx and hope for the best

Close the two halves and use the smaller half to inscribe a circle with a knife where the pvc will come out of the front of the shell. Dremel where you have inscribed. Place the at2k tank in a place where the pvc connector stick out of the shell about 1/2." PUTTY THE SHIT OUT OF IT, and let it dry It took mine about a day. Drill a 1/16" hole in the wall in front of the trigger closest to the right end of the shell.

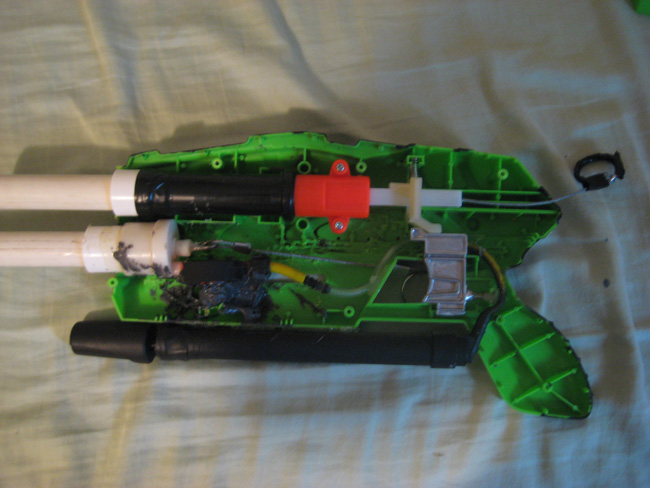
After your At2k is in place, crimp up your cable with a small loop on either end so that it runs from the Bent U firing pin, under the tubing, through the wall in front of the trigger. Keying the exposed loop. hot glue the tubing onto the wall surrounding the trigger so that it does not interfere with the trigger mech and loops around to the top of the handle closest to the trigger.

Posted Image

Goop the pump to the bottom of this side of the shell so that if it ever (god forbid) has a malfunction, it can be corrected again by opening it up.

Speedloader Springer Modding
Unscrew the two orange peices that hold the plunger tube in.
Dremel off the stem on the end of the black plunger tube, drill about 9 small holes (too keep the plunger from popping out while increasing airflow) in the front of the tube. Cut the other coupler in the same way 1/8" away from the middle and put the small pat aside. Goop the large part on the cut end to the black plunger tube. I hotglued a small peice of wire to the end of the coupler to keep the stefan from getting sucked into the plunger tube. Etape the plunger to make a better seal and cover it in silicone lube. Drill a 1/16 hole in the back of the plunger rod and thred the cable through it crimp it, thread it through the back as well, loop, and keyring. Strech the crap out of the Nightfinder spring and cut it so it is the same length as the stock, and twist them together. put the whole thing back together.
Posted Image

All together now.
Posted Image

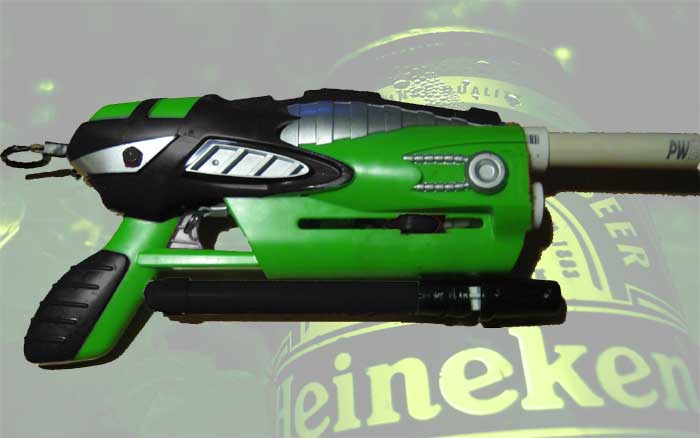
Close it up and paint as you will.

Posted Image


Ranges
avg: 56' for the singled speedloader
avg: 98' for the At2k

Questions, Comments, Flames.

At2k Firing Pin Leak.

22 November 2008 - 12:24 AM

Everyone is probably sick of hearing about leaky at2ks so sorry in advance.
Posted Image

Whenever I pump air rushes out of the butt of the airtank by the base of the firing pin. I have no idea how to fix this. Help?

Plasticap Endcap

17 November 2008 - 01:24 AM

While working on a Speedloader-At2k integration I noticed a couple of things.
Posted Image

1. The AT2k pump was far too big for the Speedloader shell.

2. The AT2k plunger would come out of it's tube if pulled too far or too vigorously pumped.

A quick, cheap, and clean solution to this problem;


Materials

Disposable Waterbottle Cap
Utility/Exacto-Knife
Sandpaper
Dremel
Electrical Tape


Instructions

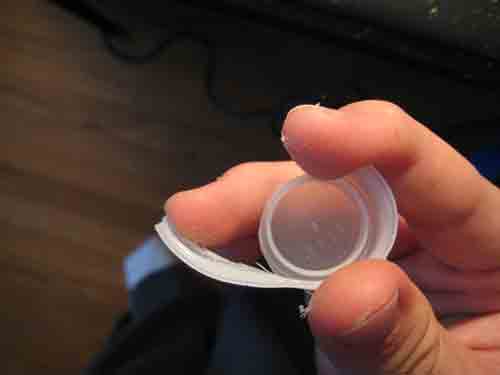
Examine the bottle cap, there should be a threaded outer rim and a smaller inner rim used to seal the bottle. Use your hobby knife to cut the outer rim away, while leaving the inner rim intact.

Posted Image

Sand the rough edges down.
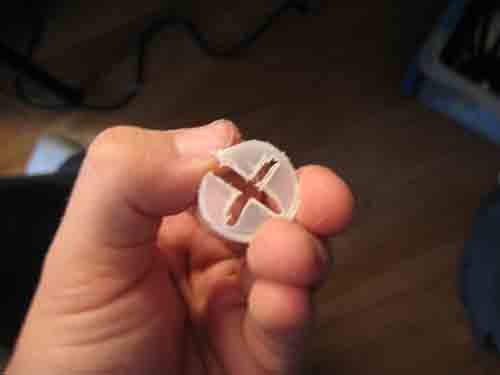
Next take your dremel and put a thick, clean "+" symbol square in the middle of the bottlecap. Cut one side of the plus all the way through the edge of the cap so it will fit on your plunger.

Posted Image

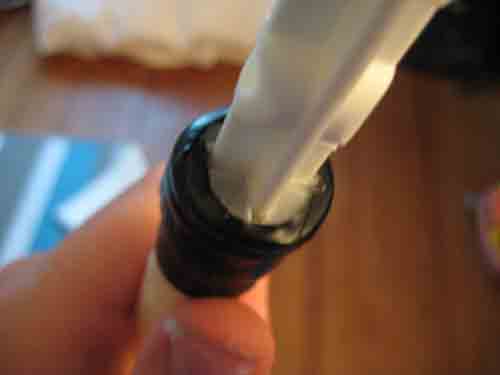
Slap it onto the end of the plunger pump tube and generously apply Electrical Tape

It should end up looking something like this.
Posted Image

Questions, comments, or flames to contribute?