I just recently found a video that I filmed about a year ago and I thought I'd post it.
VIDEO
Let me know what you think of it. Thanks
WARNING: Please don't try this at home without adult supervision.
- NerfHaven
- → Viewing Profile: Topics: cheesypiza001
cheesypiza001
Member Since 13 Oct 2008Offline Last Active Dec 22 2010 09:37 PM
Community Stats
- Group Members
- Active Posts 752
- Profile Views 11,975
- Member Title Member
- Age 30 years old
- Birthday May 30, 1995
User Tools
Latest Visitors
Topics I've Started
Wax + Molten Bronze = Huge Fire
08 May 2010 - 03:55 PM
Dart Door V2
14 April 2010 - 03:41 PM
The "Dart Door" allows darts to be fed into the back of the RSCB clip without opening and closing something, or taking off and putting on an endcap. This greatly decreases reload time.
(Note: There are a LOT of pictures)
UPDATE:
VIDEO
The V2 is basically the same but it's less bulky and much cleaner. I dremeled off the ugly outer lip of the washer that can be seen in the last 3 pictures.


1. Get this stuff. I got mine at Home Depot. It's basically just a neoprene sheet (1/16").


(Size comparison with a quarter)

2. Cut a small piece of 1/2" PVC and hot glue it to the rubber sheet. Then trace around it with a sharp Exacto knife. However, leave a bit of space on one side so that there is room to screw it in place later on.

3. Take some scissors and clean it up a bit.

4. Take a plastic washer that has an ID of a bit more than 1/2" and an OD of a bit more than the OD of a 1/2" coupler. Drill a hole through the side with a 1/16" bit.
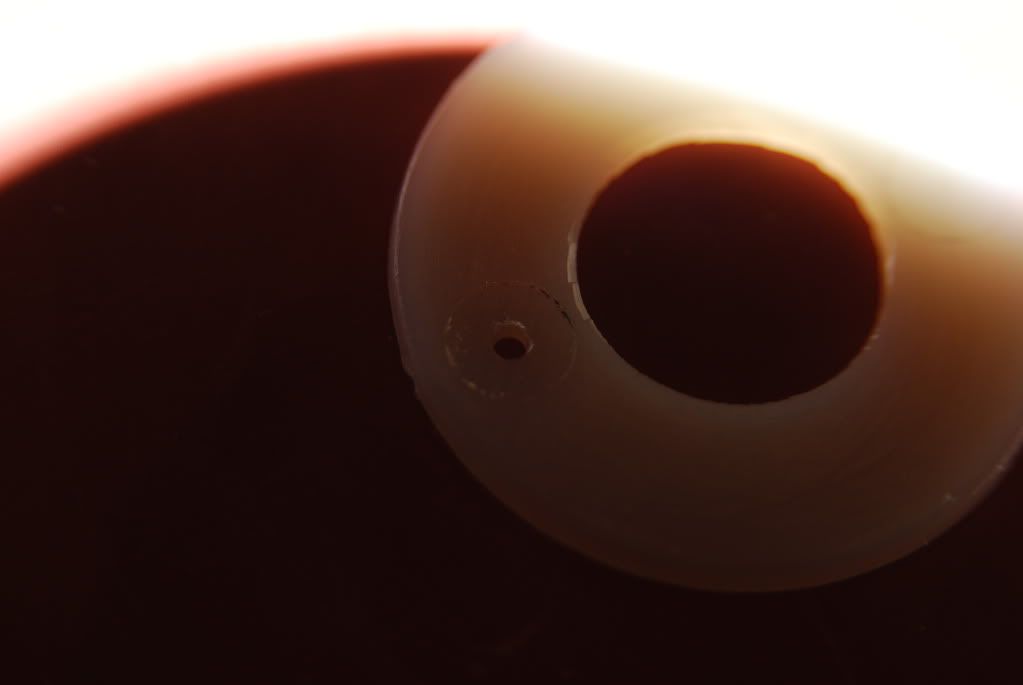
5. Hold the washer with the flap placed on it up to a light and center the flap. Then take a sharp pencil, and mark on the flap where the hole is.

6. Drill a hole through the flap with the same 1/16" bit.

7. Find yourself a really small screw (size comparison:)
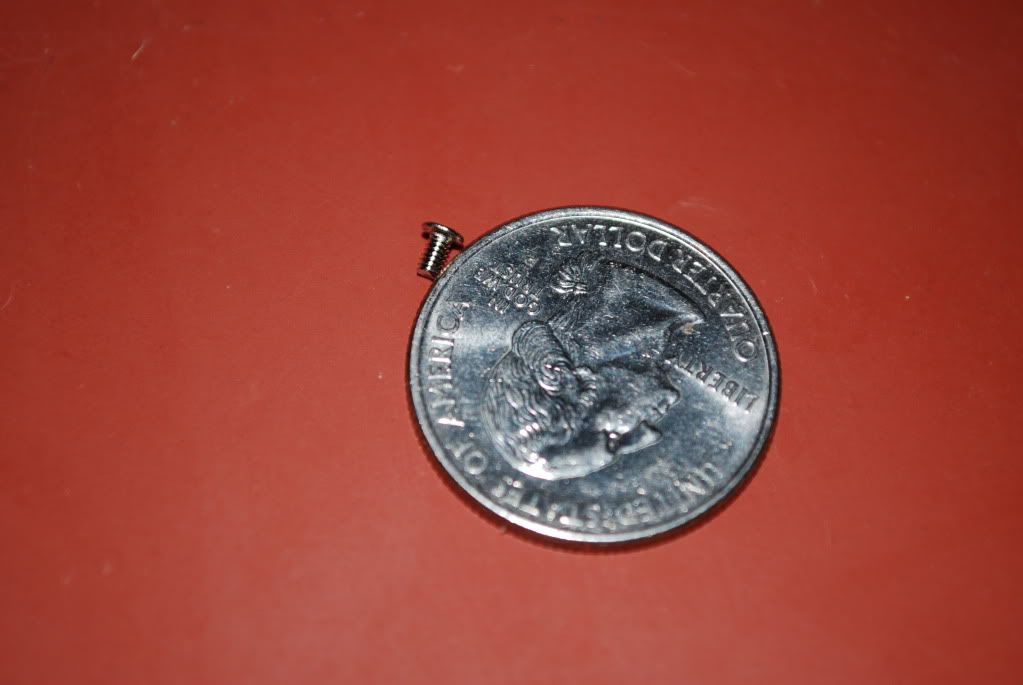
...and screw it through both the flap and the washer. It shouldn't penetrate past the end of the washer.

8. Make sure it's centered then move onto the next step.

(Note: There are a LOT of pictures)
UPDATE:
VIDEO
The V2 is basically the same but it's less bulky and much cleaner. I dremeled off the ugly outer lip of the washer that can be seen in the last 3 pictures.


1. Get this stuff. I got mine at Home Depot. It's basically just a neoprene sheet (1/16").


(Size comparison with a quarter)

2. Cut a small piece of 1/2" PVC and hot glue it to the rubber sheet. Then trace around it with a sharp Exacto knife. However, leave a bit of space on one side so that there is room to screw it in place later on.

3. Take some scissors and clean it up a bit.

4. Take a plastic washer that has an ID of a bit more than 1/2" and an OD of a bit more than the OD of a 1/2" coupler. Drill a hole through the side with a 1/16" bit.

5. Hold the washer with the flap placed on it up to a light and center the flap. Then take a sharp pencil, and mark on the flap where the hole is.

6. Drill a hole through the flap with the same 1/16" bit.

7. Find yourself a really small screw (size comparison:)

...and screw it through both the flap and the washer. It shouldn't penetrate past the end of the washer.

8. Make sure it's centered then move onto the next step.

Home-rigged Vertical Lathe
06 February 2010 - 05:33 PM
VIDEO
Let me know what you think. Thanks for watching.

Here are some pictures of how I got the CPVC to lock into the chuck:


The blue (or purple) pen body is filled with hot glue and has a hole drilled through both sides which lines up with an identical set of holes in NF laser tube that has a larger outer diameter than the pen body and therefore allows the pen body to fit inside with a tight squeeze. A metal pin is then hammered through the holes to ensure that the reducers do not fall out. As I just said, it's basically just a system of reducers to make it possible for the CPVC to be "anchored" in.
Let me know what you think. Thanks for watching.

Here are some pictures of how I got the CPVC to lock into the chuck:


The blue (or purple) pen body is filled with hot glue and has a hole drilled through both sides which lines up with an identical set of holes in NF laser tube that has a larger outer diameter than the pen body and therefore allows the pen body to fit inside with a tight squeeze. A metal pin is then hammered through the holes to ensure that the reducers do not fall out. As I just said, it's basically just a system of reducers to make it possible for the CPVC to be "anchored" in.
Template Directory
24 January 2010 - 02:17 PM
I have wanted to make one of these for a while and after seeing the wohnson89's thread, I decided it was time to make a thread.
For most of these pictures, I took the "Nerf drawings" from a website (still trying to remember what it is), put them into photoshop, redid all the colors, patched them up, and re-saved them. If the courtesy is not labeled, consider it to be from said site. I know they are mostly all the older guns but hopefully we can add more templates.
Without further adieu, I present the Template Directory.
Arrowstorm
BlastaBall
BlastaMatic
Bow N' Arrow
Crossbow
Courtesy of wohnson89
Eagle Eye
Expand A' Blast
Firestorm
Lock N' Load
Longshot
(Courtesty of wohnson89)
Missle Storm
NB-1
Nite Finder
Courtesy of pinz321
Secret Shot 1
SharpShooter 1
SharpShooter 2
Splitfire
Supermaxx 250
Supermaxx 750
Supermaxx 1500
Supermaxx 3000 (green/yellow)
Supermaxx 3000 (Blue)
(Courtesy unknown)
Supermaxx 5000
Semi-automatic Valve
16 December 2009 - 09:33 PM
Updated 12.24.09. Scroll down to the bottom for additional pictures and info.
Version 3 VIDEO
^^ Click ^^
This is pretty much just version two but inside a Firefly shell and hooked up with the actual trigger.
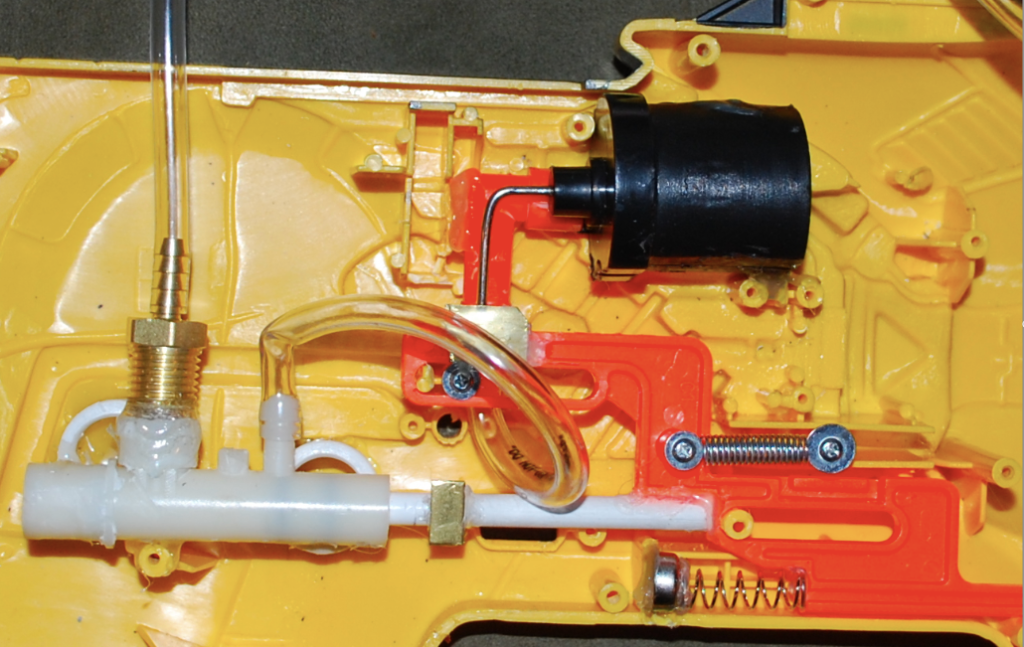
1. As the trigger is pulled approximately 1/2 way back, the valve shuts off the connection between the bladder and the tank.
2. The trigger pulls the tank valve open as it nears the end of its pull stroke.
3. As it is released, the trigger proceeds to close the tank valve, then the semi-auto valve, ensuring that no air is lost in the process.
This system is effecient for two main reasons.
1. It takes less time (however small) to complete the cycle than with a push-button valve and allows for a "true" semi-auto system.
2. It is much more effecient in terms of air conservation than having no valve at all and just simply pulling the trigger quickly.
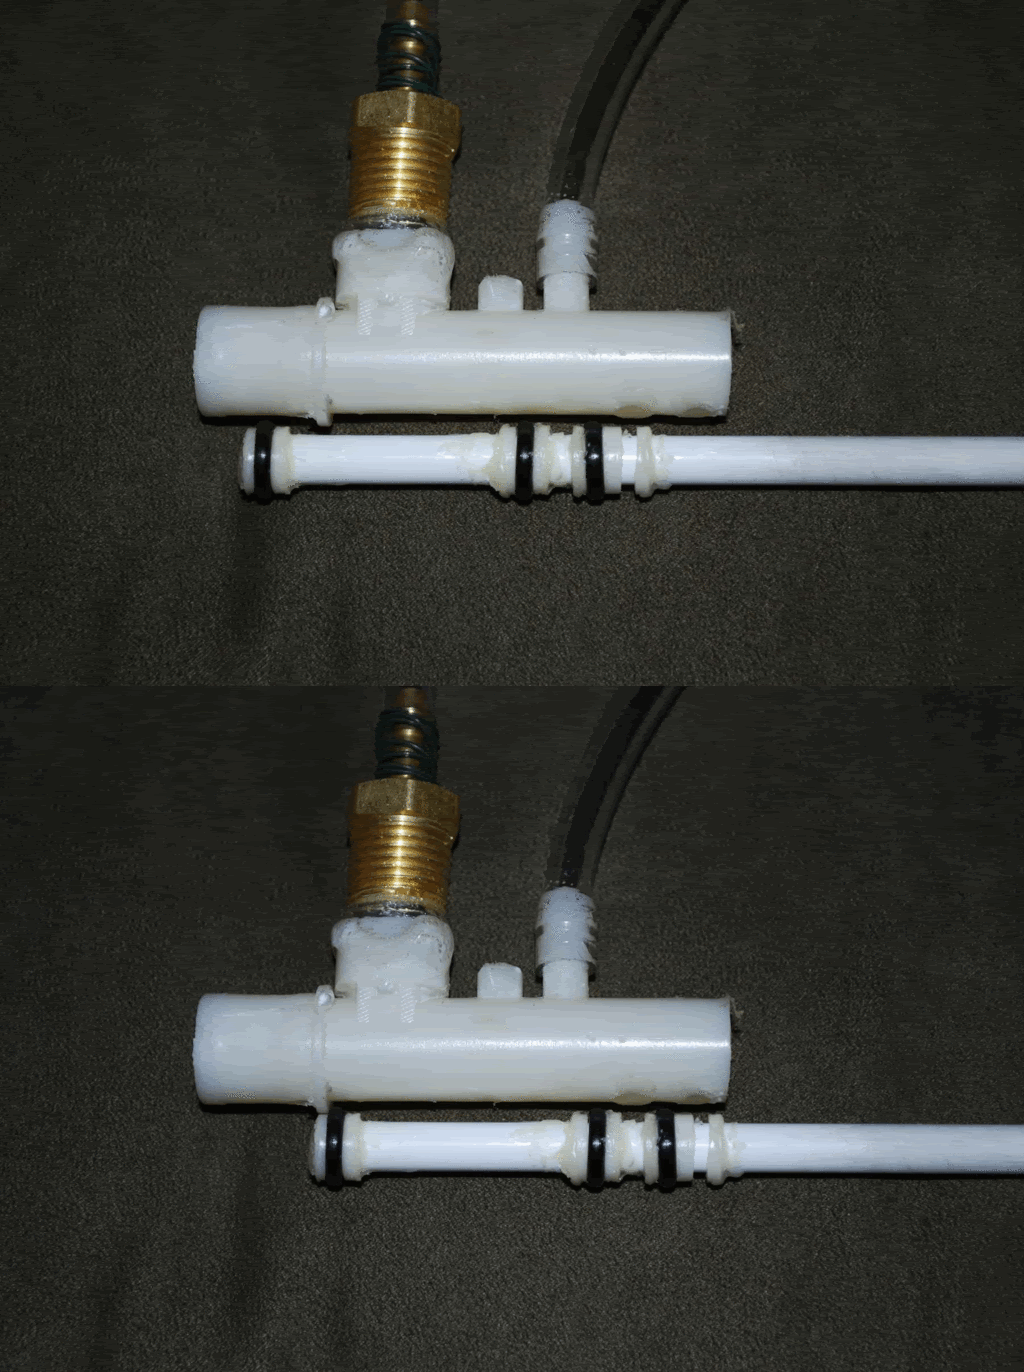
The only glitch in this setup is the large amount friciton in the valve, resulting in a need for much spring force to push the valve rod back into its default positition. This makes it slightly difficult to pull the trigger, however this problem does not escalate as I pump it more, unlike the problem in V.1.
This is my current valve design:
(Wait for it to completely load. It's an animation.)
This is what prompted Version 2, a major improvement from my last design:
This is the setup when it's not in any shell (V.2):

This configuration utilizes a Magstrike bladder, a Titan pump, and an AT3K tank.
I cut the bladder supports off of the Magstrike shell...
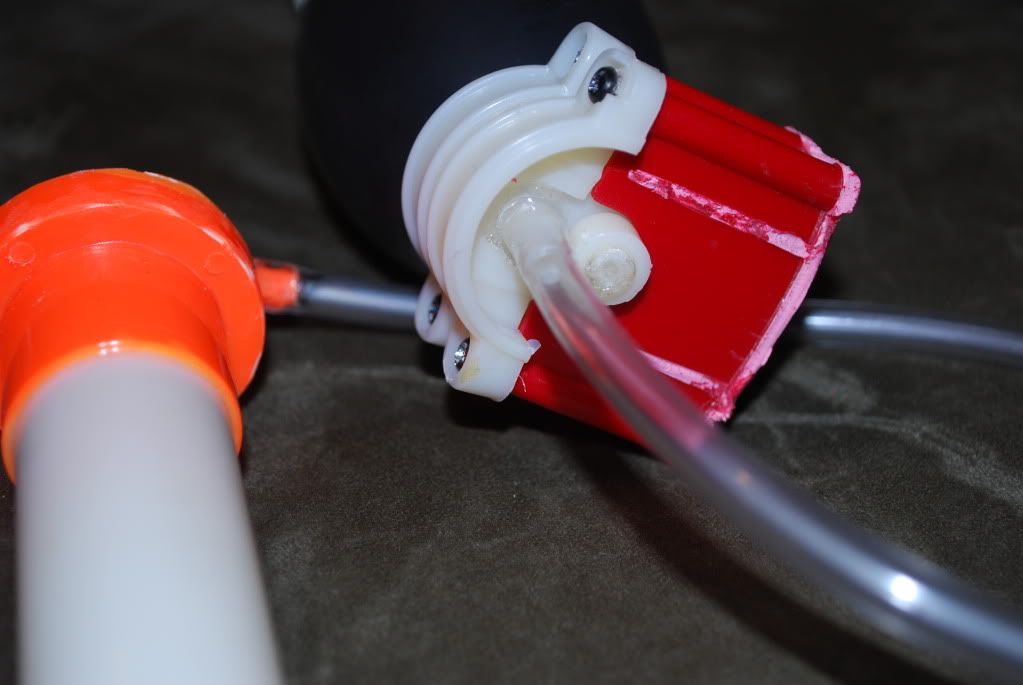
With 15 pumps, I can get off roughly 8 shots that are each extremely powerful. Only after about 8 shots do they start to get noticeably less powerful. In addition, there is absolutely no pressure build up exerted from the bladder into the trigger (unlike my previous design).
Version 3 VIDEO
Here is a link to the original topic I made concerning the Semi-Auto valve.
Please feel free to post with any questions, comments, or suggestions. Thanks.
Version 3 VIDEO
^^ Click ^^
This is pretty much just version two but inside a Firefly shell and hooked up with the actual trigger.

1. As the trigger is pulled approximately 1/2 way back, the valve shuts off the connection between the bladder and the tank.
2. The trigger pulls the tank valve open as it nears the end of its pull stroke.
3. As it is released, the trigger proceeds to close the tank valve, then the semi-auto valve, ensuring that no air is lost in the process.
This system is effecient for two main reasons.
1. It takes less time (however small) to complete the cycle than with a push-button valve and allows for a "true" semi-auto system.
2. It is much more effecient in terms of air conservation than having no valve at all and just simply pulling the trigger quickly.
The only glitch in this setup is the large amount friciton in the valve, resulting in a need for much spring force to push the valve rod back into its default positition. This makes it slightly difficult to pull the trigger, however this problem does not escalate as I pump it more, unlike the problem in V.1.
This is my current valve design:
(Wait for it to completely load. It's an animation.)

This is what prompted Version 2, a major improvement from my last design:
The way your "anti trigger" valve is set up, to press it you are directly fighting the air pressure. If you give up the back inlet and use the top as the inlet, you could have a longer metal rod through the middle, with another o-ring that stays on the far side of the inlet. Leave the hole in the back end open. Then it will be balanced.
This is the setup when it's not in any shell (V.2):

This configuration utilizes a Magstrike bladder, a Titan pump, and an AT3K tank.
I cut the bladder supports off of the Magstrike shell...

With 15 pumps, I can get off roughly 8 shots that are each extremely powerful. Only after about 8 shots do they start to get noticeably less powerful. In addition, there is absolutely no pressure build up exerted from the bladder into the trigger (unlike my previous design).
Version 3 VIDEO
Here is a link to the original topic I made concerning the Semi-Auto valve.
Please feel free to post with any questions, comments, or suggestions. Thanks.
- NerfHaven
- → Viewing Profile: Topics: cheesypiza001
- Terms of Service and Privacy Policy
- Code of Conduct ·


 Find content

