Jump to content


Lucian

Member Since 07 Aug 2008
Offline Last Active Aug 05 2021 11:14 PM

Topics I've Started

Ultimator With K14 Spring And Clear Plunger Tube

06 December 2010 - 03:28 PM

Hello again Nerfhaven, today I’ll be showing you how to give your Ultimator a clear plunger tube, minimize the dead-space, and get it to work with a normal compression spring.

Please refer to the write up and the Mcmaster list at the bottom of the page for a materials list.

Step one.
Get your Ultimator
Posted Image
And open it up
Posted Image

Step 2.
Take the barrel and spring
Posted Image
And put them aside

Step 3.
Order a 1’ section of 2.5” ID 2.75” OD Polycarbonate tubing, a pack of K14 springs, and a 2” to 1/2” PVC reducing bushing from Mcmaster
Posted Image

Step 4.
Slap a large metal washer in front of the priming-mech to protect the plastic (Ignore the [k26] spring)
Posted Image

Then go ahead and slide on a cut down K14 spring and bolt the plunger head back on

Step 5. Machining the Plunger tube.
First, cut a slot on the top and bottom of the plunger tube, using the stock one as a guide. I did this using my Band-saw.
Posted Image
The slots were 1.25” wide, on both sides, and went down about 1.75”

Then you will need to line up the plunger tube for the 2 holes on each side that secure the plunger tube to the gun Posted Image
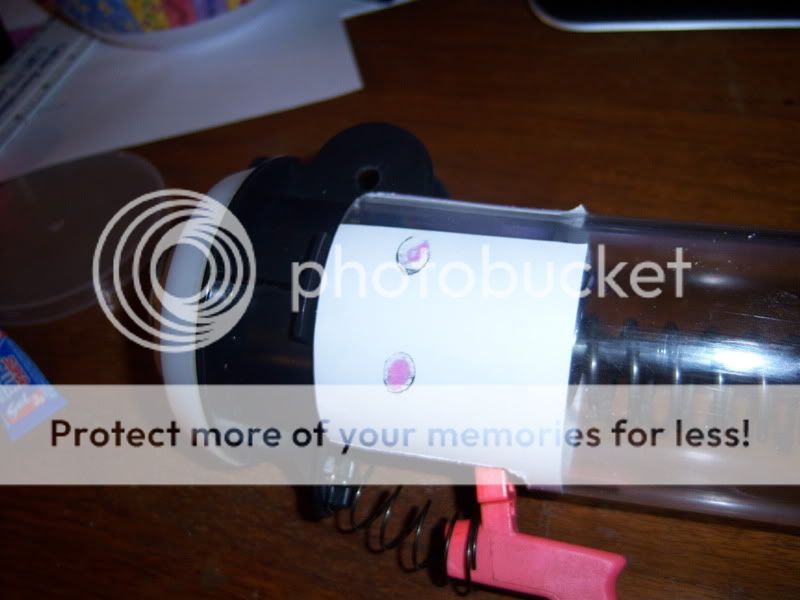
And drill them out with a 3/8” drill bit
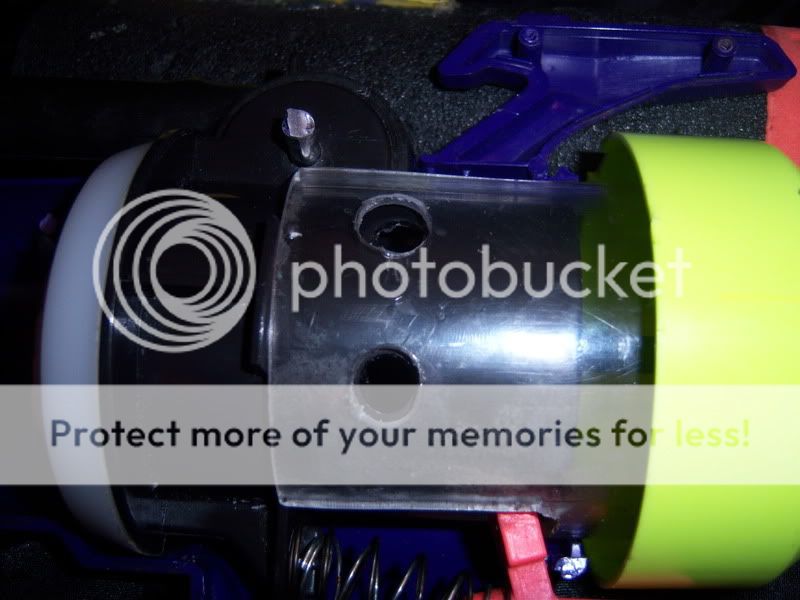
Posted Image
I screwed this part up a bit and had to widen the holes.

Big Blast With Intergrated Airtech 2000

05 December 2010 - 11:18 PM

Today, Brokensvt and myself will be doing a write-up to build your very own Big Blast with integrated Airtech 2000, with a shared stock pump.

Materials needed.
1. 3/4" to 1/2" PVC slip fitting
2. 1/2” PVC coupler
3. Polycarbonate in varying sizes
4. Various hardware
5. Goop, Gorilla glue, and Solvent weld
6. Polyester Resin – optional but recommended
7. Vinyl tubing- 1/4” OD 1/8” ID
8. Super Soaker Shot Blast pump., or any check valve that will fit
9. Brass tubing connectors

Step 1.
Get your Big Blast
Posted Image
Remove the Orange Ring
Posted Image
And open it up
Posted Image

Step 2.
Find the section of plastic on the side of the tank (See pic)
Posted Image
And remove it
Posted Image
And then remove the stock barrel
Posted Image

Step 3.
Get a 3/4" to 1/2" PVC slip fitting
Posted Image
And then sand the 3/4” side till it fits the end of the tank
Posted Image
Apply solvent weld to the tank and bushing and let it dry, be sure to do so in a well ventilated location, preferably outside

Vacuum Forming And Nerf

26 June 2010 - 11:56 PM

For several months I have been planning what I was going to do, in order to give back to the the NIC I benefited so much from. And in the past few weeks, I have been perfecting the process of Vacuum forming nerf guns.

Vacuum forming, commonly known as vacuforming, is a simplified version of thermoforming, whereby a sheet of plastic is heated to a forming temperature, stretched onto or into a single-surface mold, and held against the mold by applying vacuum between the mold surface and the sheet. The vacuum forming process can be used to make most product packaging, speaker casings and even car dashboards.

Vacuum formers are simple to make and not difficult to use at all. Even Shrub could do it! I won’t take the time to show you how to do it, simply because thousands of people have already done a great job that on Youtube. Go make your own and you won’t regret it.

The goal of this project is to bring back guns of the past, and my objective this whole time has been towards replicating the Crossbow in particular. While I have not fully achieved this, I have had relative success with a replicating half an SS2 shell, and Here is a link to a video that Nerfer 9 edited for me.
102_1080.jpg102_1079.jpg102_1086.jpg102_1090.jpg102_1085.jpg102_1084.jpg

Although this project is nowhere near finished, and I am not about to stop until I reach my goal, I hope that the NIC will see this idea and run with it.


Nerf Ultimate Frisbee

10 January 2010 - 01:22 AM

Nerf Ultimate Frisbee

Players need 4 or more.

Field setup:

To start, make two goals about 100 to 150 ft apart from each other; one for each team
The width of the field should really be at least 50 feet.

Gameplay:
Defense throws the Frisbee towards the offence team who tries to either run the Frisbee or pass it to their teammate without moving while holding the Frisbee.

They have 4 downs to get the Frisbee into the other teams goal like in football.
If the offence team tries to run with the Frisbee, they can be shot by the defense team, which stop the runner and would be a down.

Offense team can only be shot if they try to run with the Frisbee and the Frisbee can be intersected if the defense is passing the Frisbee without running with it.

This game seems to work best with low power blasters and or Melee weapons, we played today with defense having a Recon and Nerf Warlord foam axe, and it also worked well with one team having a Raider and Firefly.

My first attempt at this game was very successful and everyone had a great time, and I hope some other people get to try it out some time.

Locked Topics

28 October 2008 - 08:48 PM

Hey guys, I know I don't have much say here with me being so new in all, but I had a good idea.
Recently I have noticed more and more locked topics, and they are becoming an eyesore to the threads around them, and they just take up space on the recent topics page.
So I thought, "How hard would it be to just move the locked topics to a new Sub-forum?"
We could call it like the Graveyard or something, but I am just putting the idea out there- not giving it a name.

~Lucian

EDIT-
So I am suggesting that we add a Sub-form for the locked topics, to keep the forums filled with open topics and not...(running out of ideas) the useless, unnecessary questions, or post about a new gun (which is actually something like a Nite Finder, and the topic-maker didn’t search)

After just looking though some of the sub-forums I noticed not many locked topics, but this idea would also help in the future