
 Find content


Just in case anybody hasn't been following hobby/low end industrial 3d printing recently; it's come a long way.
I've been lucky enough to start a company making (and soon to be selling) 3d printers, and as such, get to make/print a pile of stuff for testing and for fun.
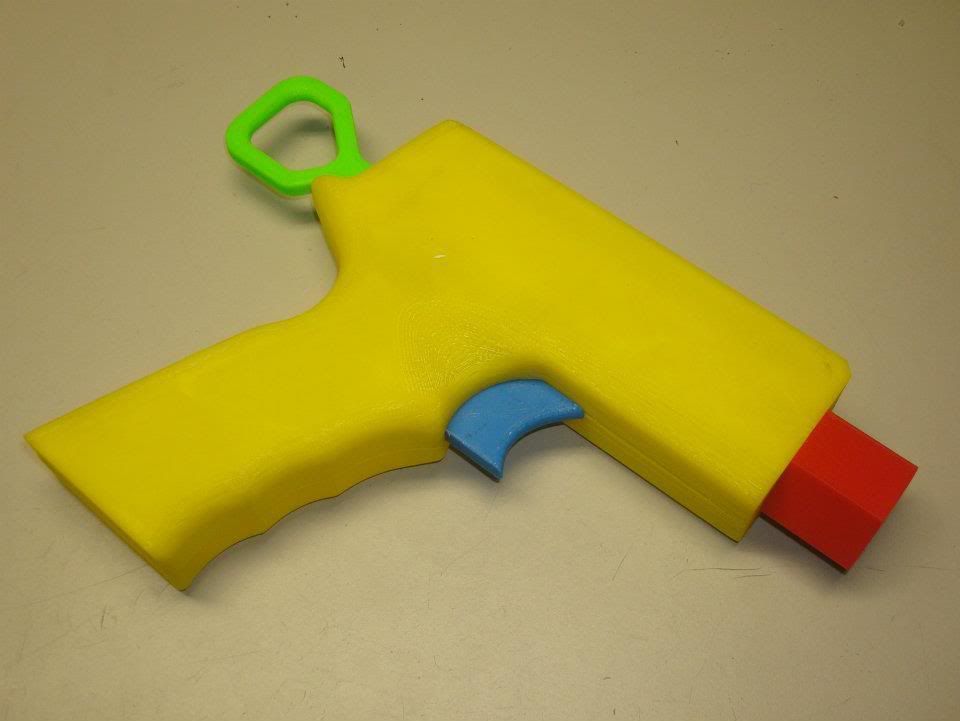
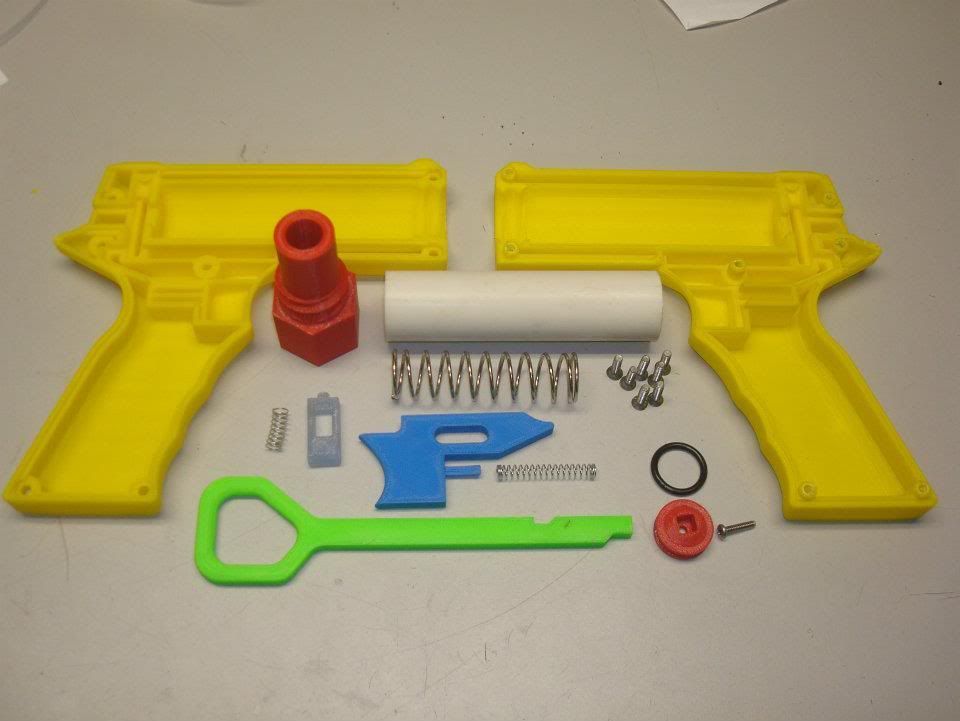
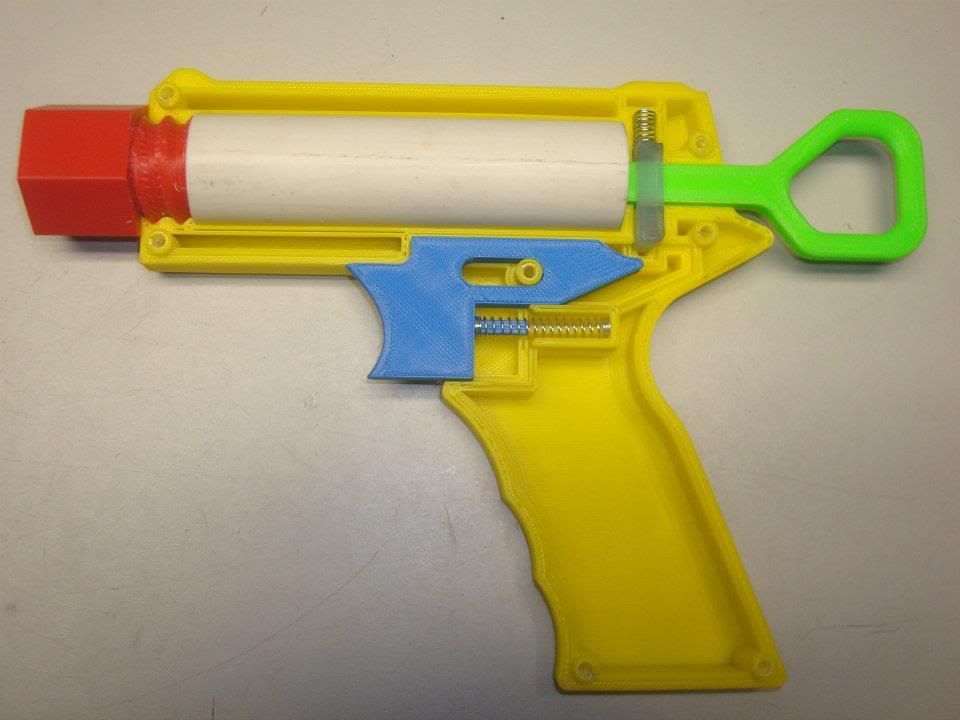
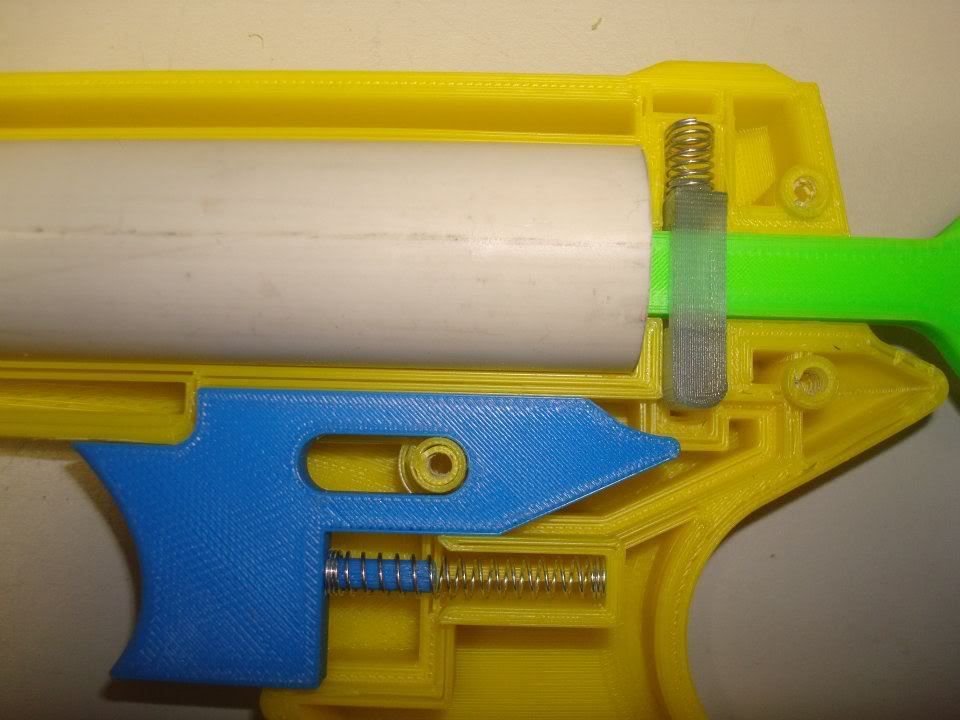
I used to do a lot of Nerf stuff with HvZ, so I decided to design a printable blaster from scratch for funzies. It just happens to be a good example of what a 3D printer that costs under 3K can do. The material is around $1 per in^3 so making custom parts is a lot more feasible than it once was.
The whole gun took about 13hrs of print time, but only $10 in plastic. The springs I had laying around the house. I think the primary spring is from an old night-finder but I'm really not sure. It gets about 1.5x the distance of a lightly modded maverick. It was designed for a fun proof of concept to be built upon upon, not for performance.
Everything plastic was printed on a Fablicator except for the PVC cylinder. It is all ABS except for the catch, which is PLA. The designs will be uploaded to thingiverse once some last minute changes are finalized.
The whole thing is every bit as rigid as an off the shelf Nerf blaster, if not more so.
Shameless plug; The website for the 3d printer I designed is www.fablicator.com (still under light construction)
~Andrew Diehl
Landru
Member Since 24 Jul 2008Offline Last Active Aug 27 2013 04:23 PM
Topics I've Started
Dart Spinning (rifling) Test Rig
27 August 2009 - 04:54 PM
There is an ongoing debate on whether spinning darts as they leave the barrel will improve stability. I have devised and constructed (still being greatly improved) a rig which allows darts to be fired from a brass barrel rotating at various RPM's (from 180 up to about 600RPM). I intend to show the ACTUAL effects of rotating a variety of types of stock darts as well as Stefans of different weight distributions.
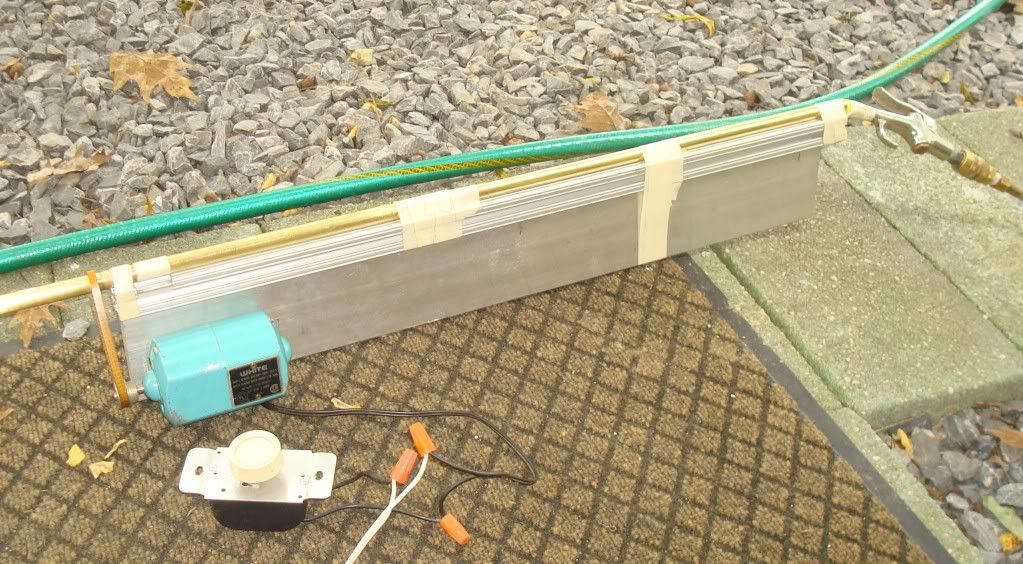
First, here is the basic setup: 17/32" brass barrel, 10" long. Powered by 60psi run through an air nozzle. An old sewing machine motor is belted to the barrel, which is nested in the next size up brass tube, which acts as a cheap bearing.
Results so far: (Keep in mind this is the beta tester, and real data will be obtained after all the bugs are worked out)
At low RPMs (600 or so), there didn't seem to be much effect on stock darts or stefans. At about triple that most stock darts catostrophically fail, the plastic tip bends over and flops around and occasionally rips off. Streamlines cartwheel right out of the barrel.
At max rpm, crappily made stefans appear to have MUCH better accuracy than their non-rotating counterparts. I will make up a batch of identical weight perfectly made stefans to test soon.
Eye Candy:
If you have any thoughts/suggestions let me know. Just remember, i will have actual numbers soon and more info about the actual firing rpm, muzzle velocity, weight distribution of the darts etc.
Rf20 Mod - Caedo
18 March 2009 - 12:28 AM
I play Humans v Zombies at Penn State and decided I needed more firepower this semester. I subsequently modified a RapidFire 20 to be charged with an air compressor in my backpack, as well as greatly improve range and accuracy.
With all modifications, I can:
Average 70ft with stock taggers
Average 105ft with my hemispherical tipped Stefans.
Charge the air tank 10times to 100psi before recharging the battery
Fire about 100 darts per charge
Fire 20darts/s

Details:
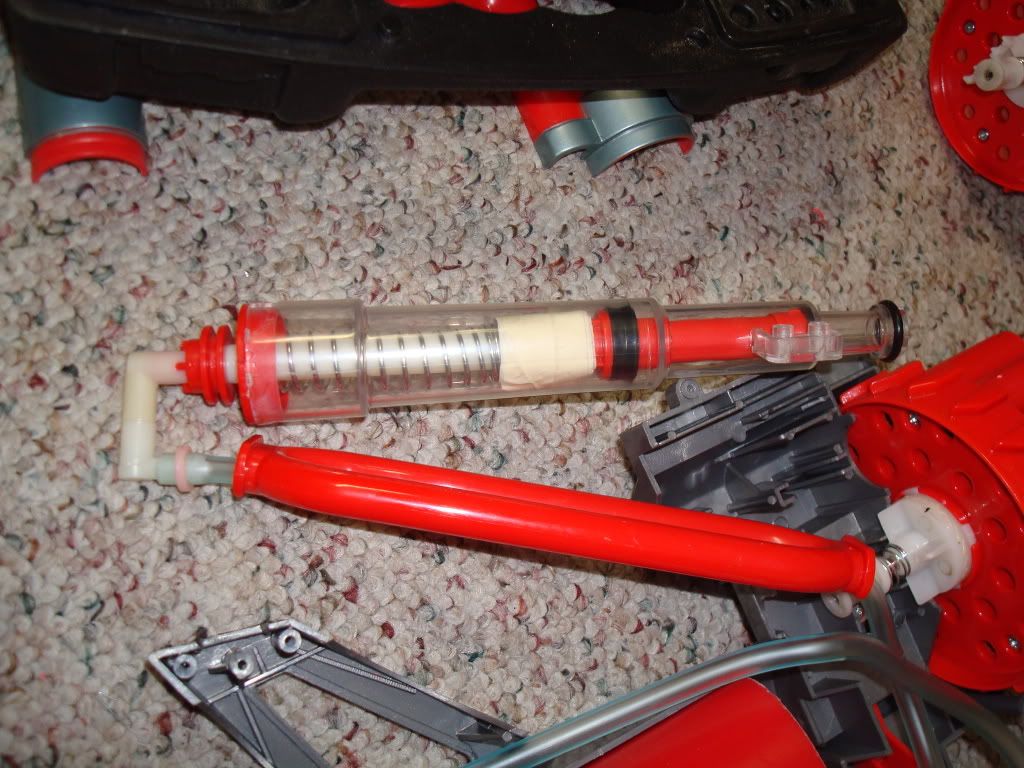
The backpack containing a compressor, batteries, and air tank was the most significant improvement from the stock gun.
Two 7.2v NiMH remote control car batteries power the compressor. The batteries are wired in series for a total of 14.4v at 3000mAh of capacity. An easy to reach push button switch on the gun is wired to a BNC cable which connects to the batteries and compressor. There is also a ‘stealth’ switch on the gun which prevents the compressor from turning on by accident.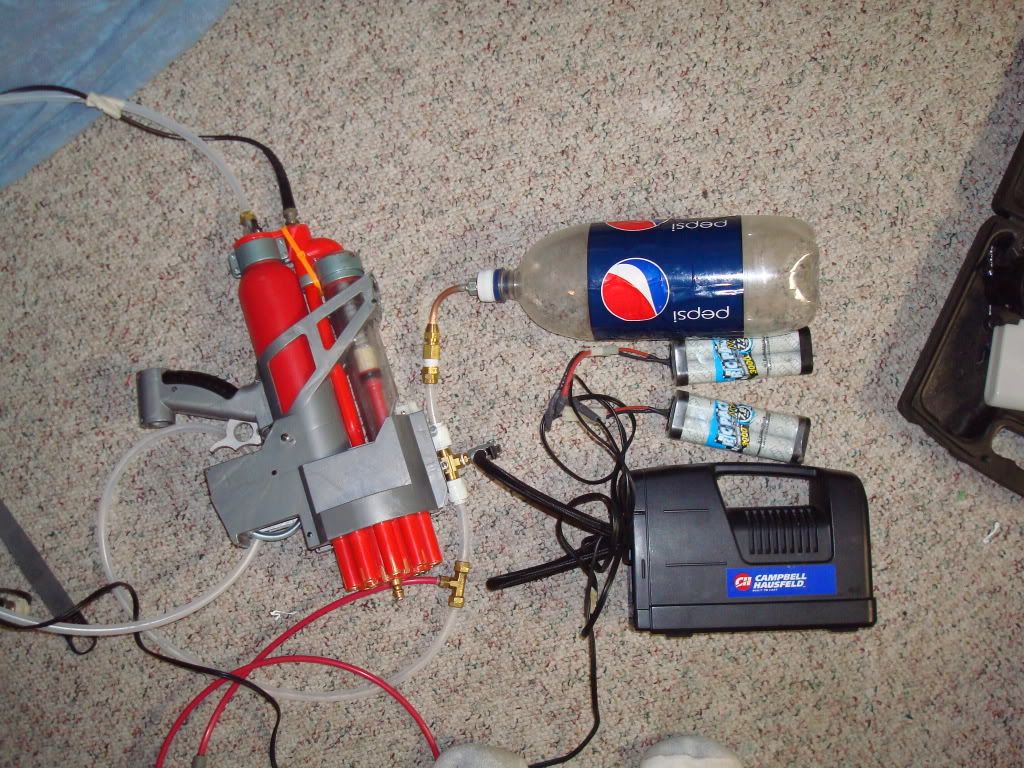
The compressor was purchased years ago for water bottle rockets, but similar ones can now be found at Harbor Freight for under $20.
The air tank used is a 2L soda bottle. They are durable, reliable, do not leak, and are dirt cheap. A custom brass fitting attaches to the bottle cap and connects the bottle to a standard 1/8in NPT fitting. There are a variety of fittings used on the system, but the push to connect is my favorite. The only reason others were ever used was local availability. The bottle connector leads to a ‘T’ which connects a bicycle valve and the tube to the gun. The compressor attaches to the bicycle valve. The air tube attaches to the gun through a quick disconnect fitting which I found at a local scrap yard. Standard compressor quick disconnects will work also, but tend to leak. Once the air hose is inside the gun, another ‘T’ connects a pressure gauge to the air line. The commercial home depot tubing is connected to the stock RF20 tubing by a barb fitting AND small hose clamps.
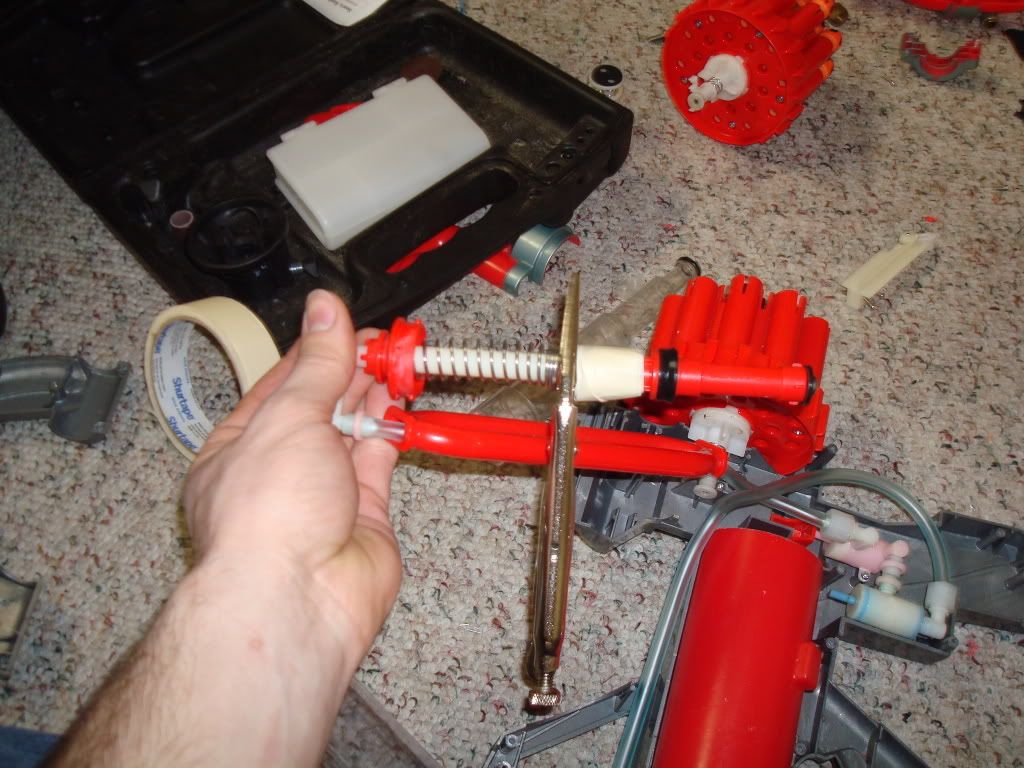
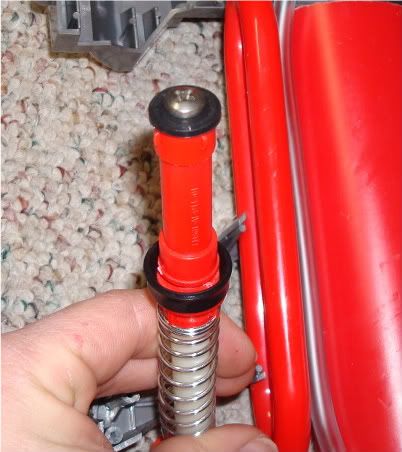
The next gun modification is of the firing mechanism. I carefully pried the clear plastic from the red piece at the base of the piston tube and opened the mechanism. I then compressed the spring back about 1in and put a large quantity of masking tape above it to pre-compress the spring and raise the minimum firing pressure to about 40psi. As a result of the higher firing pressure, the cone shaped red piece at the tip of the mechanism also needs to be replaced with something slightly wider. If it is not, the black rubber piece fails to make a reasonable seal. To replace the red cone, cut it off, careful not to damage the black gasket. Remove the rivet, and drill out the hole to 5/32 and replace the entire cone with a single 12-whatever machine screw. The head of the screw should be slightly wider than the base of the red cone for it to work correctly. The screw will self tap into the hole with some minor effort. Do not tighten the screw onto the gasket; only make it very close to touching. If the gasket is compressed it will expand outward and get stuck in the clear tube.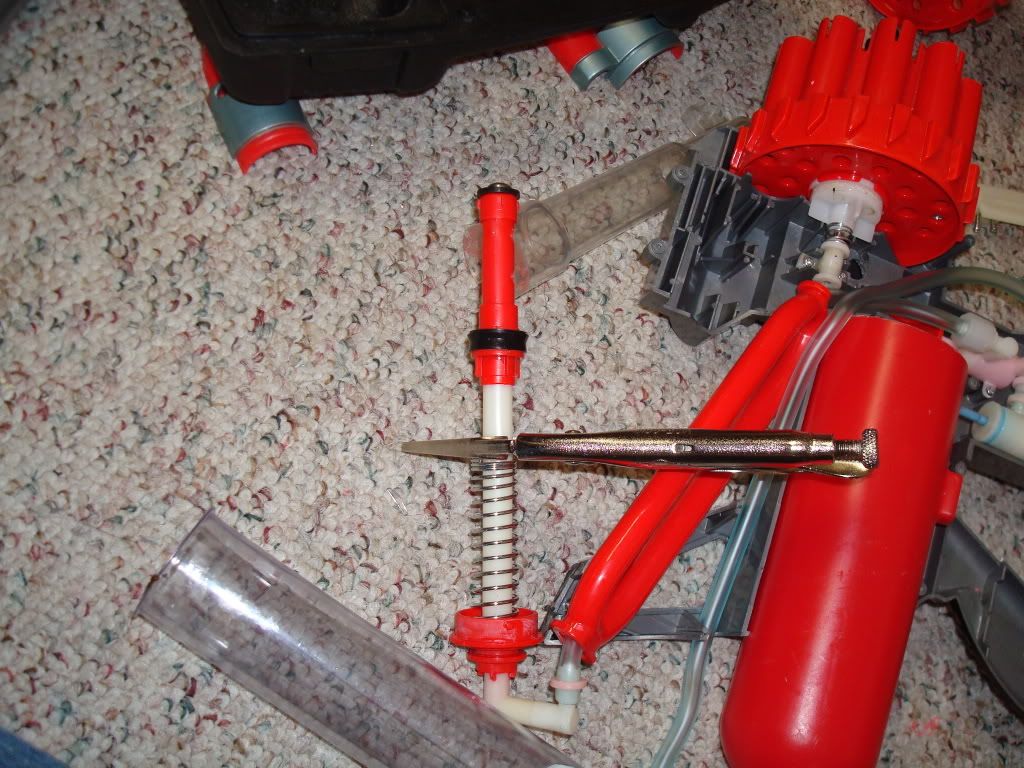
The next modification is simply cutting 20 pieces of 17/32 brass and press fitting them into the barrels. Removing the turret and using a large clamp to press fit the barrels can make things easier.
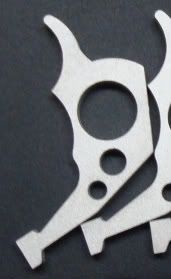
The final functional modification is replacing the trigger with something sturdier. Because the gun runs up to 100psi the trigger will fatigue and break within the first hr of use from the increased force needed to push down the firing pin. I made a paintball style aluminum trigger; reinforcing the existing trigger with embedded paperclips or dremeling a new one from polycarbonate may work too…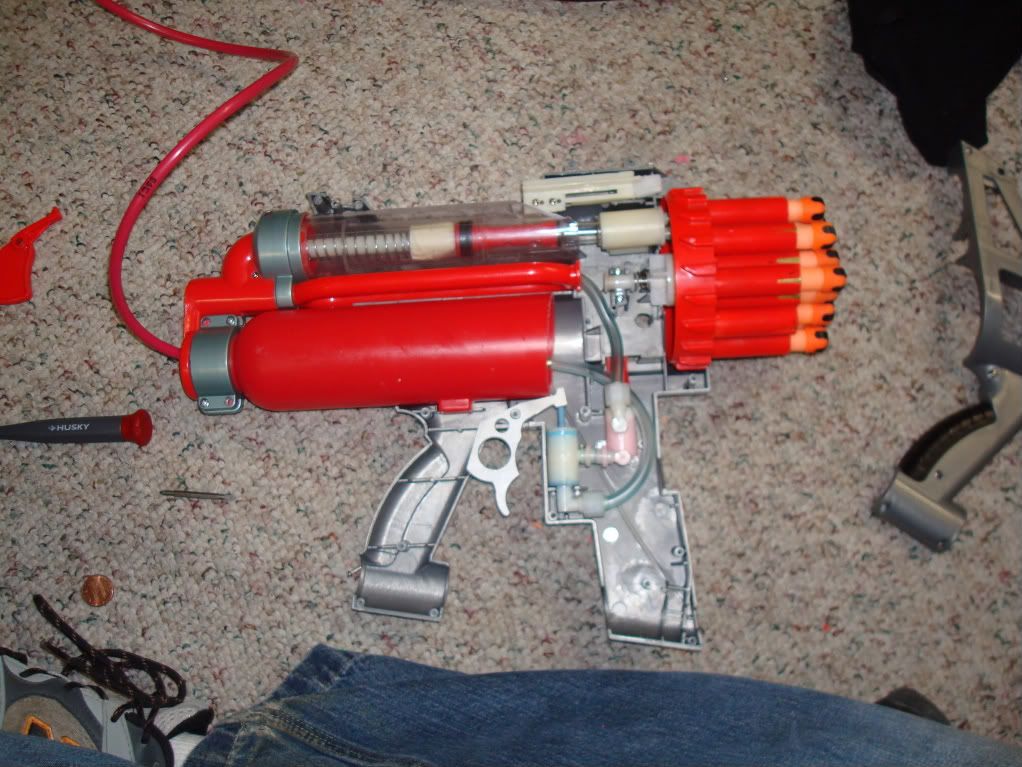
Finally I removed the black shell and cut off any excess parts to make it more manageable.
Feel free to ask questions, but I don't get on too often between dodging zombies and finishing a degree in mechanical engineering.
With all modifications, I can:
Average 70ft with stock taggers
Average 105ft with my hemispherical tipped Stefans.
Charge the air tank 10times to 100psi before recharging the battery
Fire about 100 darts per charge
Fire 20darts/s
Details:
The backpack containing a compressor, batteries, and air tank was the most significant improvement from the stock gun.
Two 7.2v NiMH remote control car batteries power the compressor. The batteries are wired in series for a total of 14.4v at 3000mAh of capacity. An easy to reach push button switch on the gun is wired to a BNC cable which connects to the batteries and compressor. There is also a ‘stealth’ switch on the gun which prevents the compressor from turning on by accident.
The compressor was purchased years ago for water bottle rockets, but similar ones can now be found at Harbor Freight for under $20.
The air tank used is a 2L soda bottle. They are durable, reliable, do not leak, and are dirt cheap. A custom brass fitting attaches to the bottle cap and connects the bottle to a standard 1/8in NPT fitting. There are a variety of fittings used on the system, but the push to connect is my favorite. The only reason others were ever used was local availability. The bottle connector leads to a ‘T’ which connects a bicycle valve and the tube to the gun. The compressor attaches to the bicycle valve. The air tube attaches to the gun through a quick disconnect fitting which I found at a local scrap yard. Standard compressor quick disconnects will work also, but tend to leak. Once the air hose is inside the gun, another ‘T’ connects a pressure gauge to the air line. The commercial home depot tubing is connected to the stock RF20 tubing by a barb fitting AND small hose clamps.
The next gun modification is of the firing mechanism. I carefully pried the clear plastic from the red piece at the base of the piston tube and opened the mechanism. I then compressed the spring back about 1in and put a large quantity of masking tape above it to pre-compress the spring and raise the minimum firing pressure to about 40psi. As a result of the higher firing pressure, the cone shaped red piece at the tip of the mechanism also needs to be replaced with something slightly wider. If it is not, the black rubber piece fails to make a reasonable seal. To replace the red cone, cut it off, careful not to damage the black gasket. Remove the rivet, and drill out the hole to 5/32 and replace the entire cone with a single 12-whatever machine screw. The head of the screw should be slightly wider than the base of the red cone for it to work correctly. The screw will self tap into the hole with some minor effort. Do not tighten the screw onto the gasket; only make it very close to touching. If the gasket is compressed it will expand outward and get stuck in the clear tube.
The next modification is simply cutting 20 pieces of 17/32 brass and press fitting them into the barrels. Removing the turret and using a large clamp to press fit the barrels can make things easier.
The final functional modification is replacing the trigger with something sturdier. Because the gun runs up to 100psi the trigger will fatigue and break within the first hr of use from the increased force needed to push down the firing pin. I made a paintball style aluminum trigger; reinforcing the existing trigger with embedded paperclips or dremeling a new one from polycarbonate may work too…
Finally I removed the black shell and cut off any excess parts to make it more manageable.
Feel free to ask questions, but I don't get on too often between dodging zombies and finishing a degree in mechanical engineering.

