Jump to content


BustaDartInYOurAss

Member Since 20 Mar 2008
Offline Last Active Dec 09 2012 03:55 AM

Topics I've Started

Longshot Modification Write-up Warning: Picture Heavy

21 December 2010 - 05:34 PM

Ok guys this is a write-up on how to modify your brand new, or not so new longshot. This modification write-up will consist of three parts. First part will be how to remove locks, Cover up the hole in the bolt, Remove air restrictors, Spring addition, Increase in plunger seal,adding a new catch spring. Part two will consist of a brass breech revolving around stock darts so that you can fire streamlines, it will also consist of reinforcement to internals. Finally part three will be a shotgun forgrip for the longshot, making this a force to be reckoned with when fighting off the Zeds, So relax and hopefully enjoy the write-up.

Difficulty of Part one out of 10: 3

PART ONE:

What you will need:
Hot-glue gun, Glue sticks
Needle Nose pliers
Nightfinder spring (optional)
Electrical tape
Sandpaper (optional)
1/2 inch PVC, and something to cut it with


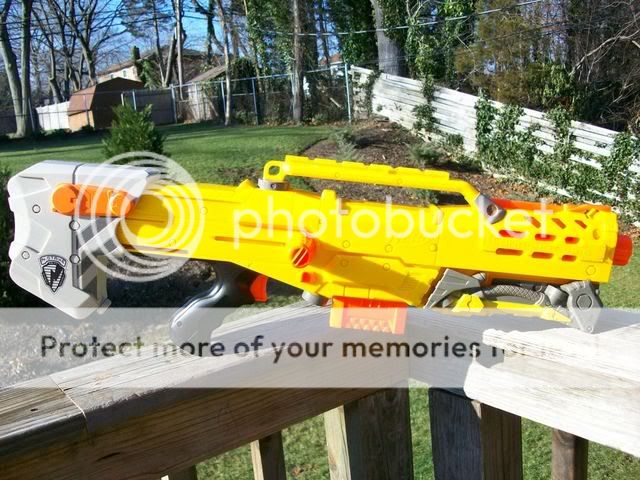
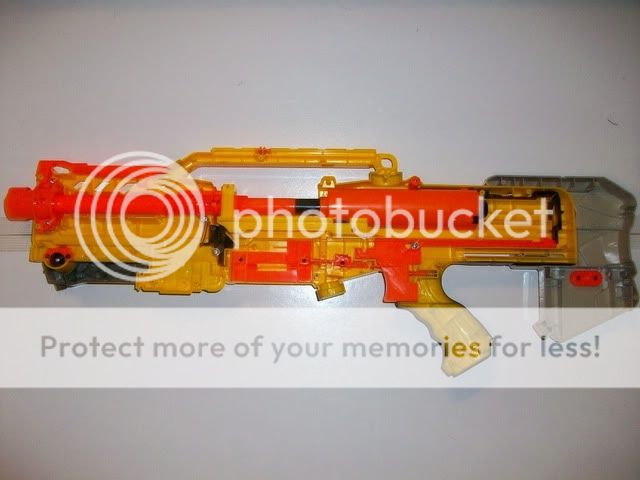
Ok so take your sexy stock longshot as such... Ain't she a beaut!
Posted Image

Crack her open, and by crack I mean remove all the screws and use the claw on a hammer to pry off the charging handle, after that you should be left with something looking like this. Be careful to make sure all the screws are completely unscrewed, and relove the shell piece carefully or else all the internals could spill over and no one liked putting a blaster back together if they had no clue where the parts go, the first time I modified one it took me a hour to put it back together. But its all trial and error
Posted Image

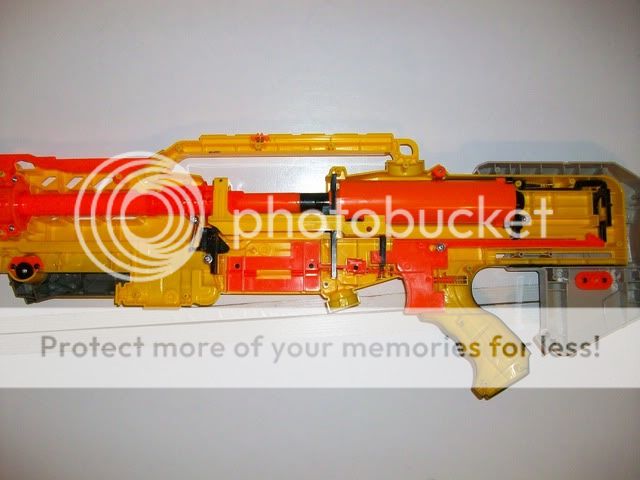
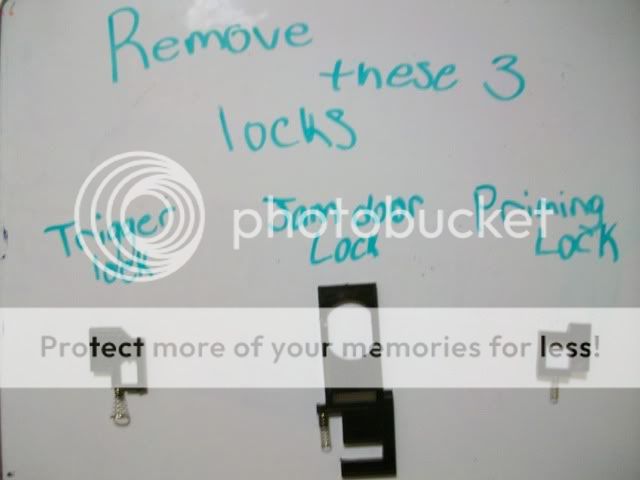
From there your going to want to look simply in the back of the gun for literally all three locks. There all located in this picture, one in the trigger, one right behind the plunger tube and one on the plunger tube itself, the tall black piece that goes into the bolt lock. Heres the photo for reference:
Posted Image

These are what all the locks look like and what there function is, Each one of these can be thrown away after you take off the spring from the Jam Door lock. Keep that, you will need it.

Posted Image

After that take the spring from the Jam door lock and intertwine it with the catch spring so it looks like this, this will help later on then you add a nightfinder spring, or spring of your choice.
Posted Image

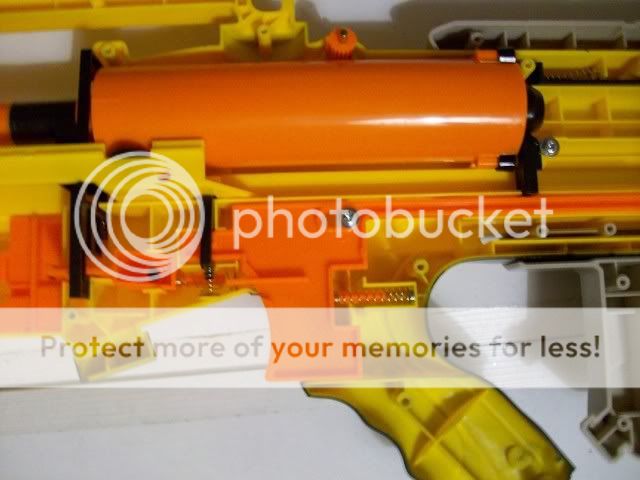
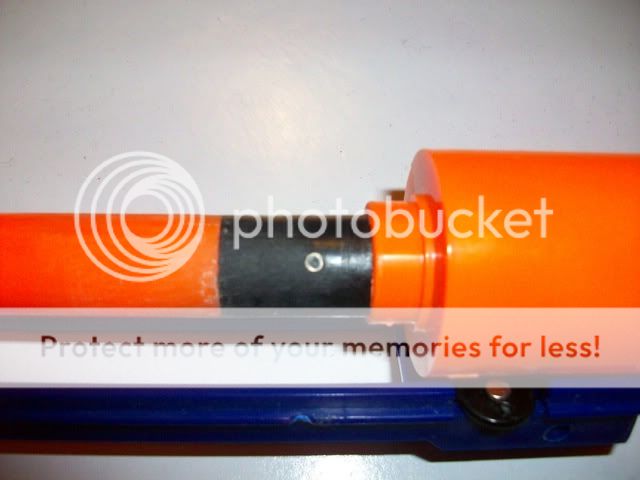
Now that those pesky locks are out of the way you can un-cock your longshot without dry firing it. From here remove the whole plunger tube system and uncrew the black cap on the back to get to the inside of the plunger tube, the air restrictor, and the plunger rod with spring. From here remove the plunger head by unscrewing it, Add a spring of your choice ( i used a nightfinder spring as it adds a significant range increase without making it too powerful). Then remove the O-ring on the plunger head and wrap one full rotation of electrical tape on it, throw the O-ring back on the plunger head, doing this makes the seal better making it more airtight, Then you want to remove the air restrictor, to do this look in the back of the plunger tube and you wil see this:Posted Image
(The flash of the camera distorted the colors, its not actually red its black but now you can see it)

So from here take needle nose pliers and twist each of the three pegs, breaking them allows the air restrictor to be removed, once broken it should just fall out. Now that thats gone it should look like this:
Posted Image

From here your going to want to warm your hot glue gun up and cover up the hole on the side of the bolt as such, i used sandpaper after to make sure that the bolt still slid nicely through the tube.
Posted Image

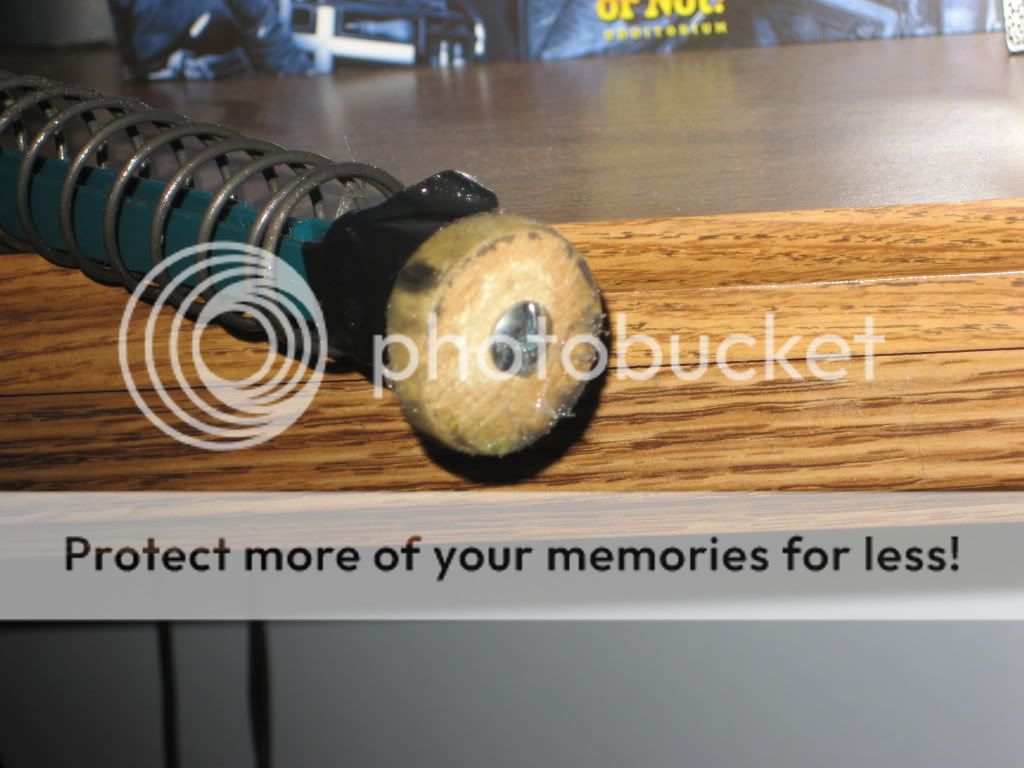
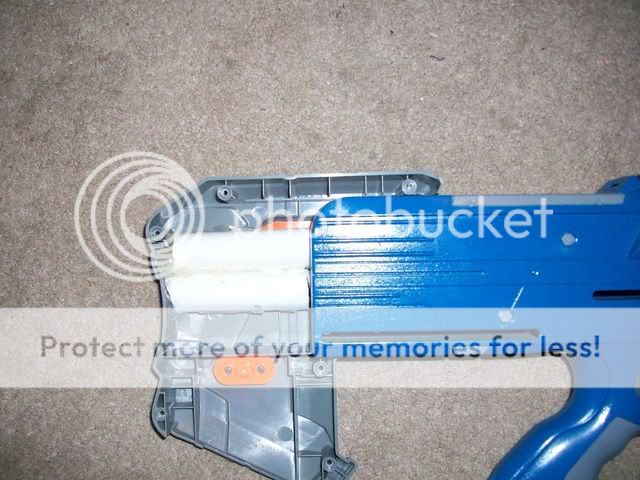
Now finally your going to want to make sure you stock doesnt collapse anymore, i do this because i personally dont like the stock failing on me and collapsing but you could not do this and it wont affect the working of your gun. Anyway place the stock at the longest i can go out and mark up PVC the same size as the gap between the back of the longshot and the stock, after cut and hot glued in it should look like this. Posted Image

Now your done with Part one, your internals should look like this when your done, Close it up and you have a nicely modified Longshot:
Posted Image

Part two will be up soon, expect it over the christmas break. I look forward to posting up part two and three, Also i have a question for you guys, Do you think it needs a integration? Hopefully you enjoyed the first part, Comments?, Questions?, Feedback?

Make A Ballzooka Shoot Darts

27 August 2009 - 08:31 PM

Ok i bought a Ballzooka at Apoc since I thought it would be funny to screw around with. Anyway, I figured out that green nerf balistic balls dont work, and that foam golf balls dont either.So I decided that something had to be done to it, thats when i got this idea to make it shoot darts. Anyway this is my writeup.

Materials:

Saw
20" Barrel material (Cpvc)
Drill(optional)
Knife
Super Glue
Hot Glue
Expanding Foam(optional)*

*I understand that there is no expanding foam used in this but I will be filling in the gaps between the barrels, and the Cpvc with it.

For people who have never seen the internals before (or a ballzooka for that matter):
Posted Image

Ok so to start off,remove the turret and remove the insides being the yellow piece and spring.After cut the barrels to 1" from the ridge on the bottom,it just makes life easier.After take you barrel of choice and cut it to four inches.Also knock out the "air restictor" which is really just that plus sign on the bottom. then take your barrel and put a ring of superglue on the end and put it into the turret hole and make it flush to where the "air restirctor" used to be.
Posted Image

Repeat this process 4 more times. Then I took hot glue and just kind of dumped it into there and glued each barrel to the original barrel ( this will later be unnoticable when you fill it in with expanding foam, so make it as messy as you want).After that add some padding to the inside of the plunger tube, I used a foam shooter disk and just cut it untill if fit.
Posted Image

Then put the assembly back into the case and drop a sharpie down the barrel to the left and right of the barrel alligned with the plunger tube, Were going to make this baby backload.From here you should have to dots located on each side. Take your drill and drill right through the shell then take your knife and bore it out so your stefans can fit through.When your done with that it should look like this.
Posted Image

After that your pretty much done, put it back together and go shoot some fools. I would give you a range test but being its dark out...Although it shoots down my 40ft hallway and hits the wall with a nice thud,but it is honestly based on how hard you push in. Here it is all done, and i will post a picture of it after i use the expanding foam to fill in the gaps.
Posted Image

Questions, comments, flames, compliments about my shorts?

Defender T3 Writeup

25 January 2009 - 02:16 PM

This is my first full blown wirtten writeup, so please hear me out.Also, if you have any questions I will answer them to the best of my abilities.

Materials Needed:

-DT3 Handgun
-Super Glue
-Epoxy Puddy
- Disk Shot spring ( optional)
- Cpvc and Pvc coupler
- Hot glue
- Small spring for catch (only needed if you add a spring)
-Dremel, with sanding bit

Ok, so heres a picture of its stock internals

Posted Image

And heres a close up on the stock barrel,which you can see was never connected to the plunger to begin with.

Posted Image

Ok here is where I took a Pvc coupler and shoved a Cpvc coupler into it, so it will has a double coupler. After that I super glued the barrel there then added Epoxy puddy as seen here.

Posted Image

I dont have a picture of it but while that was drying, I wrapped the plunger head in E-tape and also added a Disk Shot spring for extra power. So here it is put back together.

Posted Image

And here is a picture showing where you need to dremel.(there used to be two walls in the front so I just sanded those down untill 1/2 inch PVC fit in there.

Posted Image

And thats it for the Write up. Now for the Results

Sunday, January 25. 12pm, the tempature was 26 degress fahrenheit with a wind chill of 14 degrees fahrenheit. All these shots were taken with a flat angle on pavement at a height of 5'7", with a 5" long Cpvc barrel and one 10" bungee. Here are the results...

1: 93',0"

2: 88',6"

3: 79',10"

4: 80',11"

5: 74',5"

Conclusion:

Overall a good handgun for the minimal work required.
Difficulty out of ten: 4/10

Anyway...Questions, comments, flames?

What Inspired You To Nerf...

08 November 2008 - 10:26 PM

What inspired you to nerf. My inspiration was this man right here -----> . After that I searched nerf on youtube untill i stumbled upon Forsaken Angel, and thats how it all started. anyway, the main reason of this thread is becuase I want to know how it all started for you.

Wooden Crossbow Head

17 September 2008 - 04:35 PM

My friend FERD'S Crossbow head was breaking off constantly and we have tried 4 differents heads and all of them failed except for this one.

Posted Image

Posted Image

I made this head using a 1 1/4 x 48 wooden dowel and cutting it down. Then I drilled a hole through the middle of the wood.I then drilled a hole through the middle of the pluger shaft.After that I used a srew, it doesnt matter what size.Then srewed it through both of the holes. After that we used liquid epoxy to hold in the screw.Then lube the head and cover the bottom in E tape, and there you go.A working crossbow head if yours is ever to fall off.