
 Find content
Much of what I'd like to say have already been stated by oodalumps in this thread, though the mention of wars wasn't very large, and I'm hoping to expand that. There have been a few threads about such things on our website, K'nex Innovation, but nobody really starting to host a war just yet. I'm hoping to start one up here in my home town in the spring, a lot of the current k'nexers live in Ohio and Michigan.
In my opinion, K'nex guns and Nerf blasters are somewhat similar in such aspects as the ranges they can achieve, reload time, modifications can be made, the list can go on. I feel that a K'nex war modeled after Nerf wars would work quite well, with a few rules changed of course.
The main reason I started this topic was mostly to gather opinions and ideas for these types of wars. I realize that many of you don't have any idea of what these guns can do, so I'll show off some of the guns we've created. Many of the following are accompanied by videos.
My pride and joy, and latest creation, K'nexsayer (take a guess as to what that's based off of):
http://knexinnovatio....php?f=49&t=565
SRv1:
http://www.instructables.com/id/SR-v1/
Basic pistol (old):
http://www.instructa...m/id/K_NEX-GUN/
A few from oodalumps:
http://www.instructa...uto-Knex-Rifle/
http://www.instructa...id/Knex-Cannon/
http://www.instructa...-Machine-Gun_1/
http://knexinnovatio....php?f=49&t=149
One from one of my favorite members:
http://www.instructa...ecutioner-1.02/
Et cetera. Some of these guns are classics, some are newer. I've definitely posted more, but I just don't think they're as good as the one I have posted above. There are many, many, many more guns to be seen. Unfortunately, lots of people want to use guns with magazines in their handles at any war they could go to. That's fine and dandy for an indoor war, but I'm planning on hosting outdoor wars, so these types of guns would be completely useless (they shoot like 20 feet). Some of their opinions are posted here.
Blah, wall of text. Go ahead and post opinions, we'd love to hear what you guys think.
Mepain
Member Since 08 Feb 2008Offline Last Active Mar 01 2014 02:35 AM
Topics I've Started
Trifinder
27 October 2008 - 06:45 PM
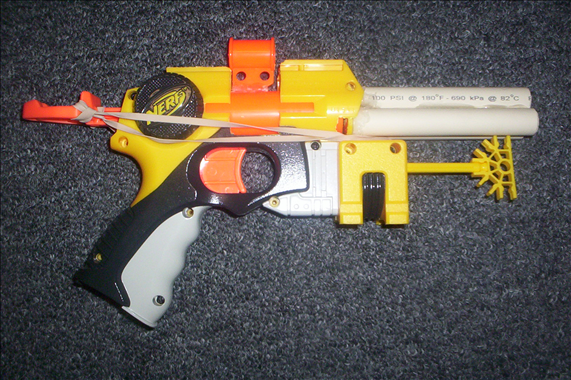
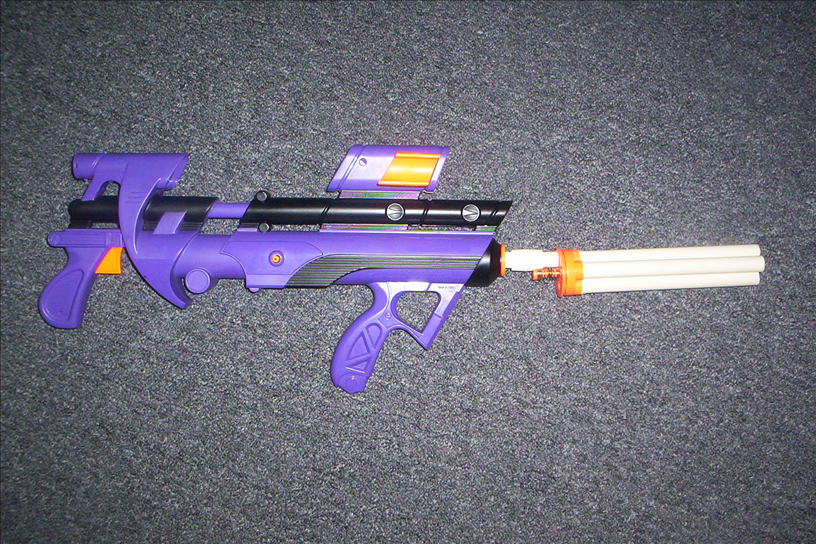
The Trifinder is basically a Nitefinder with oodalumps' SS1 modification. It has 3 barrels, each barrel able to shoot a dart independently of each other via the barrel selector. It works on the same basic principles of the SS1; it has a rotating plunger tube that selects the barrel when rotated. This modification can be a little tricky because some of the parts need to be shaped from scratch plastic or sheet plastic.
Let's make up a list of materials and tools needed for this modification, shall we?
Materials:
-Nitefinder
-Barrel material of choice (I used CPVC)
-Hot glue (I would recommend using a stronger glue like epoxy or plumbers goop)
-Super glue
-Scrap plastic or plastic sheeting of some kind
-Craft foam
-Other materials needed for a standard Nitefinder modification
Tools:
-Dremel
-Hot glue gun
-Screwdriver
-Power drill with bits
Alright, now that we have gotten all materials and tools needed, we can begin the modification. Start by taking apart the Nitefinder. This is standard procedure, not very hard.
Next, take the AR out and drill only the inner cylinder out on this part:
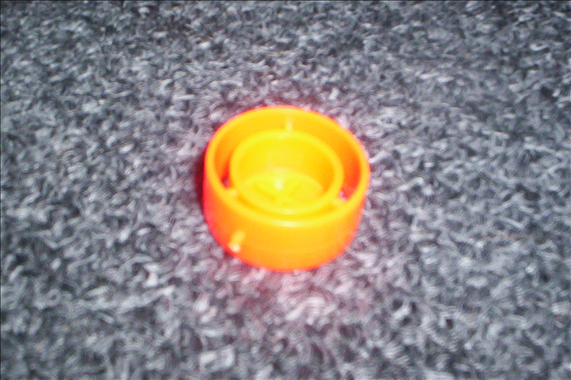
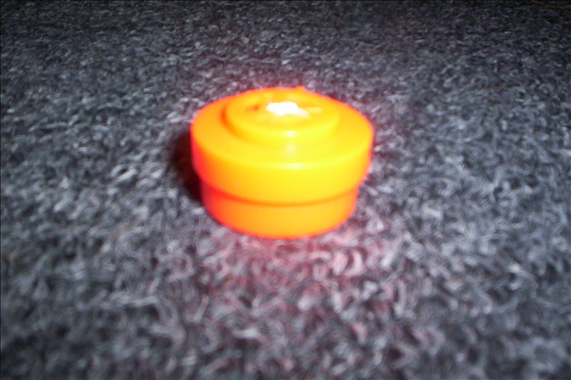
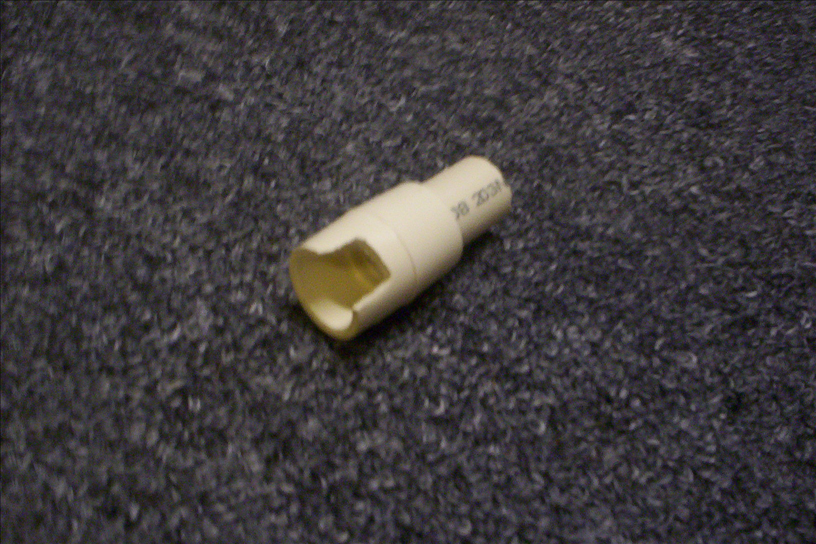
In the picture above, do you see that gap in between the supports for the inner cylinder and the top of the outer cylinder? It's length should be about 1/16''. Grab a piece of scrap plastic that is about 1/16'' thick and cut a circle out of it. This circle should have a diameter of about 7/8'' and fit snugly into the AR piece like so:
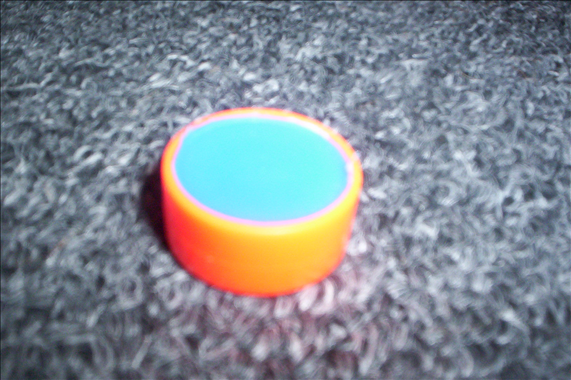
I used a water bottle cap for this writeup just to show what it looks like. The plastic I used in the Trifinder is scrap Nerf plastic. I'm sure the water bottle cap would work fine.
Next we need to super glue the scrap plastic into the AR piece. Do this, and then super glue the end cap of the barrel onto the end of the AR piece. It should now be one solid piece.
The end cap needs to be nice and flat. There is a bit coming out the top of it as seen in this picture:
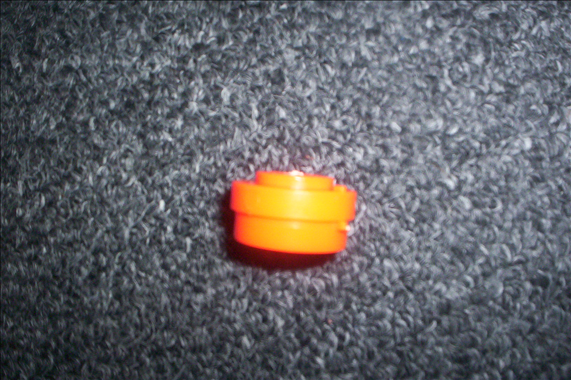
Go ahead and flatten that out. You should be left with a "hole" in the end of the tube. I filled the hole with hot glue, but I'm sure epoxy or sheet plastic would work to fill it.
Now drill a hole in the end of it. The hole is 3/16'' in diameter and 3/16'' away from the edge of the end cap. This means that the center of the circle is about 9/32'' away from the edge of the end cap. Take a look (Notice that I have worn FBR surrounding it to seal it. I really should be using craft foam, but the FBR works good enough for now. Go ahead and do this as well.):
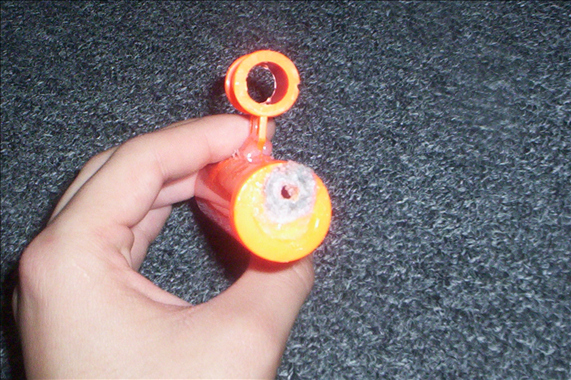
(another picture if you need it: http://i271.photobuc...8246Resized.png )
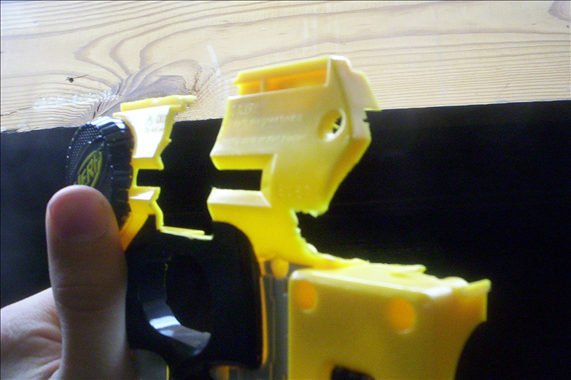
Next we need to super glue the end piece onto the plunger tube like in the above picture. Do this, and then cut/dremel off the tabs off of the tube like so:
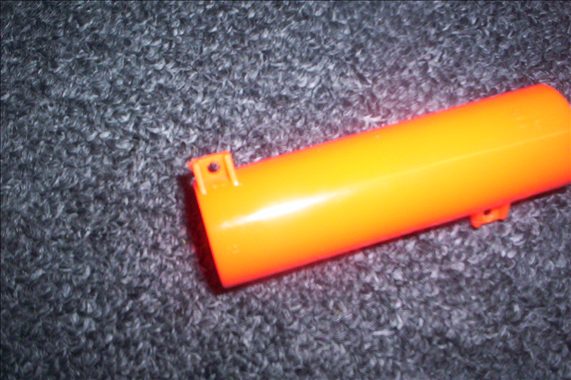

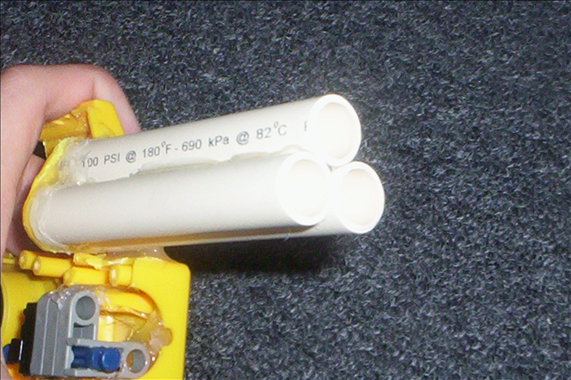
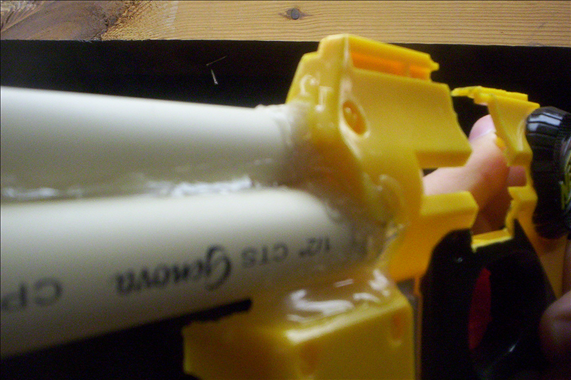
Now that that's done, we'll move to the barrels. Cut 3 4'' pieces of your barrel material of choice. I used CPVC. Glue them together in a triangular fashion, and make sure one end is completely flat when set on a flat surface.
Now we need something to put the barrels on, so we'll get som more scrap/sheet plastic and cut out the "triangular piece".
Get a sheet of paper and your barrels. Trace around the flat end of the barrels and complete the shape. Cut it out.
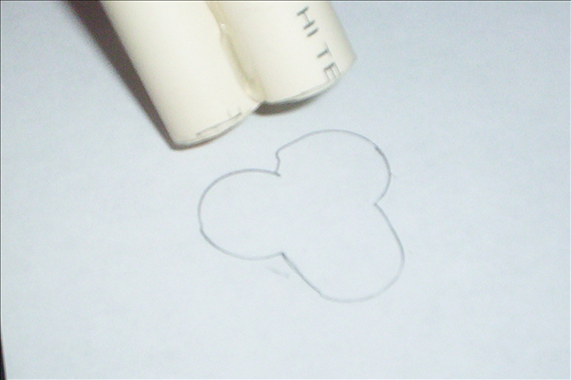

Go ahead and tape/glue/whatever the piece of paper onto your scrap plastic. Cut out the shape.
IMPORTANT: The shape is to be roughly 1/16'' LARGER than the template. It's one of those measure twice, cut once things.
Alright, here's where it gets tricky. The three holes that are needed to be cut out of the piece need to be in specific locations to produce optimum airflow when the end of the plunger tube and this piece come together. It may be a bit hard for me to explain this.
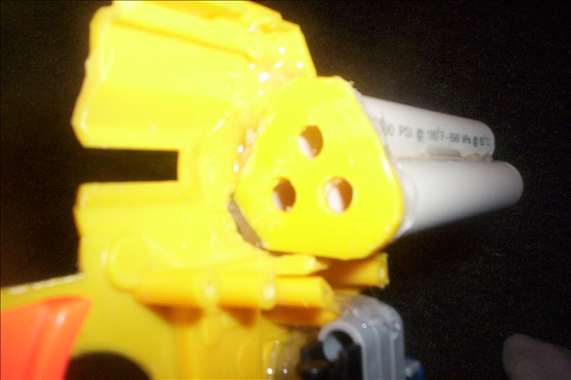
This is what the piece is supposed to look like when completed:
I've made a quick paint picture to explain what's going on:
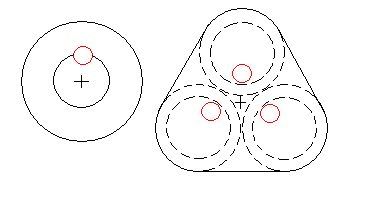
Basically, the plus signs are the centers of the pieces. The circle is the plunger tube with a hole in it, the triangle is the triangle piece. You can see how the barrels are placed on top of the triangle piece, and how the red holes are inside the barrels. The red holes must be in this position, yet be in the same spot as the hole on the plunger tube no matter what position it is in when rotated. The plus sign on the plunger tube is the axis it rotates on.
Through trial and error with measurements you need to find the perfect places for these holes, and drill them. Once again, I used a 3/16'' bit.
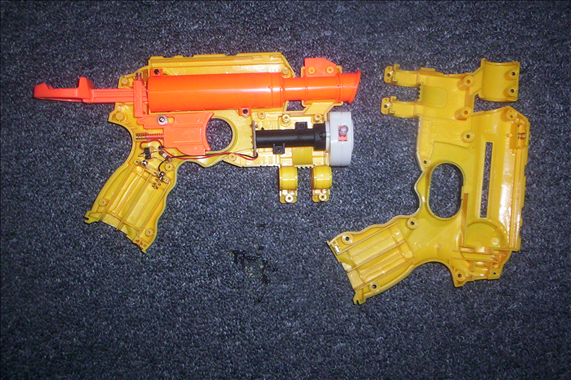
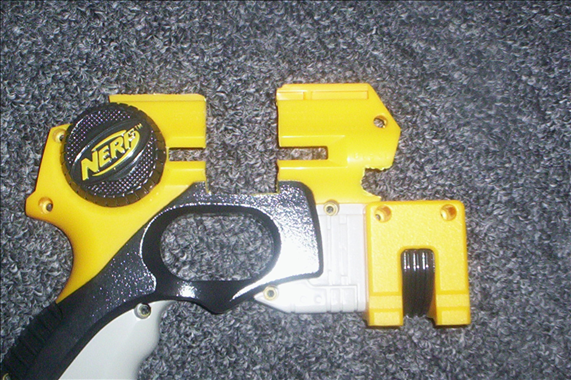
The next thing to do is cut the shell. We first need to cut it to accommodate the new barrels, so cut off the front piece and the part where the barrels will come out to fit them in the gun. Make small cuts at a time to ensure that it fits tightly and correctly.
(Picture limit)
Now we will continue to cut the shell, Decide where you want the barrel selector to be at and then cut a larghe slot in the side of the shell where you decide you want to put it. My slot is about an inch long. You can choose to leave the dart holders or get rid of them. I trashed them.
Do this to both halves.
Next we'll make the actual barrel selector. You can use anything you want for this, but I used a part of the old barrel for it. I super glued it into place, then put hot glue over it:
It should fit nicely.
All that's left to do is glue it together. Use above pictures to see where the barrels are to be glued onto the gun. I would recommend not using hot glue as I did, but instead using epoxy or a stronger alternative.
The internals should look like this when completed:
Now you can finish the gun by doing any other standard modifications to it (another o-ring, e-tape on plunger head, add a spring, etc.).
If you're planning on banding it, be sure to band it like I have in the first picture, so that the bands are not in the way of the barrel selector. Do not add to many bands, we do not want our plunger to bend downward.
Time for ranges and all that bullshit. I don't think I need to do extensive tests and whatnot to tell you that the ranges are in the mid 40's. I've only banded it as far as power goes, so there is definitely room for improvement. Here's a video.
Finally, I'd like to apologize if any of the write up is unclear. I was working with a stock Nitefinder and the already modded Trifinder here. Hopefully that was enough.
Lastly, Enjoy!
Let's make up a list of materials and tools needed for this modification, shall we?
Materials:
-Nitefinder
-Barrel material of choice (I used CPVC)
-Hot glue (I would recommend using a stronger glue like epoxy or plumbers goop)
-Super glue
-Scrap plastic or plastic sheeting of some kind
-Craft foam
-Other materials needed for a standard Nitefinder modification
Tools:
-Dremel
-Hot glue gun
-Screwdriver
-Power drill with bits
Alright, now that we have gotten all materials and tools needed, we can begin the modification. Start by taking apart the Nitefinder. This is standard procedure, not very hard.
Next, take the AR out and drill only the inner cylinder out on this part:
In the picture above, do you see that gap in between the supports for the inner cylinder and the top of the outer cylinder? It's length should be about 1/16''. Grab a piece of scrap plastic that is about 1/16'' thick and cut a circle out of it. This circle should have a diameter of about 7/8'' and fit snugly into the AR piece like so:
I used a water bottle cap for this writeup just to show what it looks like. The plastic I used in the Trifinder is scrap Nerf plastic. I'm sure the water bottle cap would work fine.
Next we need to super glue the scrap plastic into the AR piece. Do this, and then super glue the end cap of the barrel onto the end of the AR piece. It should now be one solid piece.
The end cap needs to be nice and flat. There is a bit coming out the top of it as seen in this picture:
Go ahead and flatten that out. You should be left with a "hole" in the end of the tube. I filled the hole with hot glue, but I'm sure epoxy or sheet plastic would work to fill it.
Now drill a hole in the end of it. The hole is 3/16'' in diameter and 3/16'' away from the edge of the end cap. This means that the center of the circle is about 9/32'' away from the edge of the end cap. Take a look (Notice that I have worn FBR surrounding it to seal it. I really should be using craft foam, but the FBR works good enough for now. Go ahead and do this as well.):
(another picture if you need it: http://i271.photobuc...8246Resized.png )
Next we need to super glue the end piece onto the plunger tube like in the above picture. Do this, and then cut/dremel off the tabs off of the tube like so:
Now that that's done, we'll move to the barrels. Cut 3 4'' pieces of your barrel material of choice. I used CPVC. Glue them together in a triangular fashion, and make sure one end is completely flat when set on a flat surface.
Now we need something to put the barrels on, so we'll get som more scrap/sheet plastic and cut out the "triangular piece".
Get a sheet of paper and your barrels. Trace around the flat end of the barrels and complete the shape. Cut it out.
Go ahead and tape/glue/whatever the piece of paper onto your scrap plastic. Cut out the shape.
IMPORTANT: The shape is to be roughly 1/16'' LARGER than the template. It's one of those measure twice, cut once things.
Alright, here's where it gets tricky. The three holes that are needed to be cut out of the piece need to be in specific locations to produce optimum airflow when the end of the plunger tube and this piece come together. It may be a bit hard for me to explain this.
This is what the piece is supposed to look like when completed:
I've made a quick paint picture to explain what's going on:
Basically, the plus signs are the centers of the pieces. The circle is the plunger tube with a hole in it, the triangle is the triangle piece. You can see how the barrels are placed on top of the triangle piece, and how the red holes are inside the barrels. The red holes must be in this position, yet be in the same spot as the hole on the plunger tube no matter what position it is in when rotated. The plus sign on the plunger tube is the axis it rotates on.
Through trial and error with measurements you need to find the perfect places for these holes, and drill them. Once again, I used a 3/16'' bit.
The next thing to do is cut the shell. We first need to cut it to accommodate the new barrels, so cut off the front piece and the part where the barrels will come out to fit them in the gun. Make small cuts at a time to ensure that it fits tightly and correctly.
(Picture limit)
Now we will continue to cut the shell, Decide where you want the barrel selector to be at and then cut a larghe slot in the side of the shell where you decide you want to put it. My slot is about an inch long. You can choose to leave the dart holders or get rid of them. I trashed them.
Do this to both halves.
Next we'll make the actual barrel selector. You can use anything you want for this, but I used a part of the old barrel for it. I super glued it into place, then put hot glue over it:
It should fit nicely.
All that's left to do is glue it together. Use above pictures to see where the barrels are to be glued onto the gun. I would recommend not using hot glue as I did, but instead using epoxy or a stronger alternative.
The internals should look like this when completed:
Now you can finish the gun by doing any other standard modifications to it (another o-ring, e-tape on plunger head, add a spring, etc.).
If you're planning on banding it, be sure to band it like I have in the first picture, so that the bands are not in the way of the barrel selector. Do not add to many bands, we do not want our plunger to bend downward.
Time for ranges and all that bullshit. I don't think I need to do extensive tests and whatnot to tell you that the ranges are in the mid 40's. I've only banded it as far as power goes, so there is definitely room for improvement. Here's a video.
Finally, I'd like to apologize if any of the write up is unclear. I was working with a stock Nitefinder and the already modded Trifinder here. Hopefully that was enough.
Lastly, Enjoy!
At2k Modification
27 August 2008 - 06:55 PM
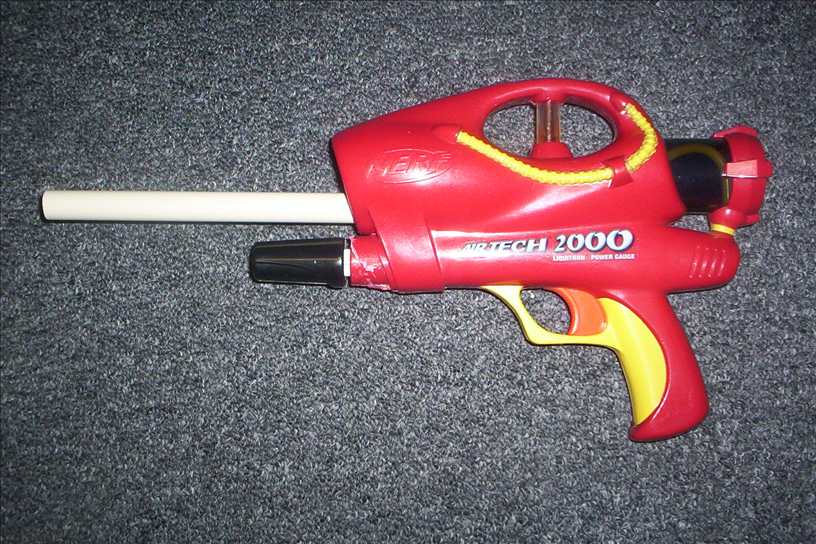
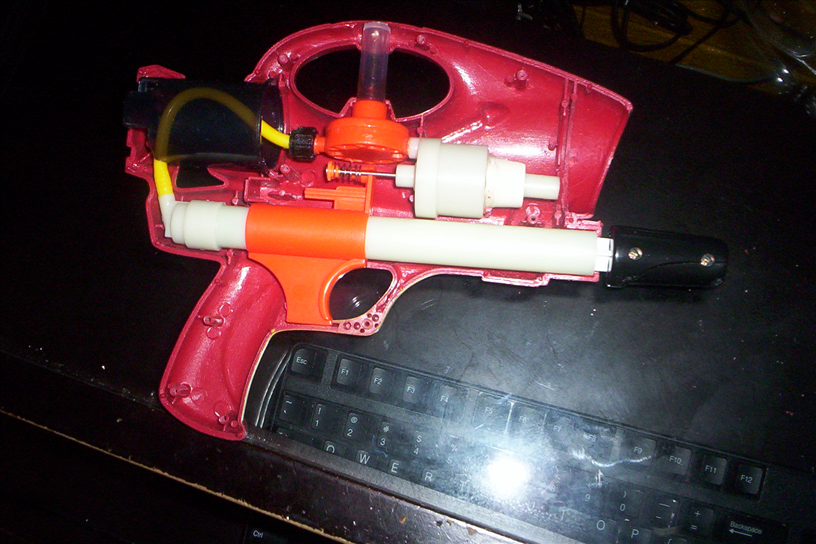
This modification not only allows your At2k to have a removable turret, but also a normal single shot barrel.
Here are some pictures:
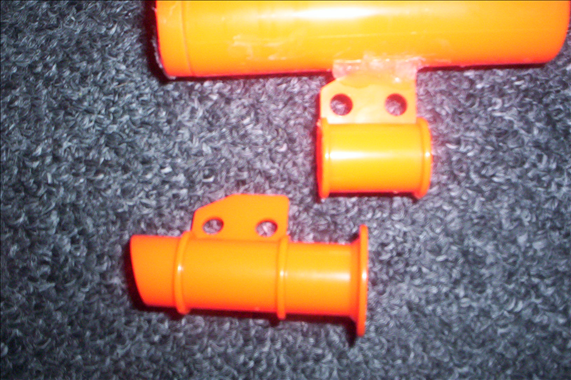
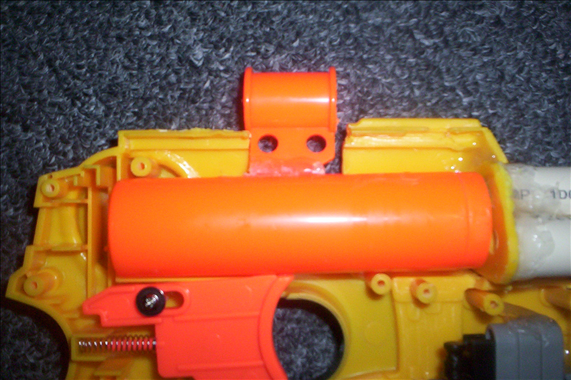
In order to do this, you must have a 1/2'' CPVC coupler and 1'' of 1/2'' ID CPVC pipe. I am unsure as to how well a PVC would work, but I don't think it would make much of a difference. The coupler has been cut nearly in half, but I left the full inner ring intact. The pieces are then to be cut/sanded like so: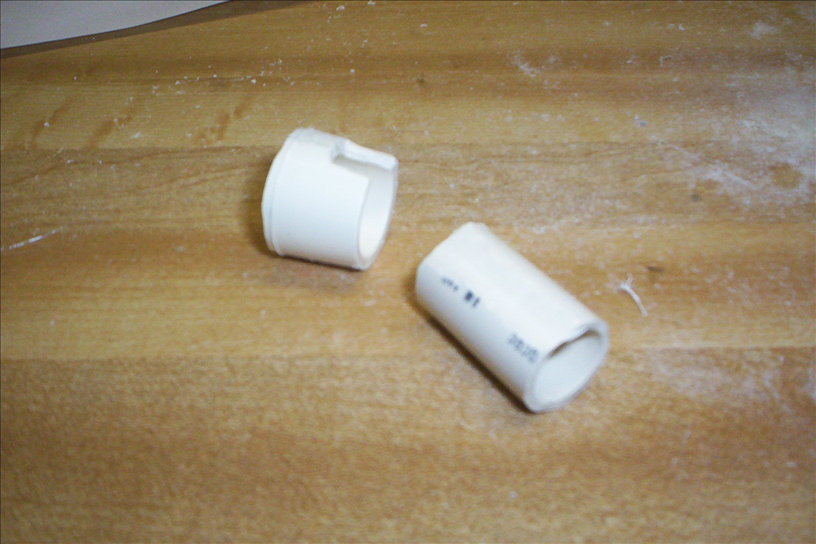
The inner ring of the coupler was sanded enough so that it fit snugly over the air chamber as shown. I then used hot glue, though I should probably be using epoxy or plumbers goop, to bond the pieces in place. As you can see, the turret has not yet been barreled at this stage. This is simply because I am lazy.
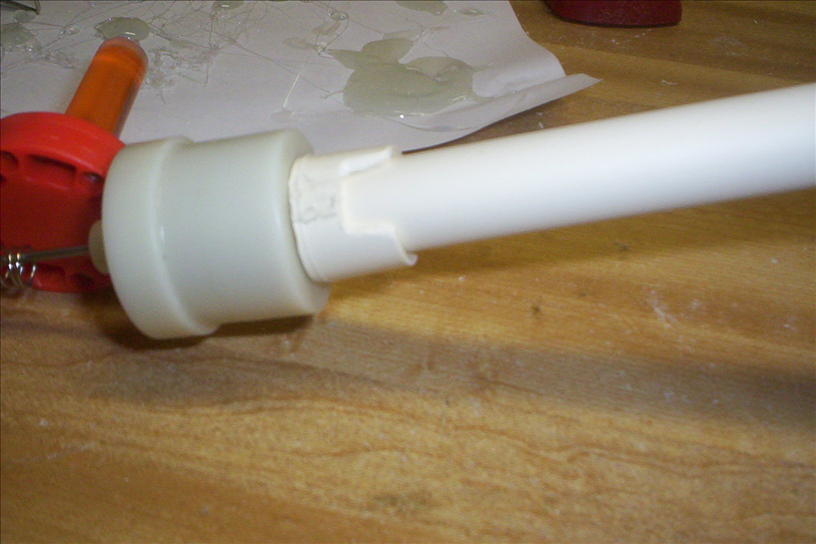
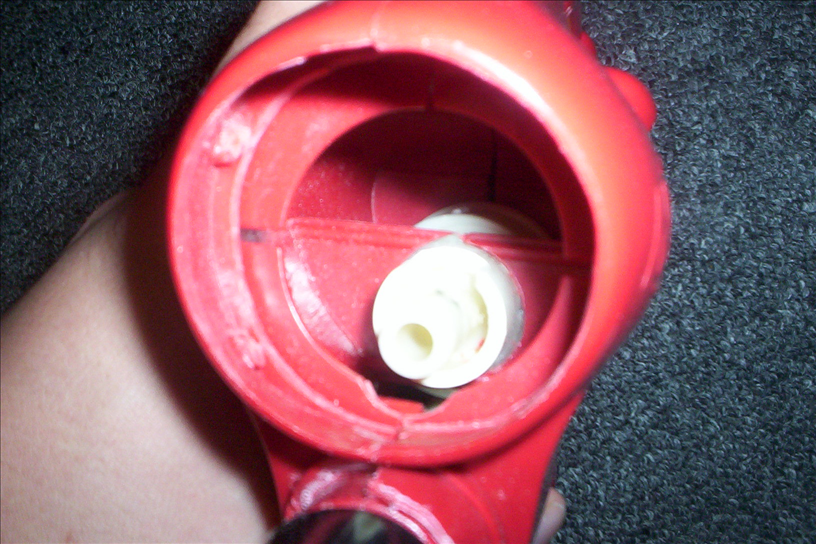
A perfect fit, no sealing problems either. Though you should probably hot glue a small piece of foam around the part that the air comes out of (for lack of a better name) for a better seal.
A barrel fits perfectly as well. No sealing problems here either.
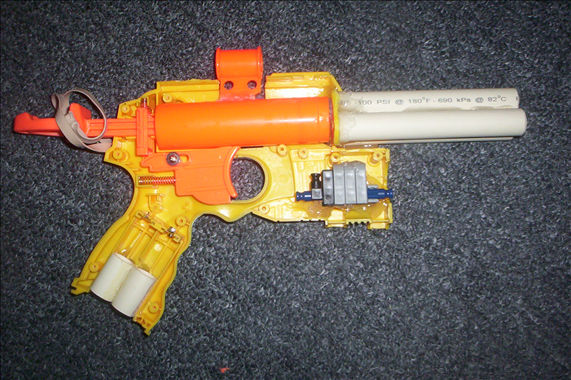
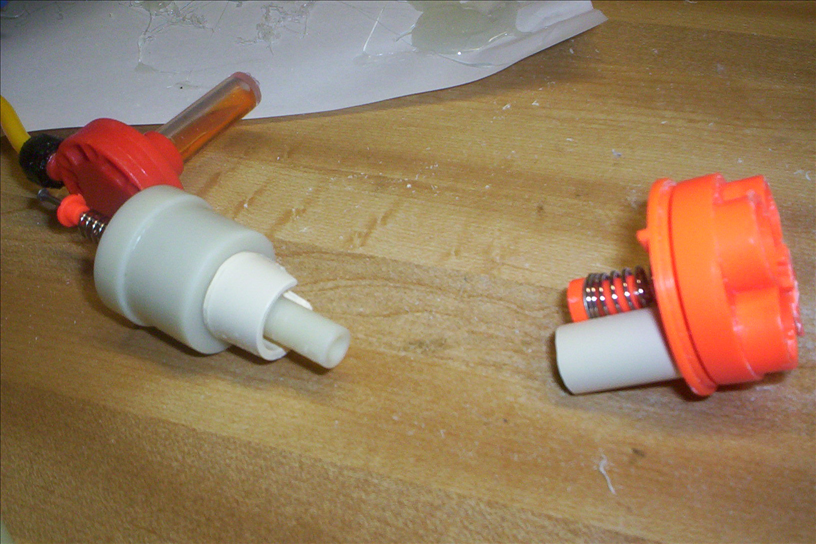
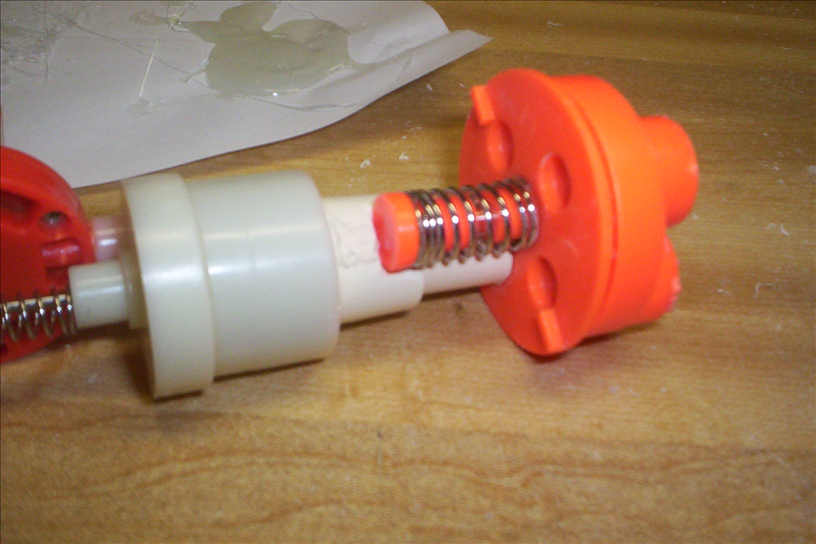
In this image, you can see that parts of the shell have been dremeled to accommodate for the new additions. I dremeled the part that holds the turret in place, so it can be removed. The plate in front of the air chamber has also been dremeled to fit the new coupler.
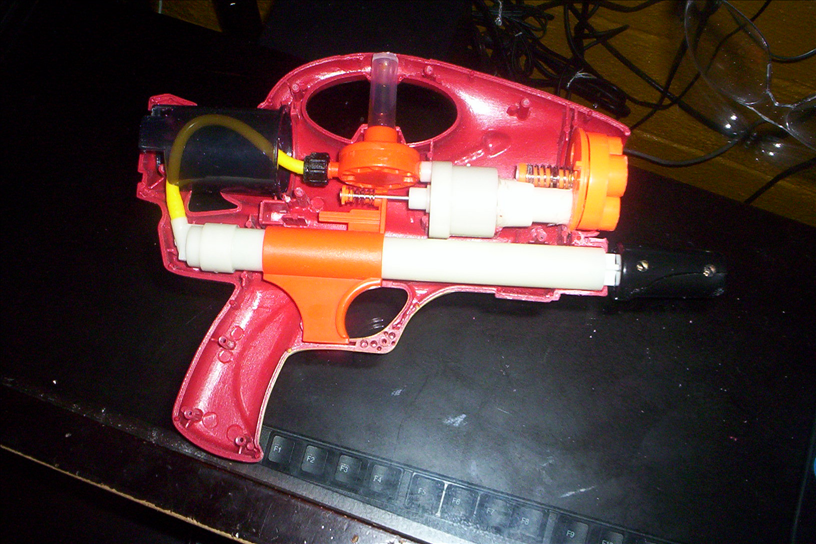
Here is another image showing what has been done:
Everything works:
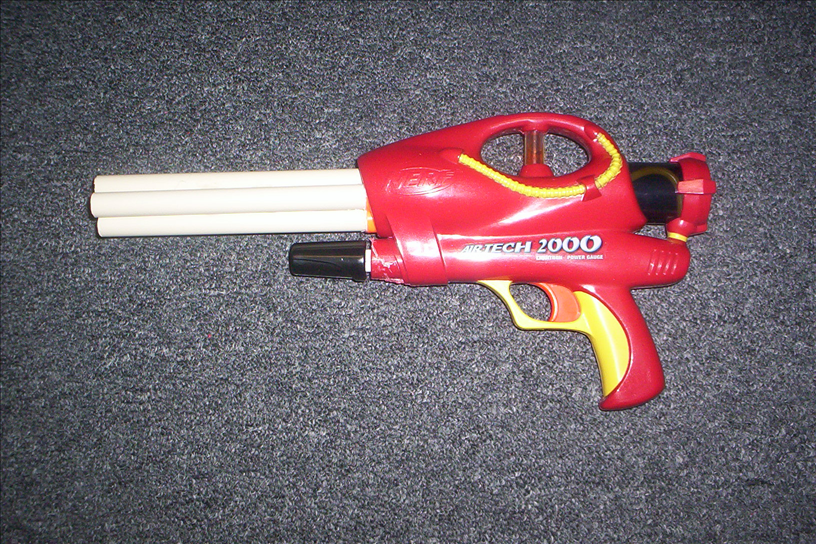
And that wasn't even the best part.
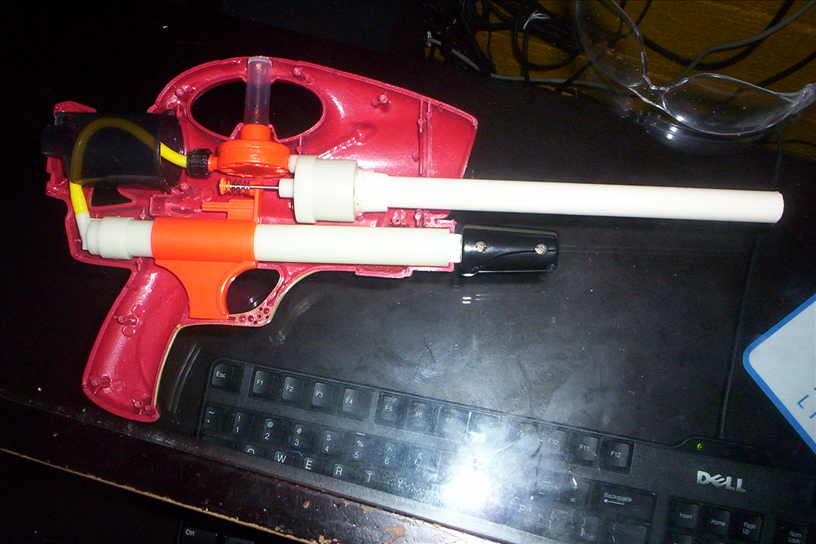
The second part of this Write-up will feature an adapter, allowing you to attach the 2k's turret to any gun that has a 1/2'' CPVC coupler (or PVC, if it works):
(Yes, the turret is slightly angled because of my shitty craftsmanship.)
The adapter is as simple as this:
It is a coupler that has the same notch in it as the one in the 2k, but the coupler is full, not half, and there is a 1'' piece of CPVC hot glued into the other end so it can be attached to another gun.
Ranges have not been tested due to windy conditions outside, but I would guess ranges are typical for a 2k. If not, less.
Enjoy!
Here are some pictures:
In order to do this, you must have a 1/2'' CPVC coupler and 1'' of 1/2'' ID CPVC pipe. I am unsure as to how well a PVC would work, but I don't think it would make much of a difference. The coupler has been cut nearly in half, but I left the full inner ring intact. The pieces are then to be cut/sanded like so:
The inner ring of the coupler was sanded enough so that it fit snugly over the air chamber as shown. I then used hot glue, though I should probably be using epoxy or plumbers goop, to bond the pieces in place. As you can see, the turret has not yet been barreled at this stage. This is simply because I am lazy.
A perfect fit, no sealing problems either. Though you should probably hot glue a small piece of foam around the part that the air comes out of (for lack of a better name) for a better seal.
A barrel fits perfectly as well. No sealing problems here either.
In this image, you can see that parts of the shell have been dremeled to accommodate for the new additions. I dremeled the part that holds the turret in place, so it can be removed. The plate in front of the air chamber has also been dremeled to fit the new coupler.
Here is another image showing what has been done:
Everything works:
And that wasn't even the best part.
The second part of this Write-up will feature an adapter, allowing you to attach the 2k's turret to any gun that has a 1/2'' CPVC coupler (or PVC, if it works):
(Yes, the turret is slightly angled because of my shitty craftsmanship.)
The adapter is as simple as this:
It is a coupler that has the same notch in it as the one in the 2k, but the coupler is full, not half, and there is a 1'' piece of CPVC hot glued into the other end so it can be attached to another gun.
Ranges have not been tested due to windy conditions outside, but I would guess ranges are typical for a 2k. If not, less.
Enjoy!

