
 Find content
In case people don't know or whatever, you can go to this address: http://www.hasbro.co...n&go.x=0&go.y=0
and buy the vulcan now, I just placed an order out of curiosity and you can buy the value pack from here for the same money and it gets you 25 extra darts, totaling 50 darts, plus an extra ammo chain as well as a shoulder strap. you'll pay $13 for shipping, but you'd have that in darts, chain, and a shoulder strap, plus you don't have to wait. Hope this helps unless everyone already knows and I'm behind the game. Just putting this out there for if you're dying to get your hands on a vulcan like I was.
Gutzenheim
Member Since 22 Jan 2008Offline Last Active Nov 28 2009 06:24 PM
Topics I've Started
Nerf Ball Popper/ Loader/ Barrel Thing
09 March 2008 - 08:29 PM
Well, when I first got heavily into nerf a year or so back I started off with this probably 16 year old nerf ball gun. It might have been old, but it was very powerful. Sadly the 2 we had broke and I've never seen them anywhere else. The ball actually popped into a pocket in the end of the barrel and could really rock a nerf ball with a good push of the plunger. I've never seen anyone create a successful ball popper end that actually held up. So I only had half my classes last week one day and was bored. I was looking at some old pvc I had including a coupler thing with rubber seals. When screwing with these rubber seals I realized I had just created a really good ball popping end that would be very sturdy. Anyways, I'll quit boring you now and show you how I made this. This ball popper could be hooked to the end of an air cannon which is what I'll be doing with it or it could be integrated into a homemade mechanical ball popping gun. Also, this was a budget project that spent no money on so I used parts and did things that were unpractical, so hopefully you can see where other parts can be substituted in and I'll make notes where other parts could be used.
First I'll show you the wicked old nerf gun I was talking about, some of you might know it.
Here it is:
OK.....I couldn't find any pics of the whole gun, put here's the ball popper end from it I talked about.
Anyways, now on to my creation.....
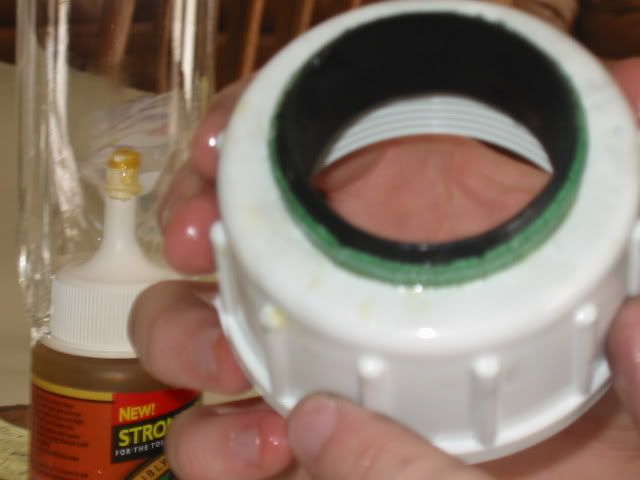
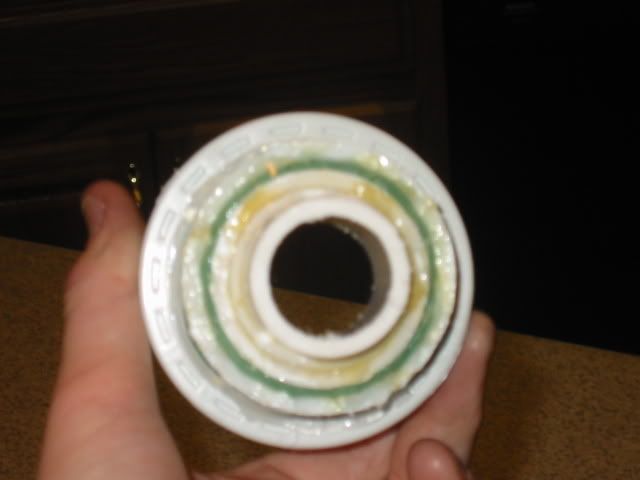
I started with this 1.5" coupler thing I had left over. It looks like this when unscrewed:

As you can see I put a little bit of duct tape on the rubber rings to make just a slightly tighter fit, I went around each ring once or twice with the duct tape.
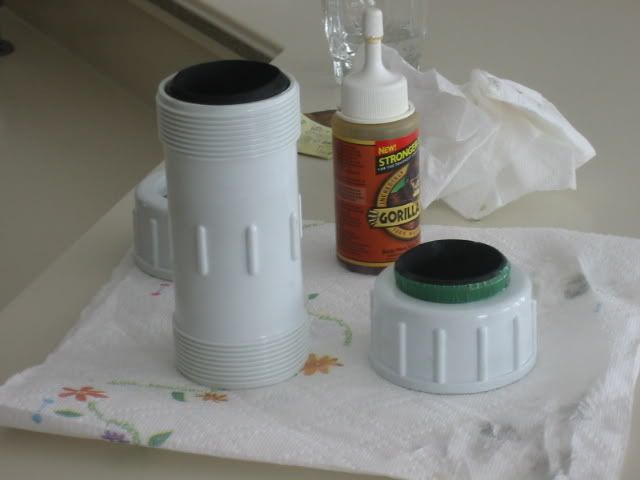
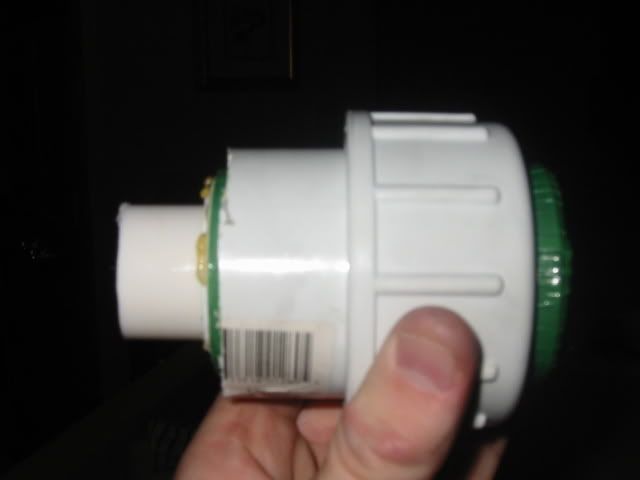
Next I glued one of the rubber rings into one of the screw on pieces with about 1/4 of an inch of rubber sticking out of the top as shown in this picture:
Next I glued the other ring in the top of the main body of the coupler so the top of the ring would be flush with the top of the threads as shown here:
This is what you should have done so far
Next I cut the main body in a little less than half giving me this:
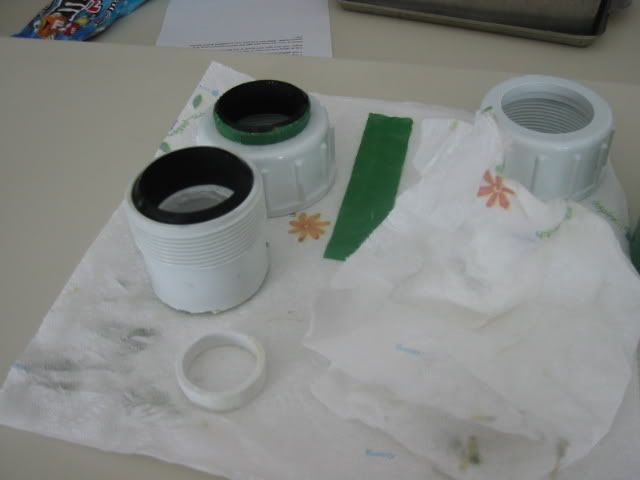
Then I took a 1 1/2" plug and cut the top out like this because I had no 1 1/2" pipe....if you have some use it for this part and you'll save loads of time. Anyways, here that part is:

Actually that was just the first drilling I did on it, I cut the whole top out.
Next put a little duct tape around that plug so it fits tightly in the body and glue it into the body so the top of it is against the bottom of the rubber in the body.
................
At this point if you had 1 1/2" piping cut a short piece and glue it in there as described above only you shouldn't need tape, at least not much. Now with that 1 1/2" piece of pipe you glued in there you can glue a reducer bushing into that making it whatever size you want.
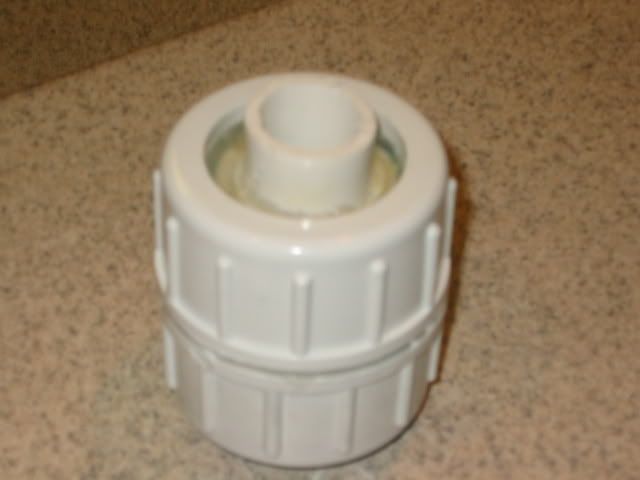
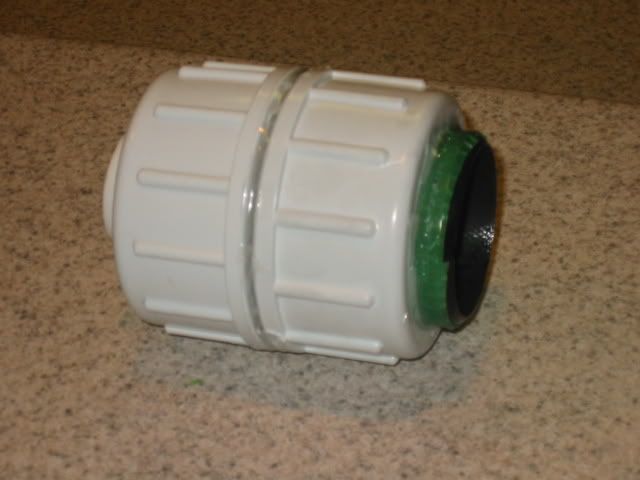
After this point I didn't have the 1 1/2" piping so I had to do some other stuff because I wasn't thinking upon construction. If you want to know how I did this part for whatever reason I will, but you shouldn't need it though so here are some other pictures of the project as it progressed and then a final product. I still need to buy a reducer bushing, but other than that I'm done and you'll have a finished working nerf ball popper/ loader that allows you to a load a ball just py pushing it against the ground over the ball snd the ball won't fall out until you fire. Here are the rest of the pics:
~~Gutzenheim
First I'll show you the wicked old nerf gun I was talking about, some of you might know it.
Here it is:
OK.....I couldn't find any pics of the whole gun, put here's the ball popper end from it I talked about.
Anyways, now on to my creation.....
I started with this 1.5" coupler thing I had left over. It looks like this when unscrewed:
As you can see I put a little bit of duct tape on the rubber rings to make just a slightly tighter fit, I went around each ring once or twice with the duct tape.
Next I glued one of the rubber rings into one of the screw on pieces with about 1/4 of an inch of rubber sticking out of the top as shown in this picture:
Next I glued the other ring in the top of the main body of the coupler so the top of the ring would be flush with the top of the threads as shown here:
This is what you should have done so far
Next I cut the main body in a little less than half giving me this:
Then I took a 1 1/2" plug and cut the top out like this because I had no 1 1/2" pipe....if you have some use it for this part and you'll save loads of time. Anyways, here that part is:
Actually that was just the first drilling I did on it, I cut the whole top out.
Next put a little duct tape around that plug so it fits tightly in the body and glue it into the body so the top of it is against the bottom of the rubber in the body.
................
At this point if you had 1 1/2" piping cut a short piece and glue it in there as described above only you shouldn't need tape, at least not much. Now with that 1 1/2" piece of pipe you glued in there you can glue a reducer bushing into that making it whatever size you want.
After this point I didn't have the 1 1/2" piping so I had to do some other stuff because I wasn't thinking upon construction. If you want to know how I did this part for whatever reason I will, but you shouldn't need it though so here are some other pictures of the project as it progressed and then a final product. I still need to buy a reducer bushing, but other than that I'm done and you'll have a finished working nerf ball popper/ loader that allows you to a load a ball just py pushing it against the ground over the ball snd the ball won't fall out until you fire. Here are the rest of the pics:
~~Gutzenheim
My 2nd Homemade With Hpa And Interchangeable Barrels
08 March 2008 - 09:46 AM
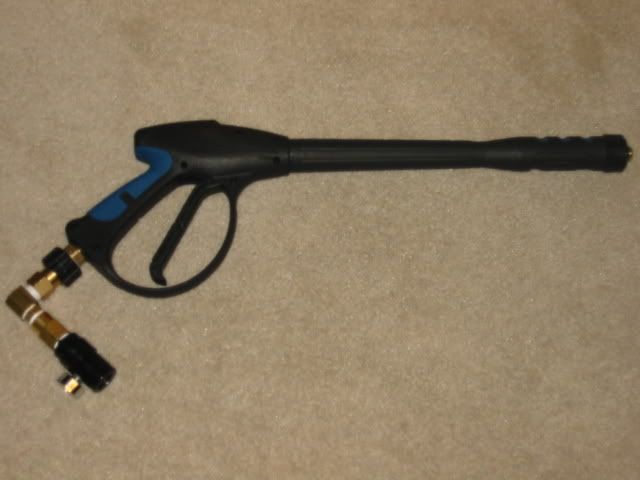
Hey guys, here is the second homemade I've made in my nerfing expedition. It integrates an hpa tank, interchangeable barrels, and a pressure washer handle. WARNING: Building this type of gun can be very dangerous if you don't use rated valves, I had a bad experience with that, I'll tell my story here soon. Anyways for now though, here's my almost complete, untested gun. I have high expectations for it.
The first picture of it here is just the complete gun...fir the most part.
The second pic is a closeup of the piping I took care of, I'll explain the piping in detail directly beneath the picture.
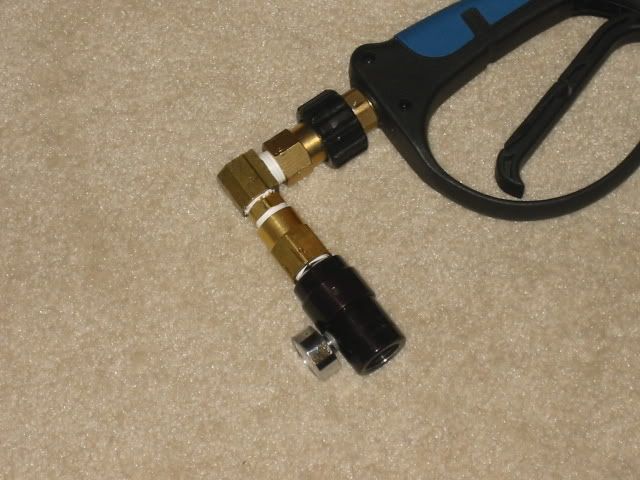
As far as piping goes this gun is really simple...no glues, no mess, etc. The piping can though, believe it or not be a little pricey. Starting from where the piping starts at the handle I have a garden hose adapter they sell with the fittings for pressure washers that's used to connect to the spray gun to the hose. Next I have a 3/8 elbow. connecting to a 3/8 male to male cl nipple. Next up is a 3/8 to 3/8 or 3/8 to 1/2 female to female, I can't remember exactly. Then I screwed my regulator into that. An hpa tank screws into that and then you can regulate the pressure at which you fire, never have to pump, and it allows for higher pressure for creating other sport barrels such as paint ball and airsoft.
The handle and trigger mechanism itself was chosen based on the fact that the valve in most pressure washer handles can handle as much psi level as is in the hpa tank (3000psi). Don't skimp on your valve when working on this project. I tried to regulate and just use a sprinkler valve. Long story short we thought we adjusted the regulator right, then realized the tank wasn't screwed in. Upon screwing the tank in the system over pressurized and a sprinkler valve blew up in my face. No one was hurt and I jumped out of the way of the hunk that flew at me. It did actually blow an entire half off the sprinkler valve. I have a picture somewhere of what it looks like now. I'll post it if I find it. In short be careful!!!
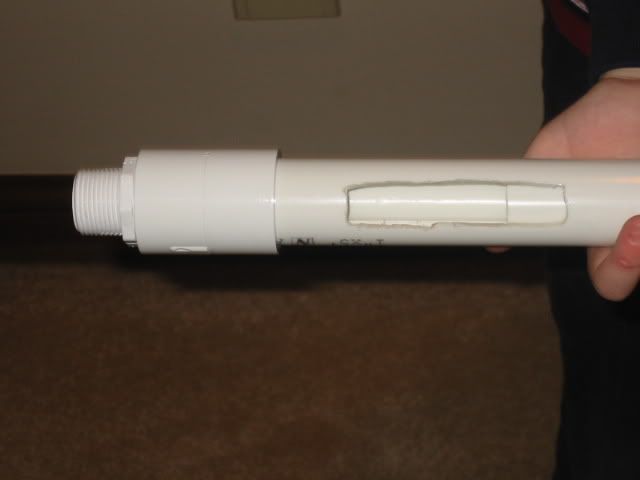
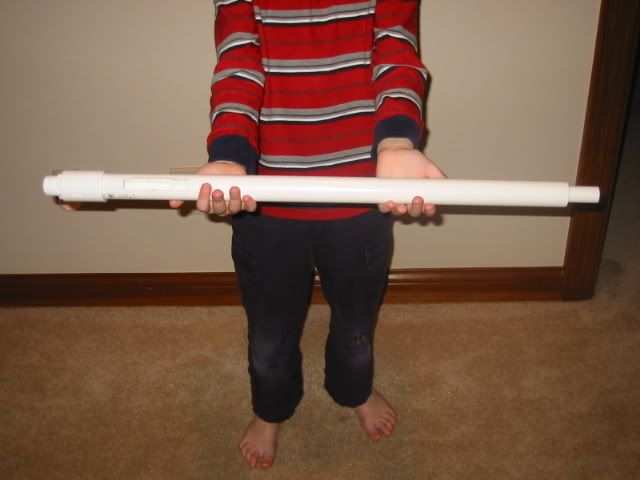
At this point I've made one quick reload barrel of which I'll show below. I have my designs together to create the airsoft and paint ball barrels and now I just need to make them. I also need to add a handle to this barrel.
Anyways, Here's the quick reload pictures.
And here's my dremel setup to create all this.
Also, to connect the barrels I'll be screwing a 1/2 cl nipple into a 3/4 to 1/2 adapter and screw the other half of the cl nipple into the end of the spray gun.
At this point I can't put stats and such because when my first valve blew I lost all my air in the tank and haven't got a chance to get it refilled since. I also have a ball barrel not pictured. Any questions You might have I'll answer to the best of my knowledge.
~~Gutzenheim
The first picture of it here is just the complete gun...fir the most part.
The second pic is a closeup of the piping I took care of, I'll explain the piping in detail directly beneath the picture.
As far as piping goes this gun is really simple...no glues, no mess, etc. The piping can though, believe it or not be a little pricey. Starting from where the piping starts at the handle I have a garden hose adapter they sell with the fittings for pressure washers that's used to connect to the spray gun to the hose. Next I have a 3/8 elbow. connecting to a 3/8 male to male cl nipple. Next up is a 3/8 to 3/8 or 3/8 to 1/2 female to female, I can't remember exactly. Then I screwed my regulator into that. An hpa tank screws into that and then you can regulate the pressure at which you fire, never have to pump, and it allows for higher pressure for creating other sport barrels such as paint ball and airsoft.
The handle and trigger mechanism itself was chosen based on the fact that the valve in most pressure washer handles can handle as much psi level as is in the hpa tank (3000psi). Don't skimp on your valve when working on this project. I tried to regulate and just use a sprinkler valve. Long story short we thought we adjusted the regulator right, then realized the tank wasn't screwed in. Upon screwing the tank in the system over pressurized and a sprinkler valve blew up in my face. No one was hurt and I jumped out of the way of the hunk that flew at me. It did actually blow an entire half off the sprinkler valve. I have a picture somewhere of what it looks like now. I'll post it if I find it. In short be careful!!!
At this point I've made one quick reload barrel of which I'll show below. I have my designs together to create the airsoft and paint ball barrels and now I just need to make them. I also need to add a handle to this barrel.
Anyways, Here's the quick reload pictures.
And here's my dremel setup to create all this.
Also, to connect the barrels I'll be screwing a 1/2 cl nipple into a 3/4 to 1/2 adapter and screw the other half of the cl nipple into the end of the spray gun.
At this point I can't put stats and such because when my first valve blew I lost all my air in the tank and haven't got a chance to get it refilled since. I also have a ball barrel not pictured. Any questions You might have I'll answer to the best of my knowledge.
~~Gutzenheim
Check Out My First Homemade
07 March 2008 - 08:17 PM
Hey everybody, I'm kind of new to the web site and I've done quite a few modifications in the past, but almost immediately wanted to make homemades. This is my first gun and I'm actually posting my second gun as another thread immediately after I post this. I use a rainbird 3/4 inch sprinkler valve, 2 9 volt batteries and a momentary switch to create my trigger.
Here's a torn apart pic of the gun.
Here's a constructed pic of the gun with the normal dart barrel.
http://i258.photobuc...er/IMG_8529.jpg
Here's my lovely wiring. It's just a simple series circuit.
Here's a side by side barrel comparison pic that shows the ball attachment and the dart attachment.
http://i258.photobuc...er/IMG_8547.jpg
Hooked to an air compressor.
I've had some questions on wiring so here's an explanation of how it's done.
I'm sorry, but I can't give you stats as far as distance and those things go at this point in time because I don't have a long enough range to fire it yet and it's very cold outside here now. I will, though when given the chance do all my official testing. I will however say that it does indeed rock a nerf dart at only 50psi and splits them at 100psi. I hope you like my first gun and view my 2nd gun which should be on here either today or tomorrow.
~~Gutzenheim

