Here is the problem. When it is loaded or unloaded (with a clip in) regardless of battery type, the plunger just shuttles back and forth near the beginning of its travel without chambering any dart or mis-catching.
http://s1126.photobu...nt=9ad520dd.mp4
My catch control spring is in place correctly and my catch is facing the correct way. I only have the stock spring in, and have thoroughly greased the plunger head and plunger tube with silicone grease (tried and tested on all my other blasters). I have advanced the plunger by hand and it moves fine. The only possible thing that could be causing the problem that i can see first hand is the white lever that is moved by the trigger. However, when i move the plunger by hand (with the blaster open) it works fine and has no issues with movement or catching or jamming.
Any suggestions would be greatly appreciated as My HvZ loadout is now crippled!
- NerfHaven
- → Viewing Profile: Topics: ThatBritishGuy
ThatBritishGuy
Member Since 14 Nov 2011Offline Last Active Jul 05 2016 04:28 AM
Community Stats
- Group Members
- Active Posts 104
- Profile Views 7,360
- Member Title Member
- Age Age Unknown
- Birthday Birthday Unknown
User Tools
Topics I've Started
Strange Stampede Problem
04 April 2012 - 06:40 AM
OMW Massacre AT Kit
24 March 2012 - 09:26 AM
After a particularly long war with friends, and moving down people close range with my Alpha Trooper, the plunger tube shattered (even though it was padded). I had probably only fired about 1000 shots through it, in comparison my longshot has probably had around 2.5k through it, so i was pretty disappointed in the workmanship, but that is Hasbro I suppose.
Anyway after a long wait look what arrived in the post today .
.
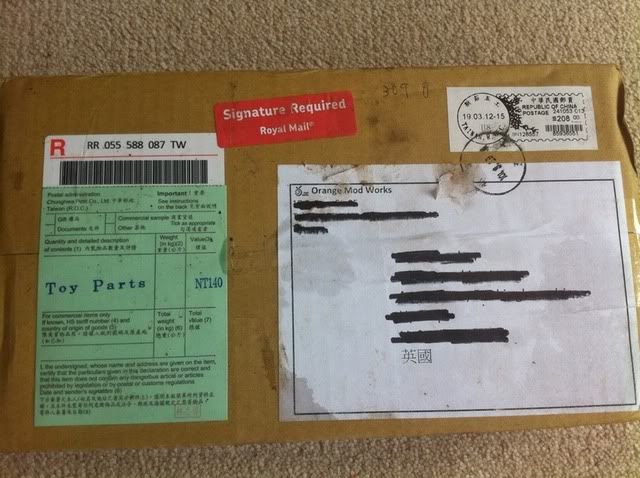
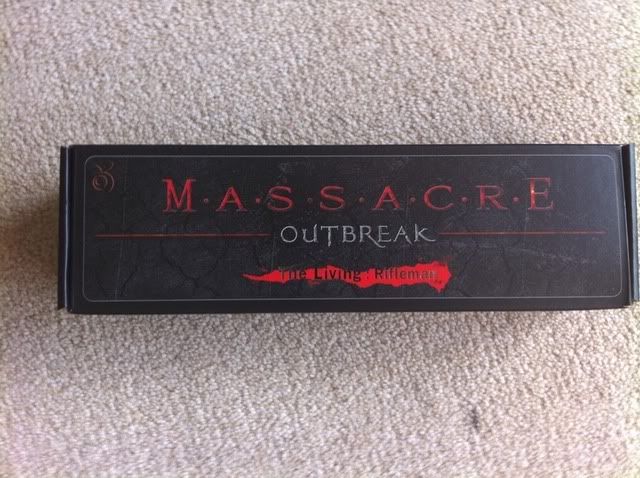
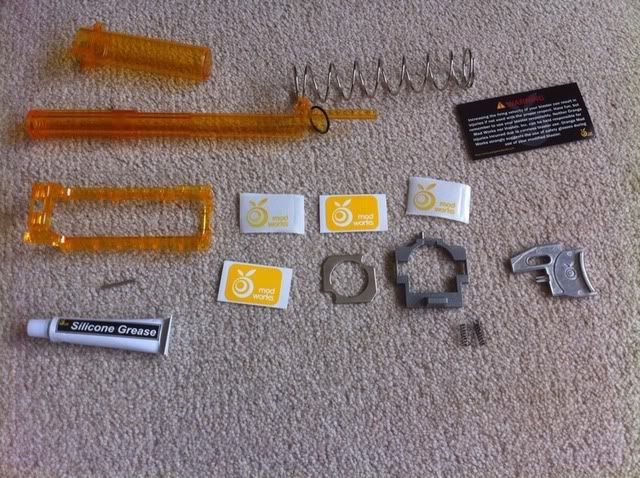
Orange Mod Works Alpha Trooper Massacre Kit - The Rifleman
Includes: Plunger assembly, 6kg spring, metal catch & trigger (because i pre-ordered), stickers, catch springs (2!), and destructions.
I'll now go through each piece in detail and then talk about my testing.
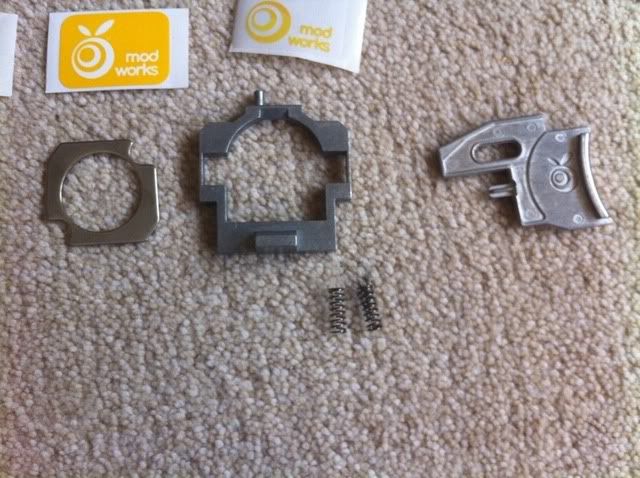
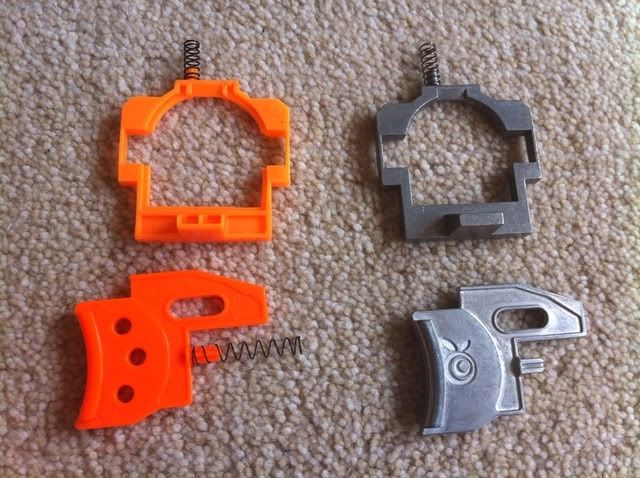
The Catch, trigger, and reinforcement plate are of extremely high quality. They are extremely durable with no flexing under any stress i can provide normally. The trigger has OMW logos on both sides and adds some nice weight to the blaster. The catch has none of the hollows of the standard catch and so i doubt it will be breaking. The springs that come with it are also longer and stronger than the original springs. The reinforcement plate is optional but i'm using it as i have the 6Kg spring currently installed.
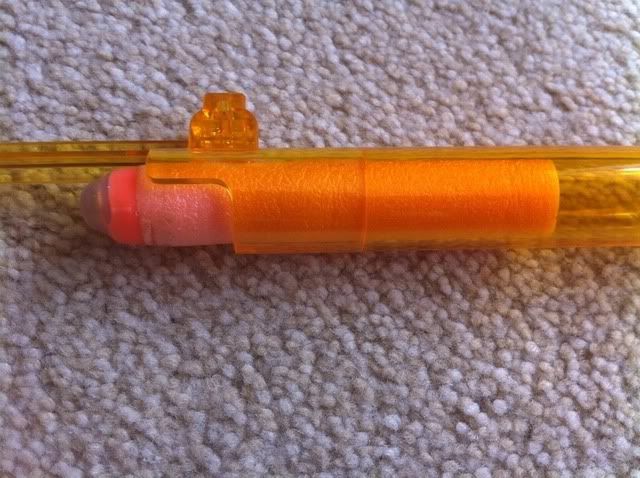
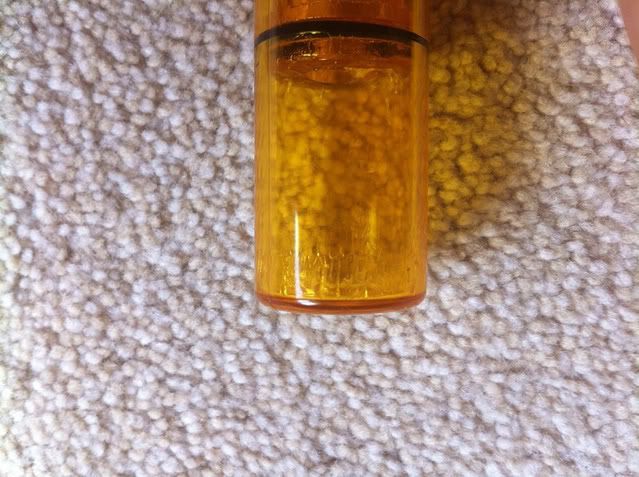
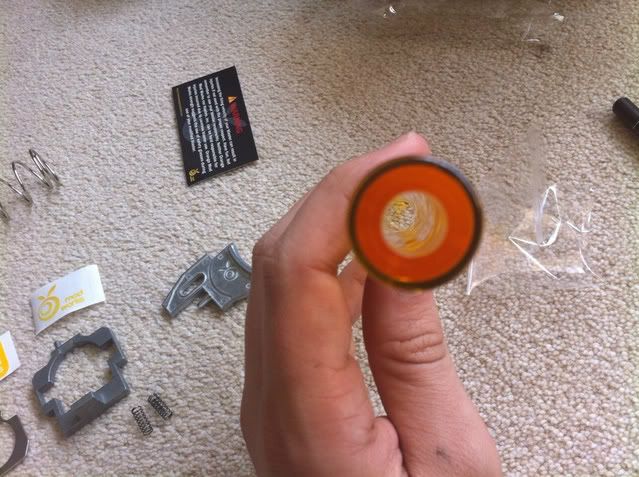
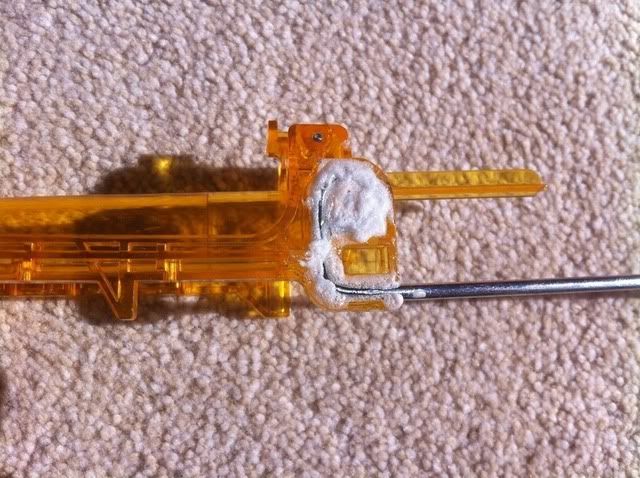
The bolt has a better grip on the dart than the stock model, with the ID comparable to 17/32 brass (or at least the brass i have). It has a slightly wider section near the front for easier loading, and yes it vacuum loads darts if you try. The front is made of fairly thin polycarb though so if you wanted to this is where you could crack it.
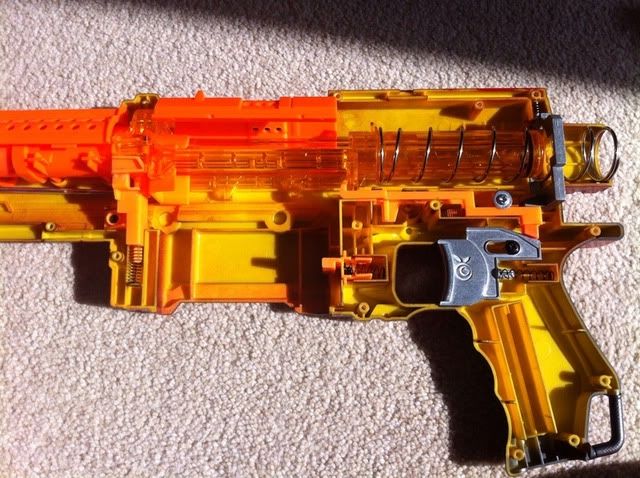
The rear of the plunger tube is thicker than stock, presumably to protect against the breakage that happened to my original kit.
The rear of the bolt has a smaller ID than stock to reduce deadspace and to stop the dart travelling all the way back into the plunger tube. There also is no AR (obviously) and the 17/32ish ID region is just longer than a streamling dart length.
All the bolt assembly is covered in OMW logos for those of you that like aesthetics.
If you are using the 6Kg spring, unfortunately some extra reinforcement is needed where the priming bar attaches to the bolt sled. I just slathered mine in gorilla glue and clamped it down for 2 hours so it had properly set, and I have had no problems so far.
In some blasters (mine included) you may need to add a 1/4 inch spacer at the back of the Plunger Tube as it wont travel far enough to catch as the priming rod will bend because of the 6Kg spring. I just used foam for this like normal PT padding.
EDIT: Ranges with stock streamlines seem to hover around the 65-70ft mark with some streamlines hitting 80. My hot glue streamlines with added weights hit consistent 80s.
Anyway after a long wait look what arrived in the post today


Orange Mod Works Alpha Trooper Massacre Kit - The Rifleman
Includes: Plunger assembly, 6kg spring, metal catch & trigger (because i pre-ordered), stickers, catch springs (2!), and destructions.
I'll now go through each piece in detail and then talk about my testing.


The Catch, trigger, and reinforcement plate are of extremely high quality. They are extremely durable with no flexing under any stress i can provide normally. The trigger has OMW logos on both sides and adds some nice weight to the blaster. The catch has none of the hollows of the standard catch and so i doubt it will be breaking. The springs that come with it are also longer and stronger than the original springs. The reinforcement plate is optional but i'm using it as i have the 6Kg spring currently installed.


The bolt has a better grip on the dart than the stock model, with the ID comparable to 17/32 brass (or at least the brass i have). It has a slightly wider section near the front for easier loading, and yes it vacuum loads darts if you try. The front is made of fairly thin polycarb though so if you wanted to this is where you could crack it.
The rear of the plunger tube is thicker than stock, presumably to protect against the breakage that happened to my original kit.
The rear of the bolt has a smaller ID than stock to reduce deadspace and to stop the dart travelling all the way back into the plunger tube. There also is no AR (obviously) and the 17/32ish ID region is just longer than a streamling dart length.
All the bolt assembly is covered in OMW logos for those of you that like aesthetics.
If you are using the 6Kg spring, unfortunately some extra reinforcement is needed where the priming bar attaches to the bolt sled. I just slathered mine in gorilla glue and clamped it down for 2 hours so it had properly set, and I have had no problems so far.
In some blasters (mine included) you may need to add a 1/4 inch spacer at the back of the Plunger Tube as it wont travel far enough to catch as the priming rod will bend because of the 6Kg spring. I just used foam for this like normal PT padding.

EDIT: Ranges with stock streamlines seem to hover around the 65-70ft mark with some streamlines hitting 80. My hot glue streamlines with added weights hit consistent 80s.
Stampede Problem
19 February 2012 - 11:18 AM
So I replaced the 6 D cells with 4 trustfire 14500 batteries in a 4 AA battery holder. When i connect the pack to the battery tray in normal bias and try to fire the gun (all the other locks are still in place) the bolt advances about 1/2 an inch and then stops. When i then turn the circuit off it doesn't retract. When i then replace the trustfires with the original D cells, the bolt automatically fires and then resets to normal.
I'm not sure what i'm doing wrong. In this thread (http://nerfhaven.com...=1)SpectreX said connecting it in reverse bias solved his problem but that hasn't worked for me.
Thanks in advance.
I'm not sure what i'm doing wrong. In this thread (http://nerfhaven.com...=1)SpectreX said connecting it in reverse bias solved his problem but that hasn't worked for me.
Thanks in advance.
UK based Commissions CLOSED
18 February 2012 - 08:18 AM
Langley Edit: You can post this in Trading when you're no longer an FNG.
Good Singled Maverick
25 January 2012 - 03:22 PM
Intro
If TL:DR, skip to materials.
So, while looking at one of my many broken mavericks with the normal terrible ranges next to my 70ft shooting NF, i wondered if i could make a Maverick as effective as a NF.
3 attempts later (and a completely broken recon - 20lbs of spring force into a reverse plunger is not good -) i think i maye have cracked it.
This is something that will be continually updated - especially if i decide to make custom internals.
Materials & Tools
1x Maverick
1x Recon bolt assembly
Assorted springs
Extra O-Ring
Teflon tape
Hot glue
Deadspace filling foam
Electrical tape
Hacksaw
Dremel (optional)
3" 17/32 brass
1/2" 1/2 brass (optional)
Materials from substitute priming mech (optional)
Writeup
Get your stock maverick and open her up.
Remove the turret, the rotation mech, and cut along the shell along the blue line, just where the turret holding arms meet the main body of the shell.
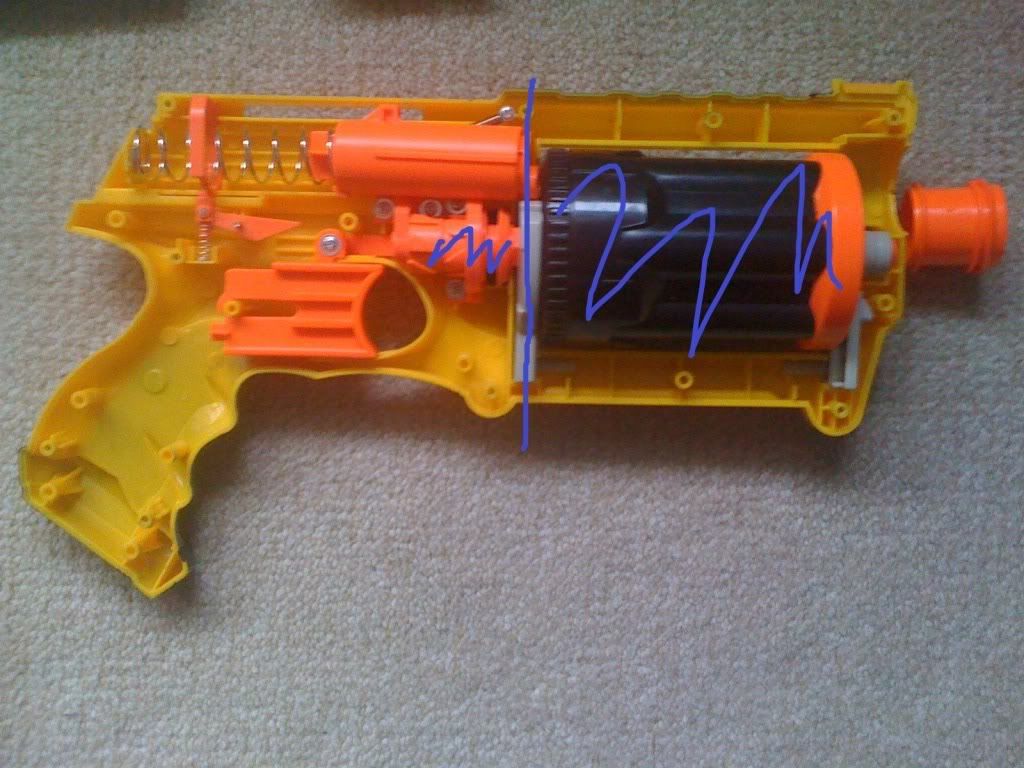
Leave in this part of the rotation mech to stabilise the trigger and replace your main springs / catch spring.

Cut the recon along the main seam, leaving the part that is normally inside the plunger tube - about 3" long. Put on your new O-Ring and add teflon tape if needed to give the best seal your springs can manage in the maverick plunger tube (mine is about 80%). I put a thin layer of hot glue on the back of the Maverick plunger tube to help with breakages and give some precompression.

Sand down your 3" of 17/32 brass and insert it inside the recon bolt so it fits along the whole length without poking out of the back. You may have to sand the brass first - or the inside of the bolt to get it to fit. Glue it in securely - i used Gorilla Glue.

Put the Maverick plunger tube back in the blaster and insert the recon bolt so it pokes out of the shell. Fill deadspace with foam and then add the other shell cover.

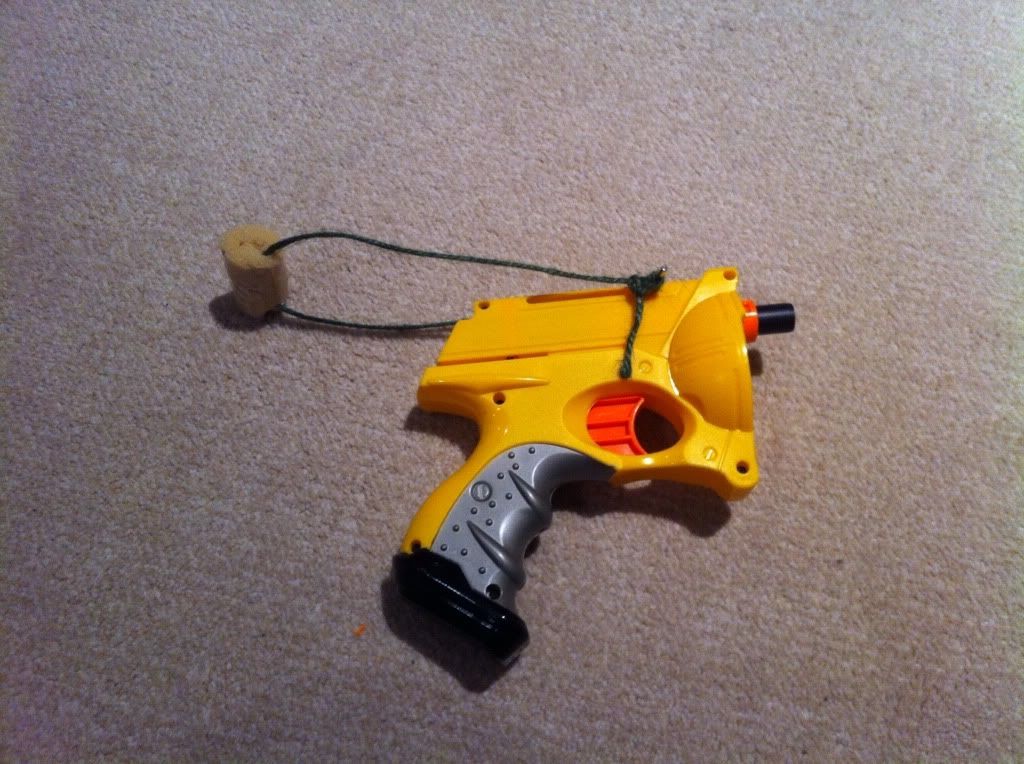
Reassemble the blaster and secure the recon bolt to the outside of the maverick shell with hot glue (or epoxy if you're feeling uber cool) to stop the bolt moving. A streamline dart should just come up to the lip of the bolt for reference.

Ranges are about 50ft with screamers and about 55-60 with stefans FLAT.
EDIT: i added a 1/2" stub of 1/2 brass into the 17/32 barrel (inserted only 1/4") to give a better grip on my screamers and taggers.
If TL:DR, skip to materials.
So, while looking at one of my many broken mavericks with the normal terrible ranges next to my 70ft shooting NF, i wondered if i could make a Maverick as effective as a NF.
3 attempts later (and a completely broken recon - 20lbs of spring force into a reverse plunger is not good -) i think i maye have cracked it.
This is something that will be continually updated - especially if i decide to make custom internals.
Materials & Tools
1x Maverick
1x Recon bolt assembly
Assorted springs
Extra O-Ring
Teflon tape
Hot glue
Deadspace filling foam
Electrical tape
Hacksaw
Dremel (optional)
3" 17/32 brass
1/2" 1/2 brass (optional)
Materials from substitute priming mech (optional)
Writeup
Get your stock maverick and open her up.
Remove the turret, the rotation mech, and cut along the shell along the blue line, just where the turret holding arms meet the main body of the shell.

Leave in this part of the rotation mech to stabilise the trigger and replace your main springs / catch spring.

Cut the recon along the main seam, leaving the part that is normally inside the plunger tube - about 3" long. Put on your new O-Ring and add teflon tape if needed to give the best seal your springs can manage in the maverick plunger tube (mine is about 80%). I put a thin layer of hot glue on the back of the Maverick plunger tube to help with breakages and give some precompression.

Sand down your 3" of 17/32 brass and insert it inside the recon bolt so it fits along the whole length without poking out of the back. You may have to sand the brass first - or the inside of the bolt to get it to fit. Glue it in securely - i used Gorilla Glue.

Put the Maverick plunger tube back in the blaster and insert the recon bolt so it pokes out of the shell. Fill deadspace with foam and then add the other shell cover.

Reassemble the blaster and secure the recon bolt to the outside of the maverick shell with hot glue (or epoxy if you're feeling uber cool) to stop the bolt moving. A streamline dart should just come up to the lip of the bolt for reference.

Ranges are about 50ft with screamers and about 55-60 with stefans FLAT.
EDIT: i added a 1/2" stub of 1/2 brass into the 17/32 barrel (inserted only 1/4") to give a better grip on my screamers and taggers.

- NerfHaven
- → Viewing Profile: Topics: ThatBritishGuy
- Terms of Service and Privacy Policy
- Code of Conduct ·


 Find content
