Jump to content


Photo

A Pump Action Snap

Thanks to Carbon

13 replies to this topic

#1 Shadow 92

Shadow 92

    Member

  • Members
  • 193 posts

Posted 24 May 2007 - 09:51 PM

A week or so ago I finished my Big SNAP, my first homemade. It was great. The feel of the gun when I cocked it, the tremendous power it produced, and the smooth trigger pull. The only problem was I dremeled the inside of the reducing brushing too much so I could no longer fit PVC as a barrel. so I had to switch to PETG inside a 3/8 coupler. The barrel was fine but I wanted to fire stock darts and to do that I needed a new brushing. So I went to Lowes to buy a new one. That's when I got an epiphany.

When looking around for the brushing I decided to look for other SNAP parts. I had always planned on building another SNAP but I wasn't sure what to do differently. Then I remembered Carbon's idea of creating a SNAP with a shorter aluminum rod for the charging handle except it would only be used to guide the spring. But if I did that, I thought, I would have to use a different system of priming the gun. I saw the SNAP 2.0 but I also didn't want to have to pull back on a rod to cock the gun. So I bought a 1 1/4" to 1/2" reducing brushing in addition to the regular SNAP parts. I plan to attach that to a short length of PVC and nest some of my 5/8 OD PETG inside and use that as the main barrel and what I would use to cock the gun.

Here is what I've done so far.

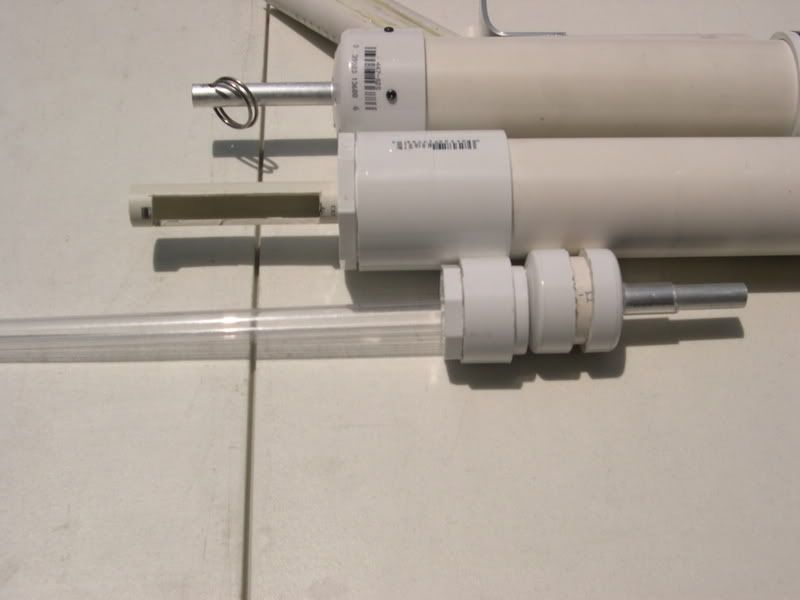
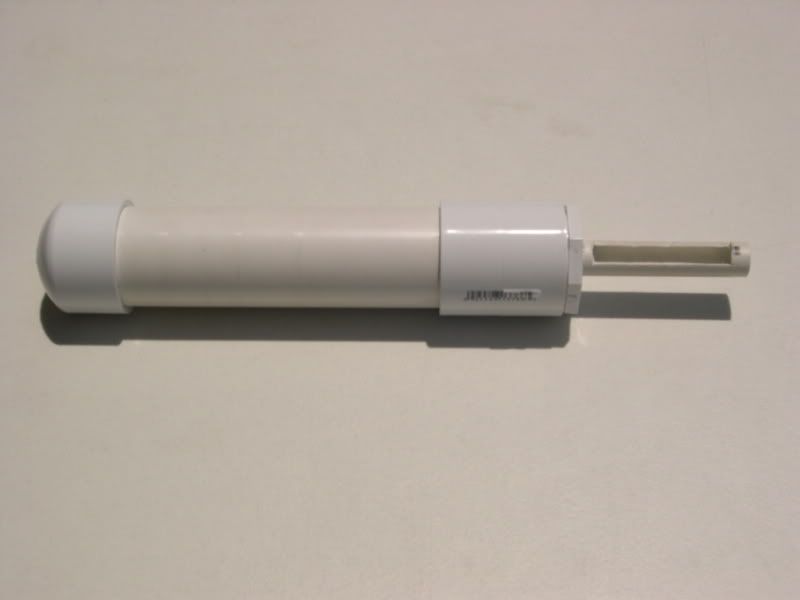
This is the 2" PVC, the endcap, the reducing brushing, and my PVC breach.

Posted Image

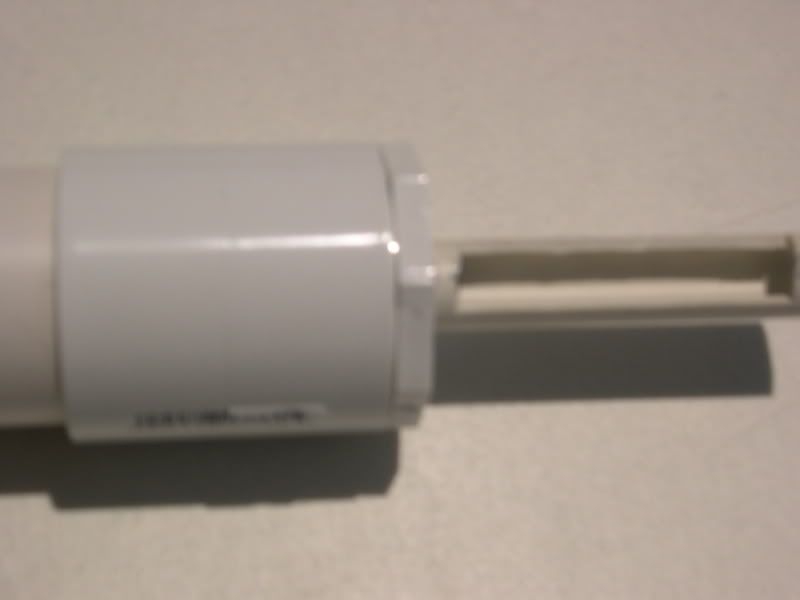
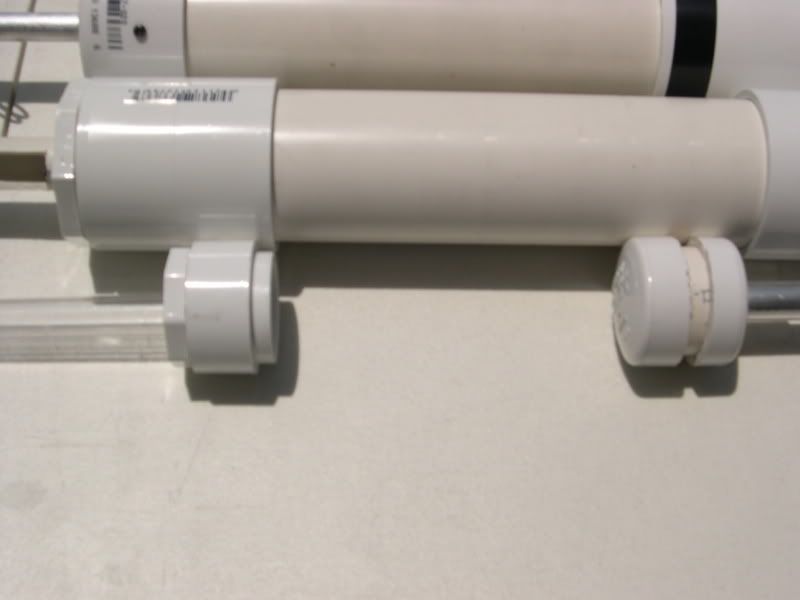
A close up of the breach.

Posted Image

EDIT: Can't double post to fit both sections. I need someone to post a break so I can post the second section
End of Part I

Edited by Shadow 92, 24 May 2007 - 09:54 PM.

  • 0

#2 SHADOW HUNTER ALPHA

SHADOW HUNTER ALPHA

    Member

  • Members
  • 1,116 posts

Posted 24 May 2007 - 10:05 PM

Go ahead. The second pic is a little blurry, but the breach looks good so far.
  • 0
The only commonly shared fate among us all is death. I turn to the shadows so that I may not be unfamiliar with hell's corridors when I arrive. - SHADOW HUNTER ALPHA

Founder of the Shadow Militia.
Founder of Nightshade Laboratories and The Nightshade Armament Corporation.

#3 Shadow 92

Shadow 92

    Member

  • Members
  • 193 posts

Posted 24 May 2007 - 10:12 PM

Thanks SHA. Yeah, I took the pictures outside today on a white table. Down here in SD, it was really bright so I had a hard time seeing the pictures I took when I was taking them. I'm surprised that not all of them turned out like that.

Part II

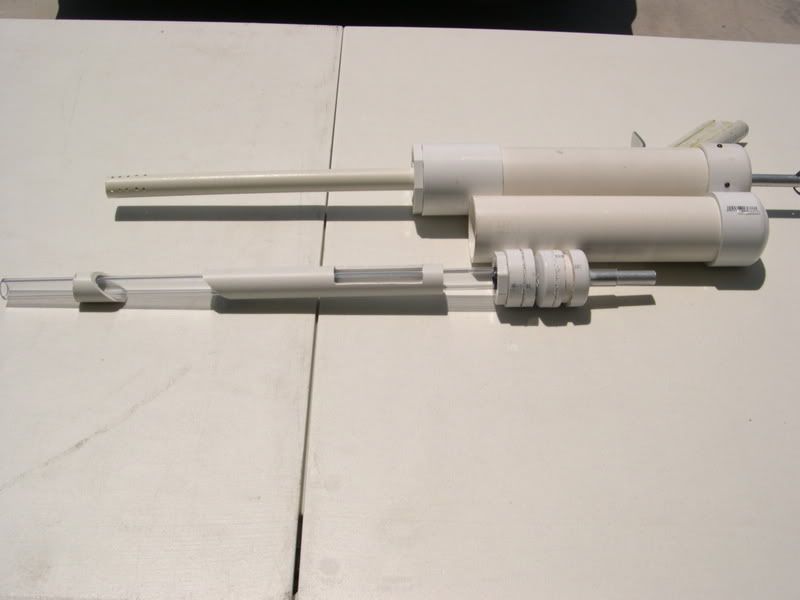
Here's how it works:
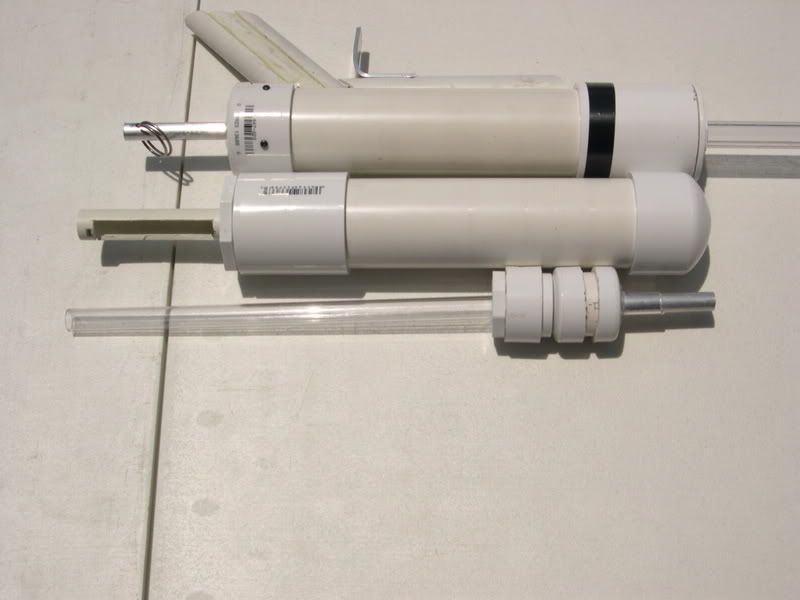
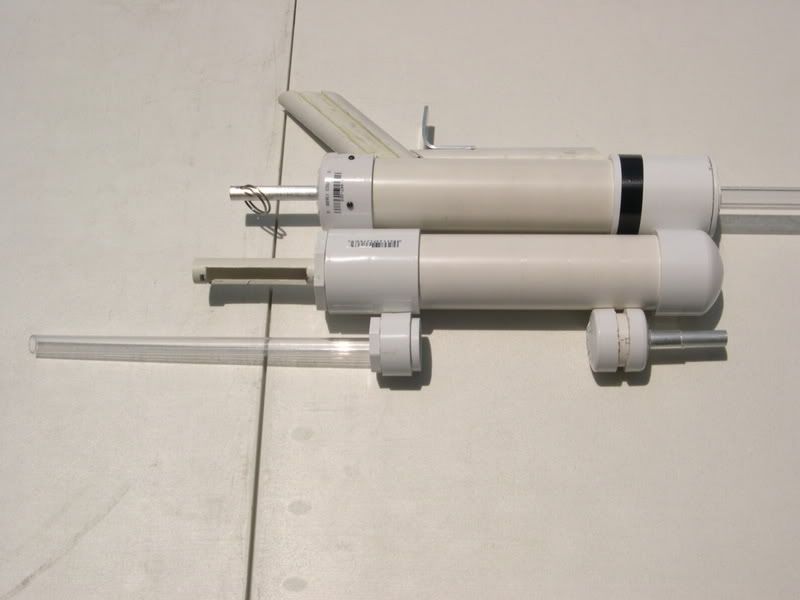
The PETG nested inside the 1/2" PVC will be able to slide freely back and forth inside the PVC, which will be secured to the gun by the 2"-1/2" reducing brushing. The PETG will act as the barrel. At the back of the barrel will be a 1 1/4"-1/2" reducing brushing with a small section of 1/2" PVC. I plan on gluing the PETG to the inside of the 1/2" PVC so the brushing is secured to the barrel. On the outside of the brushing is part of the 1 1/4" endcap I used for the plunger and an o-ring on top of that to seal the barrel and the pressure chamber. Right behind the barrel is the plunger made of 1 1/4" endcaps and tubbing. Instead of a gasket system I will be using o-rings to decrease weight. I also used a small section of 3/8 aluminum and glued that to the plunger.
Posted Image

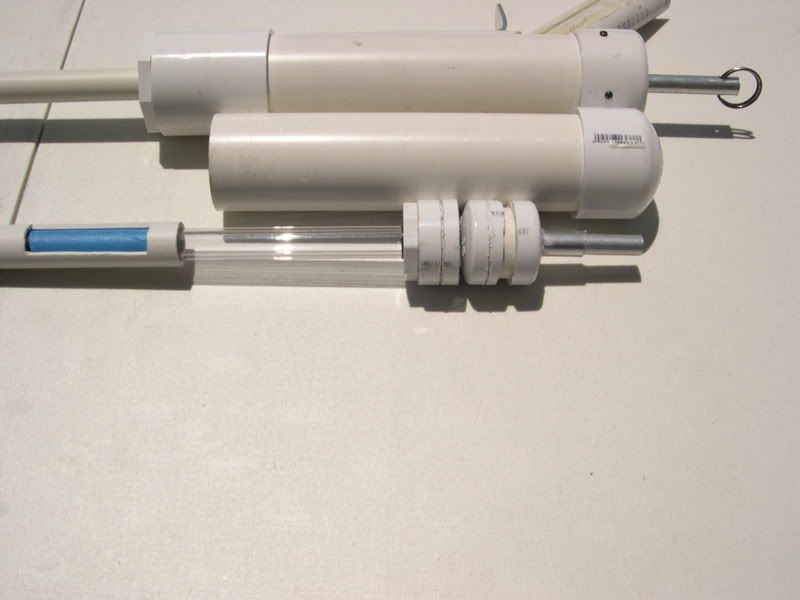
When the barrel is pushed back, it pushed the plunger back with, similarly to the way ompa's SCAR works. It will be pushed all the way back until the plunger is locked into place by the clothespin trigger. And at sometime when the barrel is pushed back, the breach in the PETG will match the breach in the PVC opening a whole and allowing me to put a dart inside the barrel.
Posted Image

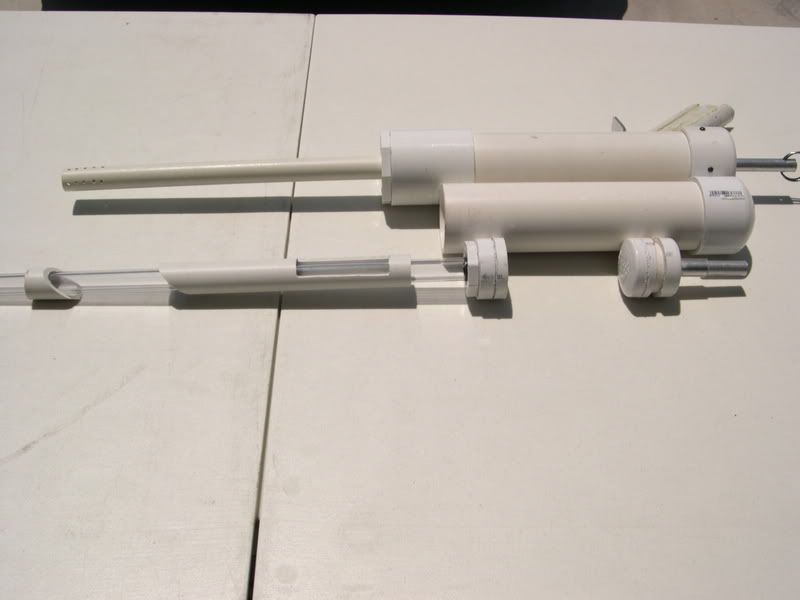
Once the plunger has caught onto the clothespin, I will move pull the barrel forward, closing the breach and
allowing the gun to be ready to fire.
Posted Image
Posted Image

Short term problems:
1. My barrel is too short (12") I will need at least a 16" barrel if I want to be able to attach a grip on the barrel to hold onto while pushing it back. I also think the air output is sufficient for a 16" barrel.
2. I don't have any o-rings on the plunger or on the barrel. This can be fixed, I just need to figure out what size o-ring to buy.
3. I don't have springs right now. I plan on using two, full length Handyman springs from Home Depot, just like in my Big SNAP.
4. I have yet to build a handle, trigger, or cover. I already have all of the materials it just takes some motivation.

Long term problems:
1. I'm not so sure on how to build the breach on the barrel. I don't know where I should put on the PETG and if it will be close enough to the back of the barrel.
2. I'm worried about the springs. Since I'm not using a full length of aluminum and I'm using two springs instead of one, I have no idea whether the springs will fold or come off the plunger.

That's about it. Questions, comments, and ideas would all be really helpful right now.
  • 0

#4 SHADOW HUNTER ALPHA

SHADOW HUNTER ALPHA

    Member

  • Members
  • 1,116 posts

Posted 24 May 2007 - 10:21 PM

Be careful. One of those springs destroyed ny NF (blew the plunger tube and barrel, which were epoxied into the shell, out of the gun. I need to get better epoxy). I would also recommend using steel or carbon rod for the catch, or something even more resiliant to stand up to the spring(s). Lastly, if you are using the same Handyman springs I did, then I would suggest not attaching the grip to the PETG, but to some stronger part with more compression strength, just as a precaution.

P.S.: A deodorant clip would go nicely with that breech. Also, you need longer PVC to cover the open breach in the PETG, unless you want to vent so much pressure that early.

Edited by SHADOW HUNTER ALPHA, 24 May 2007 - 10:24 PM.

  • 0
The only commonly shared fate among us all is death. I turn to the shadows so that I may not be unfamiliar with hell's corridors when I arrive. - SHADOW HUNTER ALPHA

Founder of the Shadow Militia.
Founder of Nightshade Laboratories and The Nightshade Armament Corporation.

#5 Carbon

Carbon

    Contriberator

  • Moderators
  • 1,894 posts

Posted 24 May 2007 - 10:32 PM

Looks good so far...keep it coming!

I could see those springs causing a nerf gun to explode, but PVC is made of sterner stuff. I don't think it'd give you any problems with your catch.

Two springs and an incomplete guiderod, though...I think that'd end up folding on you, especially in 2" PVC. Perhaps you could make an inner-outer guide...Put your rear spring in a small section of say, 1'" PVC, and your front spring with the aluminum guiderod inside of it. They'd press together, and sheath each other. Just a thought.

I don't think I knew that 1.25" endcaps nested in 2" PVC...that'd make some nice weight reduction. Did you ever find out the range on that beast? I may have to do some rebuilding on my big SNAP.
  • 0
Hello. I am Indigo of the Rainbow Clan. You Nerfed my father. Prepare to die.

#6 Shadow 92

Shadow 92

    Member

  • Members
  • 193 posts

Posted 24 May 2007 - 11:09 PM

Thanks for the comments.

1.I would also recommend using steel or carbon rod for the catch, or something even more resiliant to stand up to the spring(s).
2.Lastly, if you are using the same Handyman springs I did, then I would suggest not attaching the grip to the PETG, but to some stronger part with more compression strength, just as a precaution.
3. A deodorant clip would go nicely with that breech.
4. Also, you need longer PVC to cover the open breach in the PETG, unless you want to vent so much pressure that early.


1. Carbon rod sounds intriguing but I'll probably epoxy a ring of aluminum on the catch surface.
2. I didn't have much of a problem with the Handyman springs with my Big SNAP and a liberal amount of epoxy to the PETG should keep it secure. But if the barrel and the catch show extreme signs of wear then I'll switch springs.
3. I thought about a clip, but I figured that just getting the basic parts to function would be a major accomplishment for me. So if everything works, then I'll add a clip.
4. Oh yeah, I forgot to add that to the Short term problems list. But thanks for reminding me.

Looks good so far...keep it coming!
1.I could see those springs causing a nerf gun to explode, but PVC is made of sterner stuff. I don't think it'd give you any problems with your catch.
2.Two springs and an incomplete guiderod, though...I think that'd end up folding on you, especially in 2" PVC. Perhaps you could make an inner-outer guide...Put your rear spring in a small section of say, 1'" PVC, and your front spring with the aluminum guiderod inside of it. They'd press together, and sheath each other. Just a thought.
3.I don't think I knew that 1.25" endcaps nested in 2" PVC...that'd make some nice weight reduction.
4. Did you ever find out the range on that beast? I may have to do some rebuilding on my big SNAP.


1. Yeah, I was surprised to find out how strong the PVC was. The only reason I had to add screws to the endcap of my Big SNAP was because I cut sections of the endcap off so I could mount the handle back further. I might add aluminum to the catch if I see any wear.
2. Thanks that's a great idea. On the off chance that it doesn't completely work I'll buy a single spring with the same length, strength, and maybe a shorter compression length than the Handyman springs and use it with your idea.
3. I'm pretty sure you were the one to suggest that in your Big SNAP topic. :lol:
4. No not yet. It's funny, I went to buy another reducing brushing, but I got so caught up with this project that I forgot to buy the one thing that I came there for.
  • 0

#7 Prometheus

Prometheus

    Member

  • Members
  • 780 posts

Posted 24 May 2007 - 11:30 PM

Be careful. One of those springs destroyed ny NF (blew the plunger tube and barrel, which were epoxied into the shell, out of the gun. I need to get better epoxy). I would also recommend using steel or carbon rod for the catch, or something even more resiliant to stand up to the spring(s). Lastly, if you are using the same Handyman springs I did, then I would suggest not attaching the grip to the PETG, but to some stronger part with more compression strength, just as a precaution.

P.S.: A deodorant clip would go nicely with that breech. Also, you need longer PVC to cover the open breach in the PETG, unless you want to vent so much pressure that early.


If carbon rod didn't last long on the FAR, I doubt it would last in this beast. Steel rod is the way to go, unless Carbon has something else he found to be nice and strong.

Anyways, how about a pic of the bad boy fully assembled?
  • 0
QUOTE(VACC @ Jan 24 2008, 06:12 AM) View Post
I am NEVER going to sleep naked in the bed of a former child star ever again....seriously

#8 Carbon

Carbon

    Contriberator

  • Moderators
  • 1,894 posts

Posted 24 May 2007 - 11:30 PM

3.I don't think I knew that 1.25" endcaps nested in 2" PVC...that'd make some nice weight reduction.
4. Did you ever find out the range on that beast? I may have to do some rebuilding on my big SNAP.

3. I'm pretty sure you were the one to suggest that in your Big SNAP topic. :huh:
4. No not yet. It's funny, I went to buy another reducing brushing, but I got so caught up with this project that I forgot to buy the one thing that I came there for.

*runs over to my big SNAP*
*takes it apart*

Well, god damn....I did know that!

Although, I just used the endcap as a catchface, and used my compact plunger head to reduce size. Definitely looking forward to a range comparison, as it'll give a pretty direct match to the two plunger styles.
  • 0
Hello. I am Indigo of the Rainbow Clan. You Nerfed my father. Prepare to die.

#9 Shadow 92

Shadow 92

    Member

  • Members
  • 193 posts

Posted 24 May 2007 - 11:41 PM

If carbon rod didn't last long on the FAR, I doubt it would last in this beast. Steel rod is the way to go, unless Carbon has something else he found to be nice and strong.

Anyways, how about a pic of the bad boy fully assembled?

Wait, are you talking about the charge/ guide rod or something for the catch face? Because if you're talking about the rod, then you don't have to worry. The way it works it just, well, guides the spring as oppose to NF style plungers that need to handle a lot of the pressure. As for it being fully assembled, the first pic is as far as I gotten so far. Right now the only thing that's stopping me from finishing it are a couple design flaws and I lost my wallet.

*runs over to my big SNAP*
*takes it apart*

Well, god damn....I did know that!

Although, I just used the endcap as a catchface, and used my compact plunger head to reduce size. Definitely looking forward to a range comparison, as it'll give a pretty direct match to the two plunger styles.

I'll try and get ranges in as soon as I can.
  • 0

#10 Prometheus

Prometheus

    Member

  • Members
  • 780 posts

Posted 24 May 2007 - 11:48 PM

If carbon rod didn't last long on the FAR, I doubt it would last in this beast. Steel rod is the way to go, unless Carbon has something else he found to be nice and strong.

Anyways, how about a pic of the bad boy fully assembled?

Wait, are you talking about the charge/ guide rod or something for the catch face? Because if you're talking about the rod, then you don't have to worry. The way it works it just, well, guides the spring as oppose to NF style plungers that need to handle a lot of the pressure. As for it being fully assembled, the first pic is as far as I gotten so far. Right now the only thing that's stopping me from finishing it are a couple design flaws and I lost my wallet.

*runs over to my big SNAP*
*takes it apart*

Well, god damn....I did know that!

Although, I just used the endcap as a catchface, and used my compact plunger head to reduce size. Definitely looking forward to a range comparison, as it'll give a pretty direct match to the two plunger styles.

I'll try and get ranges in as soon as I can.


Yeah, I was thinking you were using it for other purposes. How big O.D. does the carbon rod come? I guess any stress applied to it would be on the end, or if the spring was a little off-center, it would rub, but not much. It seems like a more expensive method, when CPVC is cheaper, but also somewhat heavier (or so I assume).

Edited by Prometheus, 24 May 2007 - 11:49 PM.

  • 0
QUOTE(VACC @ Jan 24 2008, 06:12 AM) View Post
I am NEVER going to sleep naked in the bed of a former child star ever again....seriously

#11 Shadow 92

Shadow 92

    Member

  • Members
  • 193 posts

Posted 25 May 2007 - 12:14 AM

Yeah, I was thinking you were using it for other purposes. How big O.D. does the carbon rod come? I guess any stress applied to it would be on the end, or if the spring was a little off-center, it would rub, but not much. It seems like a more expensive method, when CPVC is cheaper, but also somewhat heavier (or so I assume).

If you're talking about carbon fiber, then it's lighter than mostly any other stable building material but five times the cost. I don't think I'll be using carbon fiver any time soon seeing as it's $55.00 for a 4" section of 1/2" tubing. The largest size that I can get carbon fiber rods from McMaster is 3/4 OD for solid rods and 1.6" for actual tubing, neither being feasible price wise.
  • 0

#12 Shadow 92

Shadow 92

    Member

  • Members
  • 193 posts

Posted 25 May 2007 - 07:32 PM

I tested my Big SNAP's ranges today. I had to replace the brushing and make a new barrel, but it was worth it. With a 12" PVC barrel and mega stefans, it shot about 75' flat with a slight breeze. With a 16" barrel, it was going 85-90 with no wind. If I were to re-lube the gasket and the plunger, glue the brushing and the coupler to the gun, and actually add weights to my darts I could probably pass the century mark.

I'll post pics of the nearly completed bolt and barrel later.

Edit: Hey I double posted! I wonder why I couldn't do that before?

Edited by Shadow 92, 25 May 2007 - 07:33 PM.

  • 0

#13 Carbon

Carbon

    Contriberator

  • Moderators
  • 1,894 posts

Posted 25 May 2007 - 07:56 PM

75' with megas is pretty nice....that's worth the price of admission there. As far as your double post, it might have been flood control, where the board won't let you post in quick sucession....it makes you wait a bit.
  • 0
Hello. I am Indigo of the Rainbow Clan. You Nerfed my father. Prepare to die.

#14 Shadow 92

Shadow 92

    Member

  • Members
  • 193 posts

Posted 28 May 2007 - 06:06 PM

After discovering that 3/4 OD PETG fits loosely inside 3/4 PVC, I redesigned the breach and barrel system. The PETG should be thick enough to withstand the pressure of the springs with a 2.5" breech, which I was worried about with the first design. I also won;t have to drill the 1/2" PVC to let the PETG fit.

Here's how it works:

The PETG is hot glued to the reducing brushing. The PVC will be inserted inside the reducing brushing's built in coupler. This picture shows what the parts would look like when at rest (after firing and before priming).

Posted Image

When the handle is pulled back, the whole barrel moves, pushing the plunger head back until it locks into place. Meanwhile, the breach in the PETG moves back until it matches the breach with the PVC. The breech is highlighted with painter's tape. Fortunately, the distance the plunger head moves back until it hits the back endcap and the distance the breech needs to fully open are the same. This lets me load a dart as soon as the gun is cocked.

Posted Image

After the plunger head gets caught on the trigger I'll be able to push the barrel forward until the 1.25"-3/4" reducing brushing hits the 2"-3/4" reducing brushing. To prevent air from escaping through the breech when the gun fires, I plan to place to o-rings around the breech on the barrel so as soon as the barrel is pushed forward, the breech is sealed.

Posted Image

Note: Just for conveince, I probably make the pump handle bigger using 1.25" PVC.
  • 0


2 user(s) are reading this topic

0 members, 2 guests, 0 anonymous users