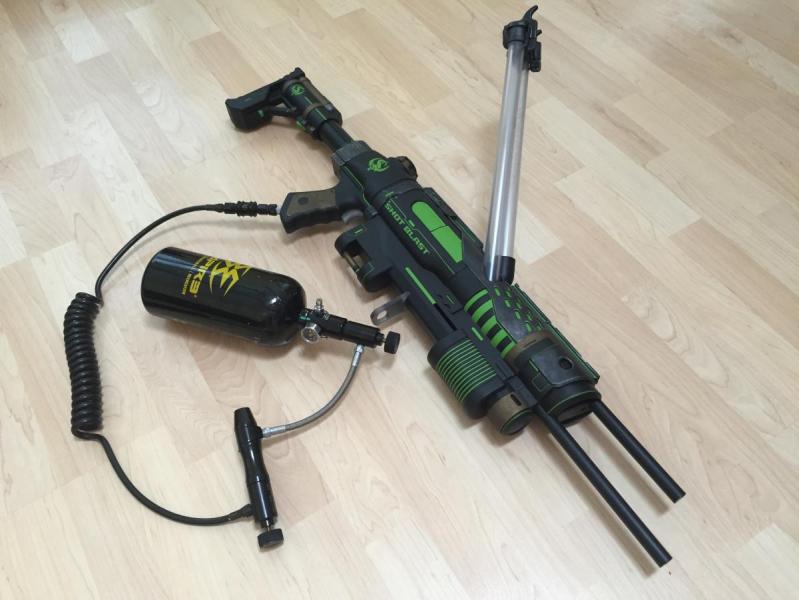
The goal of this blaster was to make a a solid primary with the comfortable Shot blast shell.
This writeup is a bit sparse on pictures but it should be enough to use as a general guide.
Main Materials
-Shot Blast
-Big blast tank(I used the old larger version)
-1/4" Polycarbonate
-1/8" or so Polycarbonate for trigger
-1/4" Vinyl tubing
-1/4" Nylon tubing
-Male Quick disconnect Adaptor
-1/2" CPVC
-2x 1/2 PVC Wye
-1/2" PVC Tee
-1/2" PVC
-Craft foam or thin rubber sheet
To open the blaster simply unscrew and pop off the external shell first. Then strip the internal airtank and pump. We will not be using those.
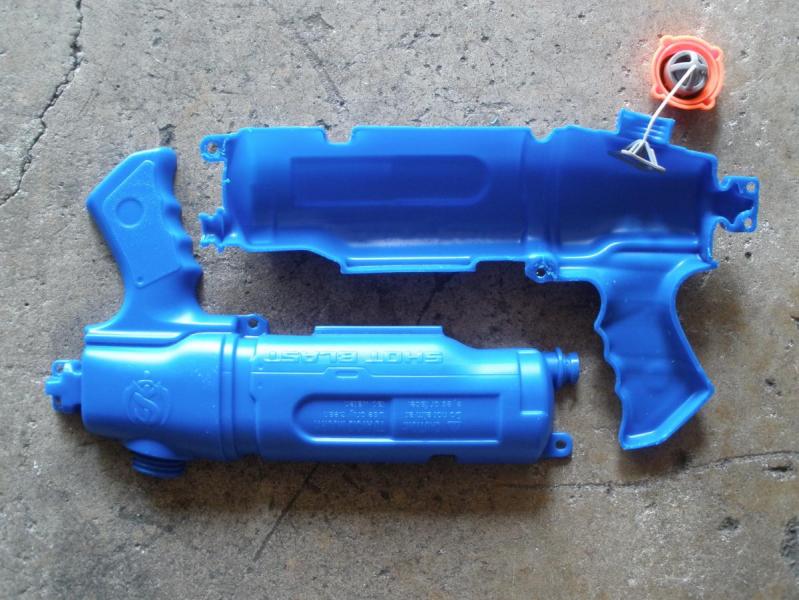
Next is probably the most irritating part of this mod. We need to cut the water tank half of the shell in half as it is molded as one piece. I simply used a box cutter knife and patience. Make sure to cut this smoothly or else it will not close up nicely. Keep the orange cap.
Now we want to take the grey front half of the shell and the water tank half and glue them into one shell. Simply hold them together and use zap-a-gap to glue it together. Use a bit of hotglue to temporarily hold it if you need to. It is essential to make sure both halves come together and close evenly. Reinforce with epoxy putty throughout the contact areas. Just do not overdo it yet as we still need to trim the shell.
It is now time to get the Big Blast tank ready. Chop the PVC Tee to leave a flat side and attach it to the tank like a normal coupler mod. Next add the vinyl tubing as we will not use the stock pump. Zorn has a good writeup on this in the directory. Chop off most of the stock pump area so that it will fit in the back of the shell. Line up the thick area of the BB tank with the wider areas of the back part of the shell, it is a close fit(Newer BB tanks are smaller so they fit much more easily). Dremel out the shells to accommodate the tank but do not glue it down yet.
After that we start on the double hopper portion. Take 2 Wyes and using a PVC/half coupler extension piece glue it to a long 1/4" polycarbonate piece(Make two). The craft foam or rubber sheet goes on these two polycarb parts to make the seal.
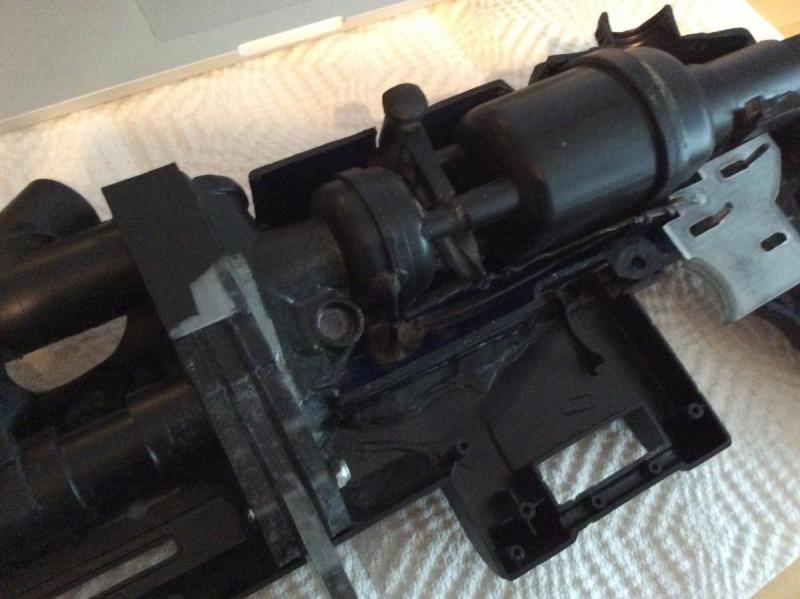
Add reinforcement via polcarb sheets and epoxy putty. Make sure that the PVC tubes will angle properly when attaching the Wyes. Dremel out the polycarbonate so air flows to the wyes. The middle polycarb needs its holes placed so that only one will be open and allow air to flow when pushed all the way up or down. Remember to account for the PVC tube from the top wye as the middle polycarb will bump into it. Add slots that stop the middle polycarb on the two positions opening the air flow. I used 8/32 machine screws. Now just sandwich everything then screw/glue it together tightly to seal it. Mine is permanently fixed but it would be simple to do it all mechanically.
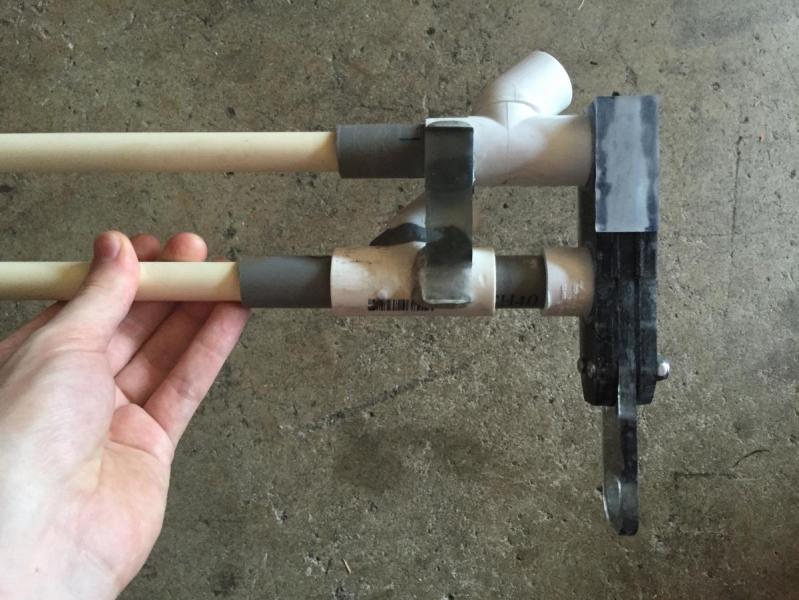
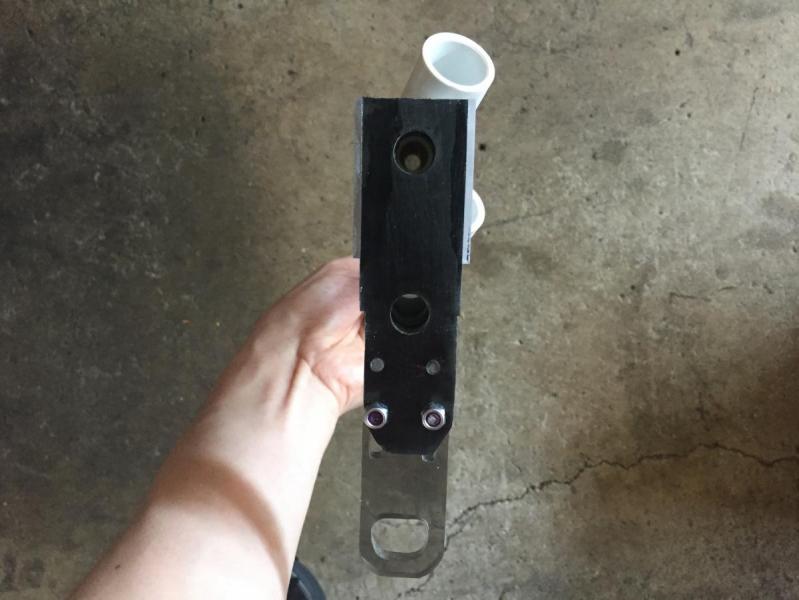
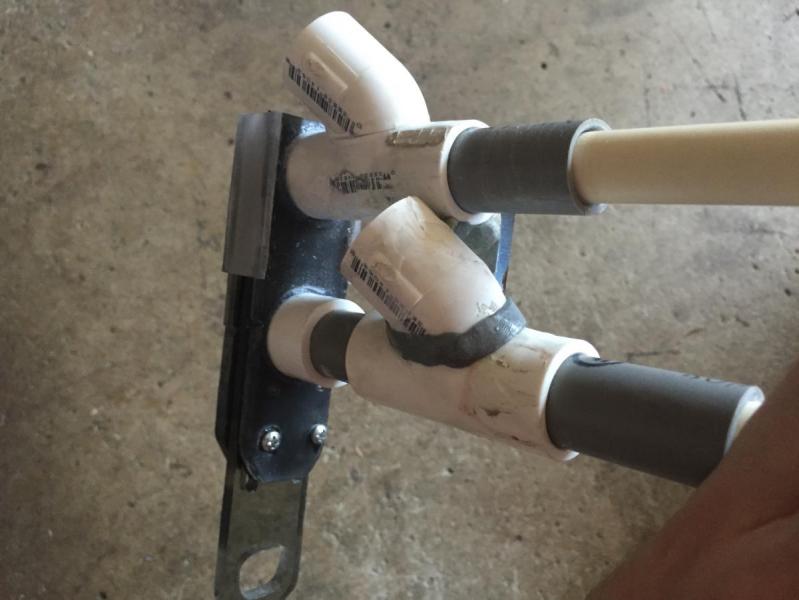
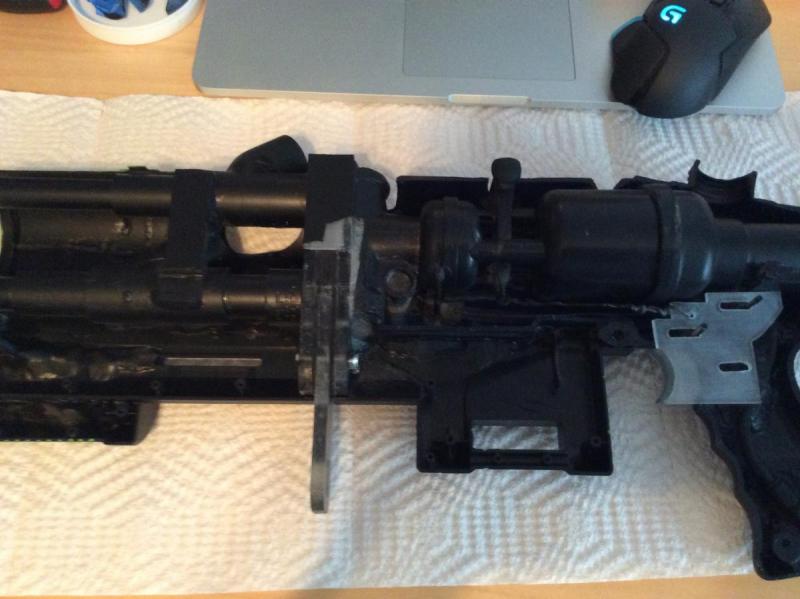
Once this part is done check the position of the Big blast tank in the shell again and attach it to the X2 hopper piece. Cover up the top and bottom exposed pieces of the tee with thinner polycarb sheets then make sure it is all airtight. Dremel out the shell to allow the X2 hopper to fit also make sure to dremel out the shell to fit the barrels. I used 12" of CPVC.
Create a pivot point for the Big blast lever. I used a thick screw and lots of epoxy putty and zap-a-gap to secure it. At this point you can glue down the entire Big blast x2 hopper assembly. make sure everything is straight and reinforce throughly with epoxy putty.
It is now time to add the trigger and screw ports. I used a mix of nylon rod, epoxy putty and zap-a-gap to create two screw ports in the handle. Use a clamp to hold the two shell halves together evenly then drill, tap and add 8/32 screws.
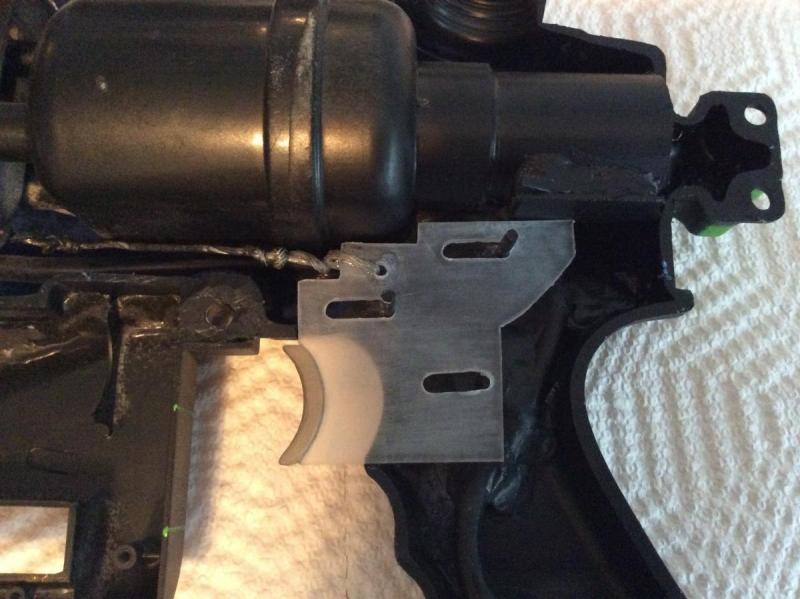
Add some more supporting rods to help the trigger pull as pictured below. I recommend making it a two finger trigger unlike mine to help with the somewhat tough trigger pull and making it one solid piece instead of a polycarb/wire mix. The wire adds flex which slightly detracts from having a perfectly smooth trigger pull. Add the return spring.
Cut the vinyl tubing to size and jam a small section of nylon tubing inside. Use zap-a-gap to secure and seal it and attach the male quick disconnect adaptor. Dremel the shell to let it fit and secure with epoxy putty and more Zap.
It should now be functional. Whats left is to drill out the front orange attachment to allow the barrels to go through and to glue the front grip in place. There are gaps so you need to use putty to raise the sides if you want the grip perfectly centered. Finally cut the outer shell to fit and reinforce with 1/8th polycarb and epoxy putty. Add a screw to the outer shell where it comes together behind the wye. I also made magnetic dart doors with an o-ring hook.
Paint it up and plug in an HPA system and you are good to go. I used a 3000PSI Ninja tank with a Azodin inline regulator to drop the pressure down to usable levels.


