This is very cool. I have a couple of questions for you.
1.Could you post a parts list of everything you used?
2.Did you use aluminum bar or aluminum tube?
3.Aside from getting your ideas on "paper," how does the CAD model help you actually machine the parts? Unless it's a CNC lathe, of course. Is it?
4.What are you using to thread the two halves?
5.Why did you decide to use the same dimensions of an at2k tank and not, for example, make it larger and more powerful but just using the same valve design?
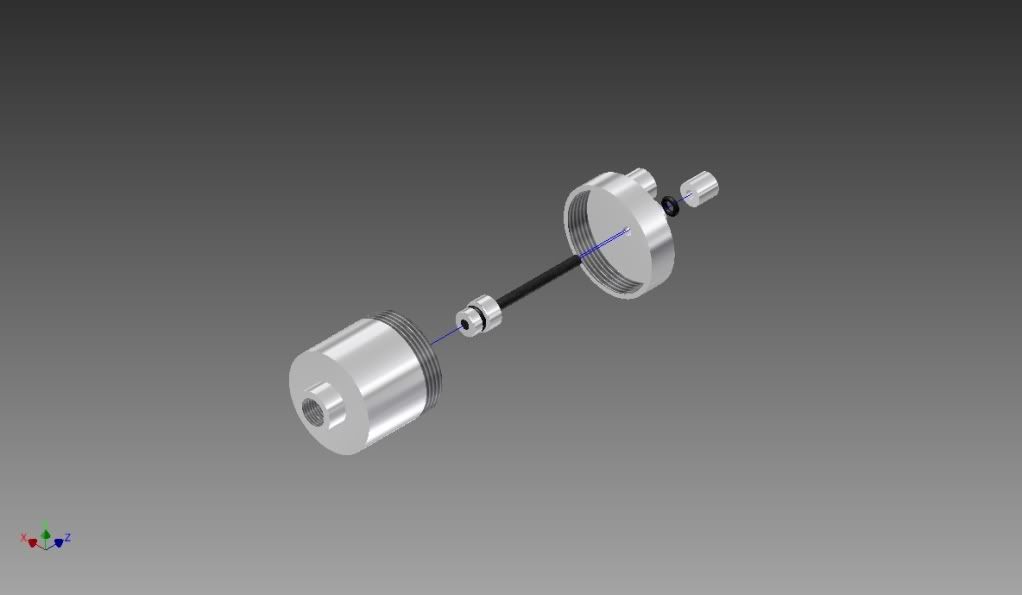
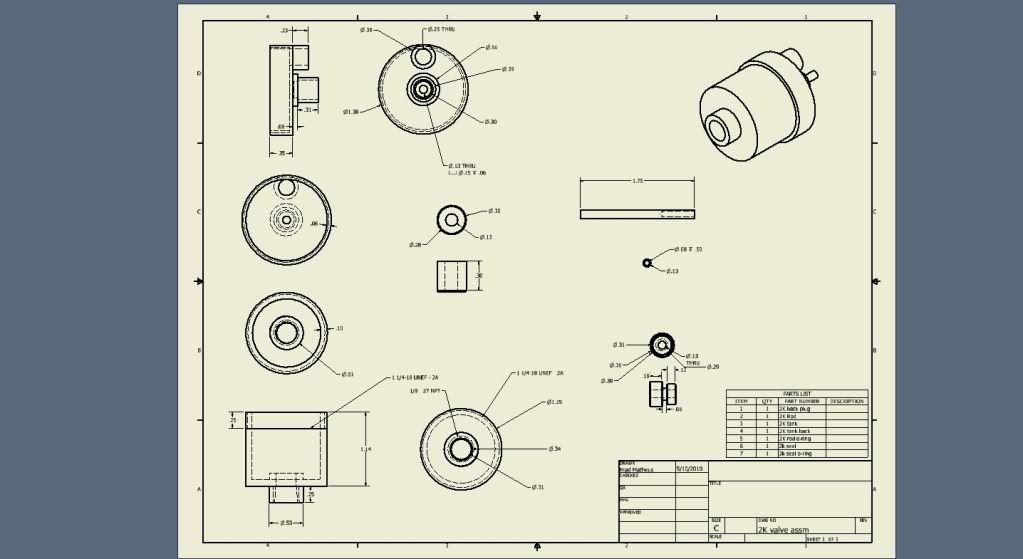
1. The parts list is on the drawing.
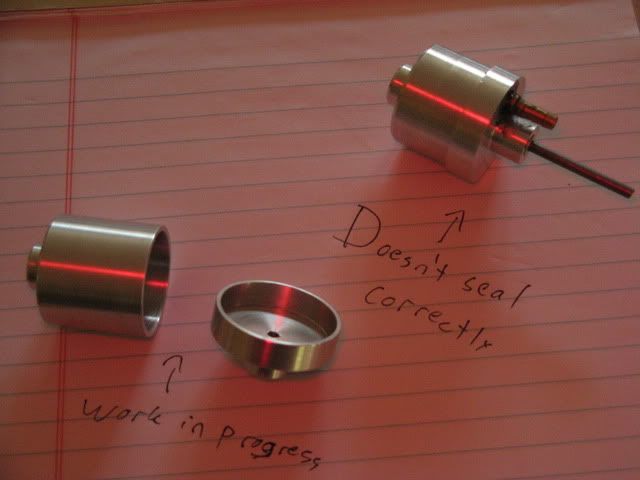
I used 1 3/8" 6061-T6 aluminum bar stock, 5/8" 6061-T6 aluminum bar stock, a random spring from a printer, a modified hose barb, some 1/8" music wire, a 1/4" OD x 1/8" ID O-ring, another O-ring that I can't remember the dimensions of, and some J-B Weld. The need for epoxy, or any other adhesives should be eliminated in the final revision of the tank.
2.I used round aluminum bar stock.
3. I need working drawings when I machine things. They help me keep track of measurements. I wish I had a CNC lathe. My school has two, and I am allowed to use them, but at the moment, I'm on summer vacation.
4.I am planning on using a single-point threading tool to cut the threads. I still need to make the internal threading tool. For the 1/8" NPT threads, I used a pipe tap.
5. I wanted a drop-in replacement of the AT2K tank, mostly so my tanks would be war-legal. I don't have an AT3K, or else I would've made one of those, too.
Wait you said you have to keep resetting the pin. Can't you just slap a spring in there to make it reset itself?
I did. As previously stated, I accidentally offset the back cap of the tank, when I was gluing it. Thus, the pin and plug do not perfectly line up with the sealing face.
Now, I'm thinking about using a sink washer in place of the O-rings on the plug, since it wouldn't require the two halves to be perfectly straight.
Edited by roboman, 13 June 2010 - 05:56 PM.


