Jump to content


Photo

Firefly With An At2k Tank Intergrated


10 replies to this topic

#1 shadow archer

shadow archer

    Member

  • Members
  • 51 posts

Posted 01 May 2010 - 07:48 PM

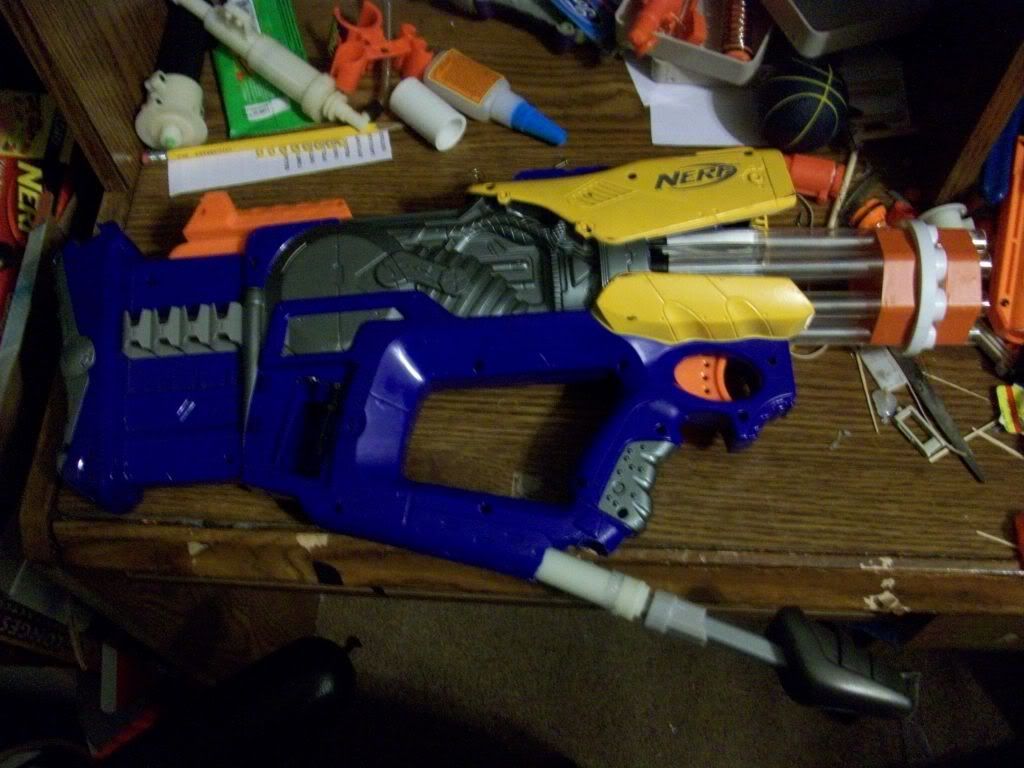
Here is a general overview on how to intergrate an AT2k tank into a firefly shell.
Posted Image
here is the finished product of this modification .
Posted Image
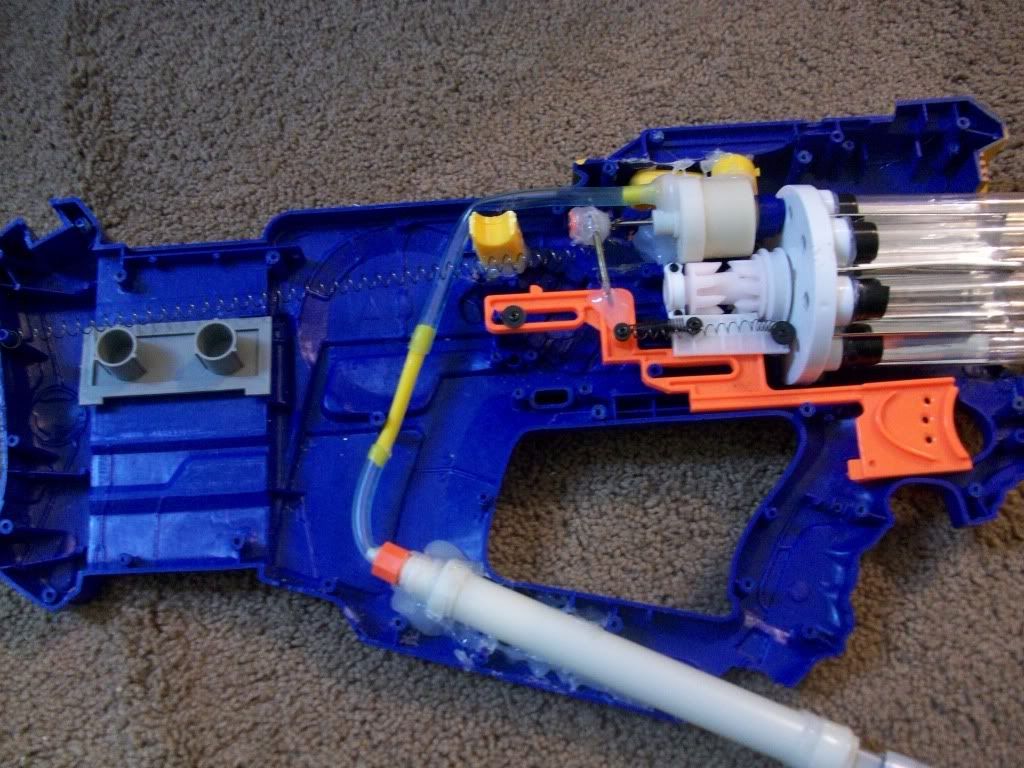
here is what the internals of the completed product looks like.
Posted Image

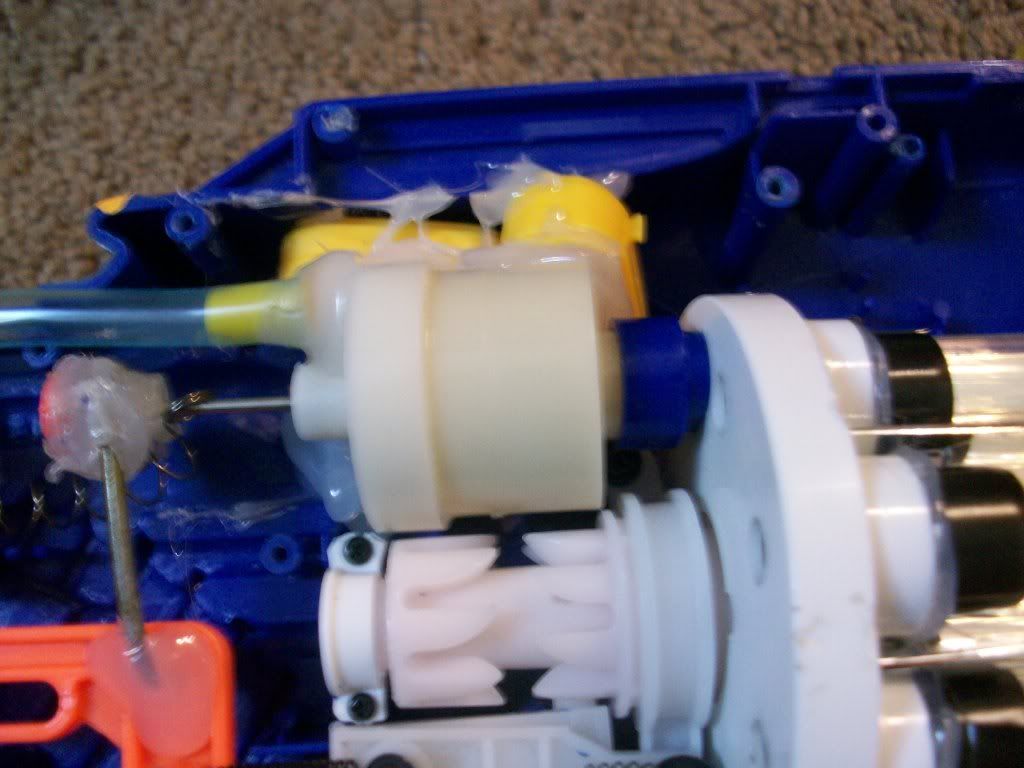
The tank is glued in place and supported by 2 NF ammo holders. the blue piece on the end of the tank, is from the plunger tube of a firefly and is used to create the seal from the tank to the turret. what you don't see is between the part from the plunger tube and the tank there is a spring, so when the turret moves around there is always a seal.
Posted Image
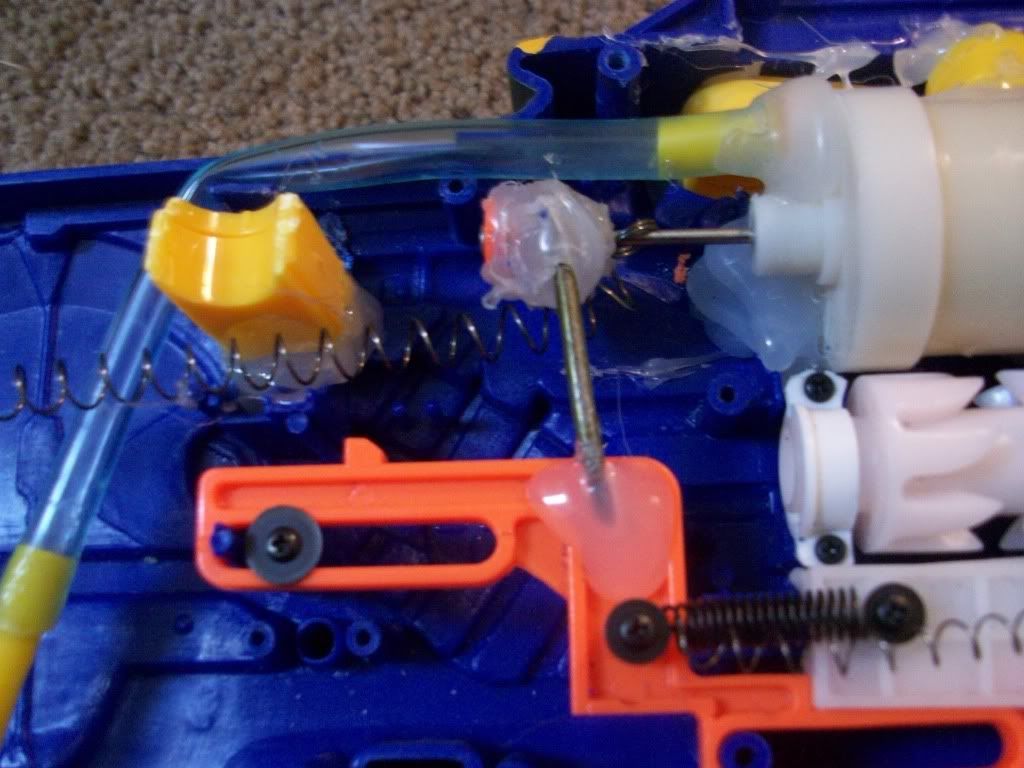
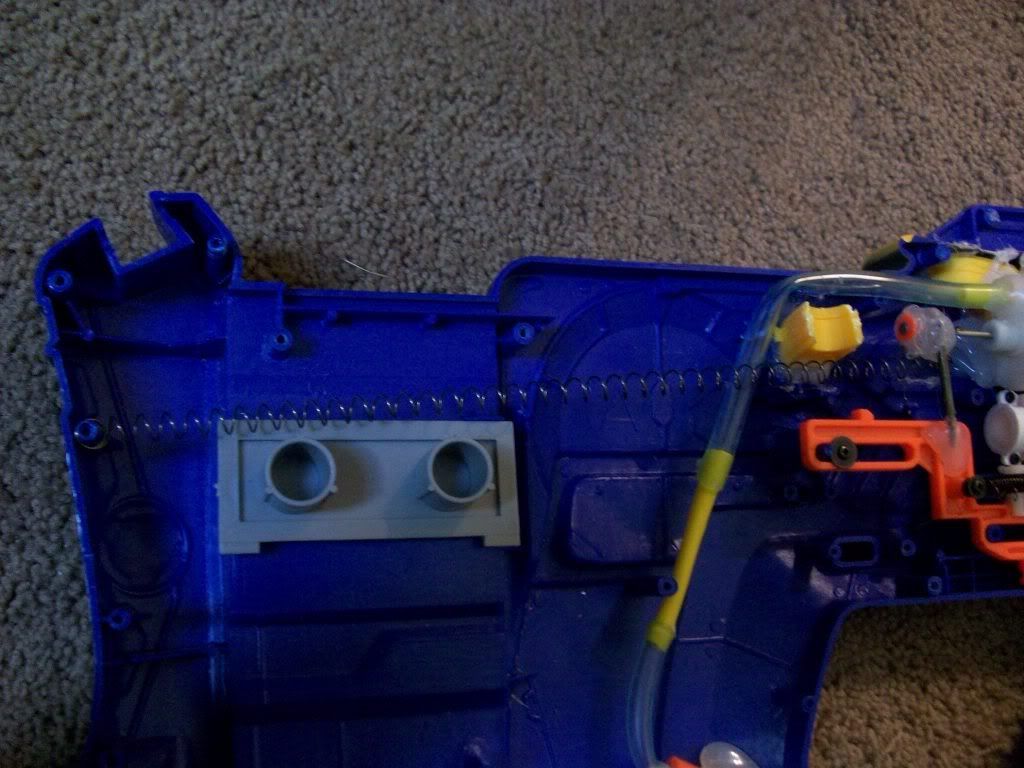
here is a close up of the trigger set up. A clothes hanger is connecting the trigger to the tank. There is a tension spring on the AT2k firing pin, because the firing pin will not go all the way back with out it and the hot glue will come off. this can be fixed with using epoxy putty instead of hot glue, and there should be no need for the tension spring, I just don't have epoxy putty at the moment.
Posted Image
the tension spring goes all the way back to the stock of the blaster.
Posted Image
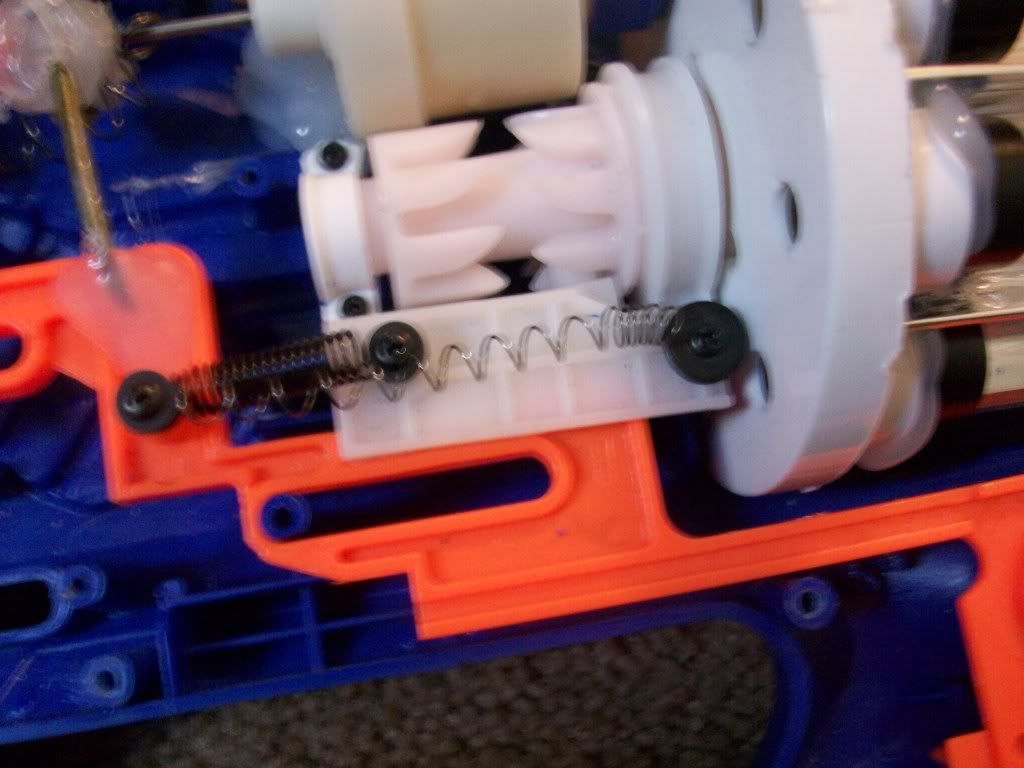
My trigger had a bit of return problem, so I added a second tension spring.
Posted Image
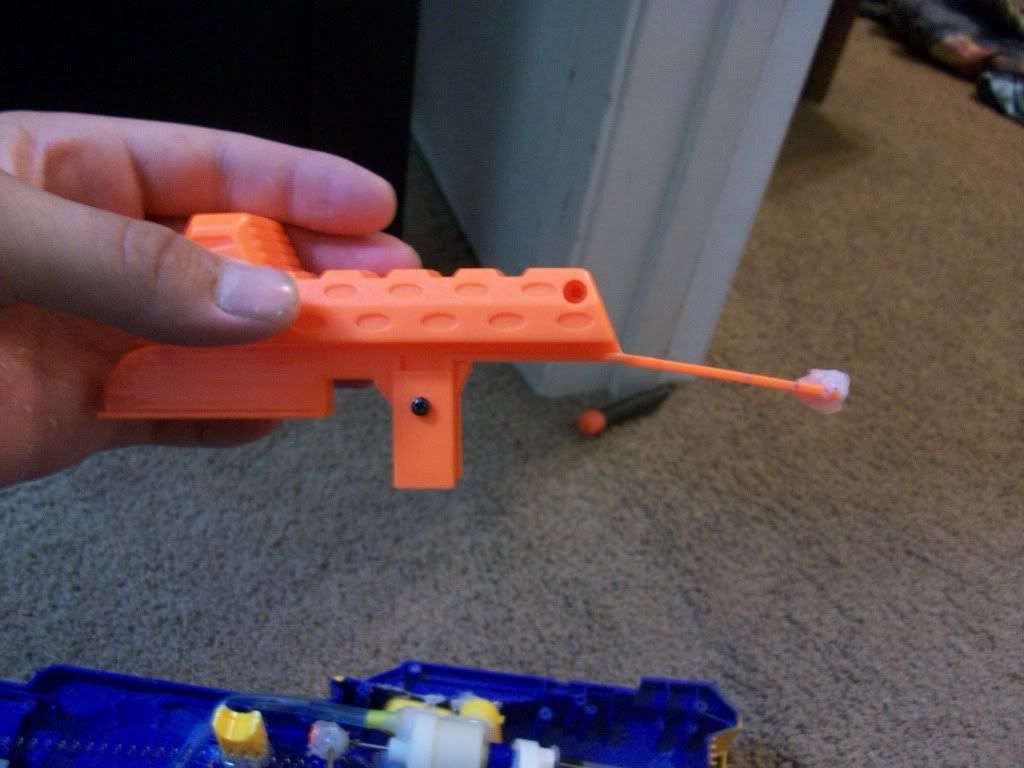
The cocking slide of the fire fly is used in this modification. Because of the tension spring on the firing pin when you try to pump it air just goes right out of the tank.
Posted Image
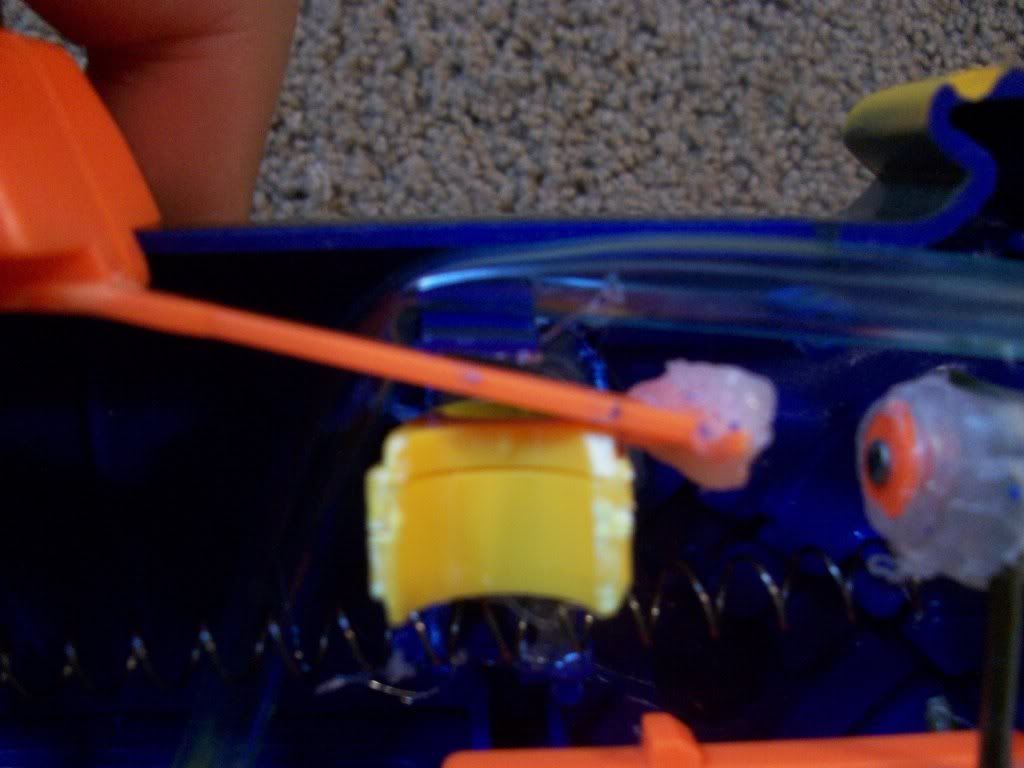
The slide is put on the originally designated slide spot. The only difference is that instead of the end of the slide being where the tubing is, it is in a notch between the little blue tab and a cut down NF ammo holder. when you push it forward it holds the firing pin forward, so you can pump the tank up.
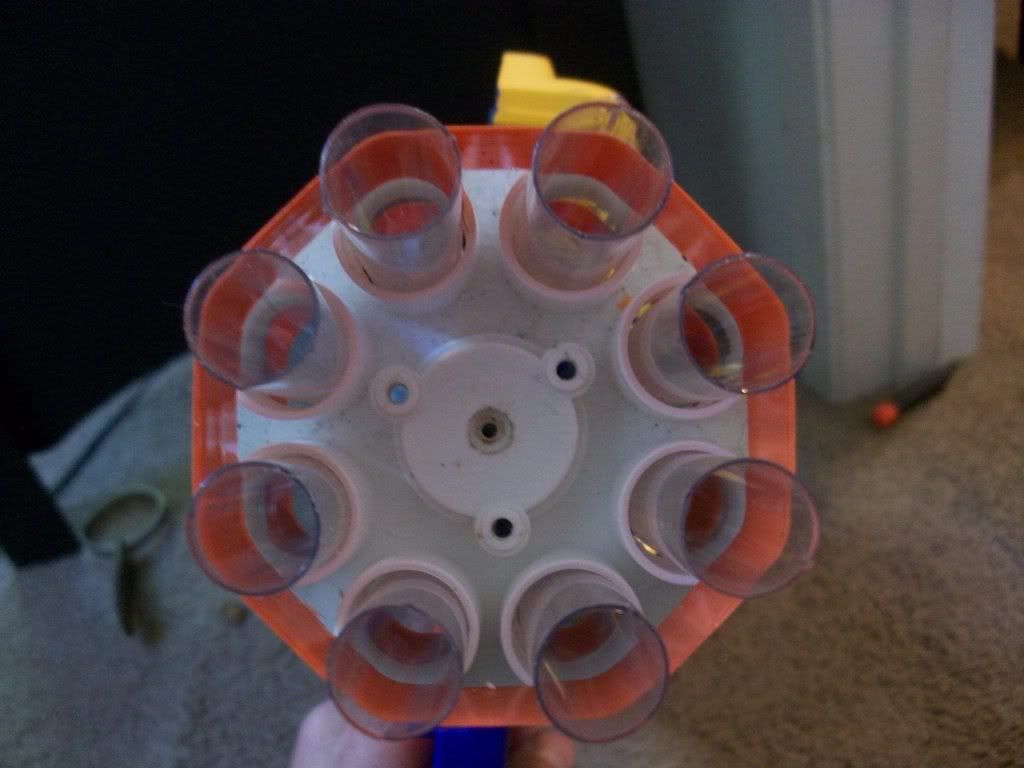
Posted Image
The white piece of plastic being used as a barrel spacer is actually a turret base from a busted up firefly. It has 8,8inch pieces of thin wall petg.
This blaster was a real pain to make, I needed to make many slight adjustments to it to make it function properly. pros and cons of this blaster compared to an AT2k with 8 in petg barrels and a plugged pump are:
pros:holds more ammo and can be reloaded quicker.
cons: harder to modify, need extra pieces("barrel spacer")

please give me your opinion on this blaster. This overview was made after the modification was completed, just way to many minor adjustments.

Edited by shadow archer, 01 May 2010 - 11:45 PM.

  • 0

#2 defcon44

defcon44

    Member

  • Members
  • 19 posts

Posted 01 May 2010 - 08:01 PM

Very nice.I could never figure out how to do this with my firefly.
  • 0

QUOTE(Forsaken_angel24 @ Dec 5 2006, 09:58 PM) View Post
The trigger is not hard to depress at all. I would say its as easier than depressing a teenager.

#3 durka durka

durka durka

    Member

  • Members
  • 364 posts

Posted 01 May 2010 - 08:12 PM

very nice. Is it really necessary to have the spring pulling on the pin so much that you need something else to counteract it? It just seems like more complexity than necessary to me.
  • 0
"The warrior who cultivates his mind polishes his arms"

#4 HOTH

HOTH

    Member

  • DO NOT TRADE
  • 557 posts

Posted 01 May 2010 - 08:27 PM

Excellent! I love this. Hope I see at it BAFF....
  • 0
My YouTube

Solved the Rubik's Cube in 46 seconds

"Nobody understands quantum mechanics" - Richard Feynman

#5 Draconis

Draconis

    I am not Lord Draconical

  • Members
  • 2,712 posts

Posted 01 May 2010 - 09:53 PM

Is it really necessary to have the spring pulling on the pin so much that you need something else to counteract it?


This is my question as well. That part doesn't make any sense. Why do you have a spring pulling back on the tank pin at all? What you really need is to fabricate an additional piece of plastic or metal which glues or screws to the trigger, and then comes up to a pint and attaches to the pin. You could us the hanger rod, since you have it, and make sort of inverted "V" shape, where the vertex of the angle folds around the pin, and each of the ends comes down to the trigger. I recommend drilling small holes in the front and back points of the trigger body and inserting the rod, then gluing them down. Hot glue may work, but epoxy (liquid, not putty) or something else would be better.
  • 0
[15:51] <+Noodle> titties
[15:51] <+Rhadamanthys> titties
[15:51] <+jakejagan> titties
[15:51] <+Lucian> boobs
[15:51] <+Gears> titties
[15:51] <@Draconis> Titties.
[15:52] <+Noodle> why is this so hard?

#6 shadow archer

shadow archer

    Member

  • Members
  • 51 posts

Posted 01 May 2010 - 10:03 PM

Is it really necessary to have the spring pulling on the pin so much that you need something else to counteract it?


This is my question as well. That part doesn't make any sense. Why do you have a spring pulling back on the tank pin at all? What you really need is to fabricate an additional piece of plastic or metal which glues or screws to the trigger, and then comes up to a pint and attaches to the pin. You could us the hanger rod, since you have it, and make sort of inverted "V" shape, where the vertex of the angle folds around the pin, and each of the ends comes down to the trigger. I recommend drilling small holes in the front and back points of the trigger body and inserting the rod, then gluing them down. Hot glue may work, but epoxy (liquid, not putty) or something else would be better.

A hole is drilled through the trigger, and the close hanger is going through it. that was all I could answer that I actually understood.
  • 0

#7 Kabigon

Kabigon

    Member

  • Members
  • 21 posts

Posted 01 May 2010 - 10:42 PM

Darn it, you beat me too it. I was doing something like this.

Really nice mod! Good use of spare parts
  • 0
QUOTE(Tannman500 @ Aug 14 2008, 08:17 PM) View Post

CDdts r great u new to nerf if u dont know how to make them
NOOB


#8 shadow archer

shadow archer

    Member

  • Members
  • 51 posts

Posted 01 May 2010 - 11:02 PM

Darn it, you beat me too it. I was doing something like this.

Really nice mod! Good use of spare parts

thank you.
  • 0

#9 moosa

moosa

    Member

  • Members
  • 243 posts

Posted 01 May 2010 - 11:06 PM

here is a close up of the trigger set up. A clothes hanger is connecting the trigger to the tank. There is a tension spring on the AT2k firing pin, because the firing pin will not go all the way back with out it and the hot glue will com off. this can be fixed with using epoxy putty instead of hot glue, and there should be no need for the tension spring, I just don't have epoxy putty at the moment.


I think this answers your questions guys.

Nice job on the mod. How is the turret seal? Did you put a different spring in there or do anything to improve it over the stock firefly turret seal?
  • 0
Yes.

#10 shadow archer

shadow archer

    Member

  • Members
  • 51 posts

Posted 01 May 2010 - 11:48 PM

here is a close up of the trigger set up. A clothes hanger is connecting the trigger to the tank. There is a tension spring on the AT2k firing pin, because the firing pin will not go all the way back with out it and the hot glue will com off. this can be fixed with using epoxy putty instead of hot glue, and there should be no need for the tension spring, I just don't have epoxy putty at the moment.


I think this answers your questions guys.

Nice job on the mod. How is the turret seal? Did you put a different spring in there or do anything to improve it over the stock firefly turret seal?

the turret seal is pretty good, I put in a stronger spring that I found in a misc spring pack.
  • 0

#11 Blue

Blue

    Member

  • Members
  • 2,222 posts

Posted 02 May 2010 - 12:04 AM

You should really invest in a tube of e6000 or Goop, those are seals will be much more durable and you can also use the goop as a stronger alternative to hold the wire in place if you layer it enough. I love the creativity.
  • 0


1 user(s) are reading this topic

0 members, 1 guests, 0 anonymous users