Jump to content


Photo

Extreme Nite Finder Modification

Extended draw, AT3K, AT2K, SSPB, and Paint

41 replies to this topic

#1 Banshee

Banshee

    Member

  • Members
  • 668 posts

Posted 23 March 2010 - 09:21 PM

Hello everyone. I’ve been working on this beast for some time now, and it’s finally finished! I have combined many modifications from many different Nerf contributors all into one gun. Essentially this is a Nite Finder with an extended plunger tube, an integrated AirTech 3000, an integrated Secret Strike Pocket Blaster, an AirTech 2000 turret, and accent lighting.

This modification is thorough and long, so if you want to skip to the good stuff, just scroll to the bottom. Otherwise, lets get started!

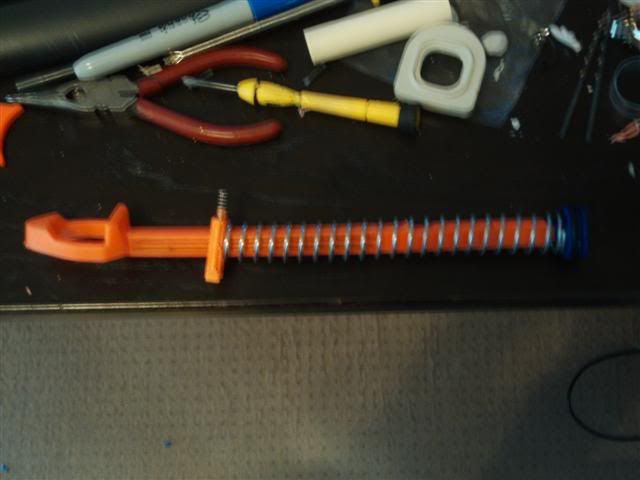
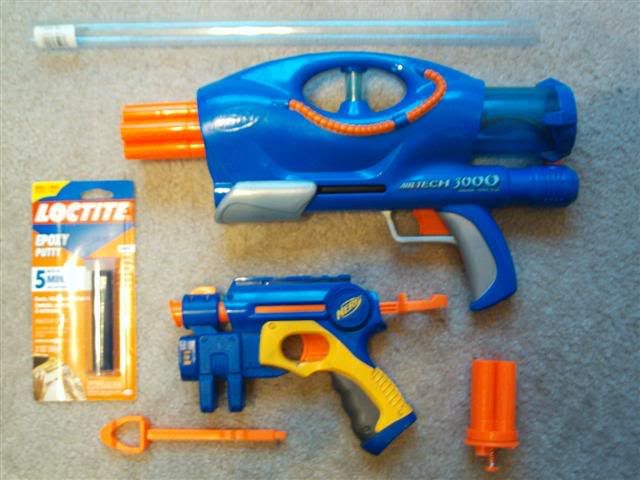
First we start with our basic materials. You’re going to also need an extra Nite Finder plunger rod or make your own from cratch. And you’re going to need some 1” PETG Tubing from Pet Smart. The following will be the installation of the AirTech 3000 to the likings of PointBlank and pump location to the liking of me and my previous Blood Finder mod.
Posted Image

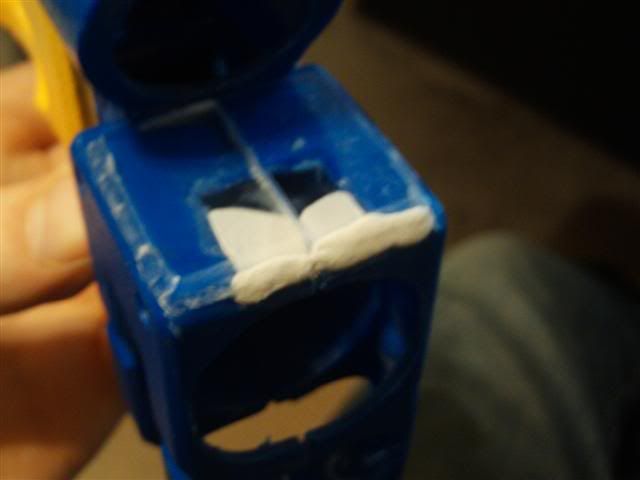
You’re going to need to rip out all the internals from the AT3K like so:
Posted Image

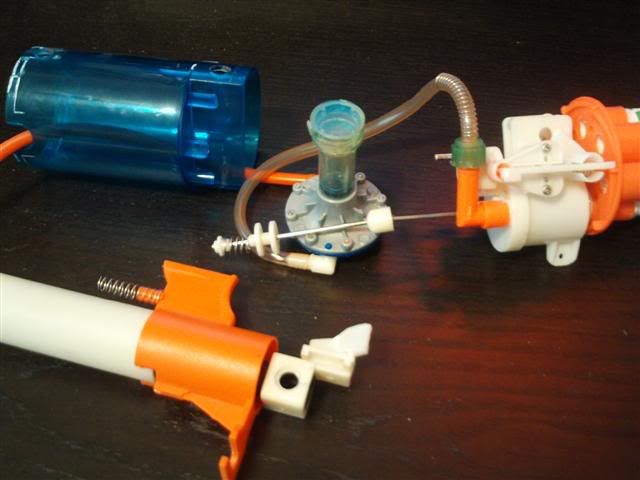
Then you need to clean all the plastic sticking out from the air tank off. It should look like this:
Posted Image

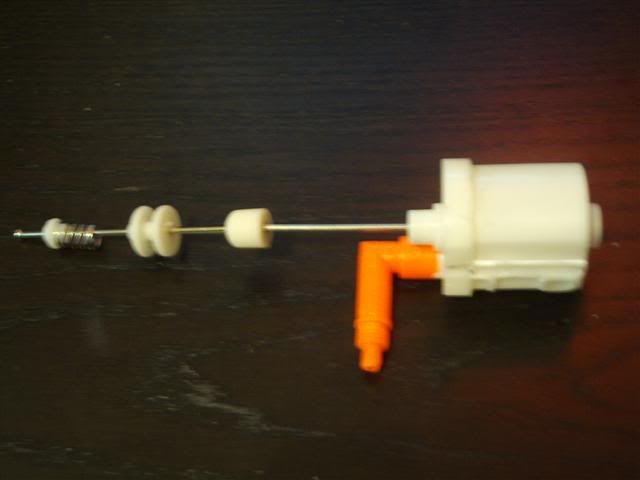
Then we’re going to bypass the pressure gauge and remove the second section of the tank pin so you have this:
Posted Image

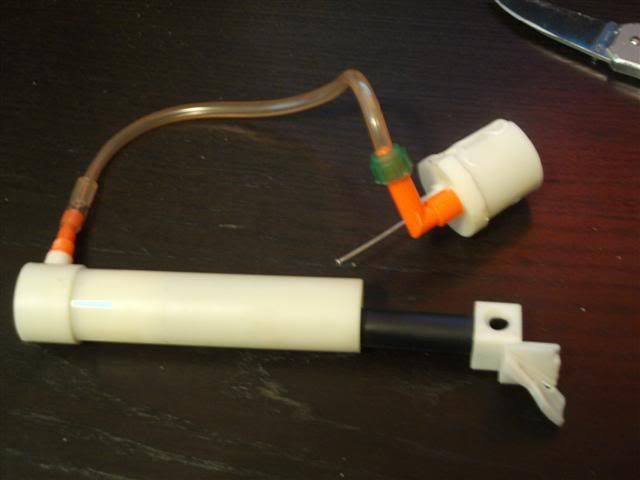
Now you’re going to set that assembly aside for later. Before we can do anything else to it, we need to move on to the Nite Finder and prepare it for the tank installation.

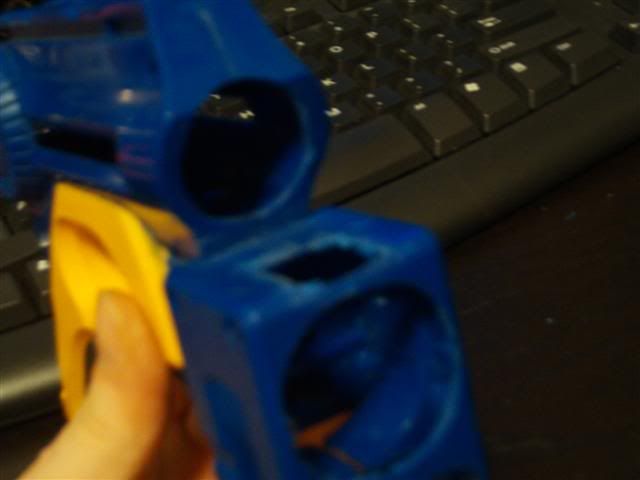
So grab your Nite Finder and open it up.
Posted Image

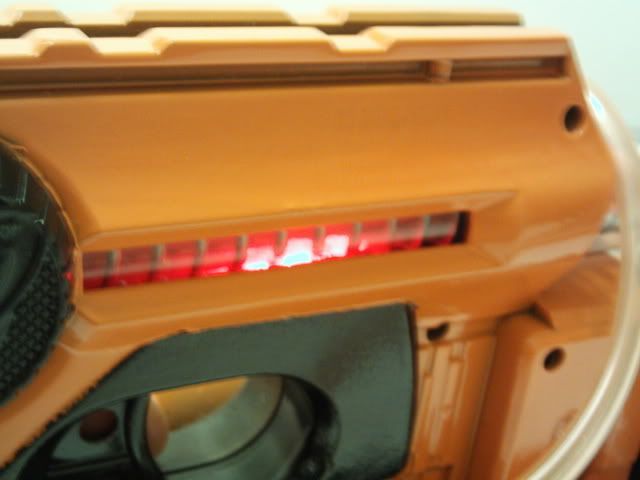
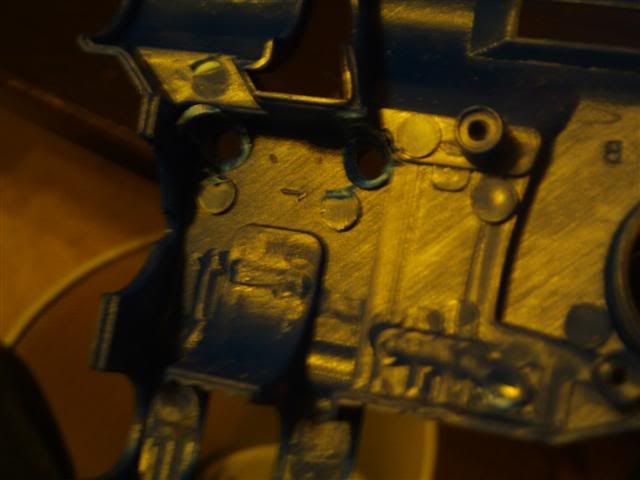
Gut the gun, remove everything from the inside. Then take a large drill bit and drill down the screw pegs on the inside where the light was.
Posted Image

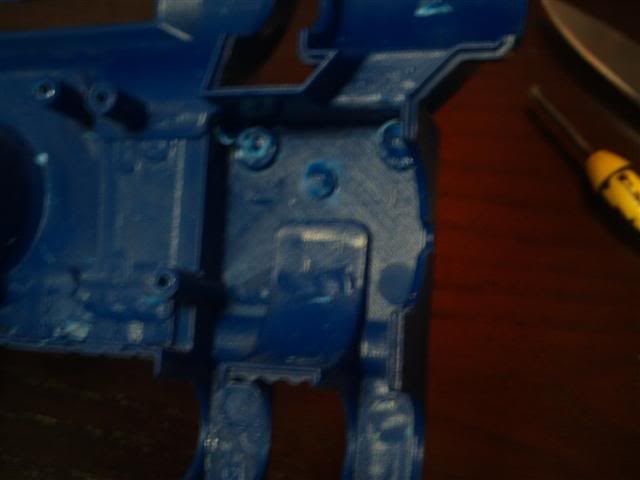
Do this to the other side as well.
Posted Image

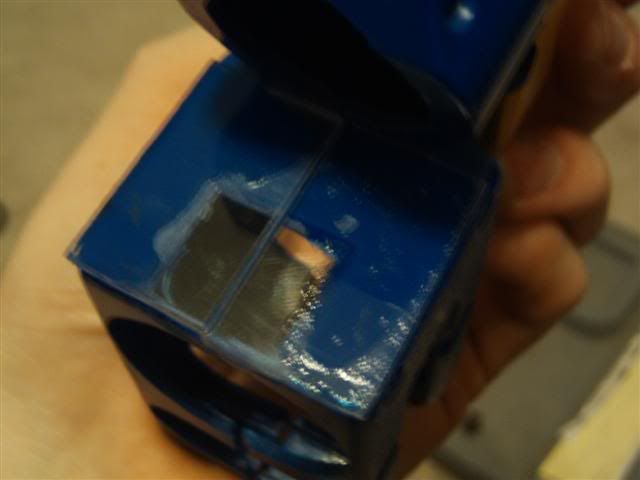
Then drill a hole large enough for the tank valve out the side.
Posted Image

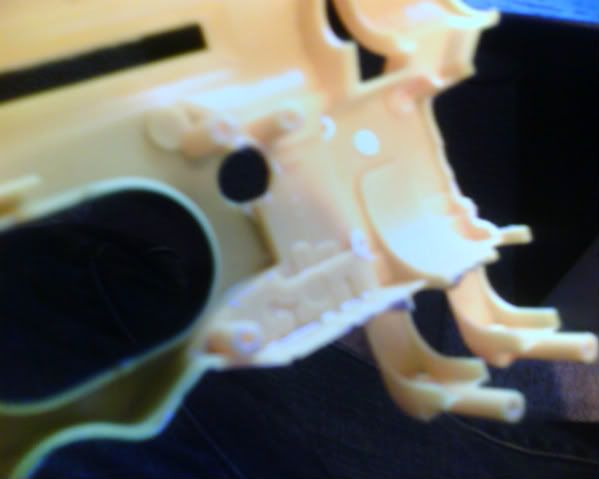
Now take a file or a Dremel tool and grind the front of the gun where the light was large enough for the tank to fit through because it will need to stick out the front a millimeter or so.
Posted Image

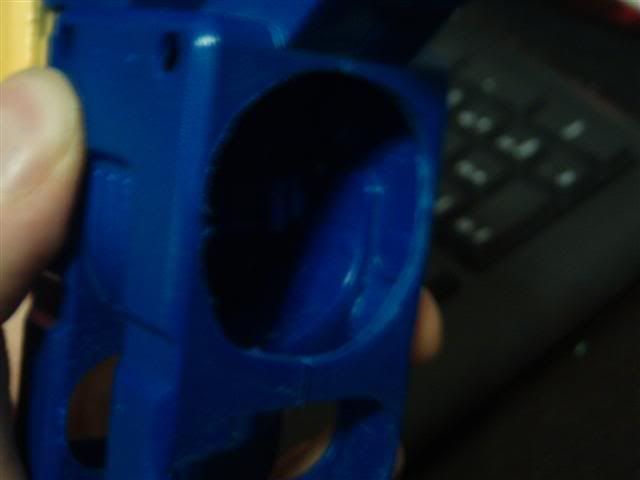
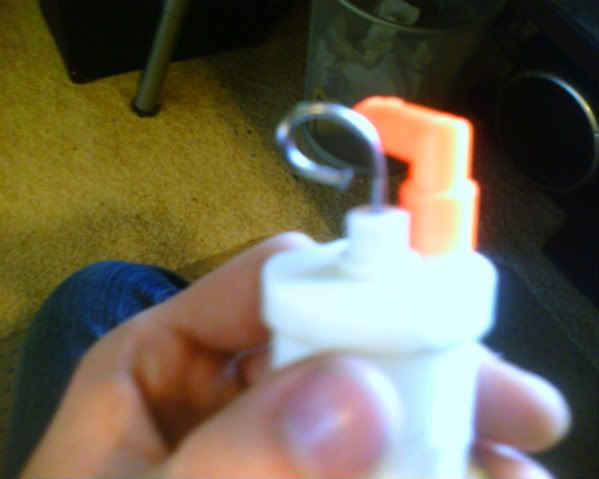
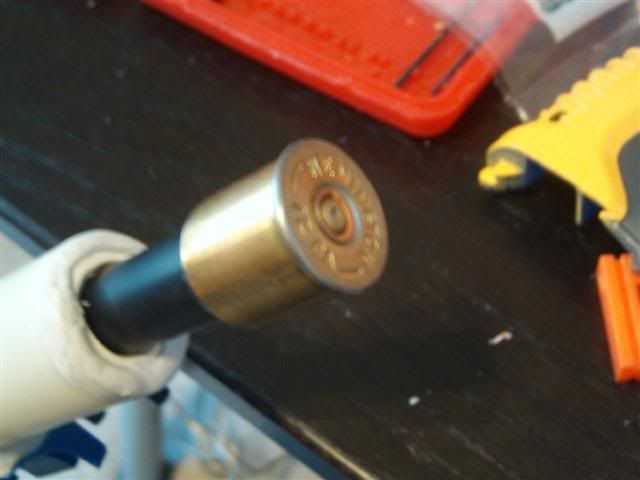
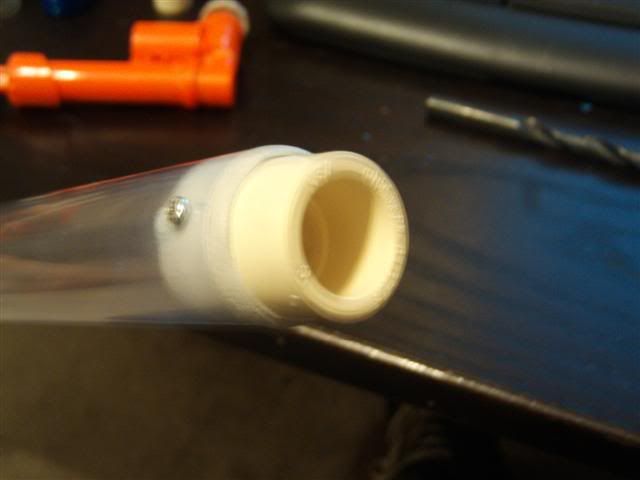
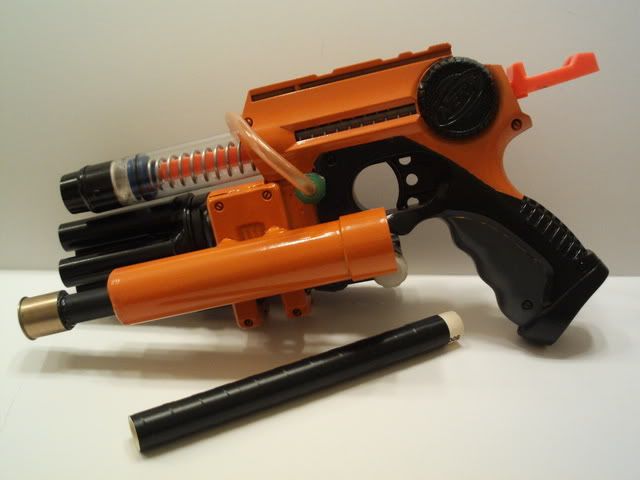
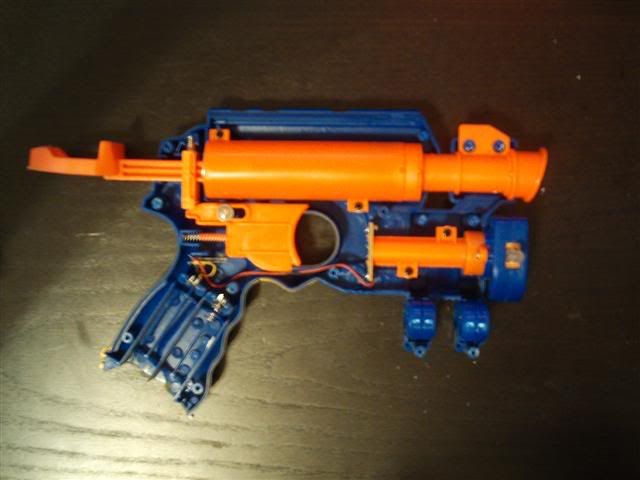
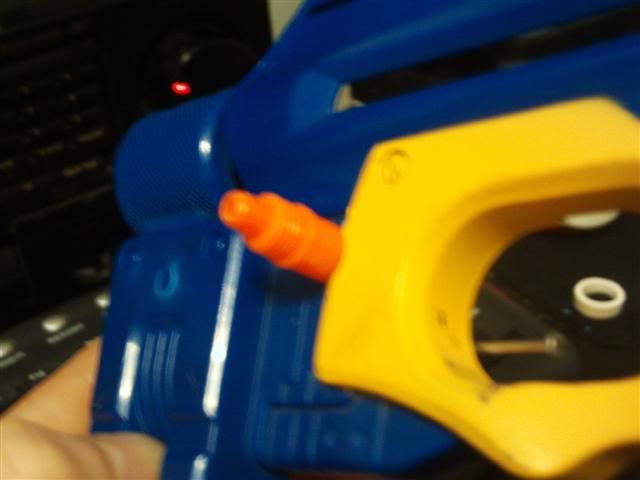
Now test fit your tank.
Posted Image

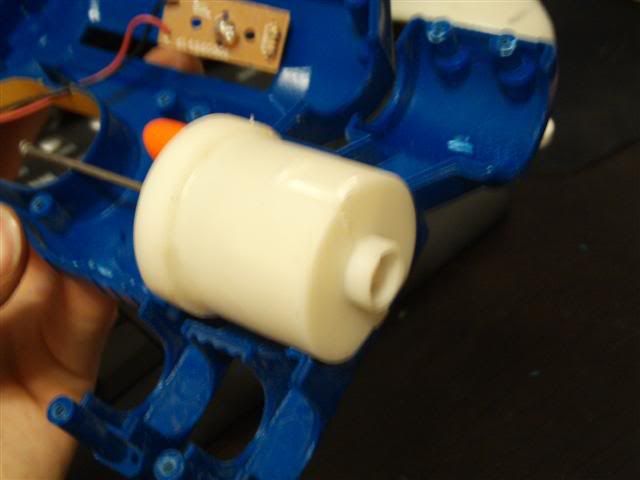
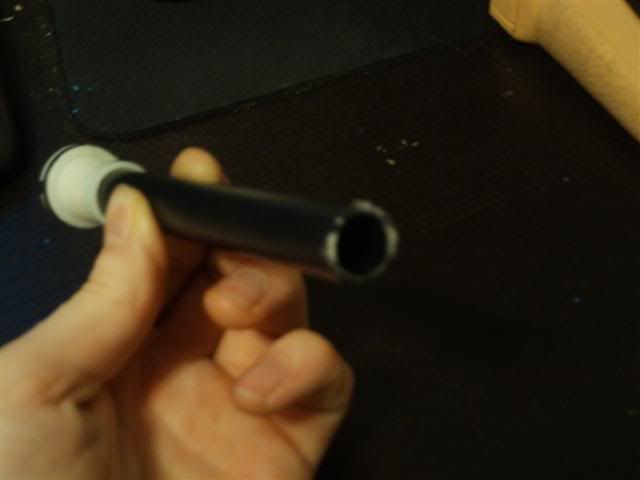
The Tube into the tank should stick out the side like this:
Posted Image

Now we’re going to take our AirTech 2000 turret and go Dremel crazy on it. We’re going to do the Reverse Turret mod like Blue did, I’m not sure if he came up with it or if it was Cheesypiza001, Blue said it was originally Black Fox. Take your Dremel and grind everything off the top, the barrels, AR’s, and the steel pin in the middle. Make sure you go slow on the steel pin and allow time for it to cool down. If not it could get hot enough to start melting the plastic on the turret and that’s never good.
Posted Image

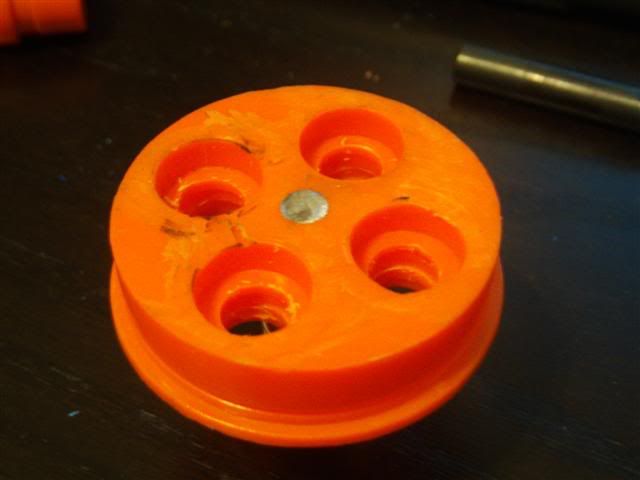
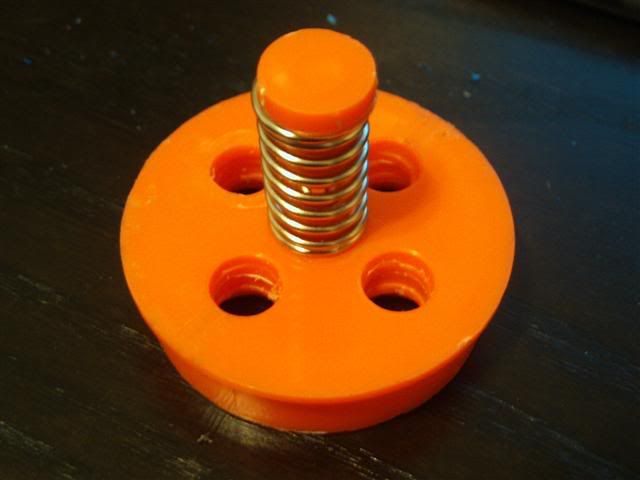
Then grind everything off of the bottom of turret except for the spring of course. Then drill barrel holes all the way through.
Posted Image

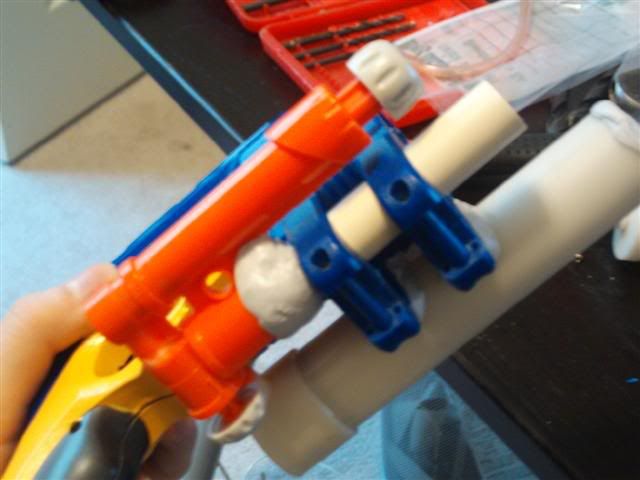
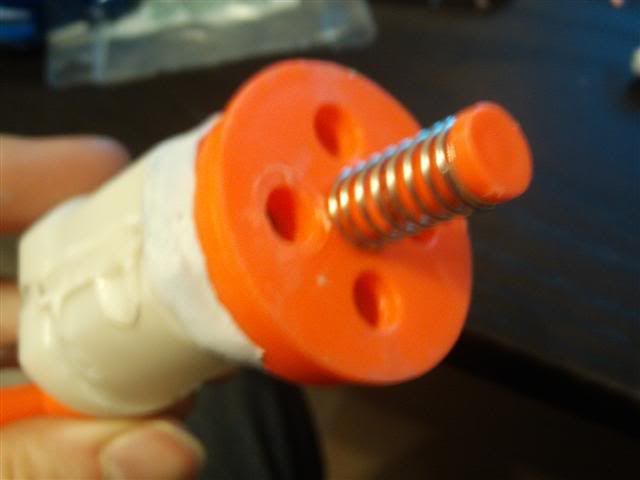
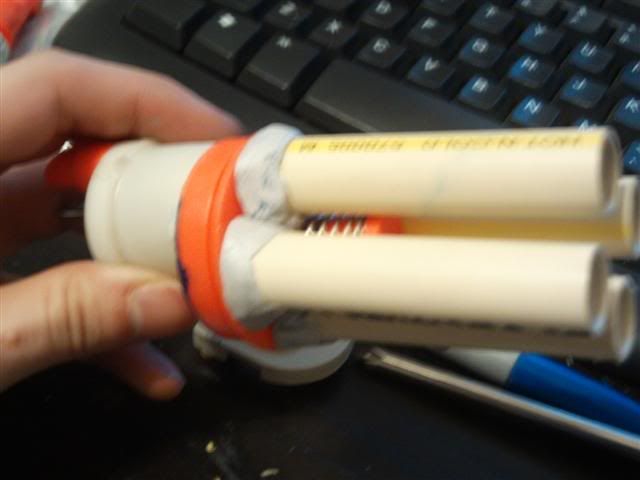
Now we’re going to attach it onto our tank with epoxy putty. I put it on offset so it wouldn’t get in the way of the plunger or the ammo holders, where I plan to put the Pocket Blaster.
Posted Image

Before you do that, if you wanted to do rear loading, this would be the time. Now we can attach the barrels. Do whatever you’d like for this, but I chose to only do 3 inch CPVC barrels. I wanted a fast reload time and didn’t want to open up the turret to do rear loading, so I went with short barrels and it works fine.
Posted Image

Edited by Banshee, 14 July 2011 - 07:43 PM.

  • 0
Like my page on Facebook! PM me, I do commissions!

#2 Banshee

Banshee

    Member

  • Members
  • 668 posts

Posted 23 March 2010 - 09:22 PM

Once it cures we need to bend our trigger pin in a circle. So grab two pairs of pliers and bend it like this:
Posted Image

Now, test fit it to make sure it all works before we attach the pump. So drop it in, and then take out the trigger. We need to drill a small hole in the far back corner according the size of your trigger wire.
Posted Image

I suggest stiff wire, not flexible wire because it’s not a straight pull on the pin. I used some copper housing wire.
Posted Image

Now we’ll move onto the pump relocation. PointBlank put his where the plunger tube was, I want mine on the side of the gun. But before we place it, I’m going to do my signature shot-gun-shell pump handle! So take your shell:
Posted Image

And cut the plastic off it!
Posted Image

Then cut the end off of our pump.
Posted Image

The way I install my pump is permanent, so you need to glue it in before you can put the handle on. So epoxy it in and put the shell on the end.
Posted Image

Now we can epoxy it on the side. I’m not very good with epoxy putty, but try and be as clean as possible.
Posted Image

Now because we’re going to do the Extended Plunger Tube mod originally done by KBarker, we need to lob off the barrel stabilizer thing on the front. I also grinded the whole in the front big enough for the plunger to fit out of the front.
Posted Image]

Then if you care to do so, you can patch the hole like I did. I used thin sheets of Plexiglas and super glued them on.
Posted Image

Then I filed the edges clean and filled in some gaps with putty.
Posted Image

Now we’re going to work on the plunger rod. We need to combine sections of two to create one long one. I’m missing a few pictures, but I used copper wire and super glue and its rock solid. It should look like this:
Posted Image

Then I used an extra long bolt to run through the head, all the way through the first section and into the original plunger head of the plunger rod. It’s hard to explain without a picture. Before you put the head on, put the catch on and your spring, I don’t remember what the spring was, but I got it from Ace and it’s basically a long skinny version of the Ace #49. You’ll need to cut off about 3 inches of it.
Posted Image
Now measure out how long you want the plunger to be. On the end, epoxy your coupler in. I also ran 2 small screws into the sides for safe measures.
Posted Image

Now we can move on to the Pocket Blaster integration. This part is entirely optional, but it only takes up one ammo holder and it’s pretty easy to do. Take both ammo holder inserts out and grind them on one side to fit CPVC like this:
Posted Image
  • 0
Like my page on Facebook! PM me, I do commissions!

#3 Banshee

Banshee

    Member

  • Members
  • 668 posts

Posted 23 March 2010 - 09:23 PM

Now take your pocket blaster out of the shell, cut the barrel off and epoxy on a CPVC one. Then install your ammo holders, slide the Pocket Blaster into place and glue it. It should look like this:
Posted Image

Now we’ve done everything to the gun and its time to paint it. I had a craving to do an orange and black paint job for a while, so that’s what I did. I nick-named it the General Lee. And for those of you old enough to know anything about The Dukes of Hazzard will know why.
Posted Image

Posted Image

Posted Image

Posted Image

The light that was used for the sight is now angled upwards into the plunger tube. So when you pull the trigger, the plunger tube lights up red. Its just another signature modification I’ve done on previous guns I’ve sold.

Now I know you all want ranges, right?

The Nite Finder gets close to 100 feet but consistently lands in the upper 80’s and 90’s depending on the dart. I’m using a 10” CPVC Barrel. And it’s the most accurate gun I’ve ever used. I test fired it and shot my friend in the chest at 85 feet consistently.

The AirTech 3000 is getting about 70-80 feet

And the Pocket Blaster gets a whopping 40-50 feet!

Edited by CaptainSlug, 25 March 2010 - 02:52 PM.

  • 0
Like my page on Facebook! PM me, I do commissions!

#4 Blue

Blue

    Member

  • Members
  • 2,222 posts

Posted 23 March 2010 - 09:28 PM

Wow, that's amazing. I saw Black Foxes post in the Mod PJ thread, so I decided to try it myself and make a writeup. I'm glad to see it worked out so well for you.
  • 0

#5 Banshee

Banshee

    Member

  • Members
  • 668 posts

Posted 23 March 2010 - 09:37 PM

Wow, that's amazing. I saw Black Foxes post in the Mod PJ thread, so I decided to try it myself and make a writeup. I'm glad to see it worked out so well for you.

So it was Blackfox? I'm going to change the credit then, thanks. But yeah, it works beautifully.
  • 0
Like my page on Facebook! PM me, I do commissions!

#6 HOTH

HOTH

    Member

  • DO NOT TRADE
  • 557 posts

Posted 23 March 2010 - 09:50 PM

Before the paint, I was scared of the exposed putty, but after, it is so totally eye diddle staus. Nice work.
  • 0
My YouTube

Solved the Rubik's Cube in 46 seconds

"Nobody understands quantum mechanics" - Richard Feynman

#7 jakejagan

jakejagan

    Member

  • Members
  • 209 posts

Posted 23 March 2010 - 09:56 PM

I think I just shat my pants after I saw the finished product. This is a fantastic modification Banshee. May you get lots of money for this gun on ebay.
  • 0
00:38 jakejagan I hear you guys still bring up the "gangsta shot"
00:38 Bags it is legend now

17:45 *** MrPzowned was kicked by Zorn (MrPzowned)
17:45 Zorn moral of the story: don't pick on idle mods yo

#8 Lt Stefan

Lt Stefan

    Member

  • Members
  • 892 posts

Posted 23 March 2010 - 10:22 PM

That is absolutely amazing. Not even the gun.... Just the way it's made and how clean it is.
  • 0

#9 Banshee

Banshee

    Member

  • Members
  • 668 posts

Posted 23 March 2010 - 10:52 PM

Thanks everyone! Any questions?

Things I might add, is that this gun is not at all front heavy, it takes a real man to prime it, and firing three darts at once is always a plus!
  • 0
Like my page on Facebook! PM me, I do commissions!

#10 Salmon

Salmon

    Member

  • Members
  • 447 posts

Posted 23 March 2010 - 10:59 PM

Daaaaaammmmmnnn.


But seriously, that's pretty nice man. The paint job is incredibly clean, and I love the light-up plunger tube mod.
  • 0
Welcome to I-dont-care-isburg, population: me.
We're located in I-Don't-Give-a-Damn County, in scenic Shut-the-Hell-Up-achussets.
Maybe you're familiar with our annual charity drive where we ask for shit, and no one gives any.

#11 Soothsayer

Soothsayer

    Member

  • Members
  • 663 posts

Posted 23 March 2010 - 11:00 PM

I've never been much for pistol sized primaries, but I'll make an exception with this thing.

Do you think one of those shotgun shell ends could be fashioned to make a good seal on a turret?
  • 0

yeah I'm that guy who made that cool thing with the cool paint.


#12 Banshee

Banshee

    Member

  • Members
  • 668 posts

Posted 23 March 2010 - 11:43 PM

I've never been much for pistol sized primaries, but I'll make an exception with this thing.

Do you think one of those shotgun shell ends could be fashioned to make a good seal on a turret?

I assume you mean to use them as actual shells for darts? I would say it'd be about as good as one of the BuzzBee shells. The only problem will be drilling through the primer because it rotates freely so its almost impossible to drill.
  • 0
Like my page on Facebook! PM me, I do commissions!

#13 catmods

catmods

    Member

  • DO NOT TRADE
  • 67 posts

Posted 23 March 2010 - 11:49 PM

I was loving the mod. Until I saw its on sale. Any chance of duplicating this? I want to see it in person. Did you have to reinforce the catch?
  • 0
"Don't worry I'll just close it. Your gun sucks." - Talio

#14 Banshee

Banshee

    Member

  • Members
  • 668 posts

Posted 24 March 2010 - 12:18 AM

I was loving the mod. Until I saw its on sale. Any chance of duplicating this? I want to see it in person. Did you have to reinforce the catch?

This mod was incredibly difficult and I have no intention of doing it again unless I was given the materials to do so. The hardest part was finding the materials and killing a perfectly good AT3k. And if you had hopes of seeing it in person that would require you to come to me because I don't travel more than 20 miles for a war. So if you really want to see it, you'll have to buy it. Sorry. If you get your hands on the materials, I'll make you one for contract, but otherwise I had no plans on duplicating it.
  • 0
Like my page on Facebook! PM me, I do commissions!

#15 Soothsayer

Soothsayer

    Member

  • Members
  • 663 posts

Posted 24 March 2010 - 01:46 AM

I've never been much for pistol sized primaries, but I'll make an exception with this thing.

Do you think one of those shotgun shell ends could be fashioned to make a good seal on a turret?

I assume you mean to use them as actual shells for darts? I would say it'd be about as good as one of the BuzzBee shells. The only problem will be drilling through the primer because it rotates freely so its almost impossible to drill.

No not like that, like instead of using a washer, use the metal part of the shell to make a seal.
  • 0

yeah I'm that guy who made that cool thing with the cool paint.


#16 umpshaplapa

umpshaplapa

    Member

  • Members
  • 636 posts

Posted 24 March 2010 - 02:55 PM

How does the Nite Finder plunger tube stay in place? Did you epoxy it to a side of the shell?
  • 0
QUOTE(Talio @ Jun 29 2009, 01:50 PM) View Post

i got a black belt in noob banning in 2004.


#17 Banshee

Banshee

    Member

  • Members
  • 668 posts

Posted 24 March 2010 - 03:07 PM

Oh darn, I forgot that step! I wrapped electrical tape in the front and back of the plunger. It doesn't need much to hold it in, just as long as it doesn't fall out the front, but its rock solid.
  • 0
Like my page on Facebook! PM me, I do commissions!

#18 Captain

Captain

    Member

  • Members
  • 814 posts

Posted 24 March 2010 - 04:14 PM

It looks like the plunger pull ring hits the back of the gun before the head hits the end of the plunger. If that is what happens, that will likely cause durability problems.


Anyway, amazing job with this. It should fetch some serious dough.
  • 0
I don't care what anyone else says, Atom Blasters are fucking awesome.

#19 guardian21

guardian21

    Member

  • Members
  • 64 posts

Posted 24 March 2010 - 04:42 PM

.... my first thought

*falsetto* "whaaat?"

second though

*see first thought*


third thought. "holy shit this is awesome."

when i first read that you were combining 3 guns i had no idea what to expect but this is bloody Effeminate!


beautiful paint job too! glad to have a good writeup cause this is definately something id like to try some day!!!!


beautiful work mate! beautiful
  • 0
DATA!

#20 AgentMoe64

AgentMoe64

    Member

  • Members
  • 17 posts

Posted 24 March 2010 - 04:54 PM

This gun is totally fricking amazing! May you be paid lots of moneys!
  • 0
"- 99% of teens would cry if they saw Justin Beiber standing on top of a sky scraper, about to jump. If you're one of the 1% who would sit there eating pop corn screaming "DO A FLIP YOU FAGGOT!" Post this as your sig."

#21 billyblue888

billyblue888

    Member

  • Members
  • 39 posts

Posted 24 March 2010 - 04:59 PM

I like it a lot and would be buying it if I had the money. :)
  • 0

#22 Banshee

Banshee

    Member

  • Members
  • 668 posts

Posted 24 March 2010 - 05:12 PM

It looks like the plunger pull ring hits the back of the gun before the head hits the end of the plunger. If that is what happens, that will likely cause durability problems.


Anyway, amazing job with this. It should fetch some serious dough.

Not at all! I designed it with negative preload. There is actually slack in it. I just pushed the plunger rod all the way in for the pictures. I did it like that for the specific reason you stated. I intended this gun to be used and abused, so I didn't want the cocking handle hitting the gun, and when you fire it barely taps it and by that point there is no force behind it, so it works great. I would rather have the handle hit the gun than the head hit the end of the plunger.
  • 0
Like my page on Facebook! PM me, I do commissions!

#23 Kabigon

Kabigon

    Member

  • Members
  • 21 posts

Posted 24 March 2010 - 05:51 PM

So if I'm seeing this correctly. the shotgun shell is the pump stopper?
  • 0
QUOTE(Tannman500 @ Aug 14 2008, 08:17 PM) View Post

CDdts r great u new to nerf if u dont know how to make them
NOOB


#24 Banshee

Banshee

    Member

  • Members
  • 668 posts

Posted 24 March 2010 - 05:55 PM

So if I'm seeing this correctly. the shotgun shell is the pump stopper?

Um, I'm not sure what you mean by pump stopper? The shell is just the handle. It's purely cosmetic. What stops the pump from coming out is 3/4" PVC epoxied into the opening.
  • 0
Like my page on Facebook! PM me, I do commissions!

#25 Kabigon

Kabigon

    Member

  • Members
  • 21 posts

Posted 24 March 2010 - 07:14 PM

So if I'm seeing this correctly. the shotgun shell is the pump stopper?

Um, I'm not sure what you mean by pump stopper? The shell is just the handle. It's purely cosmetic. What stops the pump from coming out is 3/4" PVC epoxied into the opening.


Oh, OK, thank you.
  • 0
QUOTE(Tannman500 @ Aug 14 2008, 08:17 PM) View Post

CDdts r great u new to nerf if u dont know how to make them
NOOB


1 user(s) are reading this topic

0 members, 1 guests, 0 anonymous users