#1
Posted 15 February 2009 - 01:06 PM
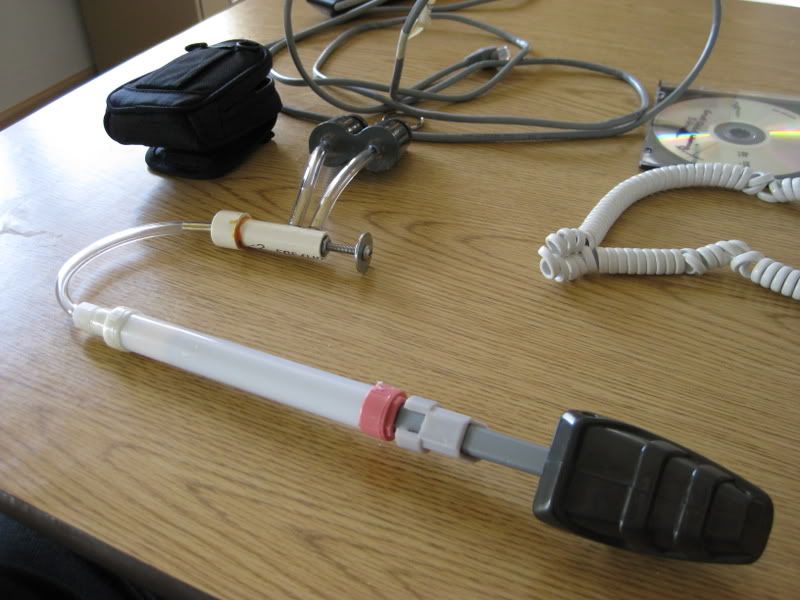
The overall setup:
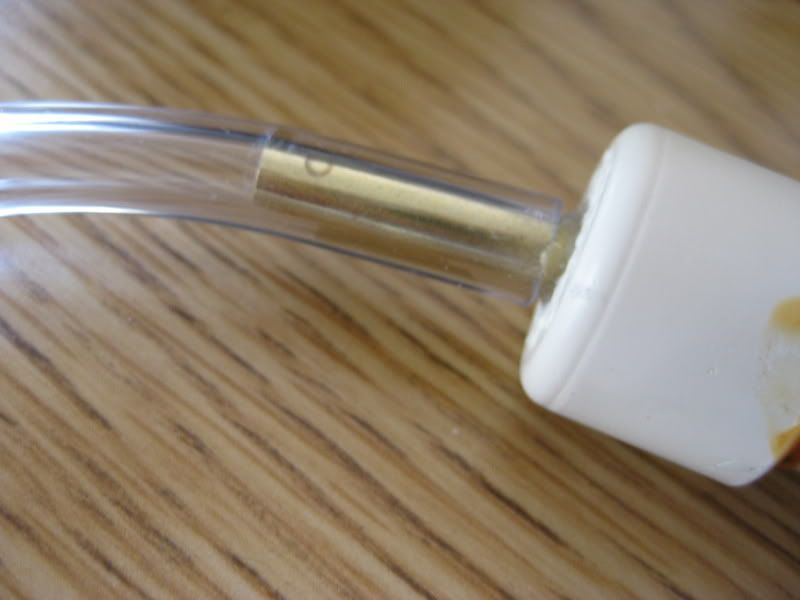
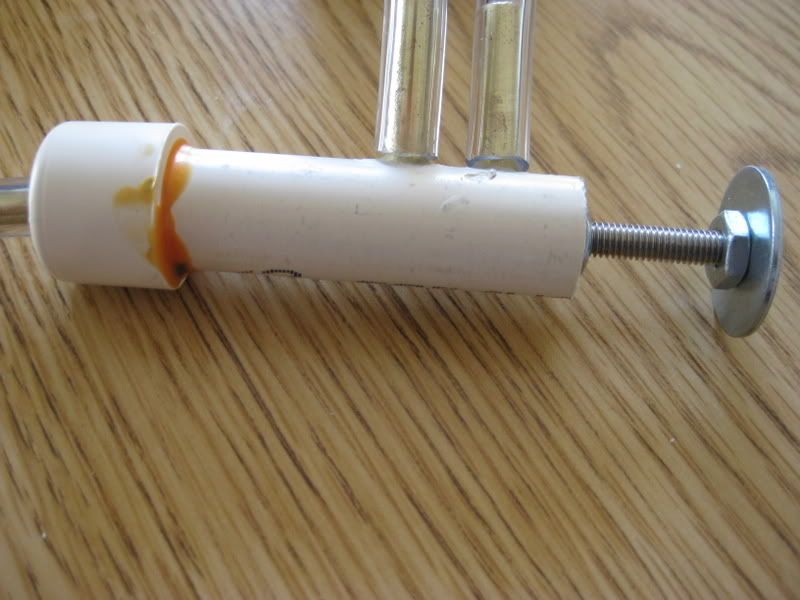
The trigger itself is made out of thinwall CPVC, with a cap on the end.
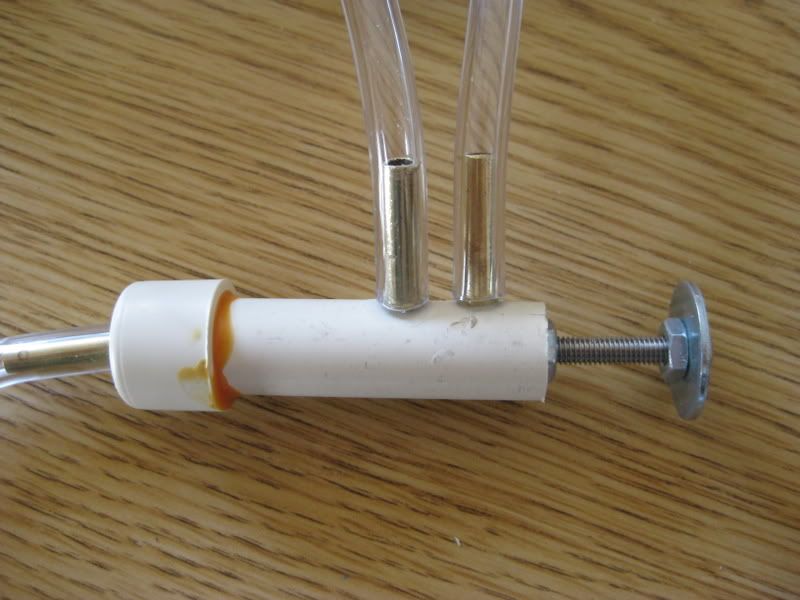
The brass acts as place for the pump and airtanks to connect.
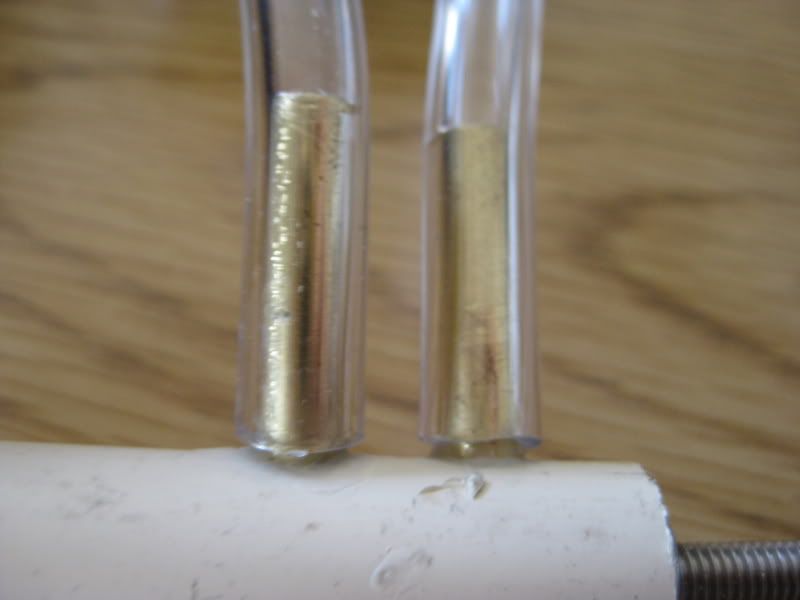
Here is what I call "The Sealer", which is probably the most crucial piece in this.
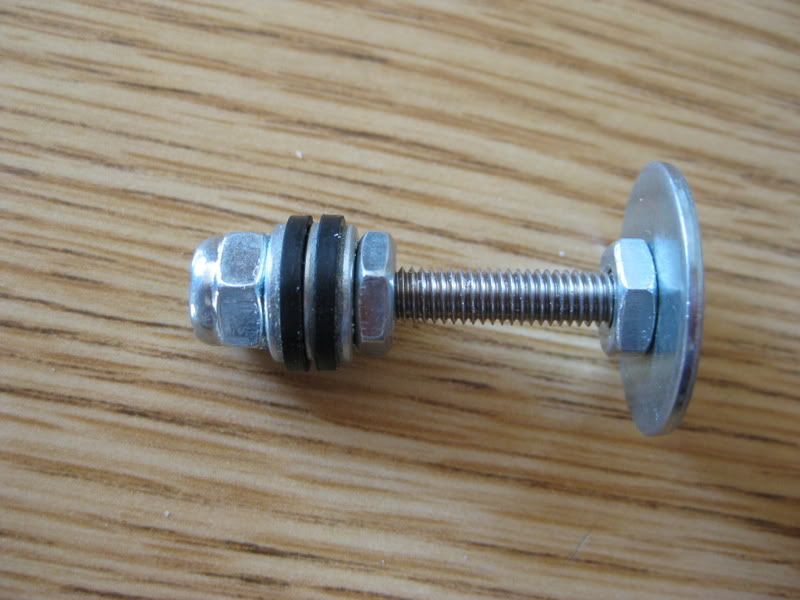
It's a 10-32 screw with a cap nut on the end then what I call "The washer sandwich" and another nut holding it all tight. The washer next to the screw head was added to make sure I didn't push the sealer into the tube too far. Here's a close-up on the washer sandwich.
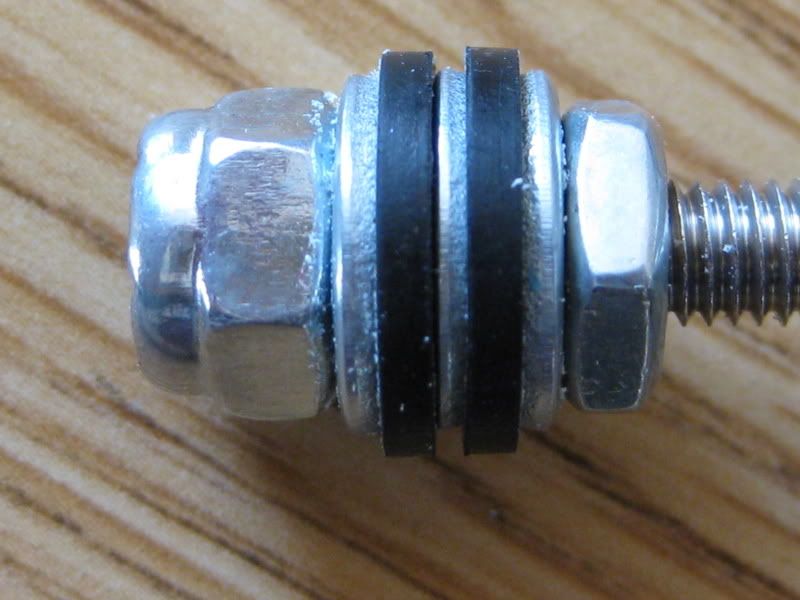
The washer sandwich consists of a #8 washer, a rubber washer, a #8 washer, a rubber washer, and another #8 washer. It was partially inspired my CS's LS plunger head replacement.
Here is the trigger ready to fire:
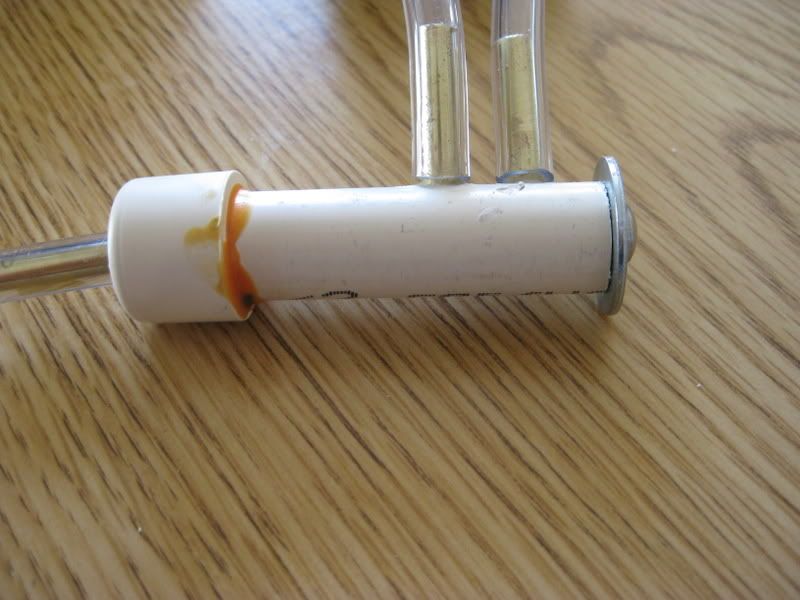
Here it is after being fired:
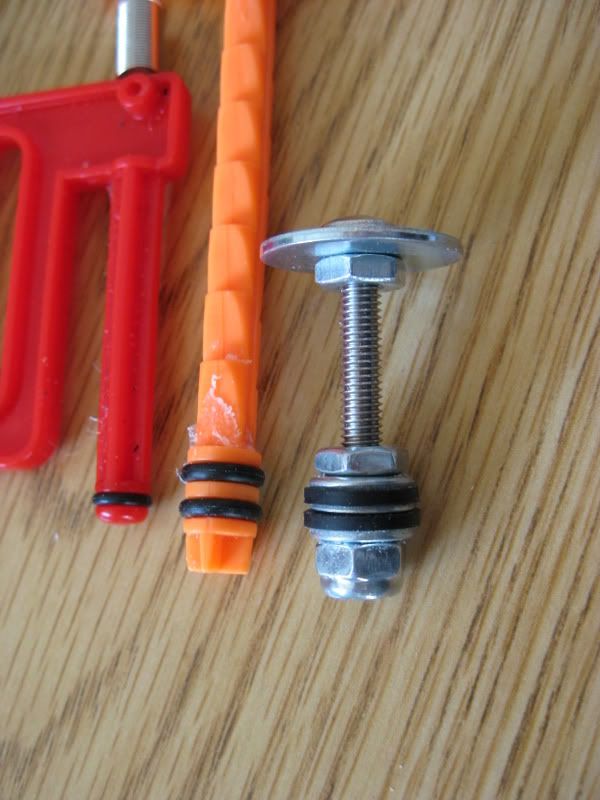
The sealer compared to one of a Hornet and Big Salvo:
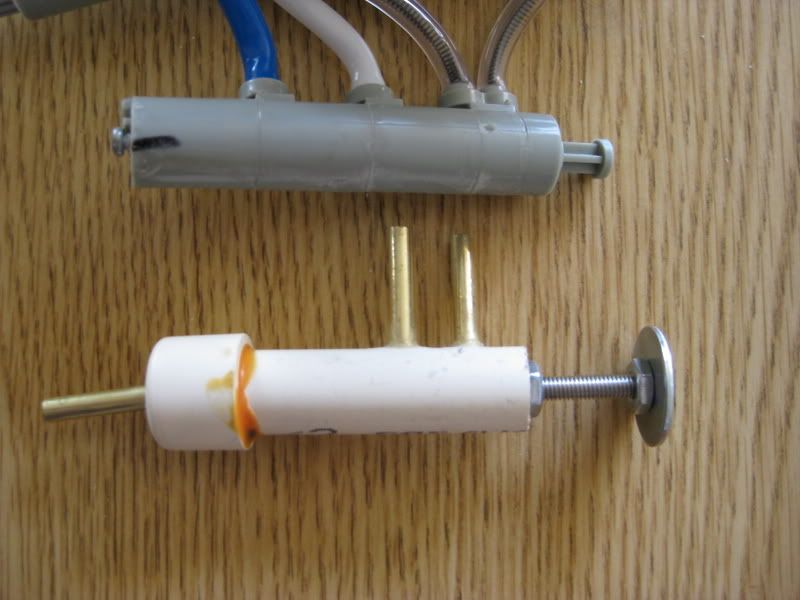
The trigger compared to an SMDTG trigger:
Notes:
As of now the setup isn't quite working. I know that the sealer is sealing well because I can pump it and the sealer will shoot out, like with the Hornet. I'm pretty sure that the tubing isn't sealing well on the brass because it doesn't fit very tightly over it, and it's not glued on at all. I'll try gluing the tubing on and see if that fixes the leaks.
#4
Posted 15 February 2009 - 01:11 PM
That's actually what I was planning to do, but I want to be able to access the sealer right now in case it needs to be adjusted.Very nice, it looks interesting, and can save people a lot of money. I suggest drilling a hole in a CPVC endcap, and putting it on, so the sealer can't fall out.
#5
Posted 15 February 2009 - 01:12 PM
Just another thought, since after firing the sealer will stay in, you should put a small spring in it, to push it back up, to make firing easier and faster.That's actually what I was planning to do, but I want to be able to access the sealer right now in case it needs to be adjusted.Very nice, it looks interesting, and can save people a lot of money. I suggest drilling a hole in a CPVC endcap, and putting it on, so the sealer can't fall out.
#6
Posted 15 February 2009 - 01:15 PM
I was planning on doing that was well, in order to make it more like the actual SMDTG trigger, but I'm just getting down the basics and making sure it works properly in this stage. V2 or V3 will definatley have all those features.Just another thought, since after firing the sealer will stay in, you should put a small spring in it, to push it back up, to make firing easier and faster.
#8
Posted 15 February 2009 - 02:04 PM
You are better with airguns. I will give you that. But you can't make a SNAP worth crap. Come on. Just prove me wrong. I am challenging you, seeing as how my newest addition to my SNAPenal (SNAP Arsenal) is about halfway done.
Venom: Haven't we all?
#9
Posted 15 February 2009 - 03:52 PM
#10
Posted 15 February 2009 - 03:52 PM
Sorry to hear that man, it's like that one famous bumper sticker, "Shit Happens"
#11
Posted 15 February 2009 - 04:04 PM
Yeah, I was thinking, "Damn, Imaseoulman would be proud". What really surprises me is that nobody thought of this before, considering how simple it is.Oh my god, you are awesome! I HAVE to try this as I love marvelous salvo's, but hate how expensive smdtg triggers are. It's to bad you came out with this after imaseoulman left. He would have been so exited about it. I know he'll be jumping for joy when he returns.
#12
Posted 15 February 2009 - 05:36 PM
#13
Posted 15 February 2009 - 06:03 PM
I had a similar idea. It was to use small screws on the edge of the tube to make sure the sealer doesn't come out. I think I'll be able to find an easy solution. And yes, pump pressure does reset it. That's proved by the sealer shooting out of the tube when I don't hold it in place, but I agree, a spring or other reset device would improve it.Pump pressure should reset it rather quickly, so a spring inside is probably not essential. Might still be helpful though.
As for the cap on the end to hold in the trigger, I agree, but I would drill a hole in the end for the trigger, slip it on, then drill a small offcenter hole through the cap and just "grazing" the tube for a metal pin. No need to glue that cap on. After you've built a bunch and are confident you won't need to open them up for service, then maybe. Or you could skip the cap and just drill for a pin (or two) to hold the works in.
#14
Posted 15 February 2009 - 10:06 PM
<a href="http://nerfhaven.com...howtopic=20409" target="_blank">Make it pump-action</a>
#15
Posted 15 February 2009 - 10:11 PM
I wish I had noted that when I was at ACE yesterday, because I knew somebody was going to ask. All that I know is that they were the second smallest ones at ACE. They shouldn't be very hard to find though because I don't think any of the other rubber washers fit in CPVC.That's cool as hell. What size rubber washers are you using?
Update: I gooped the tubing onto the brass a few hours ago. I'll post an update on how well it works tomorrow night when I test it.
#16
Posted 15 February 2009 - 10:19 PM
Edited by D_Gr8o, 15 February 2009 - 10:26 PM.
#17
Posted 15 February 2009 - 10:27 PM
Yes, I did get this at an ACE. I don't think it was labeled as thin-walled though. It's hit or miss, some Aces have it and some don't. The ACE nearest me used to have very thin thinwall; it was a hair thinner than 17/32" Brass (Inside Diameter). Then for a long time they were out of stock, until they finally got more in, but it turned out to be regular thickness. Now I get my Thinwall CPVC at an ACE that is farther away. If you absolutely can't find any, I'm sure you could carefully drill a piece of CPVC with a 1/2" drill bit. I've done it before, but I haven't tested it for this particular purpose.Did you get the cpvc from Ace? If you did, was it labeled "thin-walled"? I've never seen thin-walled cpvc at Ace, or any hardware store at all.
Edited by venom213, 16 February 2009 - 12:24 AM.
#18
Posted 15 February 2009 - 11:09 PM
Yes, I did get this at an ACE. I don't think it was labeled as thin-walled though. It's hit or miss, some Aces have it and some don't. The ACE nearest me used to have very thin thinwall; it was a hair thinner than 17/32" Brass (Inside Diameter). Then for a long time they were out of stock, until they finally got more in, but it turned out to be regular thickness. Now I get my Thinwall CPVC at an ACE that is farther away. If you absolutely can't find any, I'm sure you could carefully drill a piece of CPVC with a 5/8" drill bit. I've done it before, but I haven't tested it for this particular purpose.Did you get the cpvc from Ace? If you did, was it labeled "thin-walled"? I've never seen thin-walled cpvc at Ace, or any hardware store at all.
What brand pipe is it? My ACE only have 10ft long pieces of 'FlowGuard Gold' which is quite tight. But they still have 1ft sections of PPFA CPVC that is looser and I perfer. They both advertise the same schedule.
#19
Posted 15 February 2009 - 11:18 PM
I think the brand is Cresline. I think the brand is the same on both the thin walled CPVC and the thick walled. The easiest way to tell if it's thin walled is to bring a stock dart and see how well the stock dart fits in it. If the stock dart's fit is similar to it's fit in 17/32" brass, it is thinwall.What brand pipe is it? My ACE only have 10ft long pieces of 'FlowGuard Gold' which is quite tight. But they still have 1ft sections of PPFA CPVC that is looser and I perfer. They both advertise the same schedule.
#20
Posted 15 February 2009 - 11:21 PM
I'm sure you could carefully drill a piece of CPVC with a 5/8" drill bit. I've done it before, but I haven't tested it for this particular purpose.
I don't think you have you measurement correct. Perhaps 9/16", but it you were to use 5/8", there would be nothing remaining. The OD of 1/2" copper and CPVC is 5/8".
[15:51] <+Rhadamanthys> titties
[15:51] <+jakejagan> titties
[15:51] <+Lucian> boobs
[15:51] <+Gears> titties
[15:51] <@Draconis> Titties.
[15:52] <+Noodle> why is this so hard?
#21
Posted 16 February 2009 - 12:23 AM
My mistake, I meant 1/2". I can't beleive I didn't realize how incorrect that is.I'm sure you could carefully drill a piece of CPVC with a 5/8" drill bit. I've done it before, but I haven't tested it for this particular purpose.
I don't think you have you measurement correct. Perhaps 9/16", but it you were to use 5/8", there would be nothing remaining. The OD of 1/2" copper and CPVC is 5/8".
#22
Posted 16 February 2009 - 04:03 AM
Interesting.
Kruger and Dunning (1999)
#23
Posted 16 February 2009 - 11:23 AM
One question though, wouldn't you get a better, and easier, seal on the tubing if you used barbed connectors instead of the brass?
The fourth exciting Nerf War in Fort Wayne, IN.
#24
Posted 16 February 2009 - 11:38 AM
Rather than opening up valves, you're just letting air escape out the front to create backpressure?
Interesting.
That's how the hornet's blast triggers work.
#25
Posted 16 February 2009 - 11:48 AM
Yes, I thought about that. The brass is cheaper though. For V2 I might try taking barbed tees and cutting them up into three parts and using those. I may also try telescoping brass so that it would be more like a barbed connector.I'm really digging this design - very well done.
One question though, wouldn't you get a better, and easier, seal on the tubing if you used barbed connectors instead of the brass?
2 user(s) are reading this topic
0 members, 2 guests, 0 anonymous users