Jump to content


Photo

Snort-hog

Warthog + brass, paint

6 replies to this topic

#1 dizzyduck

dizzyduck

    Member

  • Members
  • 627 posts

Posted 01 February 2009 - 11:23 PM

I got an old Warthog off eBay. I've always wanted to mod one of these. They just look so flippin' badass.

The mod I did was pretty similar to Renegade's Warthog mod. You can find stock internals in that thread.
http://nerfhaven.com...?showtopic=6293

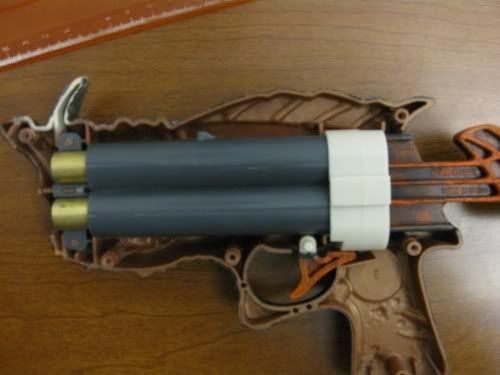
The Warthog's internals are based off of a reverse plunger design, much like the Scout or the Longshot Front Gun, but instead of the spring being placed behind the plunger tube and barrel mechanism, the spring is housed to the side. As a result, the right side of the blaster sticks out slightly further than the left side.

Anyway, this warthog was well-loved by its previous owners, which is a nice way of saying that it was showing a good bit of wear. A few of the screw housings had broken off and rattled around as I started to open the blaster. I had to secure them back into place with epoxy before proceeding.

Once I had all of the internals out, I removed the plunger/barrel assembly and made a rather grim discovery:

Posted Image

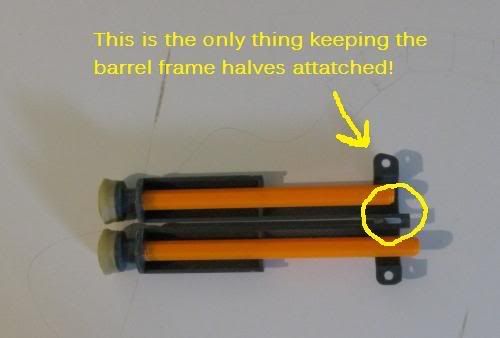
I decided against a spring replacement, as anything more powerful than the stock spring would likely break that piece.

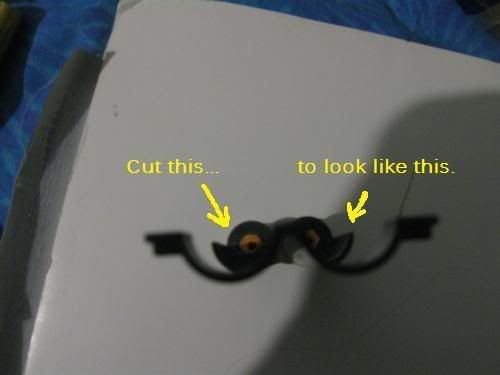
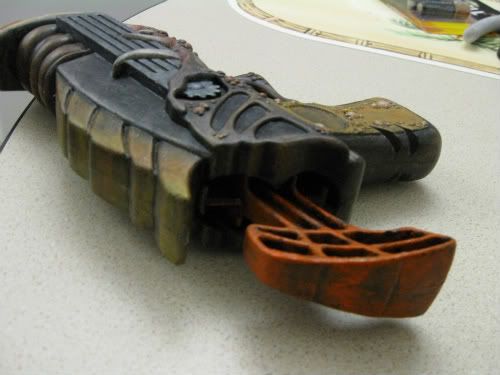
I cut the posts out very cautiously, then cut out the barrier in the middle of the frames.

Posted Image
Posted Image

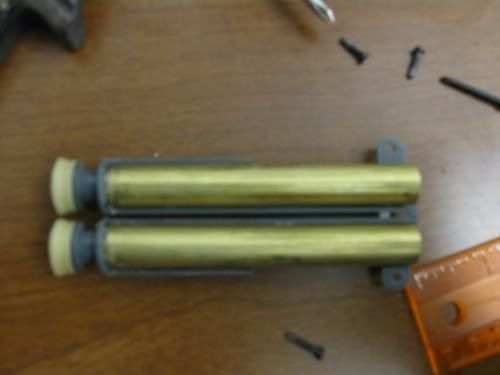
And I glued in two 4-inch cuts of 17/32" brass with carefully applied Plumber's Goop, making sure the seals between the barrels and the frame were airtight but without any excess glue spilling over the frame.

Posted Image

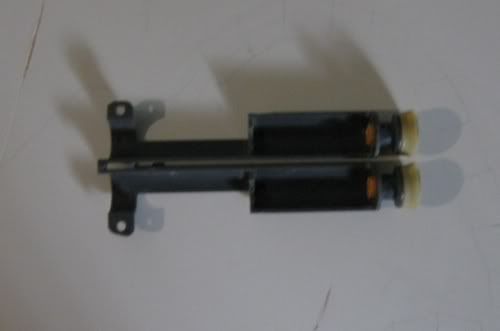
Reassembling this thing was a pain. The unusual spring placement and the "platforms" the spring rested on made it difficult to slide everything together, but once I managed to do so, this is what the finished internals looked like:

Posted Image

I had too much fun painting this beast. As with my previous paint jobs, I laid down a solid layer of black, then worked over that with heavy-body acrylic paints using a mix of drybrush, scumbling, and wet-into-wet application (painting into wet paint with more paint so that the colours blend and mix with each other).

Total painting time: 6 hours.

Posted Image

My favourite part was the tusks.

Posted Image
Posted Image
Posted Image

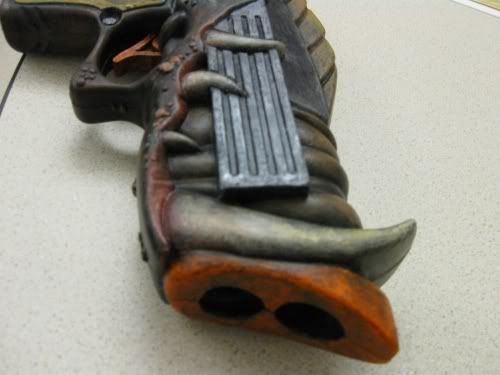
Smile for the camera...

Posted Image

No ranges yet, as I just finished putting it back together and now I have no way to test ranges accurately inside my apartment. I'll have them posted as soon as I can.

Questions? Comments? Flames?
(Quick edit for format)

Edited by dizzyduck, 01 February 2009 - 11:41 PM.

  • 0
Duck off.
Art & Stuff

#2 Salindin Naz

Salindin Naz

    Member

  • Members
  • 260 posts

Posted 01 February 2009 - 11:30 PM

Damn. that shit is sweet!! I'm jealous.


Salindin
  • 0

#3 Magic

Magic

    Formerly NerfOnFier

  • DO NOT TRADE
  • 540 posts

Posted 01 February 2009 - 11:45 PM

dizzy, I really dispise you. All of your paintjobs are incredible! I can't figure how you and so many others do it so well. Keep them coming dude.
  • 0

#4 slowguitarman

slowguitarman

    Member

  • Members
  • 1,113 posts

Posted 01 February 2009 - 11:45 PM

Every time I see one of your topics, I almost pass it by...until I notice that it's your topic. Awesome job, as usual.
  • 0
QUOTE
Your dreams were tight like a baby

SGM's Shred Shop -Mod Service

NerfHaven's resident drama queen.

#5 Blue

Blue

    Member

  • Members
  • 2,222 posts

Posted 02 February 2009 - 01:37 AM

Did you do this?
Posted Image
Posted Image
  • 0

#6 serpent sniper

serpent sniper

    Member

  • Members
  • 222 posts

Posted 02 February 2009 - 01:44 AM

Very cool dude.

I really like your paintjobs because they combine excellent detailing while still remaining within a "nerf -y" color pallet. I think that you've found a good medium where you have guns that a person can take seriously, while still looking like nerf guns.

Props to you sir.
  • 0
Animus GmbH My Custom Nerf Props and Paintjobs

#7 dizzyduck

dizzyduck

    Member

  • Members
  • 627 posts

Posted 02 February 2009 - 01:51 AM

NerfOnFier - We're talking about practice. Not a game, not a game... not a game, but practice.
(Sorry, couldn't resist the Allen Iverson quote opportunity.)

I recall you've asked me about this before. I suppose my experience with illustration may help with my painting technique, but it's not really any sort of secret. What I do is I paint to fit what is already molded on the shell. Lighter colours come forward, whereas darker colours recede. If you want to emphasize something, you make it lighter, and if you want to push something back into space, you make it darker.

Part of it is colour theory; making sure the colours you use work together. Part of it is visual mechanics, which I just explained; using lighter and darker colours to your advantage. And part of it is experience; looking back on what you have done before and learning what you can do to make it better. I almost wish NH had a paint job critique thread where people could give feedback on other people's paint jobs. The paint job + mod thread is pics only, which is great for showing off, but if someone wants to make a suggestion for improvement, they have to do it via PM's.

Sorry, I'm rambling.

Blue - No, I haven't. That is a great idea; I thought about it for a second then decided against it since I was afraid the extra pressure may cause more strain on the joint that holds the two halves of the barrel frame together. Thanks for posting it.
  • 0
Duck off.
Art & Stuff


1 user(s) are reading this topic

0 members, 1 guests, 0 anonymous users