
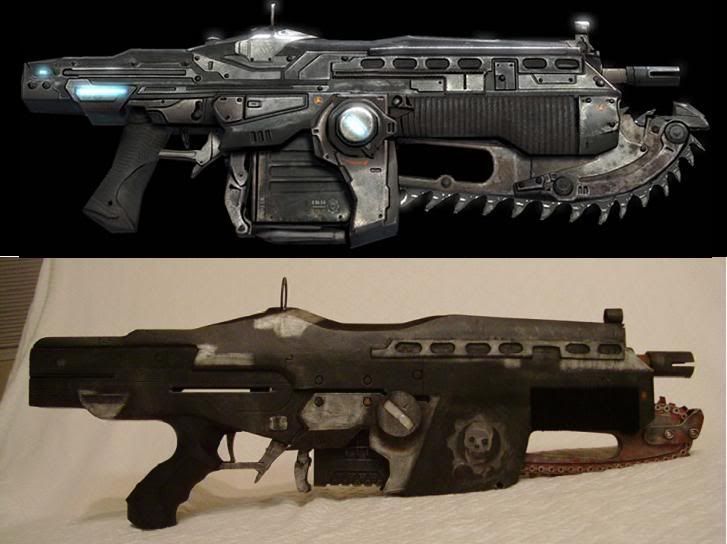
Notice the similarities to the lancer from the game:
What you see above is the accumulation of lots of work, thinking, discussion and over 30 combined years of my friend and I building and designing things. I decided to build the lancer when I saw Forsaken’s get bid up to $500+. At that point, my friend and I were confident that we could build one and improve upon it. Some of the original improvements we were looking to make were:
+Prettier paintjob
+Smoother Bondo
+One button for the LEDs

+ Make everything just a little cleaner overall
We had it finished to that point after 1 ½ days of work. Everything was done except for the paint. After getting to that point, I pointed at a google picture of the actual lancer and said, “Huh. You know…if we made these pieces around the magazine, it would look a lot better.” After that, it just kinda snowballed out of control with changes galore until we became happy that it was as much like the lancer as possible. Here are the changes we made over the original lancer design:
+More realistic paintjob
+Trigger guard and cutout trigger
+ Detail pieces around the magazine
+Sloped front
+Raised and filled in around the back site
+Only one switch (which is hidden) to operate the LEDs
+Two vibrating motors which activate with the chainsaw revving
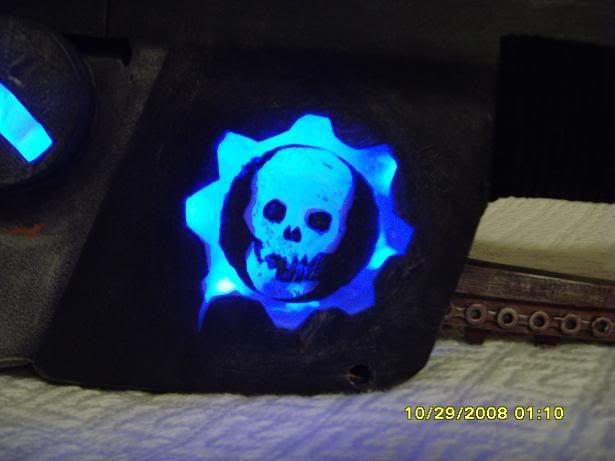
+Light up Gears symbol that activates on trigger pull
+Got rid of the stock in order to make the blaster more to scale
+Added corduroy grips to the front grip
+Accurately angled hole for front grip
+More accurate light placement
+Cleaner and more accurate overall
The inside of this thing is also modified with a BBB spring inside (for now) and an Angel breech.
This project was six months from beginning to end. The original inspiration for this project was cash. My friend and I both needed some money, and we saw the original lancer selling so well, so we decided to replicate it. All we had at our disposal tools-wise was a dremel tool, a srewdriver, sandpaper, razor knife, drill, soldering iron, pliers, putty knife, vice. The odds don’t seem good, but when you have two guys like my friend and I, who are poor, you find ways to do awesome stuff with very little. As far as materials go, we used ¼” plexiglass, 1/8” polycarbonate, Bondo (AHHHH!!!!), 25 LEDs, paint, JB Kwik, Fishin’ Glue, wire spools, PVC couplers, scrap plastic, hot glue. I would like to say that I hate Bondo and plexiglass. During the first few weeks of working on this thing, my apartment was completely pink with Bondo dust and had tons of plexi dust everywhere on the floor. When I was at my apartment, I had to wear a mask. It was terrible. Anyway, this project was not a solid six month project. We worked for about a week solid before taking a few weeks break, then worked for a day and then stopped for about 4 months, then worked a few days, stopped for a month and then finally finished it up. The only thing that wasn’t done to this to make it more realistic was smoke. I wanted to put a model train smoker to the chainsaw, but I just got sick of working on it, and there is already such a tight squeeze just to get all the wiring into the shell.
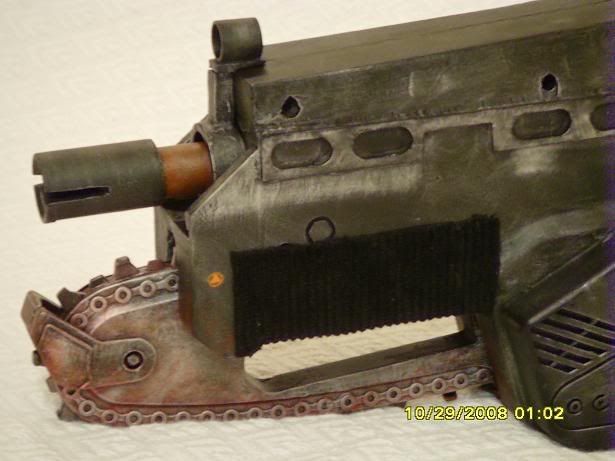
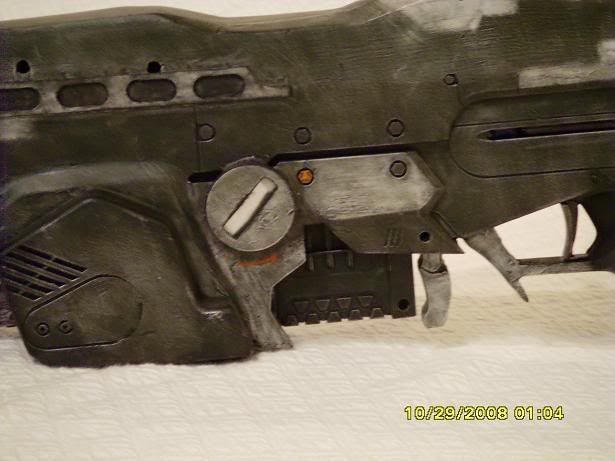
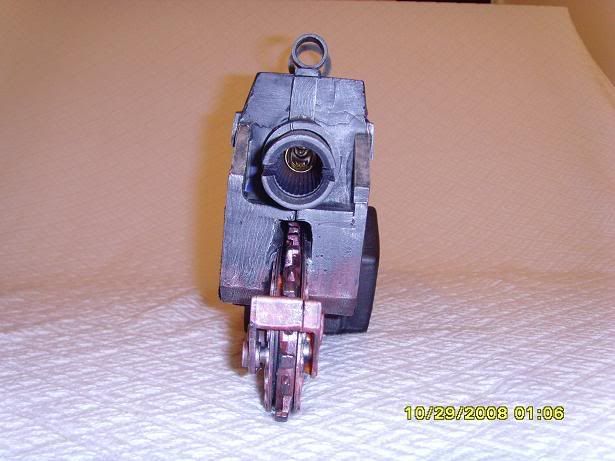
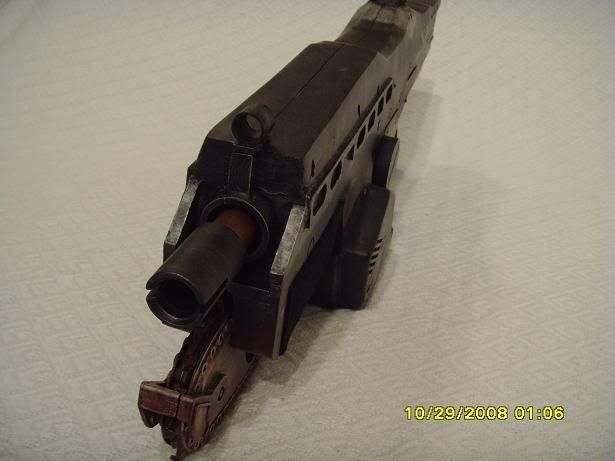
Now some detail pics:
The switch to activate the LEDs:
The switch to activate the chainsaw:
Close-up of the Gears symbol:
Yes, I realize that the cocking handle is not painted. I will be making a new one, but I haven’t been able to decide on my favorite design.
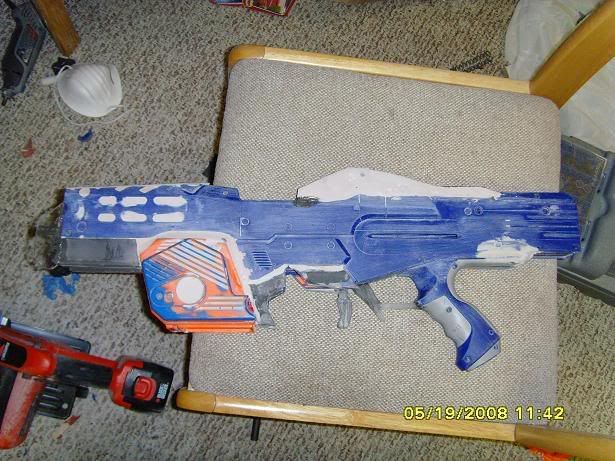
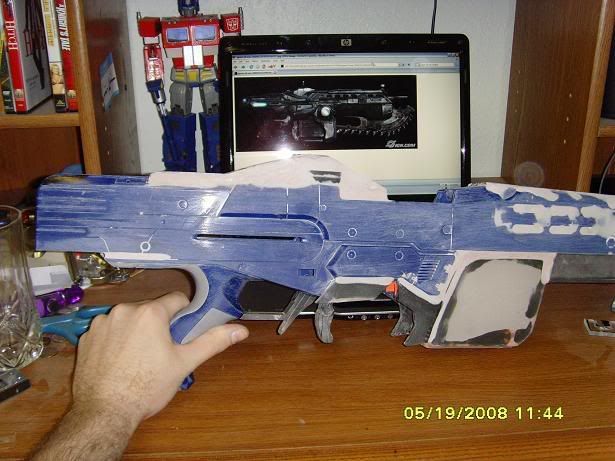
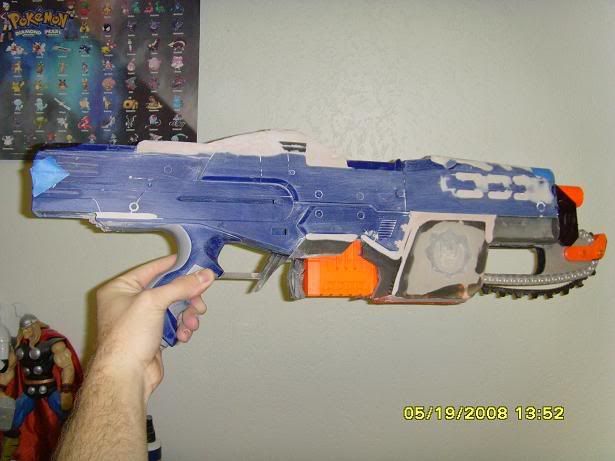
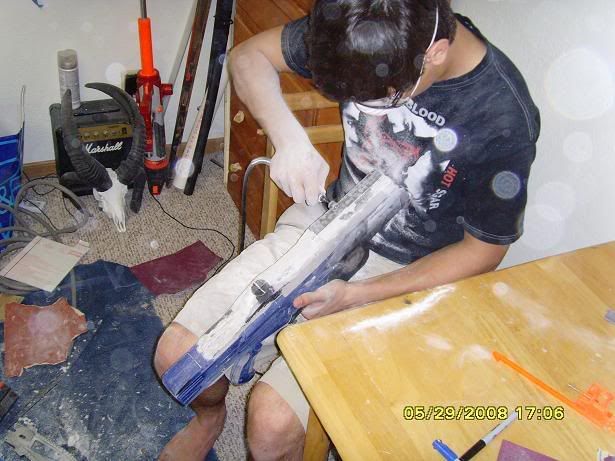
Now here’s a few in progress pictures in which you can see some of the changes made during the evolution of this blaster:
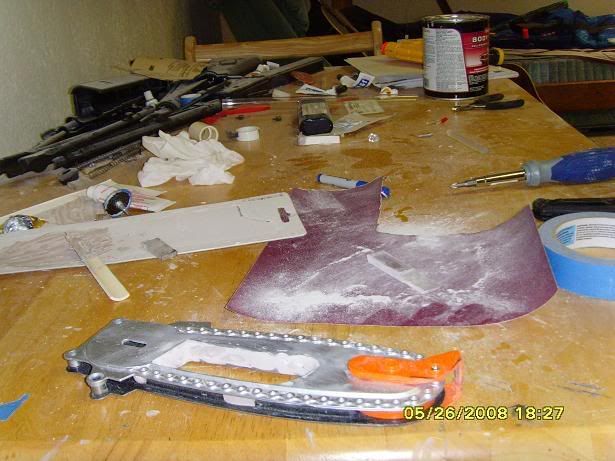

And this is why I hate Bondo...
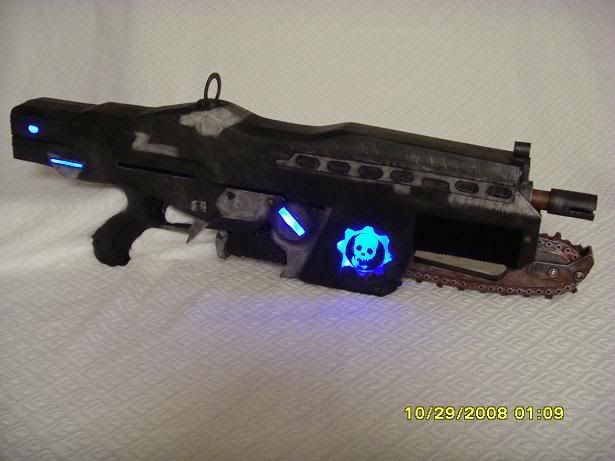
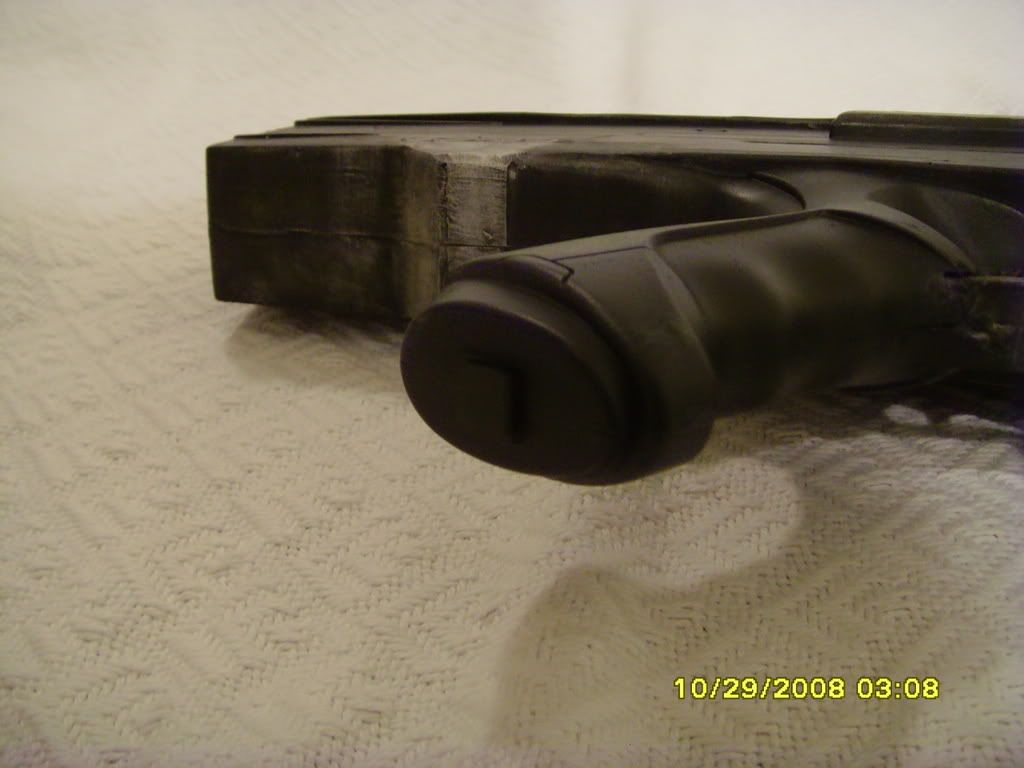
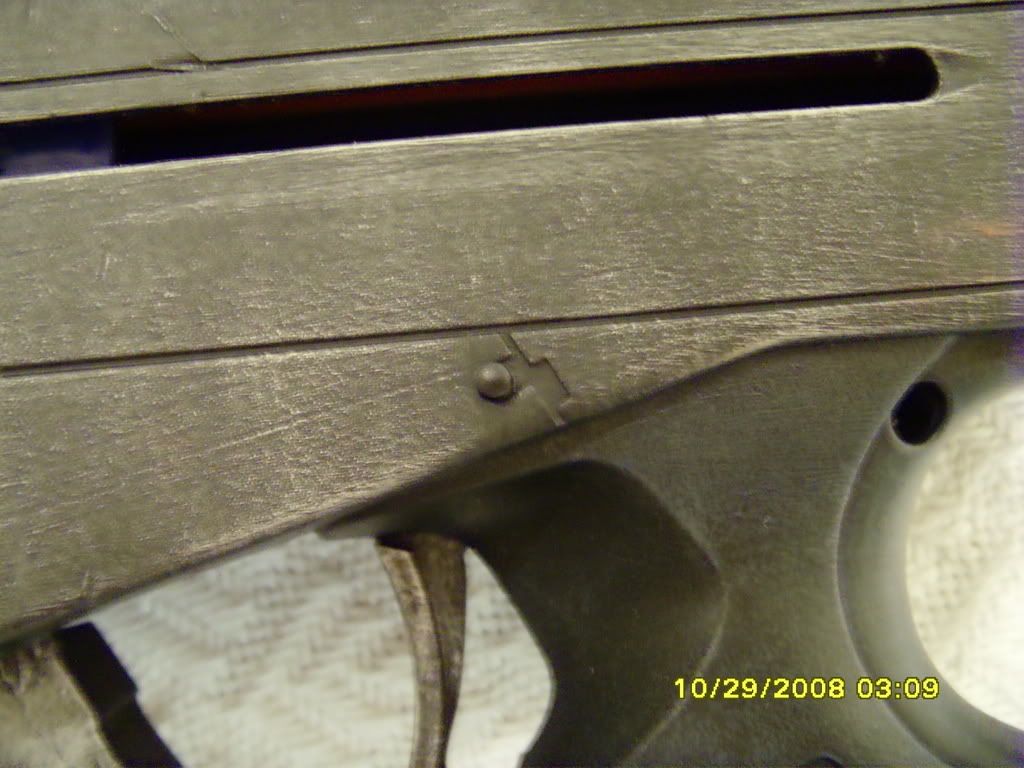
And finally some miscellaneous pictures of the finished weapon:

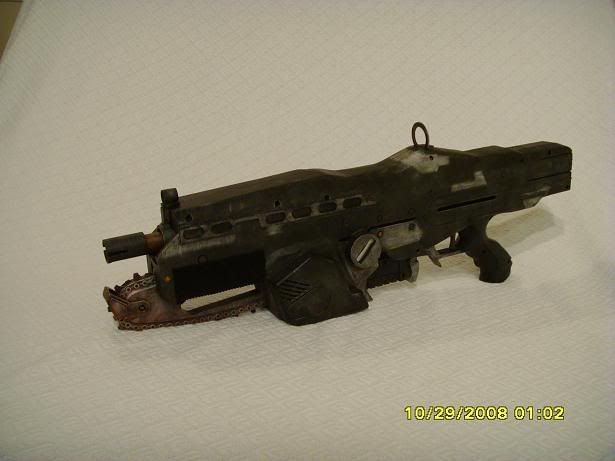
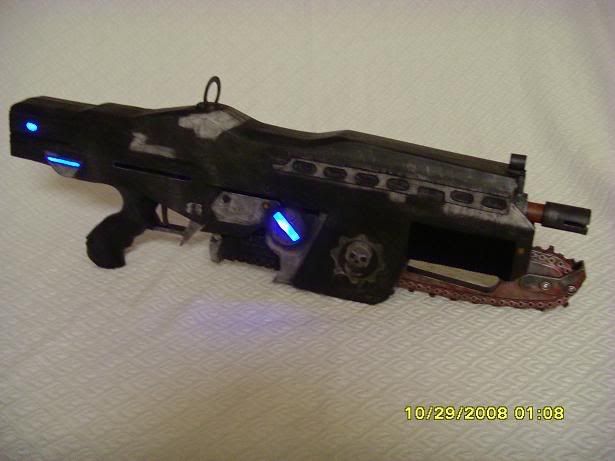
There we have it, folks. I believe this may be the most radical cosmetic and FUNctional modification ever done to a NERF weapon. I would honestly love to see something even crazier than this, but I personally have never seen anything like it before. This is a product of Kappa Sigma Armory (Yes, that is a corny pseudo-acronym involving my friend and I's real names, what of it?). Questions? Comments? Flames?


