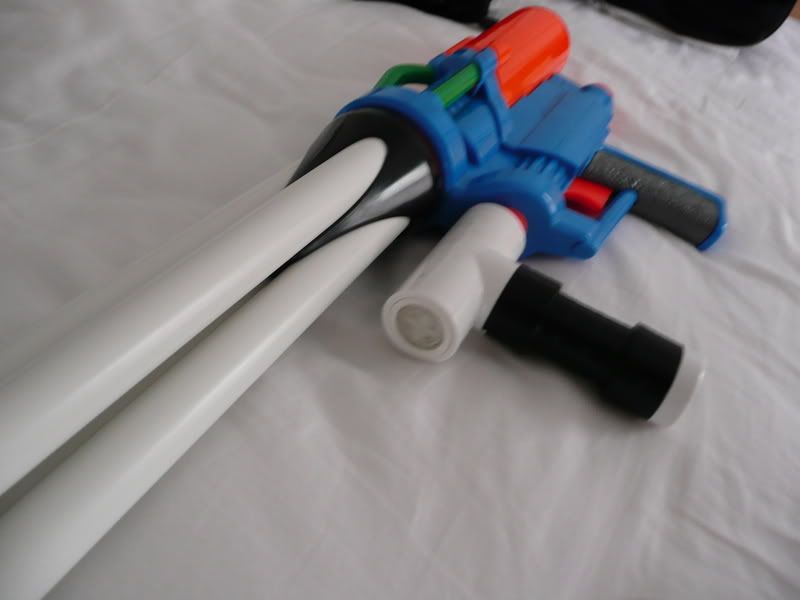
So we had a NERF war today and I pulled out a project I recently finished. At our local wars we do not have a ban list...the general rule is that as long as one team doesn't have all the firepower, it's no big deal (I supply all the guns, so I try to balance it out). Well, today several people complained about the unfair advantage I had while using this:
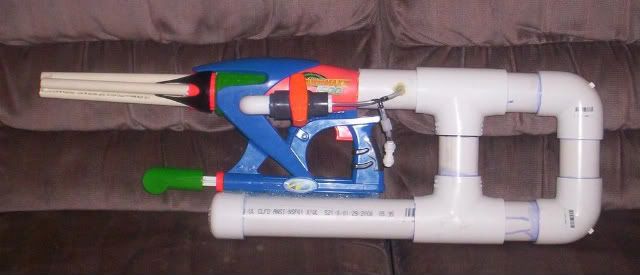
I came up with the idea of an "Air Tank Shoulder Stock" completely independently and I got excited and told Sam all about it, and then he pointed me to This Link. I felt gypped (kinda like the time in third grade when I designed a reed switch magnetic train and then found out that the Japanese beat me to it) but my take on it was a little different than Carrtoon's. I wasn't trying for just one extra shot...but several.
The ball valve I used is a "low torque" ball valve (very easy to open and close) that I picked up from a local ranch supply store (gotta love Idaho). If I close the valve, the gun works just like a normal SM1500. If I open the valve, however, I can fill up the stock (somewhere in the ballpark of 125-150 cubic inches of volume) to 60 PSI to get many shots (around 30). I can just leave the ball valve open and fire off four quick shots or open and close the valve each time to conserve air.
Running at 60 PSI this thing gets AMAZING ranges (over 110') and is quite accurate. My friends wanted to ban it, not because of the pain factor (though anybody I NERF with knows that SM1500's don't tickle), but because of the combined range and ROF was so difficult to compete with.
The stock is quite comfortable (the length of the stock is perfect for my arms) and it gives the gun a nice "rifle" feel. It's easier to aim even if it is substantially heavier.
In the future I plan to add swappable turrets for faster reloading and a two-way pump for faster refilling.
What do you guys think? I'm especially interested in hearing from the guys who run 'Geddon and Apoc' just to make sure they wouldn't ban this gun. This is hands down my new favorite primary!
WRITE UP:
<note: I'm doing this write-up from memory as this blaster is on the east coast in storage until the summer, at which time I hope to take it out and hit up the east coast NERF wars>.
Alright, so first thing you want to do is open up your blaster and take out your air tank and take it with you to the hardware store. You're going to need to find a reducing tee (slip) that is just a bit too snug for the air tank to fit through (I think it's 3/4" PVC reducing tee, but I'm not positive). It should reduce to 1/2". While you're there, pick up the rest of the supplies you'll need, or order them from mcmaster.com.
1/2" street elbow, instant tube fitting, 1/2" PVC plug, some 1/8" ID 1/4" OD vinyl tubing (you'll need about two feet just to be safe), PVC Primer and Cement, 1/8" barbed tee (for connecting the vinyl tubing),
What we're going to do is use the reducing tee as a sleeve for the air tank and then connect a 1/2" PVC ball valve to the reducing tee via a street elbow. Here's what the PVC set-up will basically look like:
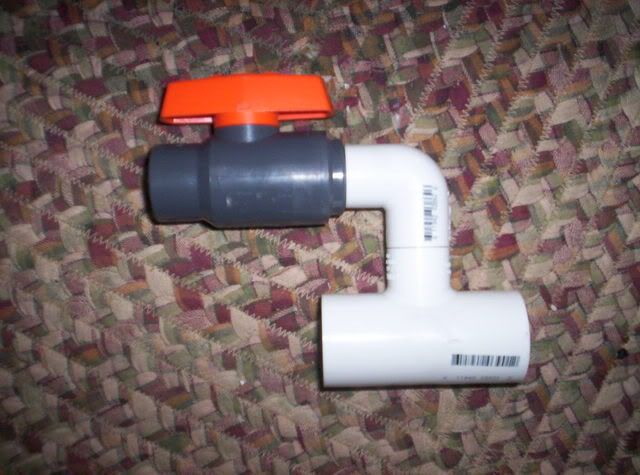
This will eventually be protruding from the left side of your blaster (unless you fire left-handed, in which case you can flip that).
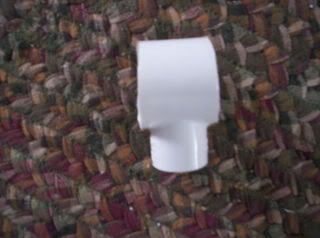
Okay, so to actually attach this thing to your blaster you're going to need to cut down the reducing coupler so that it's just a little bit longer than the actual air tank (you'll need a little bit of a wall/lip that extends past the edges of the air tank to help the epoxy stay in place to make the seal). It should look like this:

Then you're going to sand out the inside of the reducing tee until the air tank can fit all the way inside (it should be a pretty snug fit), like so:

After it's in place, seal off all the seams (there are three "seams": one at each end of the tank and one where the reduce end of the tee protrudes from the tank). I used 60 second epoxy because it comes with those self-mixing nozzle things and is easy to get into small places. Also, before inserting the tank, I squirted epoxy inside the reducing coupler as well. When sealing all of this off, you want to make absolutely sure that there are no gaps anywhere between the tank and the coupler. Yes, just sealing the edges between the coupler and the tank where the reduced end protrudes should be enough, but it's better safe than sorry, and epoxying the base of the air tank will help reinforce that common trouble spot that is prone to shattering.
Now, to get all of this back into your shell, you're going to need to do some cutting/sanding/some sort of plastic removal. You'll need to drill a hole in the side of your blaster so the 1/2" reduced end of the coupler can stick out, like this:
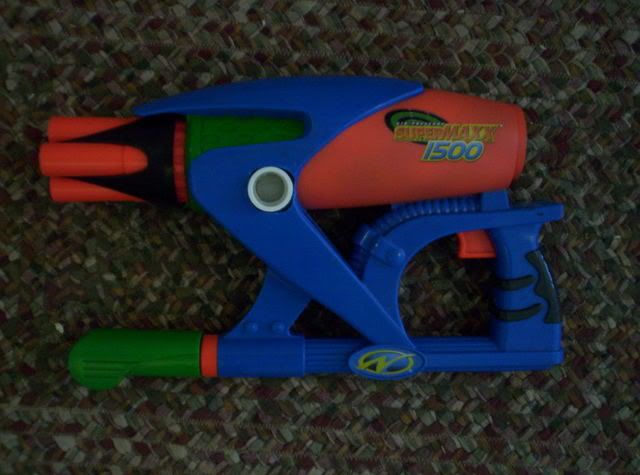
and you'll also have to do some fairly intensive internal sanding to allow the shell to close properly.
After you've got that all put back together, you're ready to attach the valve. Before you proceed to this next step, ensure that your blaster is still working. If you're getting leaks out the barrel of your blaster, it's because your firing pin is slightly pulled back; you're going to have to do some more repositioning/sanding to eliminate that. Okay, so if everything is working, and the tank holds pressure and fires just fine, drill a hole into the side of your air tank (which should be visible, now, from the outside via the opening in the 1/2" reduced end of the coupler). This is a close-up of where you're going to drill:
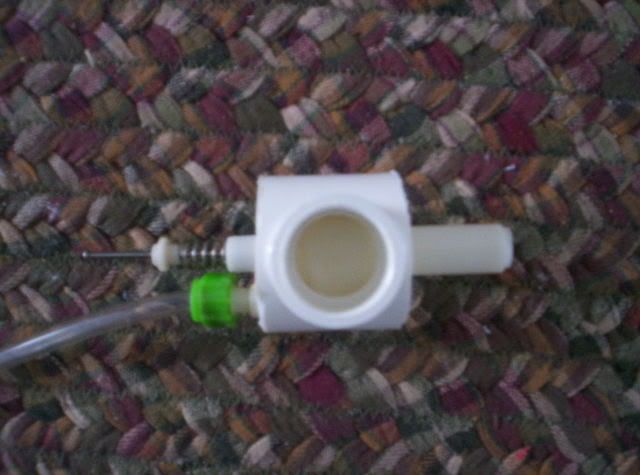
The size of the hole you're going to drill depends on what you're hoping for.
If you just want to increase rate of fire and have more shots before re-pumping, make it a small hole, 1/8" in diameter, or even 1/16".
If you want to turn this into a tank expansion (which will probably get it banned at most wars, but will dramatically improve range, while increasing the amount of air used per shot, resulting in less shots before needing to re-pump) then drill the hole as wide as possible, no less than 1/4".
Use a Q-tip to clean out as much of the plastic debris as possible that fell inside the air tank.
Now attach your street elbow to the coupler and your ball valve to your street elbow, using a short length of 1/2" PVC to make the connection. Primer and Cement these parts together.
Close your ball valve and make sure the gun operates properly. You will notice, now, that it takes more pumps to pressurize than it did before. This is because of the space inside the PVC elbow. This is why drilling the hole more widely turns it into a tank expansion. Leaving the hole as narrow as possible will also help eliminate wasted air during rapid fire, as will be explained later.
If everything is working properly, it's now time to make your "air shoulder stock." For mine, I used 2" PVC (I think, I'm pretty sure it's not 3"). You can tell from the picture what sort of elbows, tees, and end caps I used. The whole PVC stock is one large air tank. Mine is, in fact, very large and you could make it much smaller and still achieve great results.
To determine the length of stock I wanted, I just held the gun up like I would a rifle and held a piece of PVC up to it, pushed it against my shoulder, and then marked where the end should be. Not really an exact science, but I just wanted it to feel natural in my hands.
So make your stock whatever shape you desire (I added the cross section just to increase the volume) and seal everything off with PVC cement and primer. It should be a closed system, AIR TIGHT.
Now you're going to attach it to your blaster. I just used copious amounts of hot glue and zip ties (though after the glue dried, I removed the zip ties). With this much contact surface, hot glue is plenty strong enough, and allows for it to be somewhat easily removed later.
After the stock is attached to the blaster, drill a hole in the stock at a point near the ball valve in such a way that vinyl tubing running from that point to the ball valve won't be in the way of anything. The hole should be just big enough that you can shove your vinyl tubing into the hole. Vinyl tubing, being soft, will create its own seal fairly well if the drilled hole is good enough, but goop it for good measure.
Cut the tubing at length that is just long enough to reach the ball valve without any kinks. Next, you're going to drill a hole in a 1/2" PVC plug and insert the tubing just as you did in the air stock, and gooping again for good measure.
Finally, plug the endcap into the open end of the ball valve and you're done, unless you want the option of being able to fill your air stock with an external pump/inflator. If you want to be able to connect it to an inflator/bike pump/whatever, just cut your tubing that runs from the stock to the ball valve and insert a barbed tee. Connect a short bit of tubing and then a small check valve and finally an instant tube fitting.
Operating the blaster:
Open the valve and fill up the stock (could take a while, depending on the size of your air stock). Close the valve and fire. Open and close the valve to refill your blaster's firing tank. If you need to get a lot of shots off really quickly, just leave the valve open. This is the situation in which it's most ideal to have drilled the smallest hole possible in the blaster's air tank. If the hole is small enough, it will act as a flow restrictor, preventing excess air from escaping via the barrel after the dart has been fired and before the trigger is released.
Any questions? Comments? Flames? Praise?
Edited by imaseoulman, 23 December 2008 - 03:29 PM.


