Jump to content


Photo

Bullpump: Tag-Team Collaboration

bullpup bullpump spring homemade

4 replies to this topic

#1 CaptainSlug

CaptainSlug

    Resident Mad Scientist

  • Administrators
  • 4,763 posts

Posted 22 July 2016 - 02:59 PM

*
POPULAR

This is very similar to the Bullpump's that others have made (particularly MakeItGo), but we both felt that a write-up and public files for this type of blaster is overdue. I have other things I'm working on before this, so BLITZ going to take the leap and will follow-up with me or here if he runs into any problems.


I just did the CAD work. He is going to build the prototype and post his progress here.

bp_06.jpg

bp_03.jpg

Templates

http://captainslug.c...rf/bullpump.doc


Partlist

http://captainslug.c...mp_partlist.xls


  • 1
The little critters of nature, they don't know that they're ugly. That's very funny, a fly marrying a bumble bee. I told you I'd shoot, but you didn't believe me. Why didn't you believe me?

#2 Snoop Doggy doge

Snoop Doggy doge

    Fig you, Van

  • Members
  • 501 posts

Posted 22 July 2016 - 07:42 PM

CaptainSlug 
Making NerfHaven Great Again!

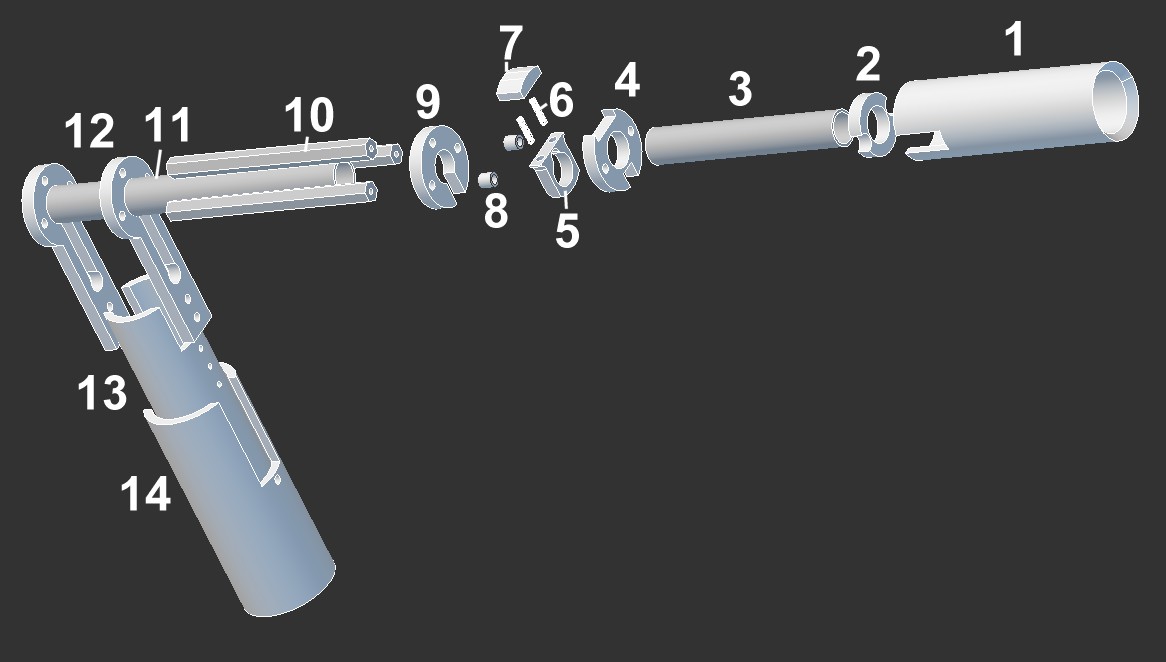
Is the second photo a picture of the pump handle? confused by the second photo. Also I would reccomend a front barrel support, i my experience, the front and middle needs support since I use fully sheathed alu barrels


  • -1

#3 CaptainSlug

CaptainSlug

    Resident Mad Scientist

  • Administrators
  • 4,763 posts

Posted 22 July 2016 - 07:47 PM

That's the exploded view of the catch "shuttle" with the earlier foregrip made out of pipe. I had just enough room left on a 12" x 12" sheet of polycarbonate to squeeze the much nicer grip parts on after i made that diagram.


You can add as many barrel supports as you want really. You just have to edit that one template and replace that 1/2" delrin rod with a longer one.


  • 0
The little critters of nature, they don't know that they're ugly. That's very funny, a fly marrying a bumble bee. I told you I'd shoot, but you didn't believe me. Why didn't you believe me?

#4 blitz

blitz

    Member

  • Members
  • 285 posts

Posted 20 August 2016 - 06:54 PM

So I just moved into my college dorm and was unable to finish this blaster. Sincere apologies to Slug. 


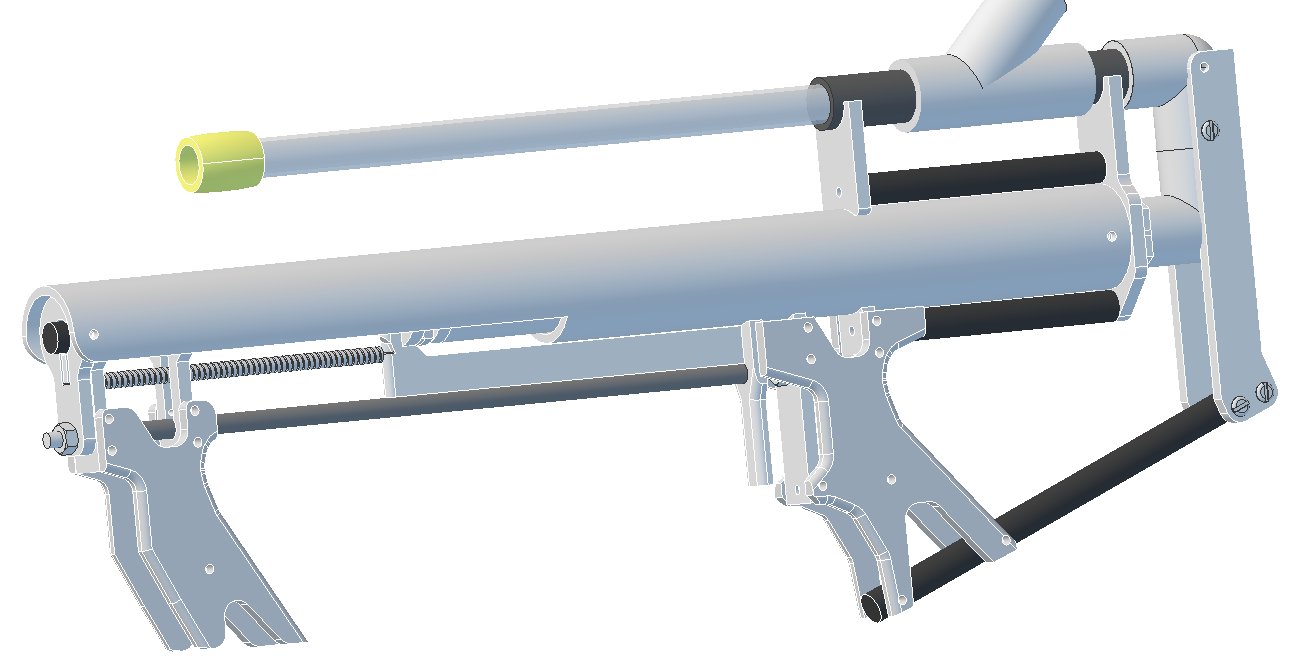
I cut out all the essential parts and got a pretty good feel for how it would eventually come together. My notes/suggestions are listed here. 


- The spacer designated "FRAME3" should be fitted over the 1/2" pvc stub connecting the bushing to the bottom elbow. The original (or at least how I interpreted it) is designed to be fitted between the 1.25" pvc body tube and the hexagon protrusion of the front bushing (thus riding on the 1" insert of the bushing). For modulability (removal) and adaptability to differing versions of bushings, the center hole should be the OD of 1/2" pvc. That said, FRAME3 needs to be SUPER STABLE and very difficult to move as a the handle and trigger are held up by it in the back. 


- I took the liberty of dicking around with the assembly of the inner catchplate and shuttle. I used really long bolts to attach SHUTTLE1 and SHUTTLE2 with a nuts inbetween to secure them. Those bolts then attached to the standoffs that connected to the catch. 


- The bottom metal threaded rod is super sturdy and It really holds everything together. Very cool. 


- I ran a ziptie through the handle and around the body tube because I want shit to stay together. This is probably a reflection of my mediocre machining skills over the design and I also like to over-engineer things. 


- I filed the shit out of the trigger as it gets some interference with the shuttle pieces and the catchplate. All points of friction were filed. The strength of the trigger spring is also key to making sure the trigger stays aligned. Stronger is better. That said, I worry about it. 


- I used countersunk screws to attach the 1" spring anti-kinking pipe to the first 1" catch circle. I believe slug suggested using epoxy or some adhesive to attach it (as it theoretically wouldn't have much/any force to deal with), but I don't want it fucking up. 


- I really dislike the open-plate handles. I realize it wouldn't be a huge hassle to put in wood or something between them, but fuck they are just killin' me. I sanded and filed the hell out of them, but damn. 

  • 0
Blitz, member of the FNBS
"sexual innuendo no intendo"

#5 CaptainSlug

CaptainSlug

    Resident Mad Scientist

  • Administrators
  • 4,763 posts

Posted 22 August 2016 - 01:11 PM

- The spacer designated "FRAME3" should be fitted over the 1/2" pvc stub connecting the bushing to the bottom elbow. The original (or at least how I interpreted it) is designed to be fitted between the 1.25" pvc body tube and the hexagon protrusion of the front bushing (thus riding on the 1" insert of the bushing). For modulability (removal) and adaptability to differing versions of bushings, the center hole should be the OD of 1/2" pvc. That said, FRAME3 needs to be SUPER STABLE and very difficult to move as a the handle and trigger are held up by it in the back.

There are multiple options for addressing this.

1. Do as suggested and shrink the through-hole to 0.875" and the piece fits over 1/2 PVC. The only downside of this is that the frame piece now have to be removed in order to remove the bushing from the plunger tube.

2. Redesign the stock pieces so that they attach to FRAME3. This would stiffen the entire assembly considerably, but the downside is that you would exceed the arbitrary limitation of wanting to fit all the parts onto a 12x12 sheet of polycarbonate.

3. Screw FRAME3 into the face of the bushing. Provided of course that the bushing has enough material on its face to fit a drilled and tapped hole.


  • 0
The little critters of nature, they don't know that they're ugly. That's very funny, a fly marrying a bumble bee. I told you I'd shoot, but you didn't believe me. Why didn't you believe me?


Also tagged with one or more of these keywords: bullpup, bullpump, spring, homemade

1 user(s) are reading this topic

0 members, 1 guests, 0 anonymous users