I spent quite a bit of time experimenting with different options for the "best" integration. After experimenting with BlastFires, Hornets, SMDTG's, Big Salvos, and many other blasters (including SuperSoakers), I decided on the "Marvelous Salvo." The Big Salvo blast chambers are capable of so much range (consistently hitting over 100'), but the trigger system is a major weakpoint. My only complaint about the original Arachnophobia was the trigger set-up. It was very difficult to get it just right and even then it didn't have an auto-return (spring) mechanism. My concern with Arachnophobia II (other than range of the back-up barrels) was the difficulty in aiming down the barrel and also the size (requiring two hands compared to the original needing only one hand).
With all of this in mind, I set out to make the next installment in the Arachnophobia Series. I first designed Arachnophobia III (still in the works) but it got put on the back-burner as I have experienced the most stressing and busy summer of my life (complete with legal battles and a major career change...in a few months I will begin a career with the U.S. Navy as a Nuclear Engineer). So being without all my tools, parts, and blasters, I decided to make what I originally intended to finish after Arachnophobia III:
The Arachnophobia Pistols:
All the Fire-power of the Originals-- Compact and Dual-Wielded
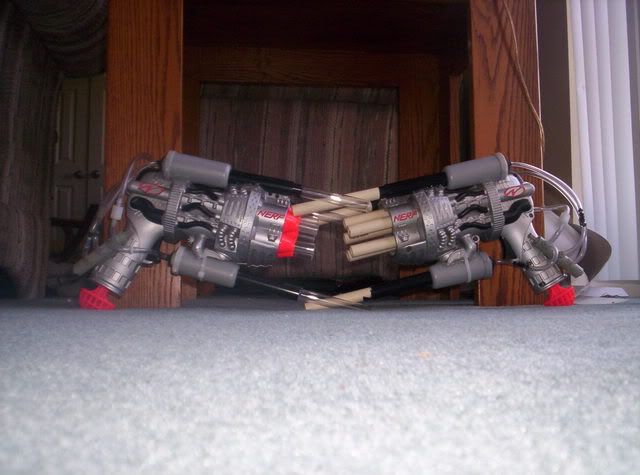
This was the first blaster I thought of once I came up with the Marvelous Salvo (the Big Big Blast was actually the third blaster I developed using the same idea). Being extremely fond of dual wielding SF's in a NERF war (and performing excellently when so doing) I wanted something similar but with just a bit more umph behind it. I can run much fast holding these than carrying any one of my primaries and these things shoot hard and far.
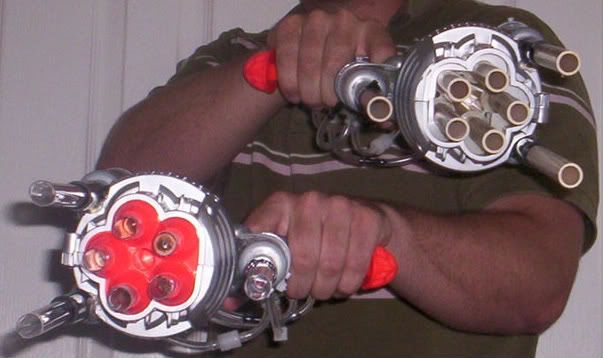
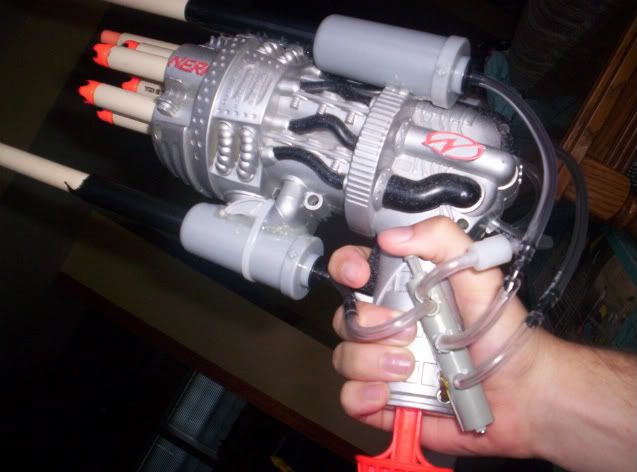
Mechanically they are quite simple. I simply sanded (with a dremel) grooves onto the Lightning Blitzes where I planned to put the barrels and trigger mechs and hot glued them on. The bottom barrel also got a zip-tie for extra support. Inside the Lightning Blitz, just before the tubing enters the blast chamber, I inserted a barbed tee and ran that line to the SMDTG trigger mech with a check valve just before the trigger mech (I had pictures of all this but my brother-in-law destroyed the camera along with all its internal memory).
One of the blasters has the trigger on the left side of the grip so that when being held in my right hand, my thumb naturally falls right where the push-button is. The right-handed blaster has CPVC barrels (in all my experimenting I have never found anything to compare to the range of a half-length CTD in CPVC for "air guns") while the left-handed blaster has PETG barrels. This is because I am not as good at aiming with my left hand so I don't need quite as good range because I won't be able to hit anything 80' anyway. The slightly more light weight blaster is easier to aim for my left hand. And reciprically the left-handed blaster has the SMDTG trigger mech on the right side, so it too fits my hand naturally. These blasters are not "ambedextrous." One is right-handed and the other is left-handed.
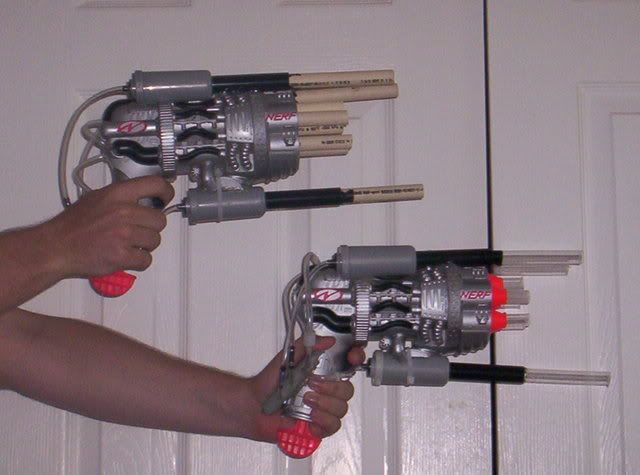
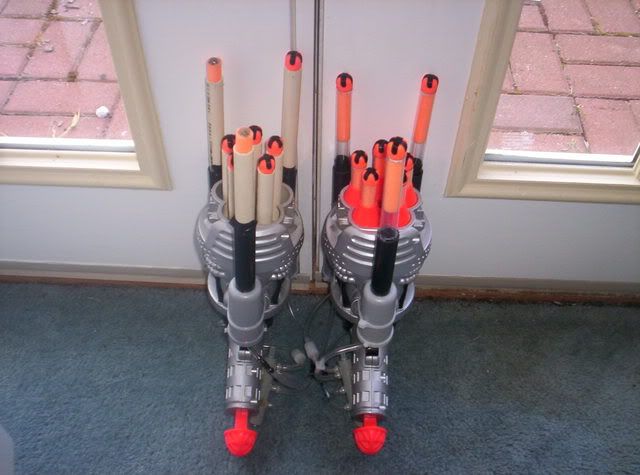
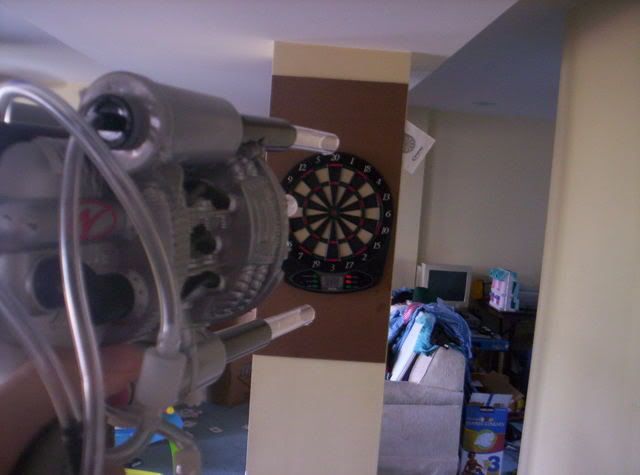
As for firing the blaster, the lightning blitz is pretty much point and shoot; the spread is good, but not so wide thay your darts will go on opposite sides of the target and miss with the entire barrage. To fire the BS chambers, first I turn the blaster sideways and aim down the lower barrel (set as the first barrel to go off). It is amazingly accurate. With my first shot I quickly aimed at a small tree (about 4" diameter trunk) from about 70' and hit it with the first shot. Then I turn the gun right side up and aim down one of the top two barrels. This was one of my design goals, to make a blaster that allowed aiming down the barrel...and I succeeded 100%.
Now for a video of firing the gun:
YouTube Link:
PhotoBucket Link:
h t t p ://s192.photobucket.com/albums/z44/imaseoulman/?action=view¤t=arachonophobiapistols.flv
(copy and paste then fix http, I don't know why this keeps giving me problems)
Write Up:
Materials:
Lightning Blitz
Barbed Connectors (3)
Barbed Tee
Barbed Check Valve
3/16" ID Tubing (at least 2')
Big Salvo Blast Chambers (3)
SMDTG Trigger Mech
This is by far the easiest to duplicate in the Arachnophobia Series. The first thing you'll want to do is open this thing up. There aren't any tricky caps that need cutting or prying, but there is a sneaky screw hidden underneath the AirJet sticker. You'll want to do a basic mod, you know, plug the pump and replace the barrels, for help with this, see Forsaken Angel's Write Up. For more details on the BS chambers see Marvelous Salvo and ChilliPepperFender's Write Up.
Next, cut the tubing that connects the pump tube to the blast chamber, about 3/4" before it enters the blast chamber and insert a barbed tee that fits your tubing (I use 3/16").
I find this a good time to talk about the LB Blast Chamber (if you just want to get on with the write up, just skip below the picture). There has been a lot of confusion due to the comparison of the Lightning Blitz with the Blast Fire, Hornet, Big Salvo, Secret Shot II, etc. While there are common features (the valve) the trigger doesn't work the same. While the Lightning Blitz belongs in the same category with the Secret Shot II, it does not belong in the same category as the other blasters mentioned. This is because of the way they're fired. In the BF, BS, Hornet, and similar blasters, the air input and back-pressure-actuated-trigger/valve use the same pathway. The LB and SS2, however, have the air input and back-pressure-actuated-trigger/valve on different pathways. The main difference this results in is that if you create back pressure in the air input pathway the blaster will fire (if it's a BS, BF, Hornet, etc.). In a lightning blitz there's a check valve right where the tubing meets the blast chamber (of the sort that's in the end of the pump tubes for AirTech and SuperMaxx blasters). The difference is significant when you realize you can't use backpressure in the tubing to fire it, i.e. you can't use a SMDTG trigger to fire off three SS2 blast chambers or three LB chambers (as cool as that would be) without removing the trigger systems. Back pressure is created in the LB and SS2 when fired by pushing in the firing rod and allowing air to escape out the back of the chamber (the backpressure then seals this leak and at the same time opens the front valve allowing air to rush out the front and launch darts). Well, that was lengthy, but I hope it helped dispell some of the confusion. If you have any questions, feel free to PM me.
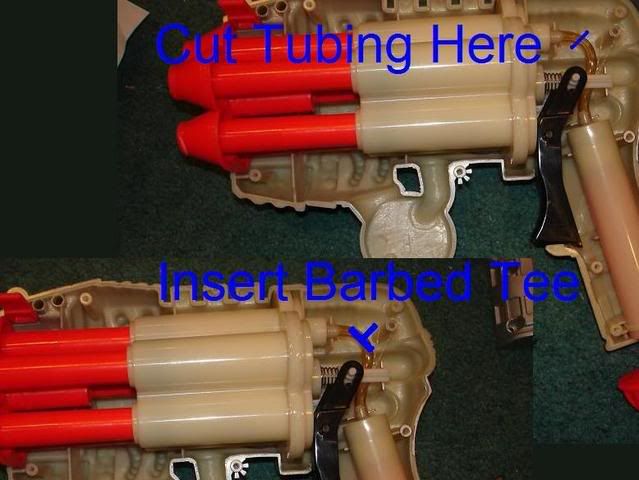
The next thing you want to is cut/sand/drill or my favorite, dremel a small hole in the back of the pistol where the picture says "drill here." I just use a sanding drum on my dremel on one side of the LB. After that, connect some tubing (at least 12", just to be safe) to the odd end of the barbed tee. Run the tubing out of the hole you just cut/drilled/whatever and put the LB back together. You may need to fiddle a bit to make sure this fits well (on my left handed pistol I came out the top of the gun and that seemed to work best).
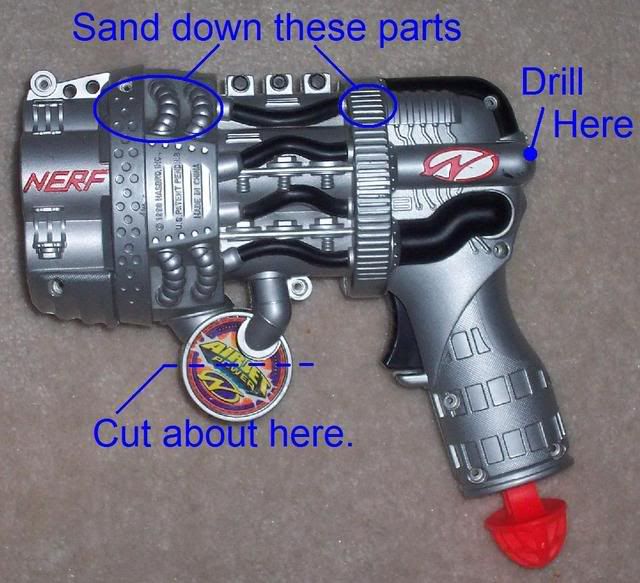
Now you're going to sand/dremel/cut down the sides of the LB where it says "sand here" in the photo. The point of this is to make a nice seat for the BS chambers. The more rearward spot will need to be sanded down a bit more because the BS chamber is wider there than at the barrel. The red circles give an idea of about how much to cut, but mostly just dremel some off and put hold the BS chamber in place, see if it's approximately straight, make corrections and repeat. Apply liberal amounts of Hot Glue and then hold the BS chamber in place until the glue dries (note: it can help to already have a barrel in the BS chamber when alligning it).
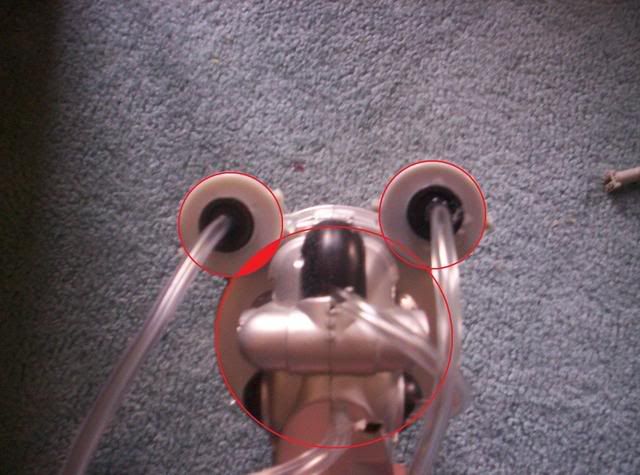
On the under side, cut about where the line in the picture is and then sorta sand out a curve to more easily attach the BS chamber. After gluing it on, throw on a zip-tie for extra support.
You'll also need to sand/dremel a groove on the handle (not deep, just enough to make a seat for the SMDTG trigger). Hold the gun in your hand (the hand you'll be using to fire the gun as this makes it so you can't comfortably hold the gun in the other hand) and move around the SMDTG trigger until it's comfortable to figure out where to place it. Mark the spot, sand the groove, glue it on, and hold it in place while it dries. (Note: when removing the SMDTG trigger mech from your SMDTG, try to get as much as possible of the original tubing on the trigger mech so you have enough to work with).
Finally, using barbed connectors, connect the BS chambers to the SMDTG trigger mech. When you connect the tube running out of the LB to the SMDTG, instead of using a barbed connector, use a barbed check valve. If you don't put in a check valve, you'll have problems when firing the LB before your fire the BS chambers.
Also, I reccommend making the bottom barrel the first to fire as it is the easiest to aim with. I know that seems strange, but just turn your blaster to the side and then you can easily aim down the barrel. This is now one of the most accurate guns I own. Enjoy!
Ranges:
Lightning Blitz 60-85'
Marvelous Salvo 80-110'
Edited by imaseoulman, 22 July 2008 - 06:28 PM.


