Jump to content


T da B's Content

There have been 64 items by T da B (Search limited from 12-December 96)


By content type

See this member's


Sort by                Order  

#325897 Modification and Paintjob Pictures

Posted by T da B on 27 January 2013 - 05:01 AM in Modifications

Here's my hoppered Lego Atlantis Harpoon Blaster that I run off 5 pumps. Mods include the following:
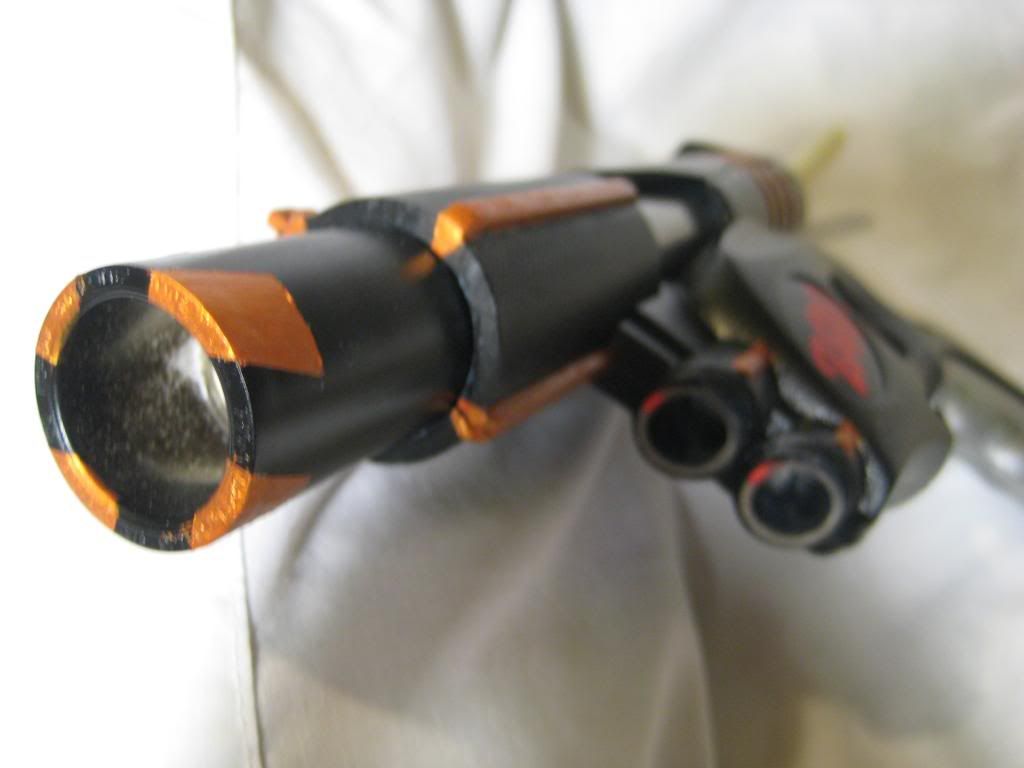
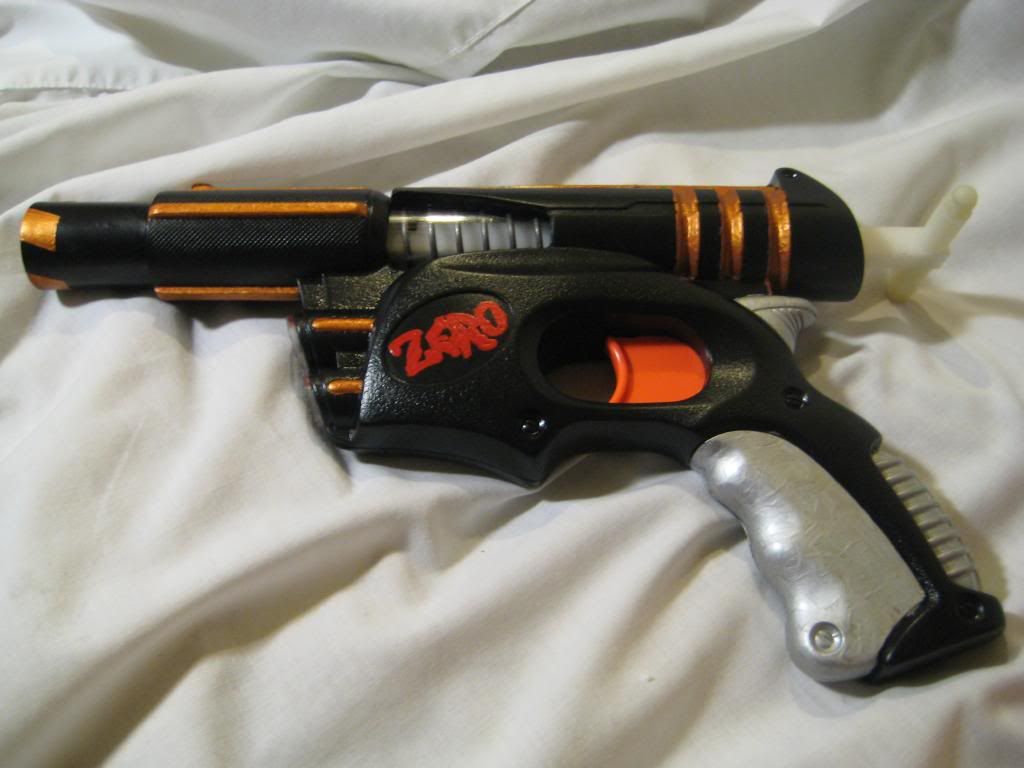
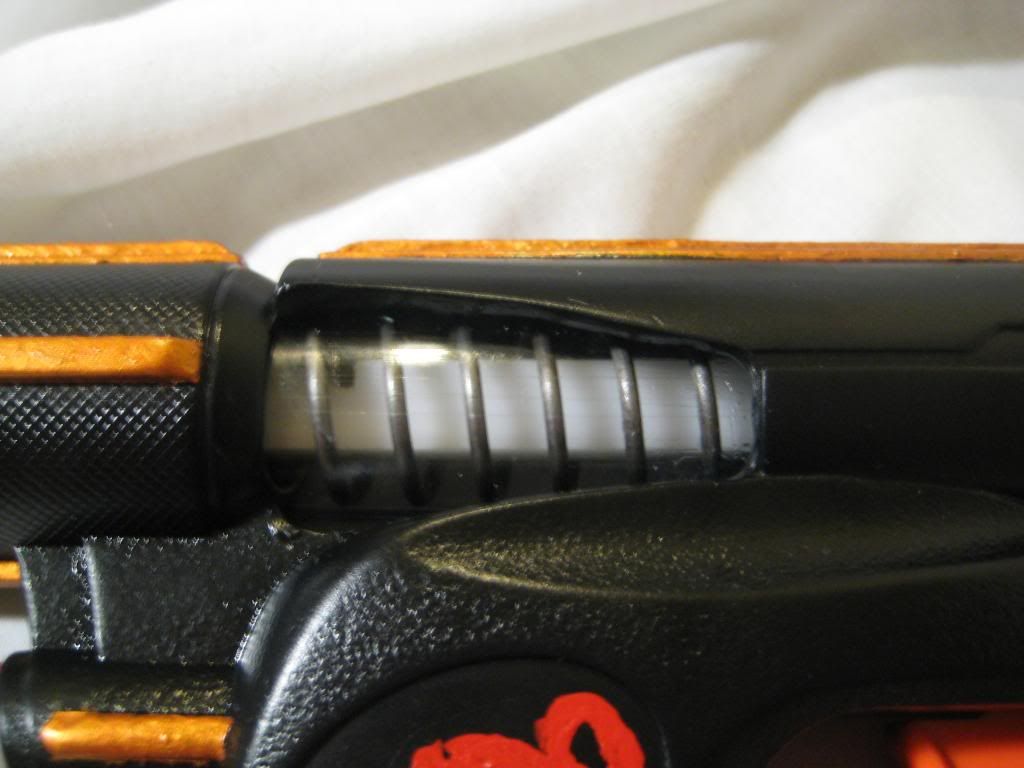
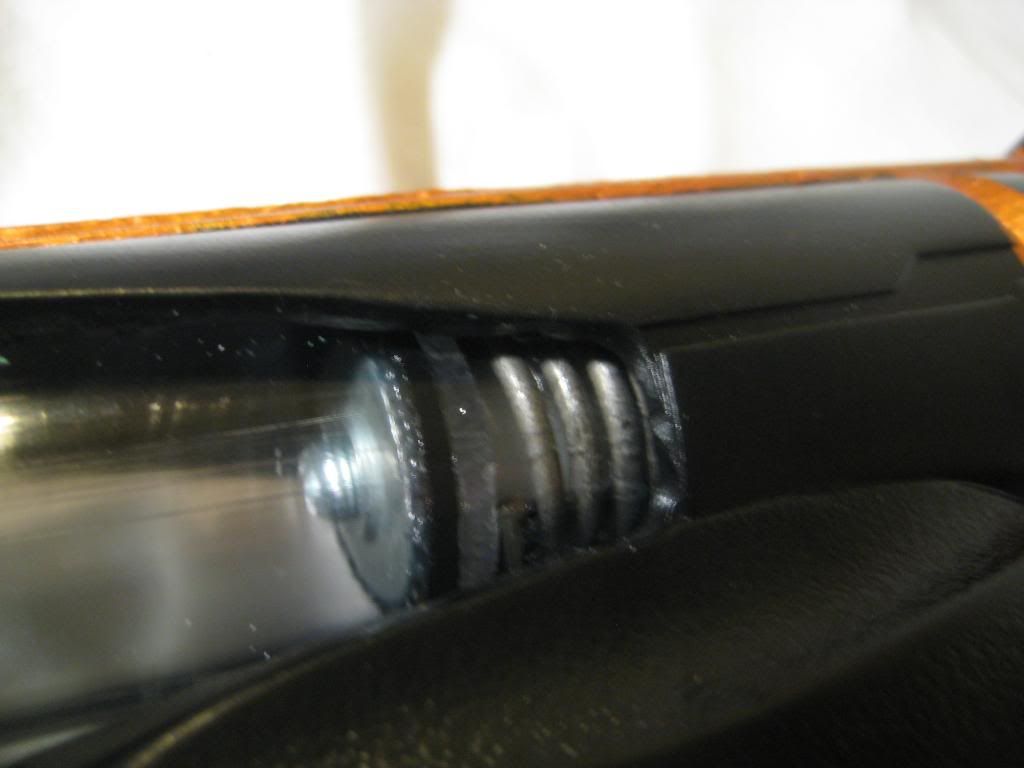
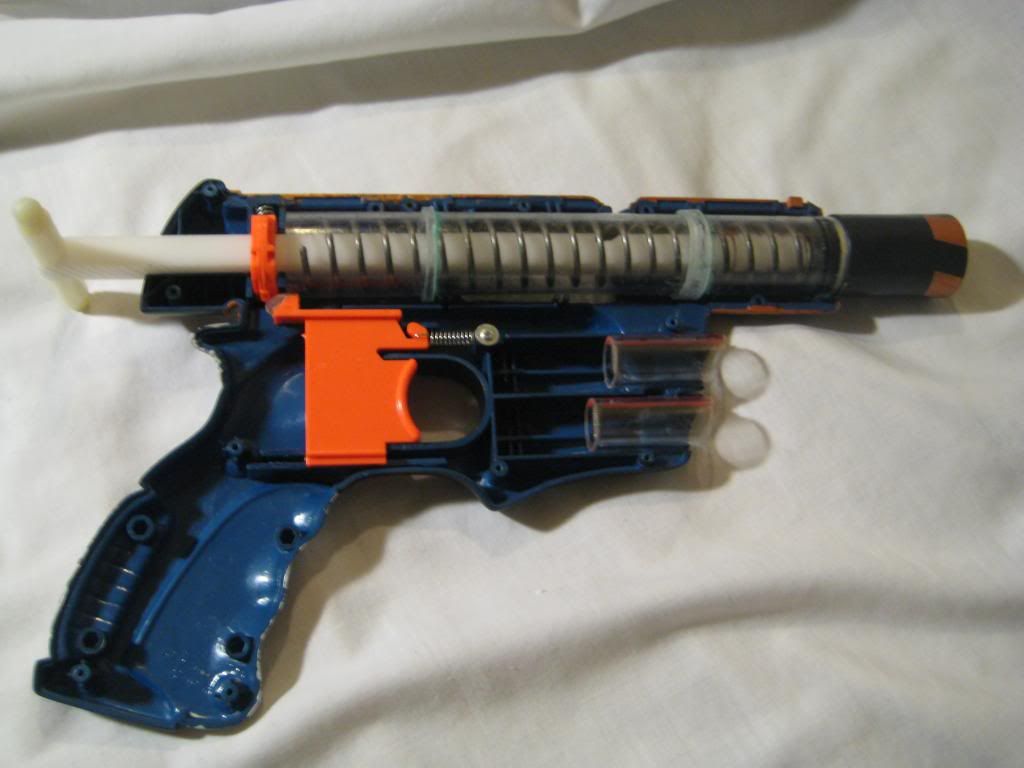
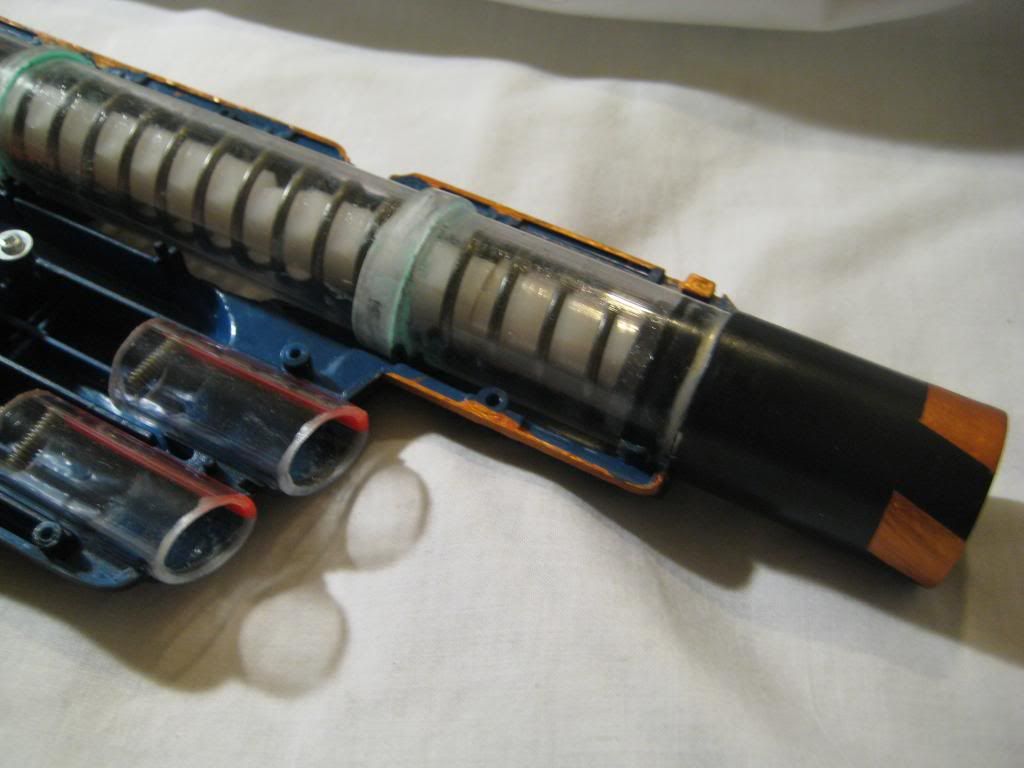
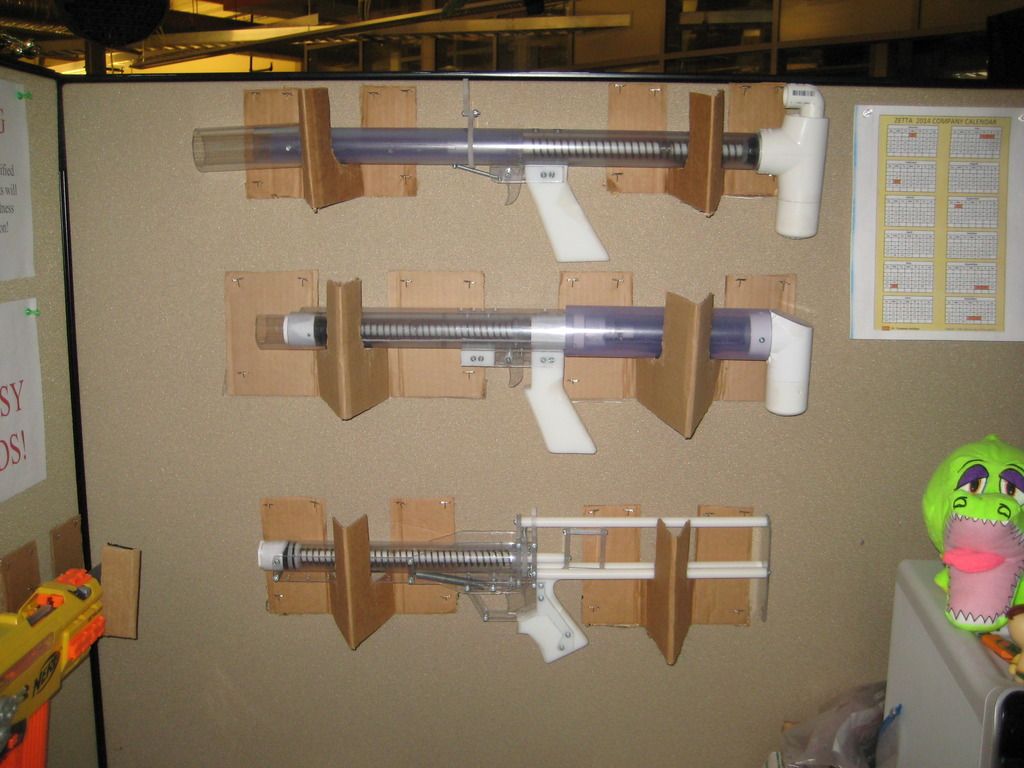
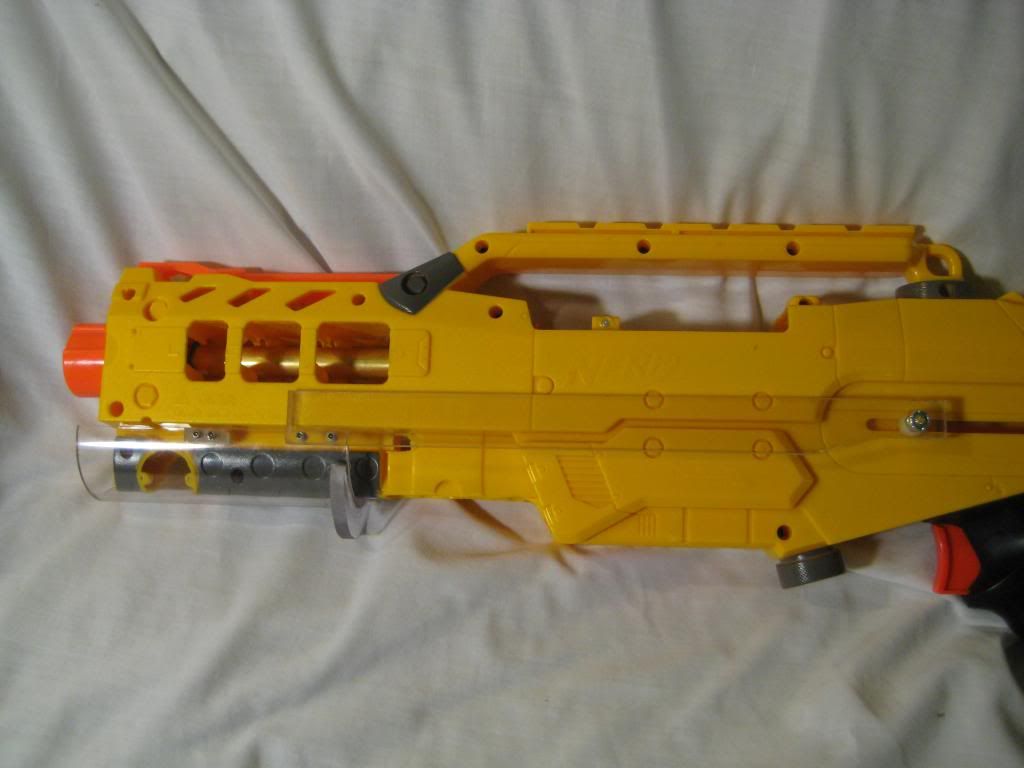
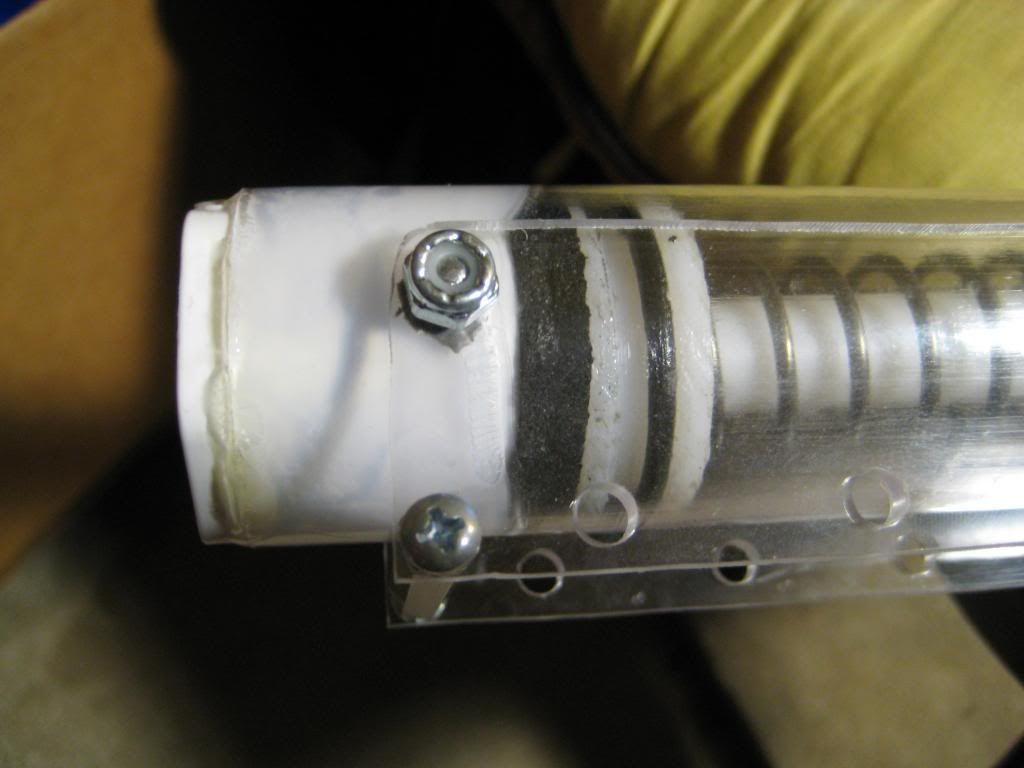
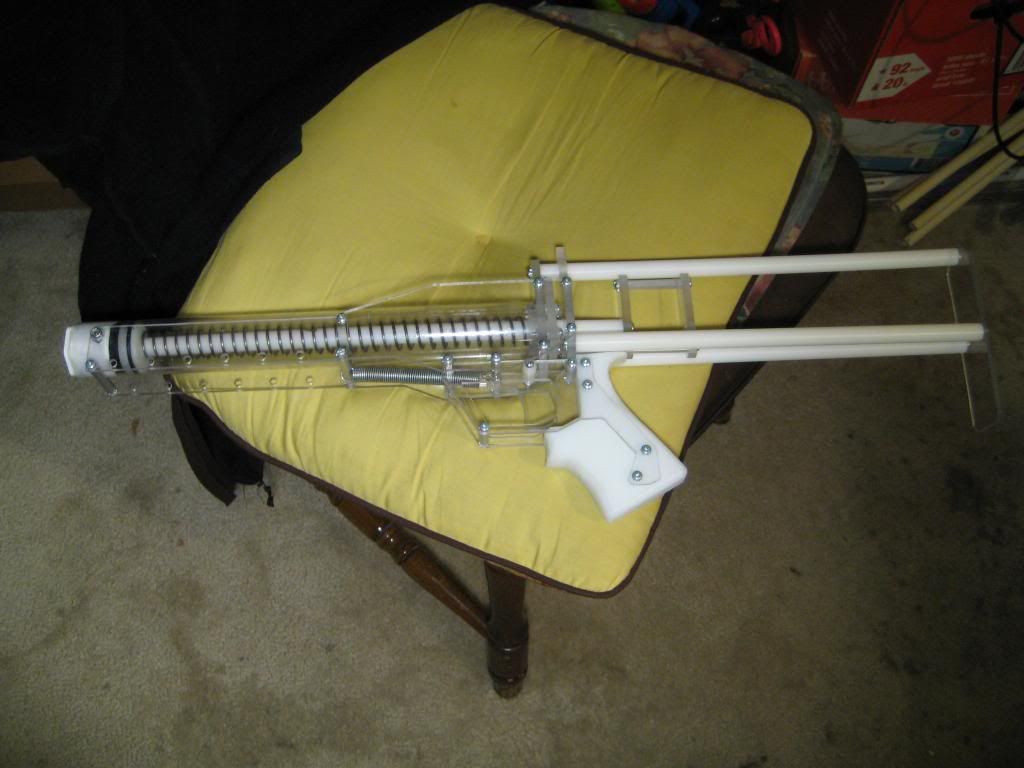
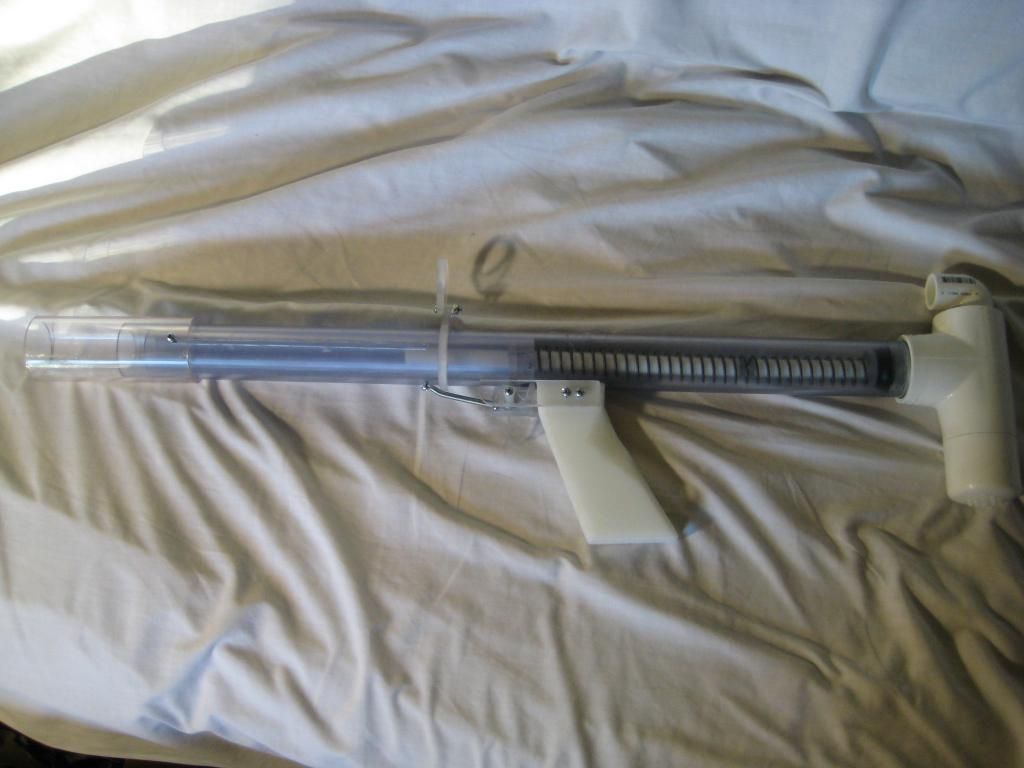
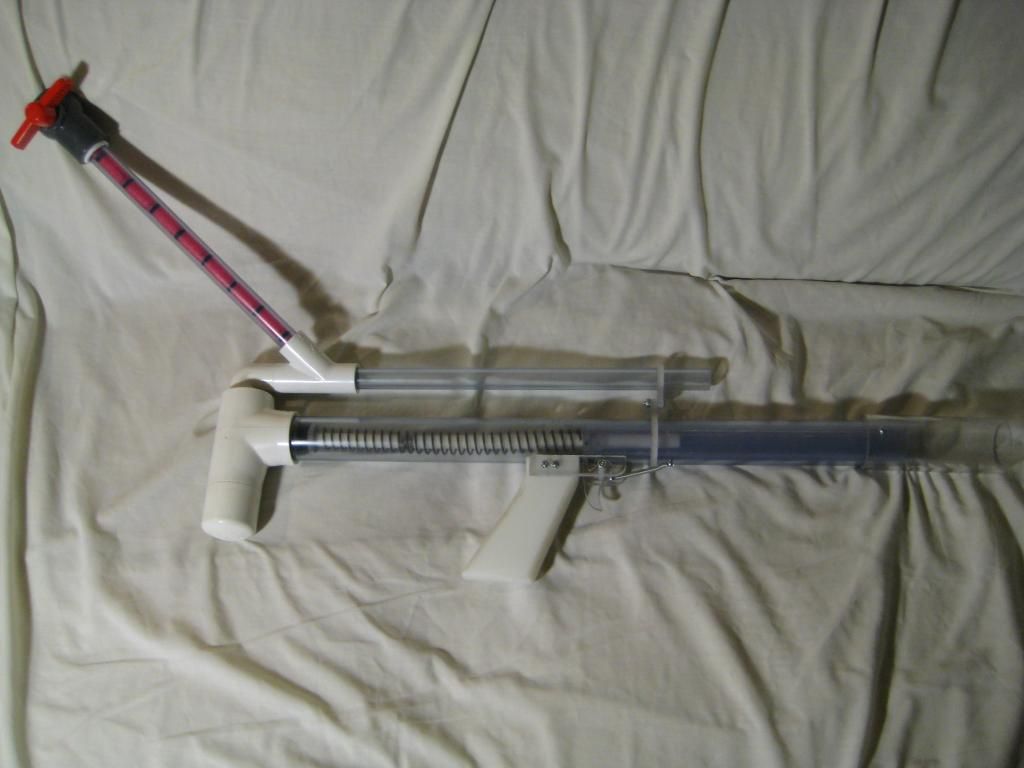
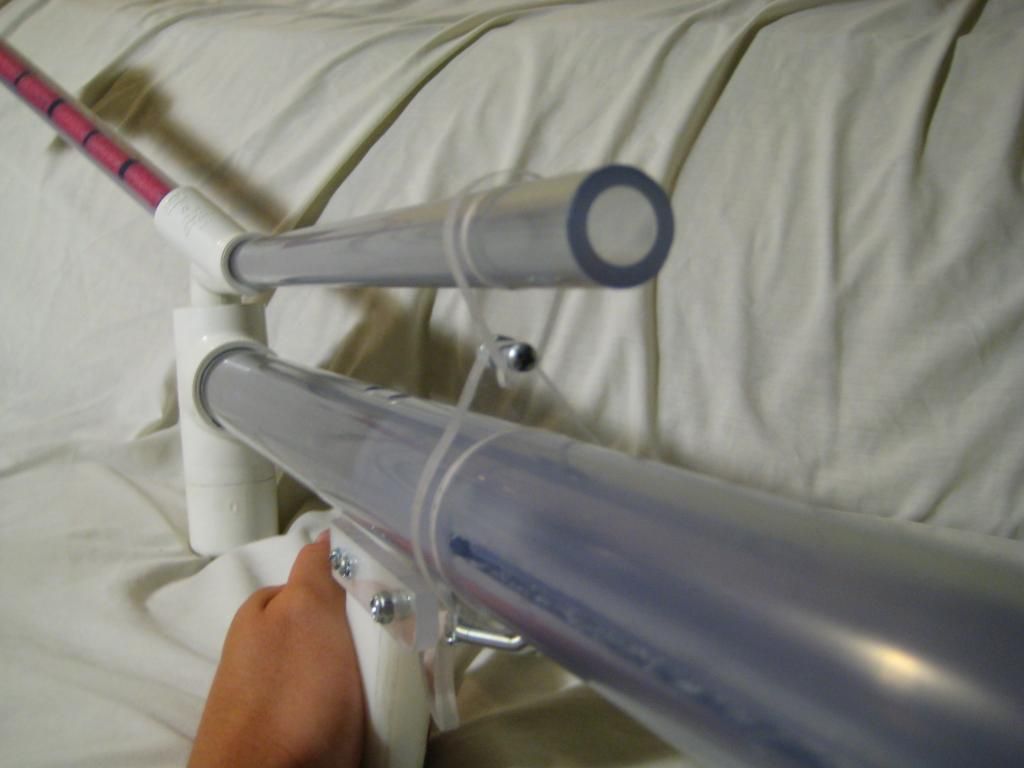
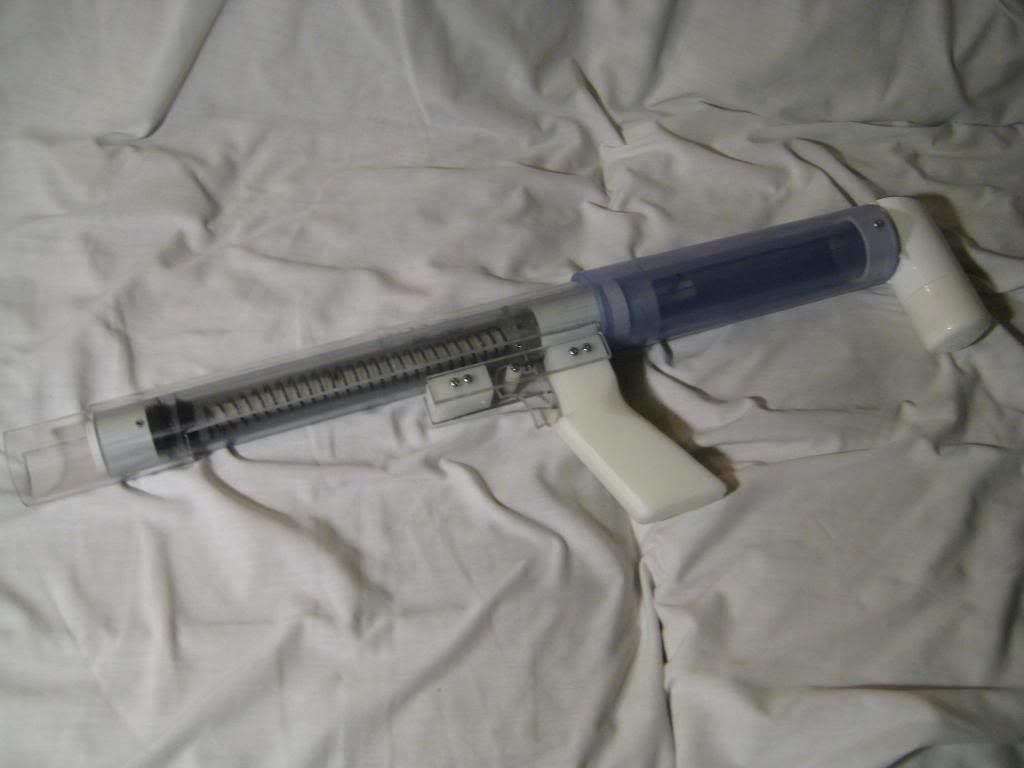
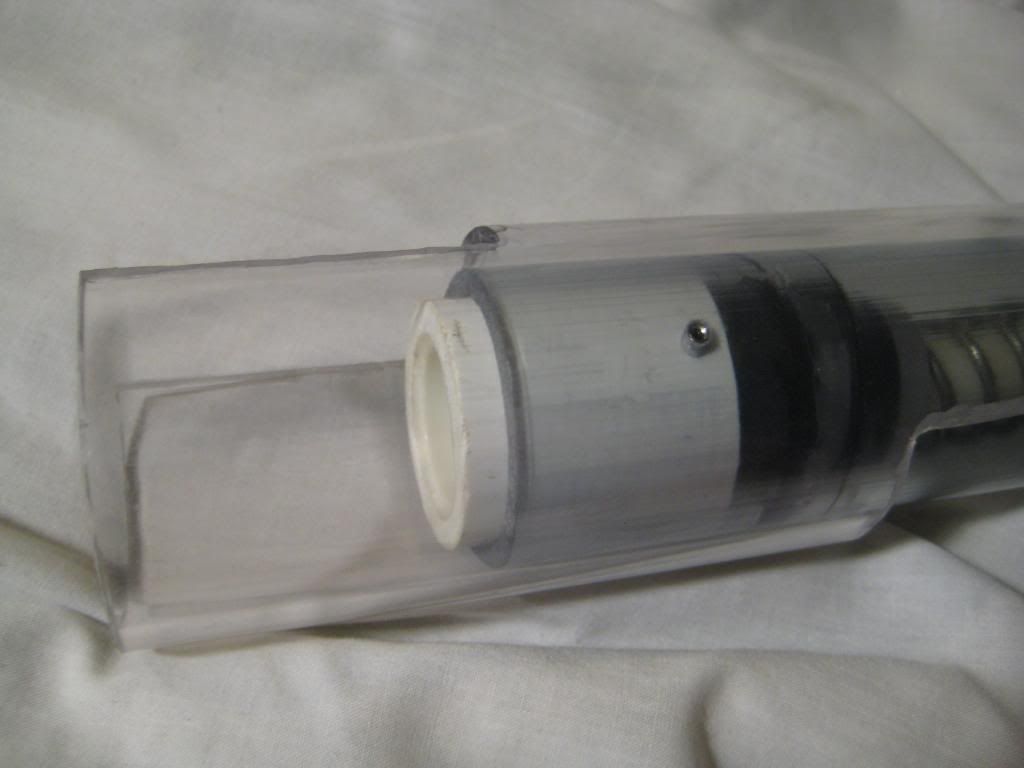
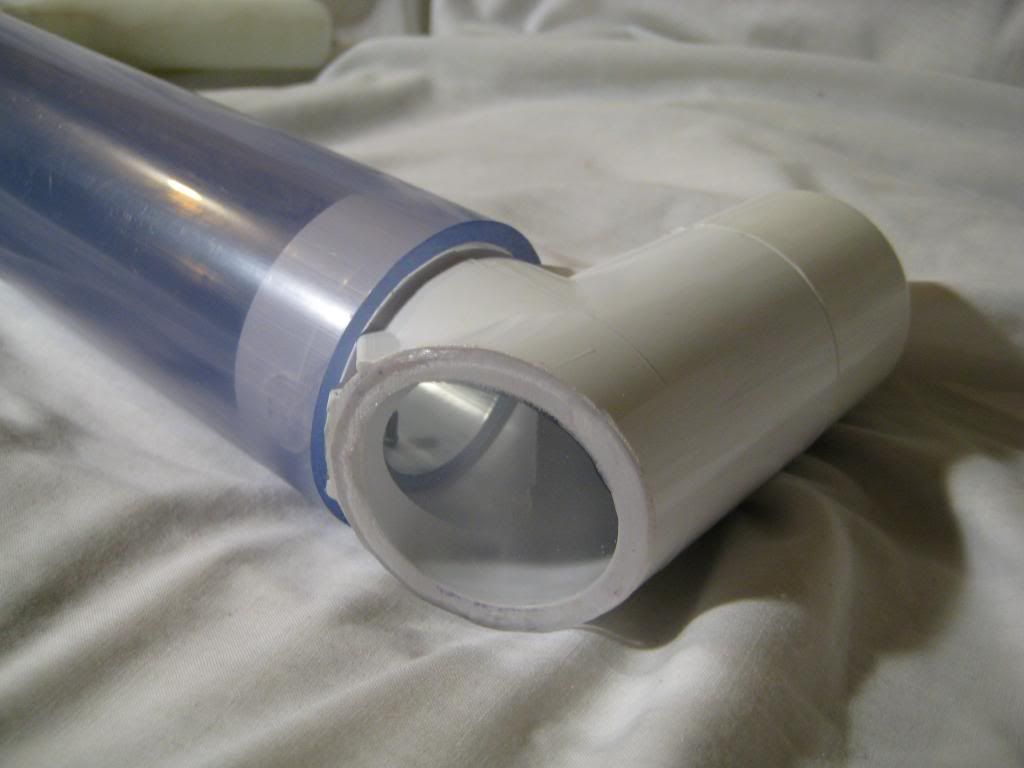
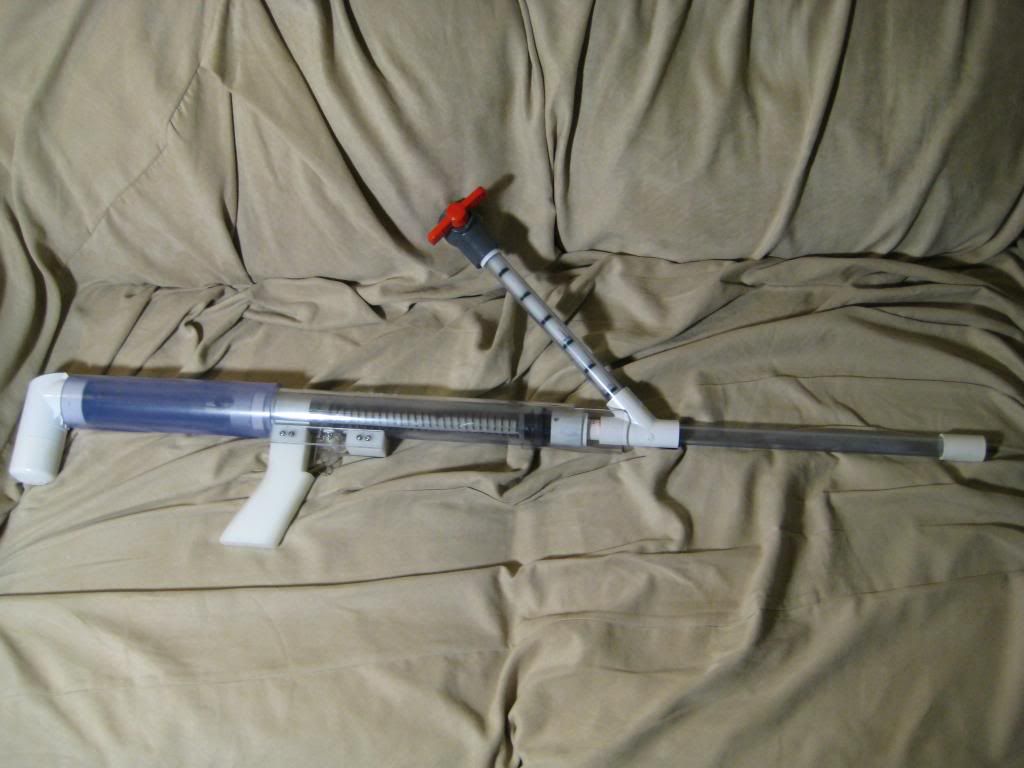
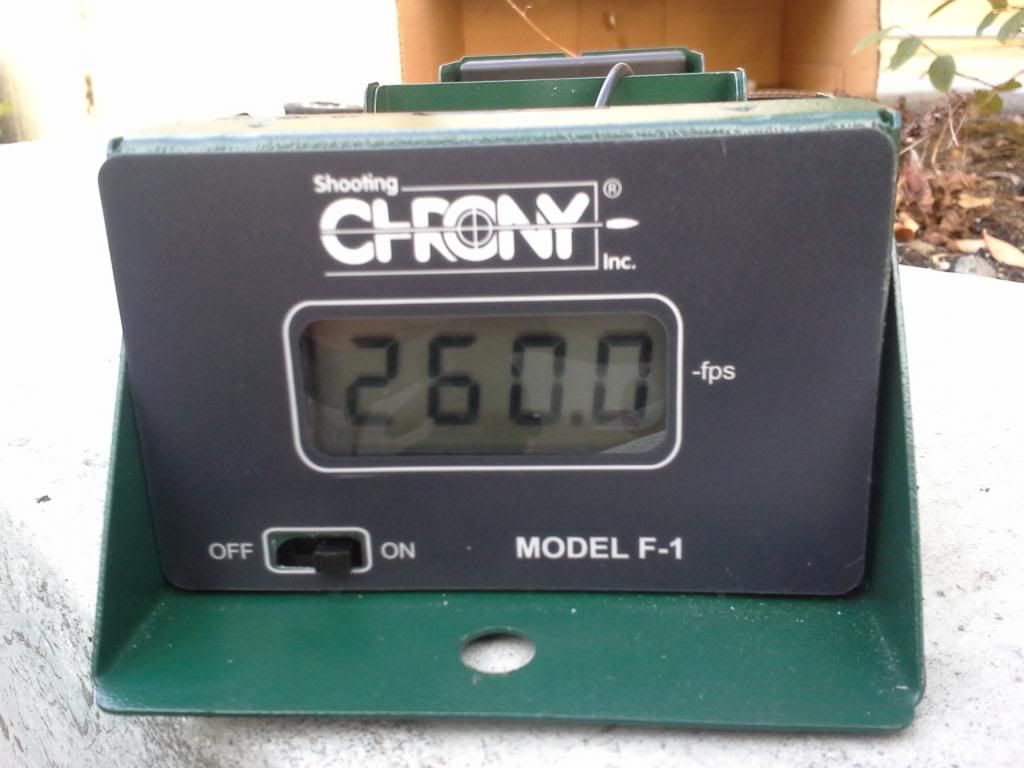
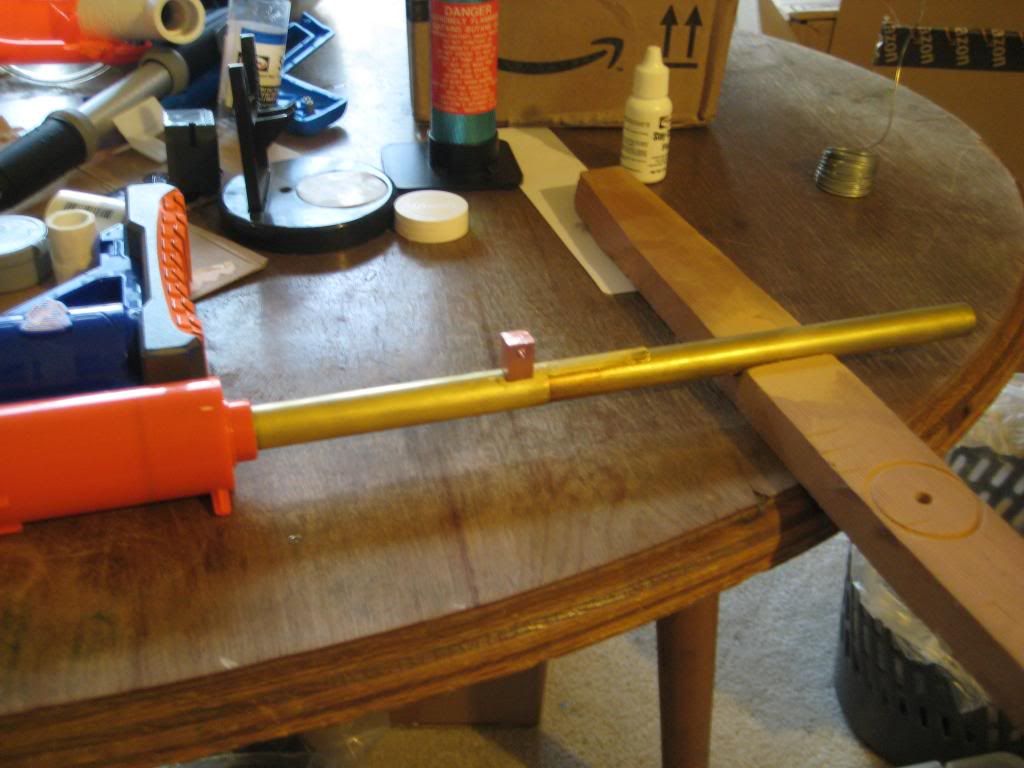
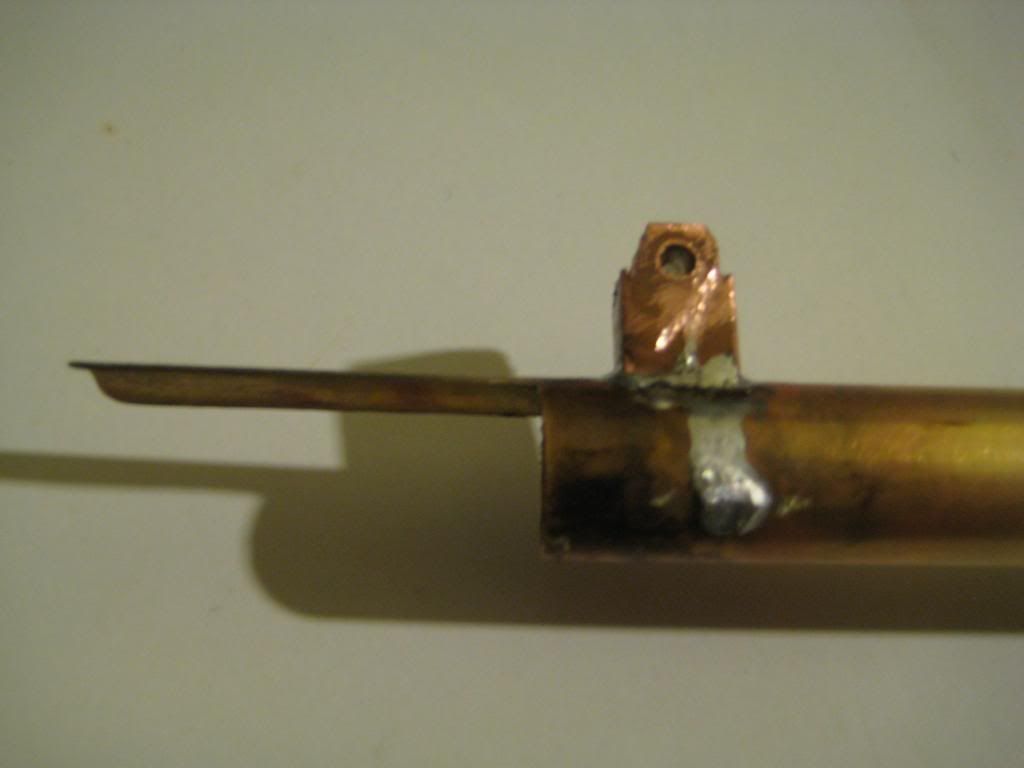
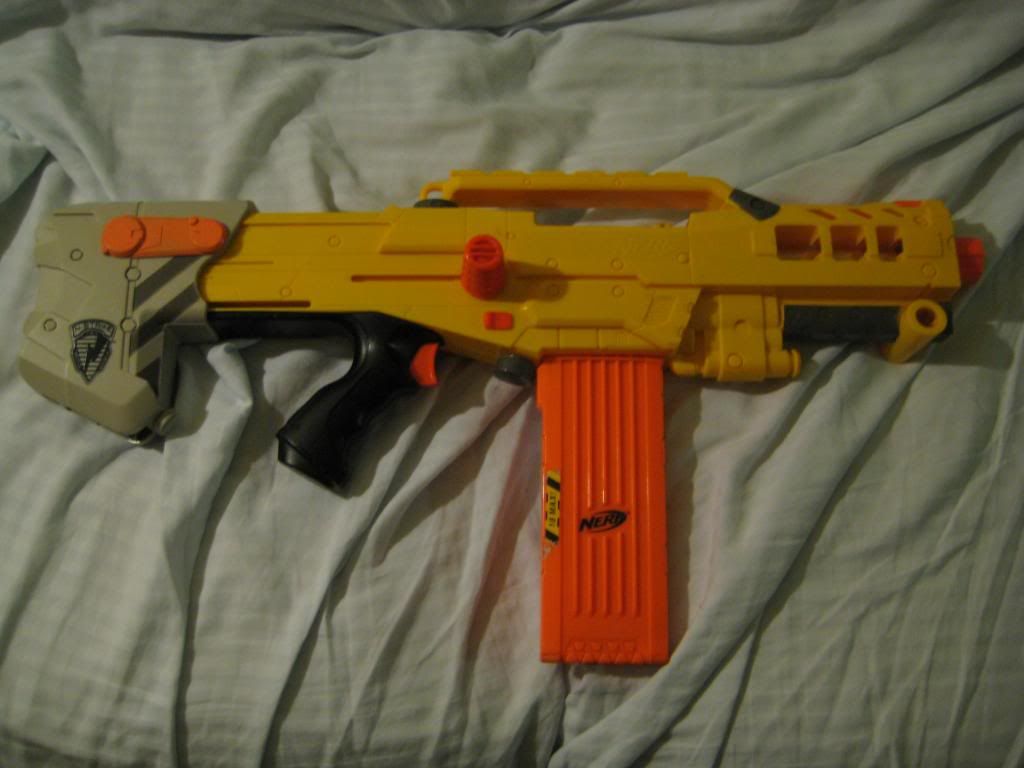
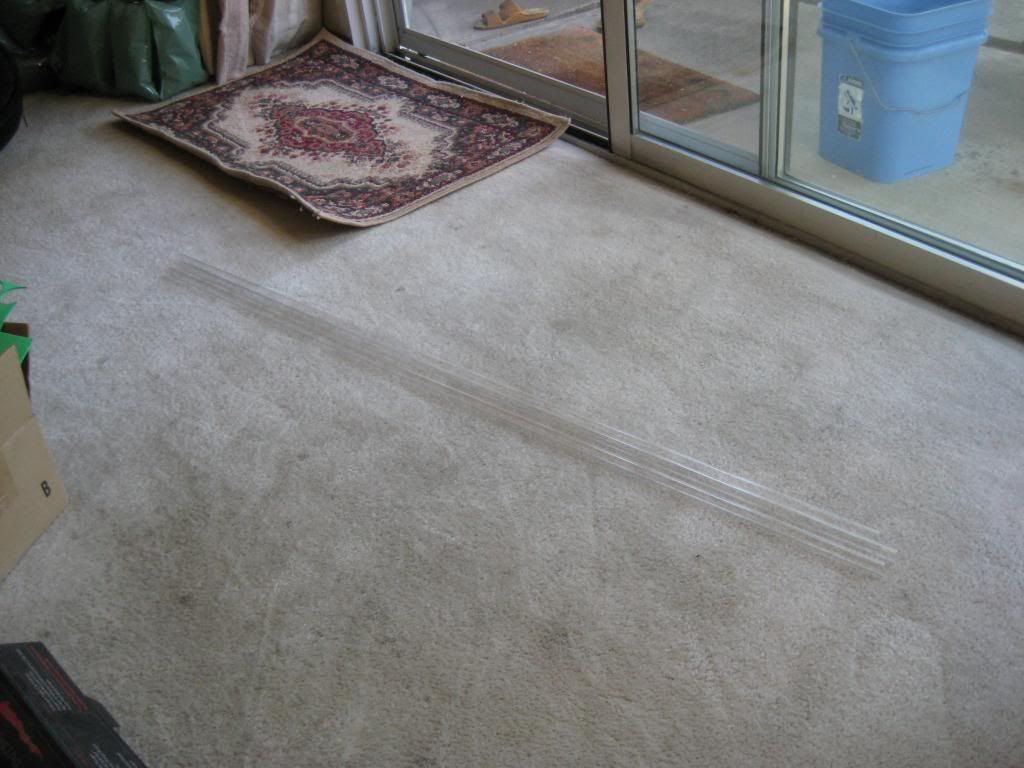
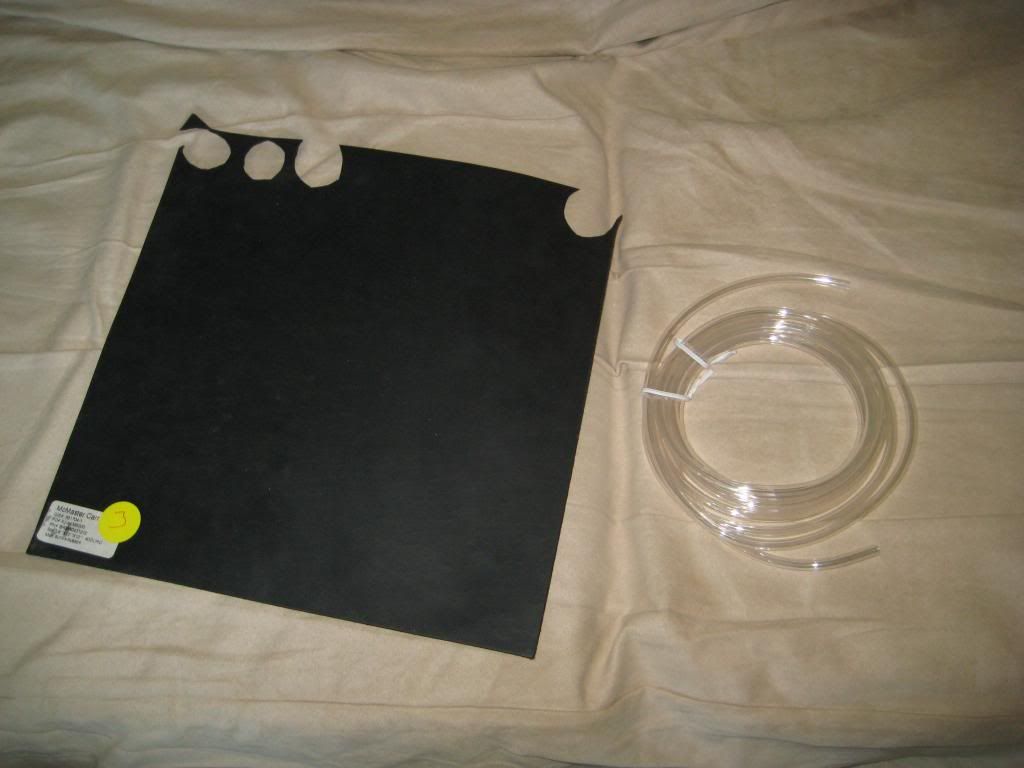
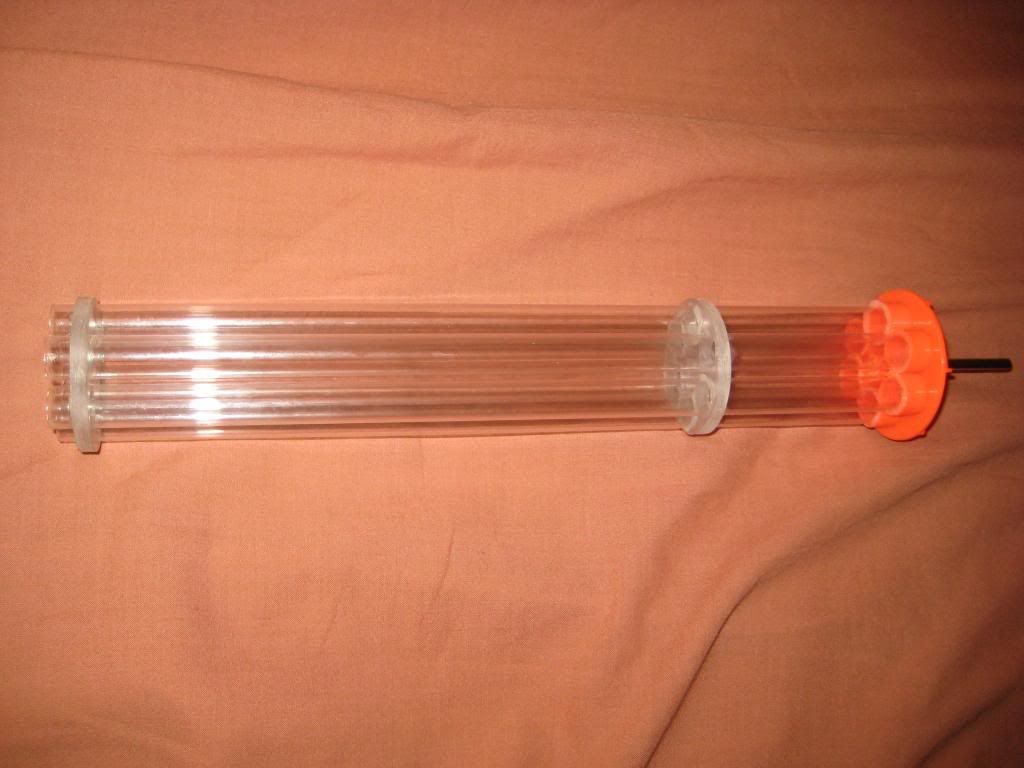
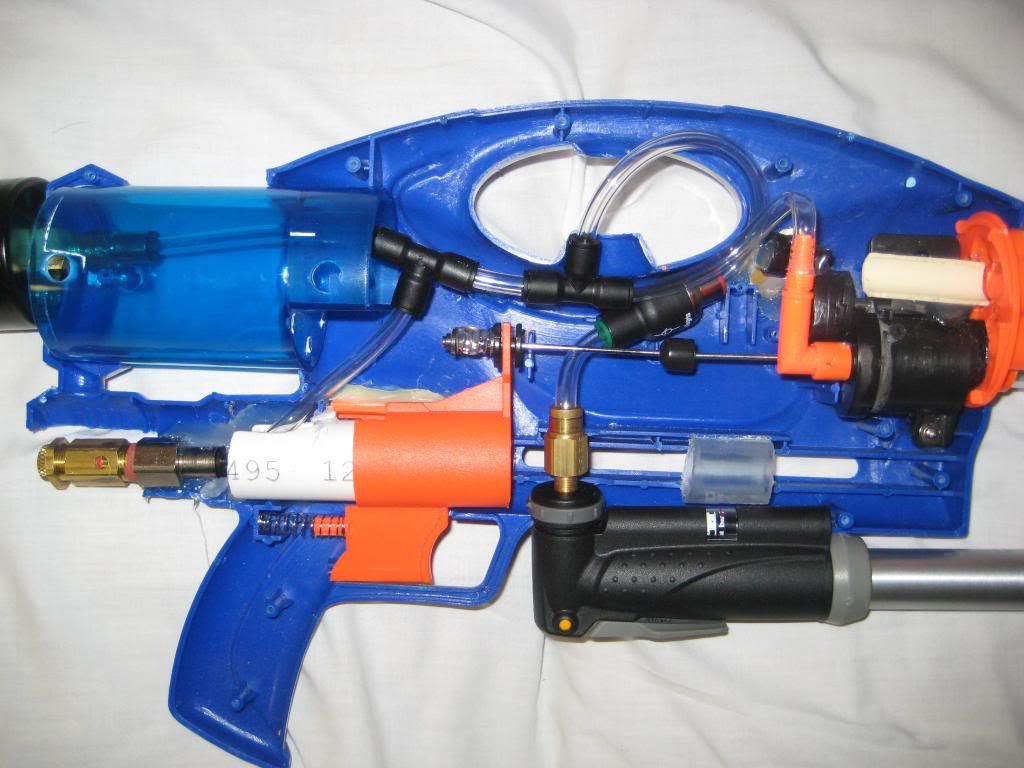
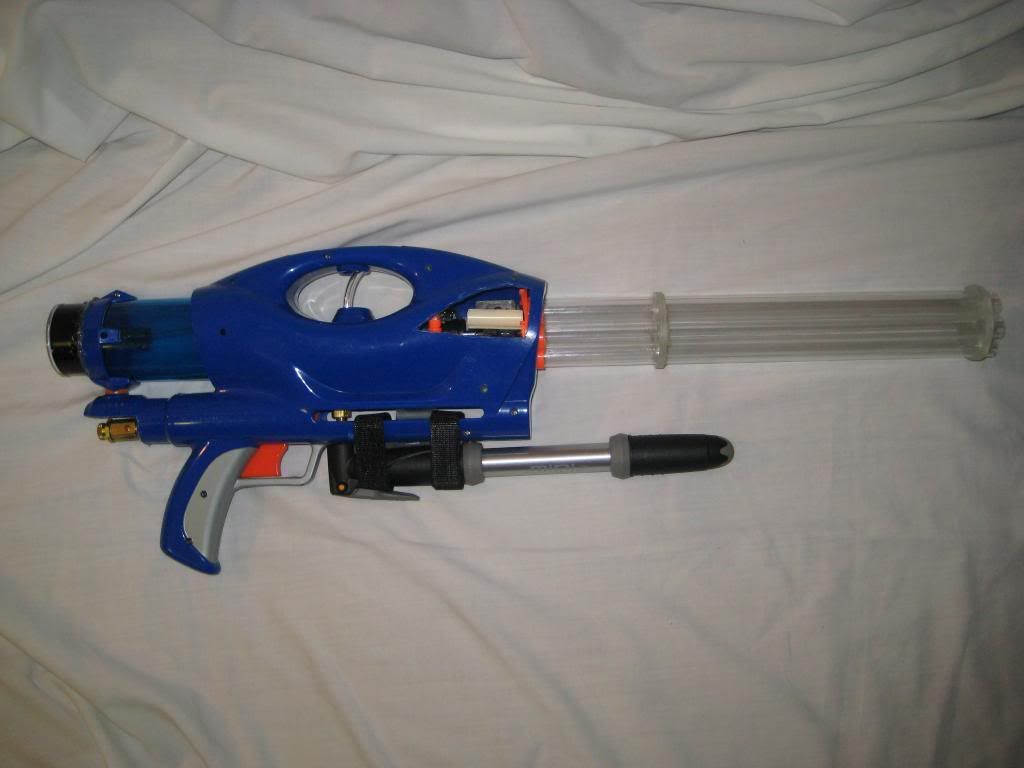
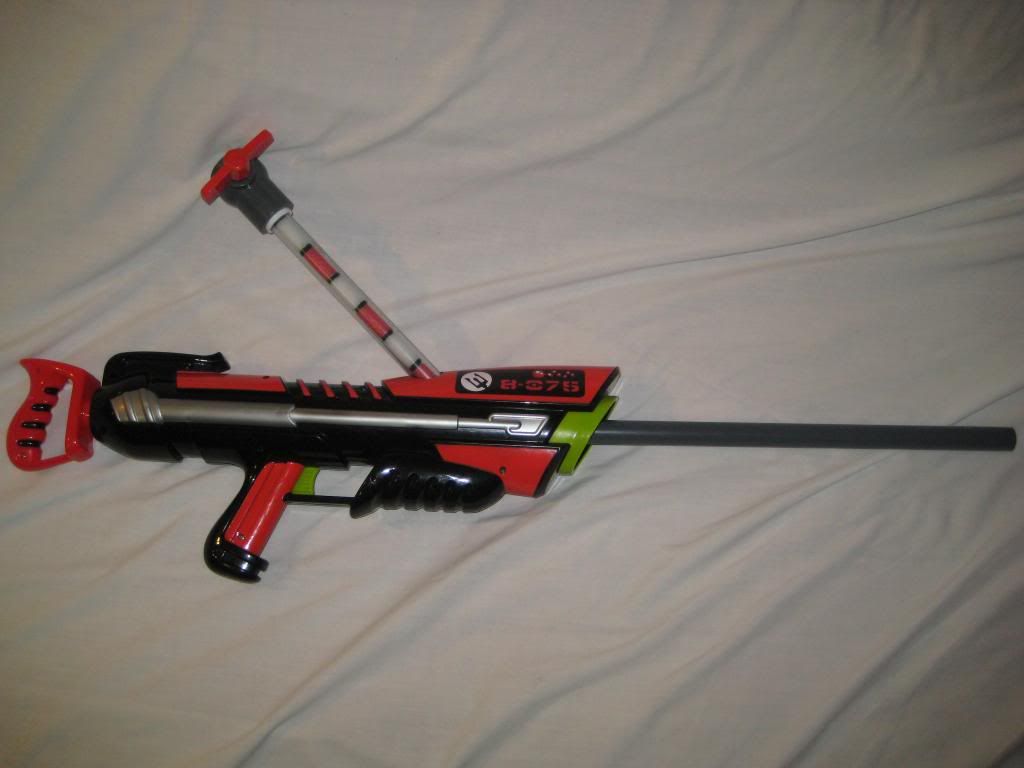
  • 16-inch barrel made from schedule 80 PVC and polyethylene tubing
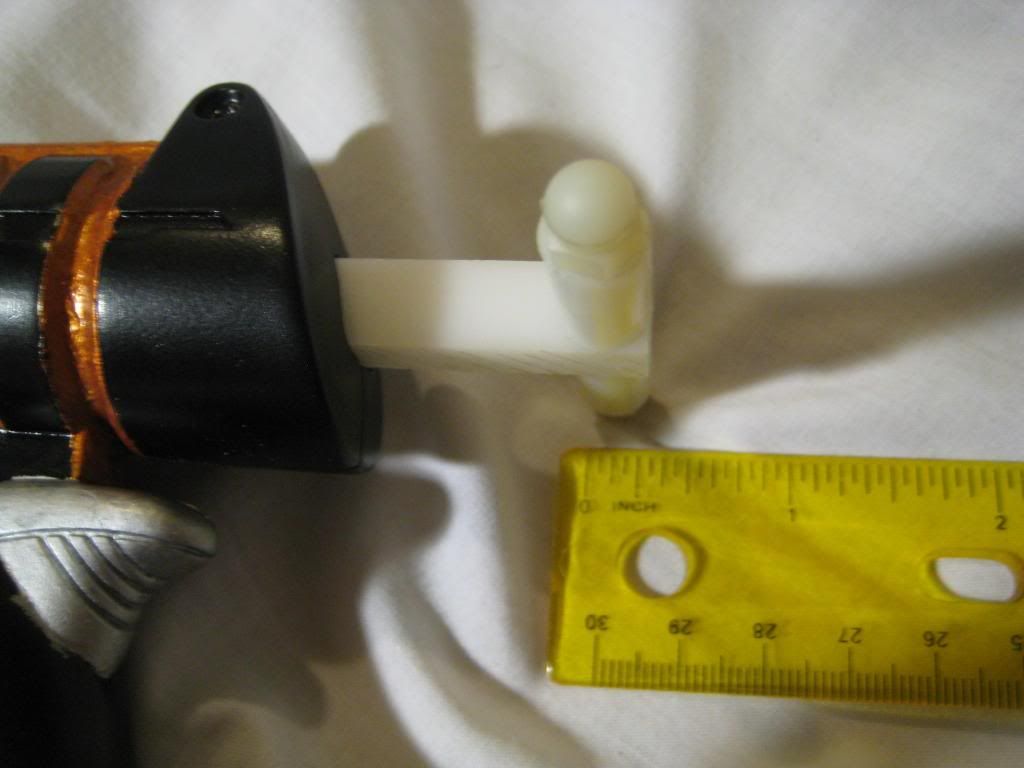
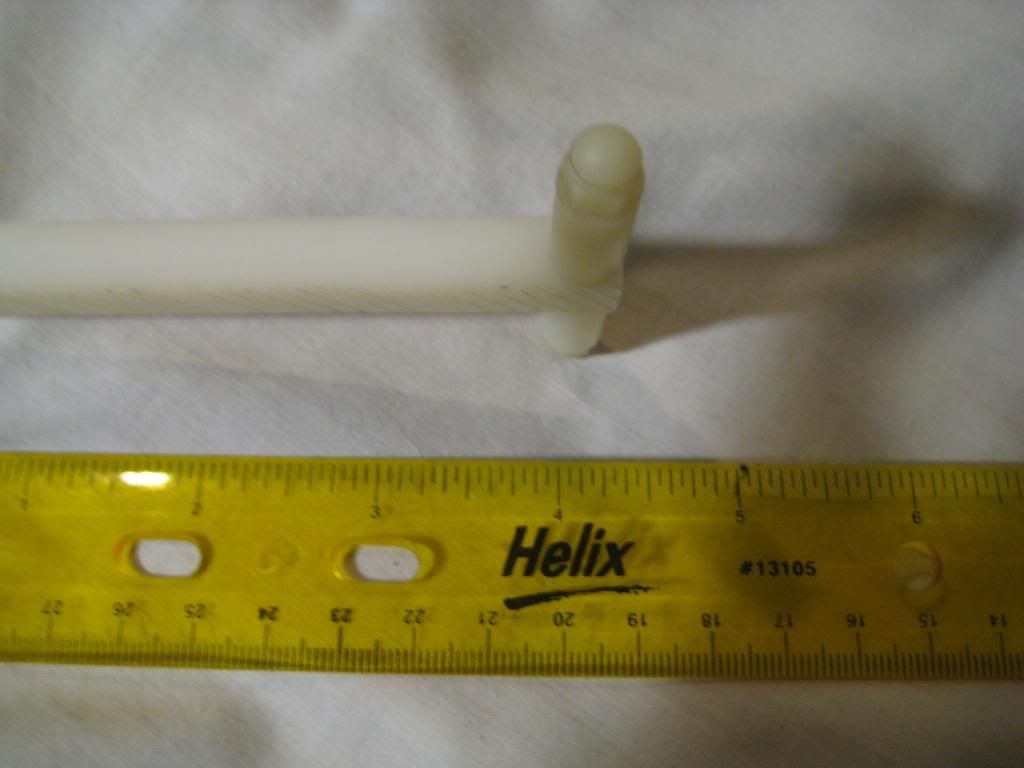
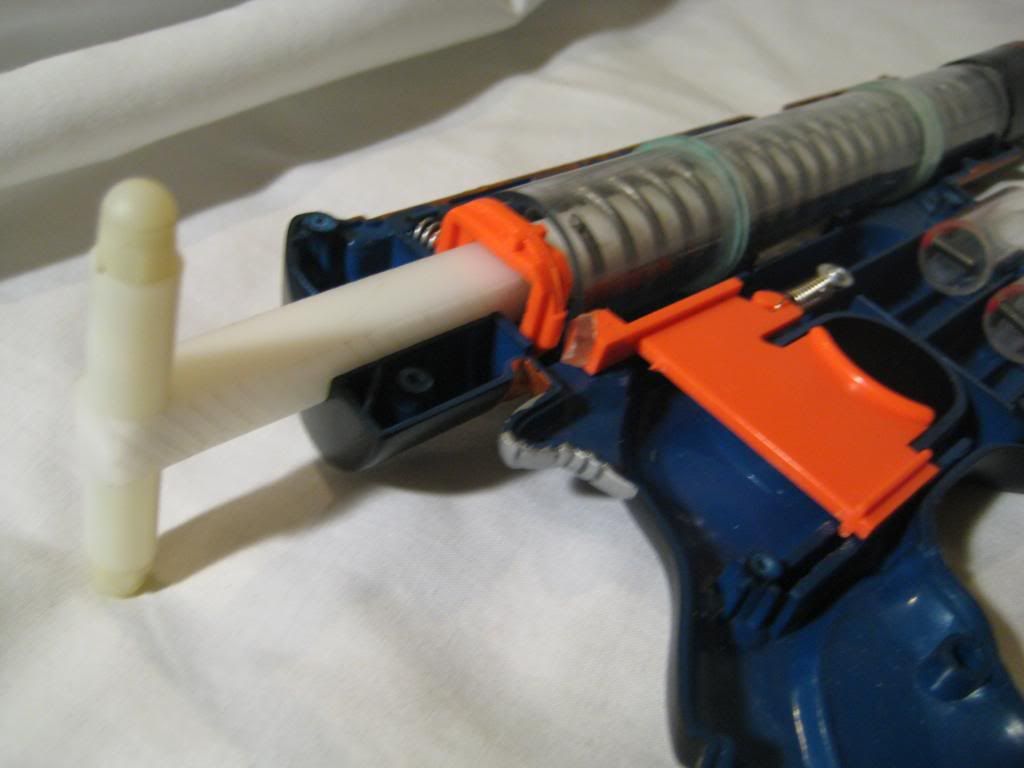
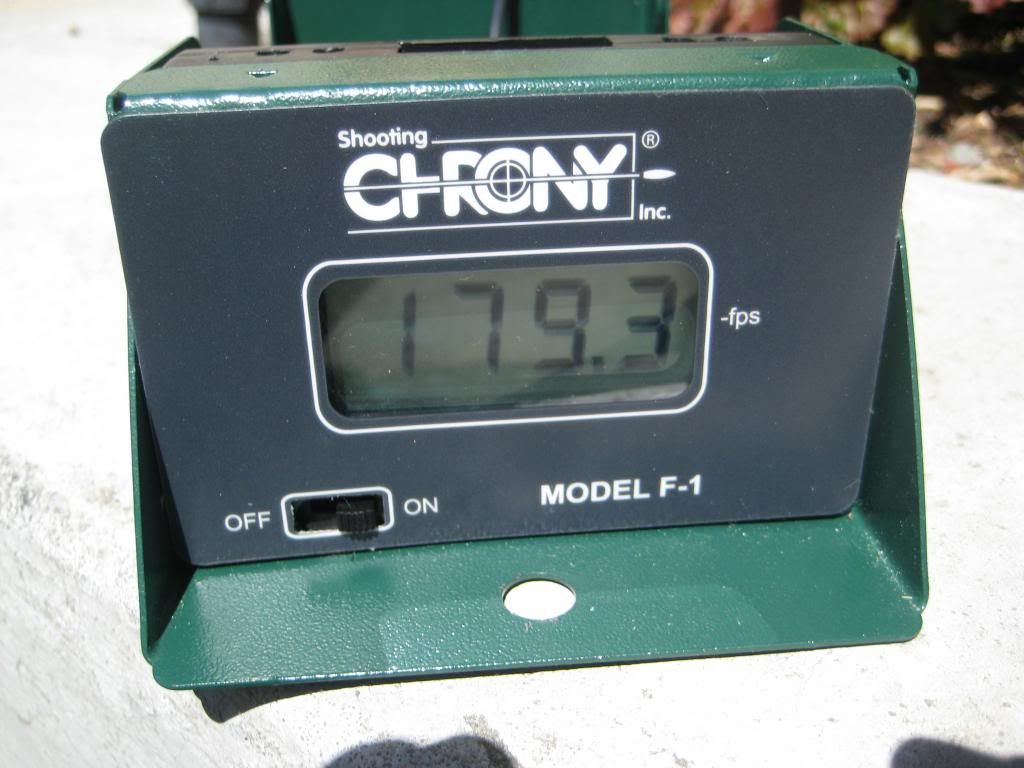
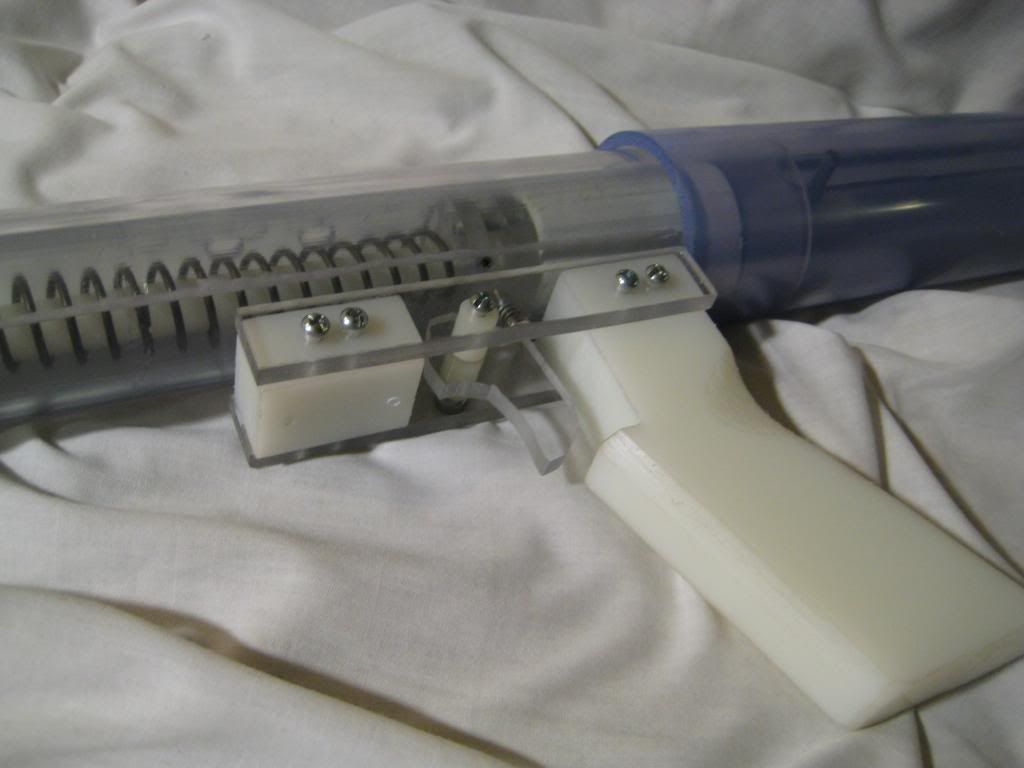
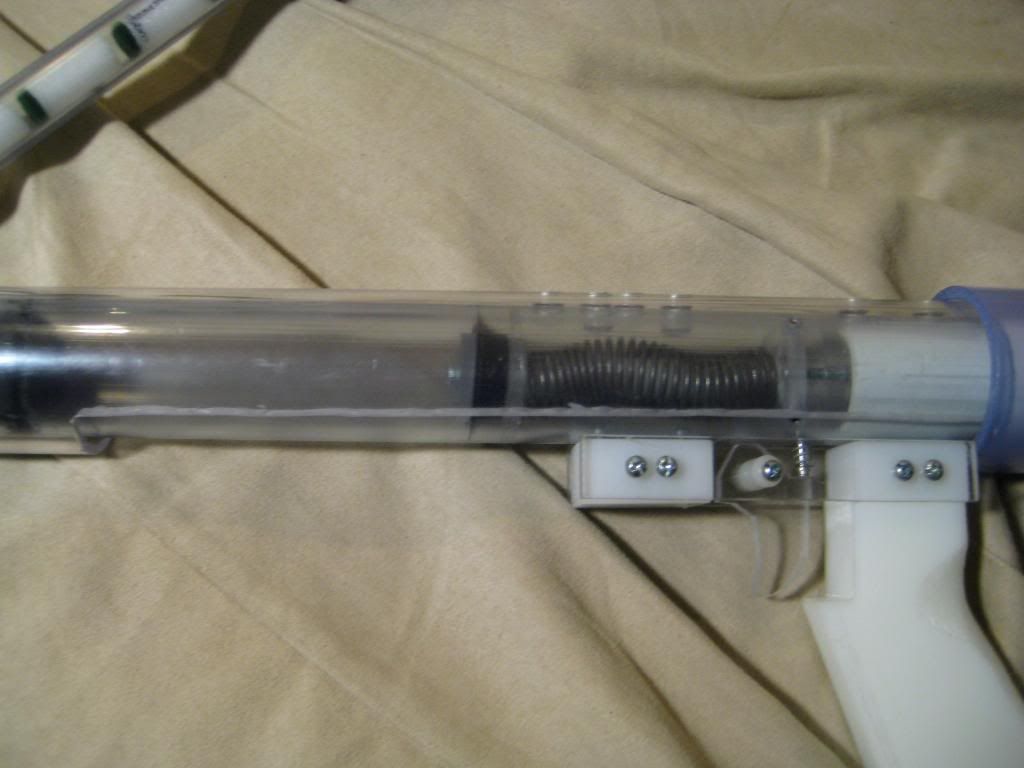
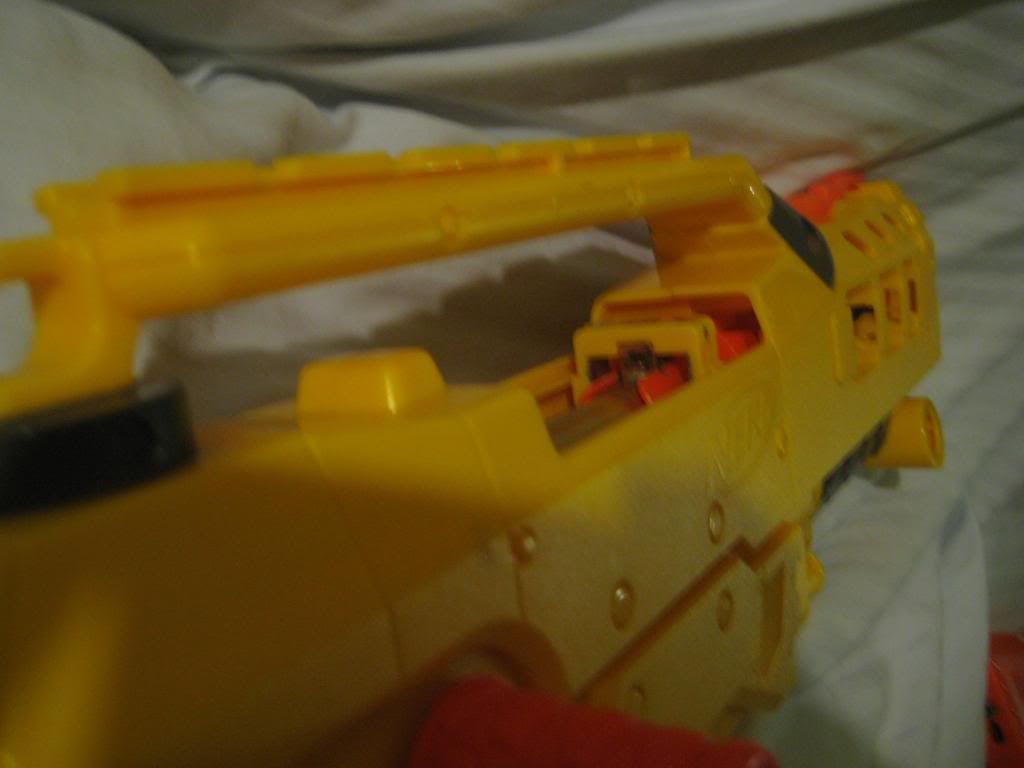
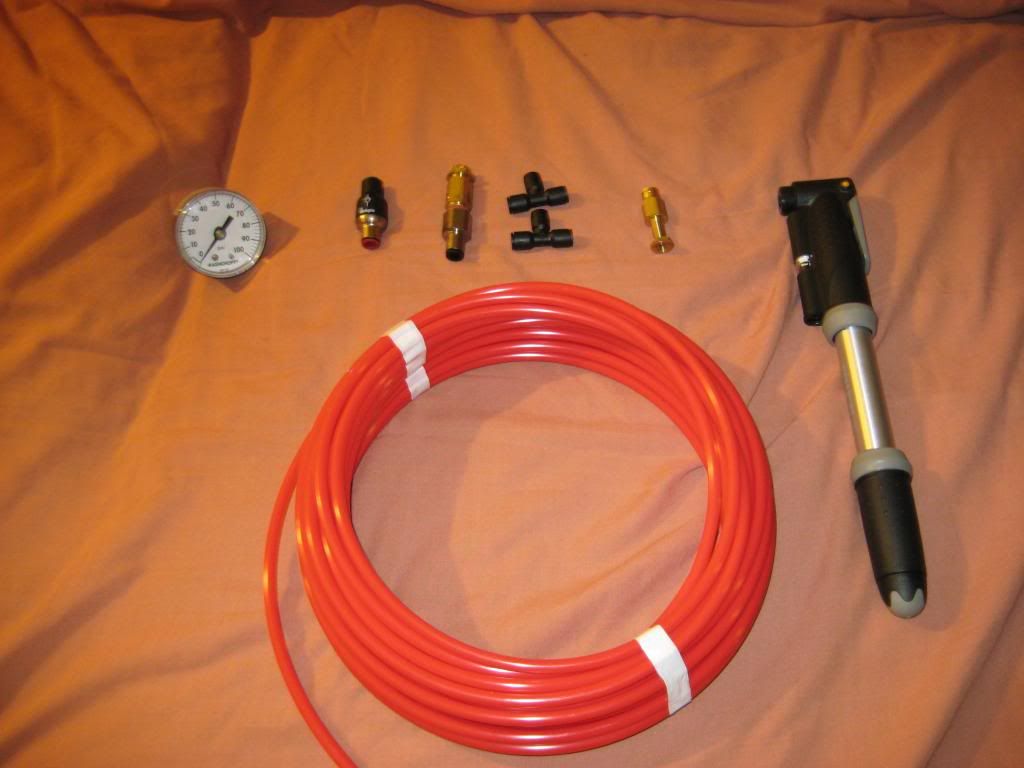
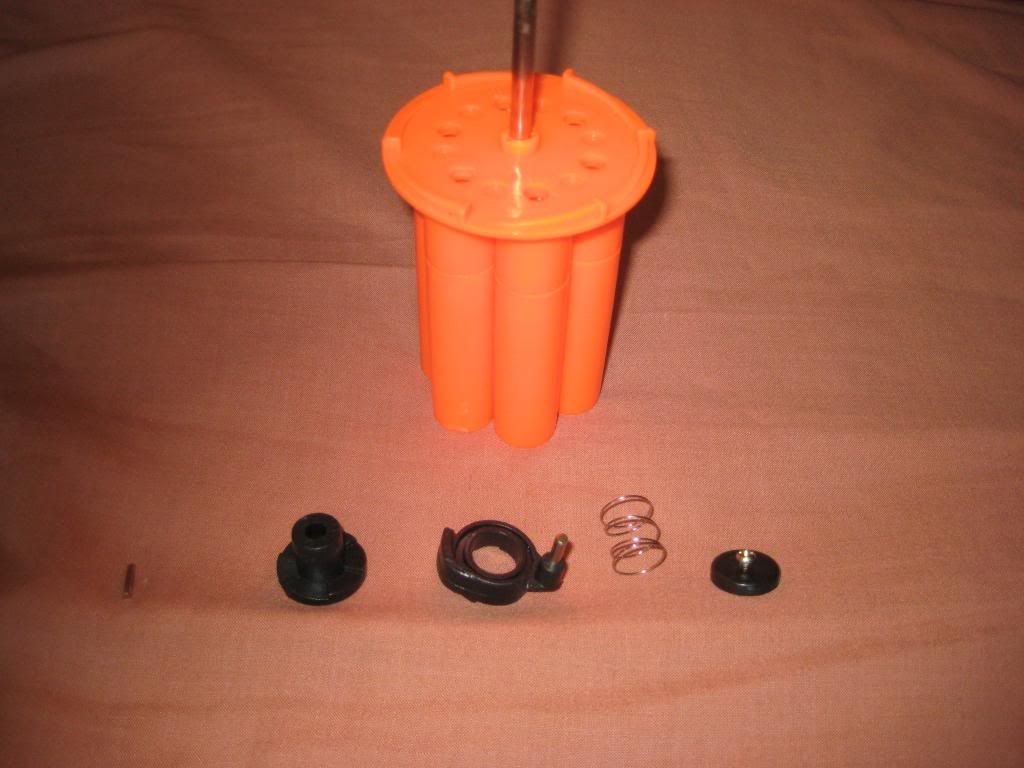
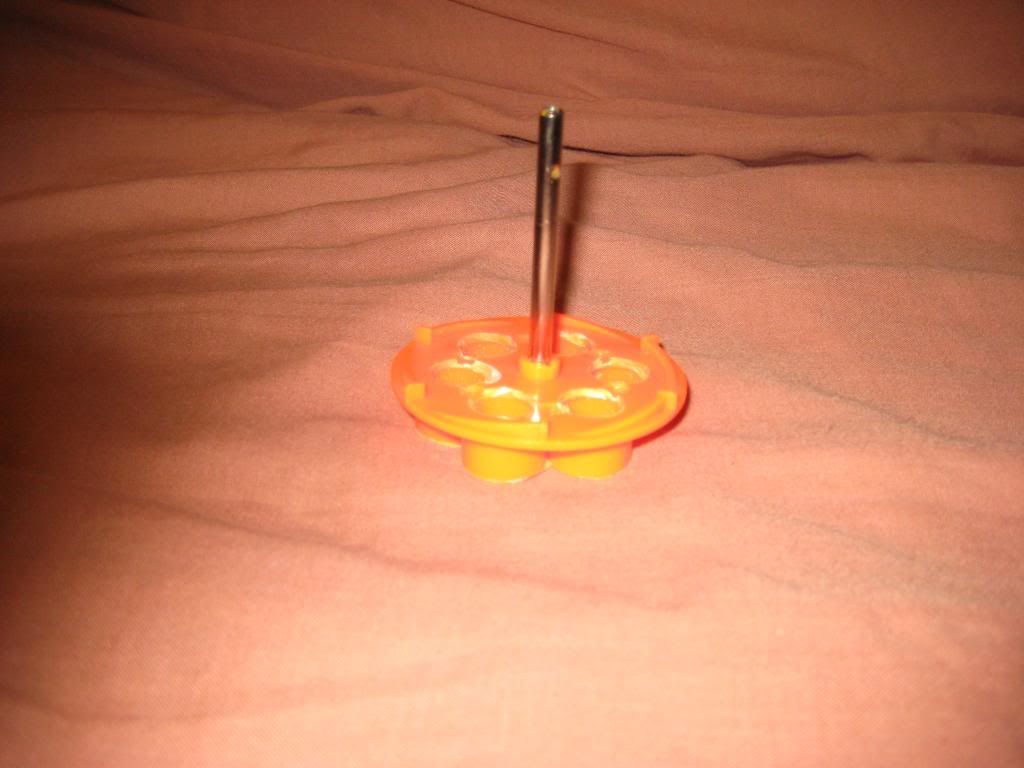
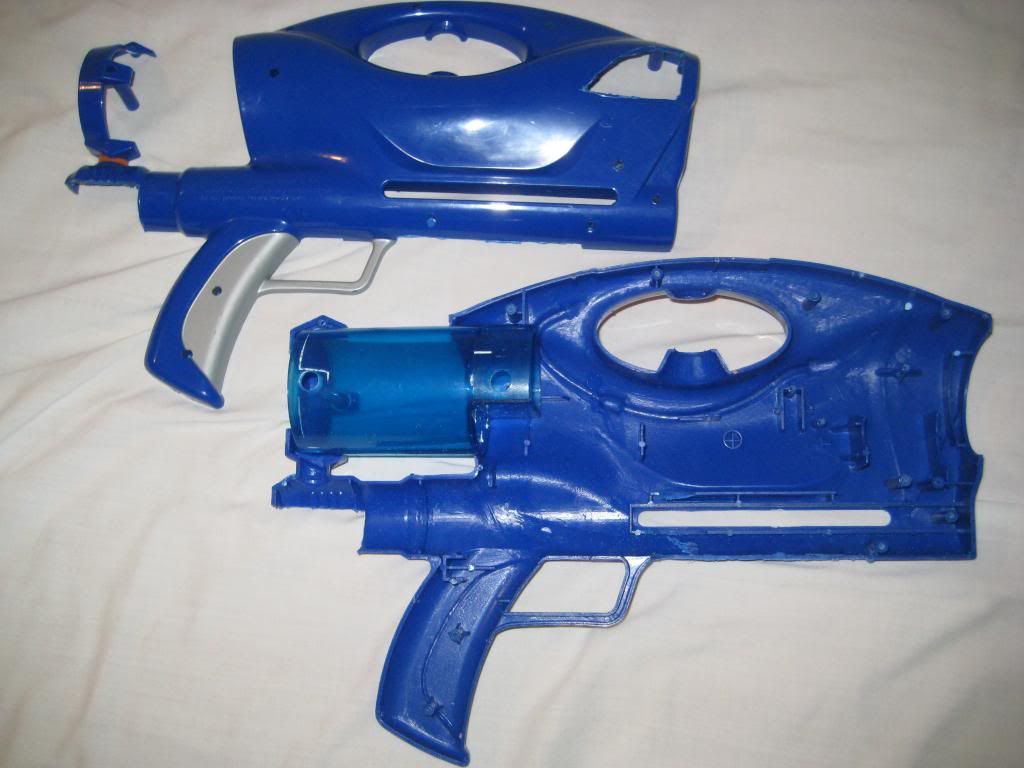
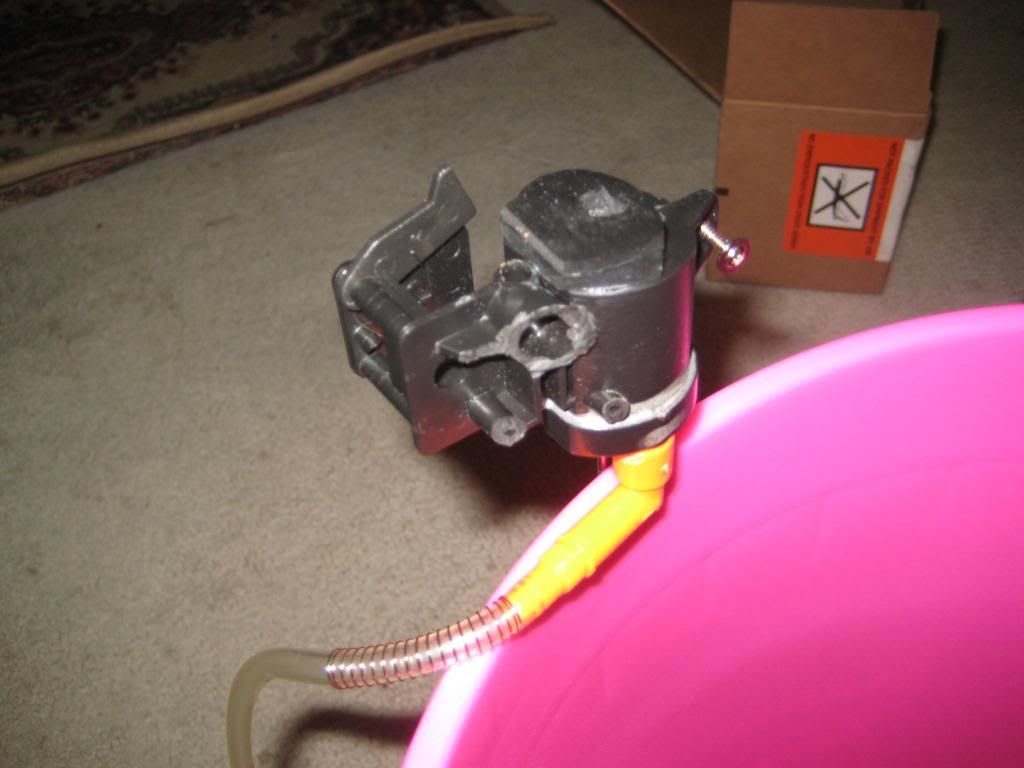
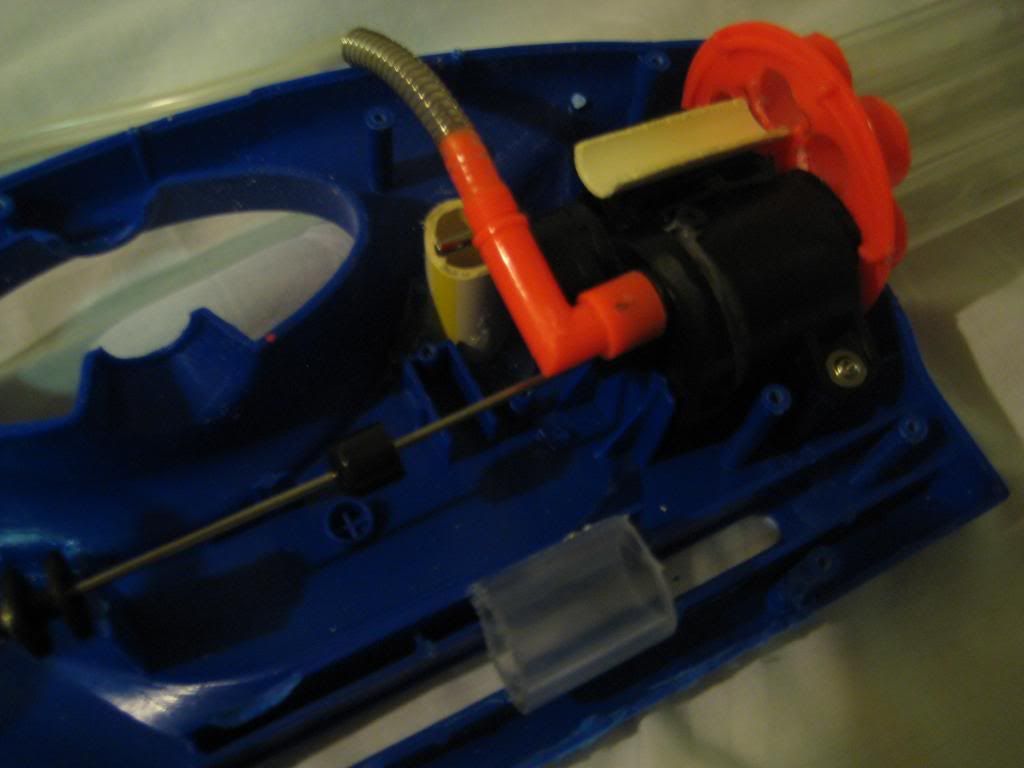
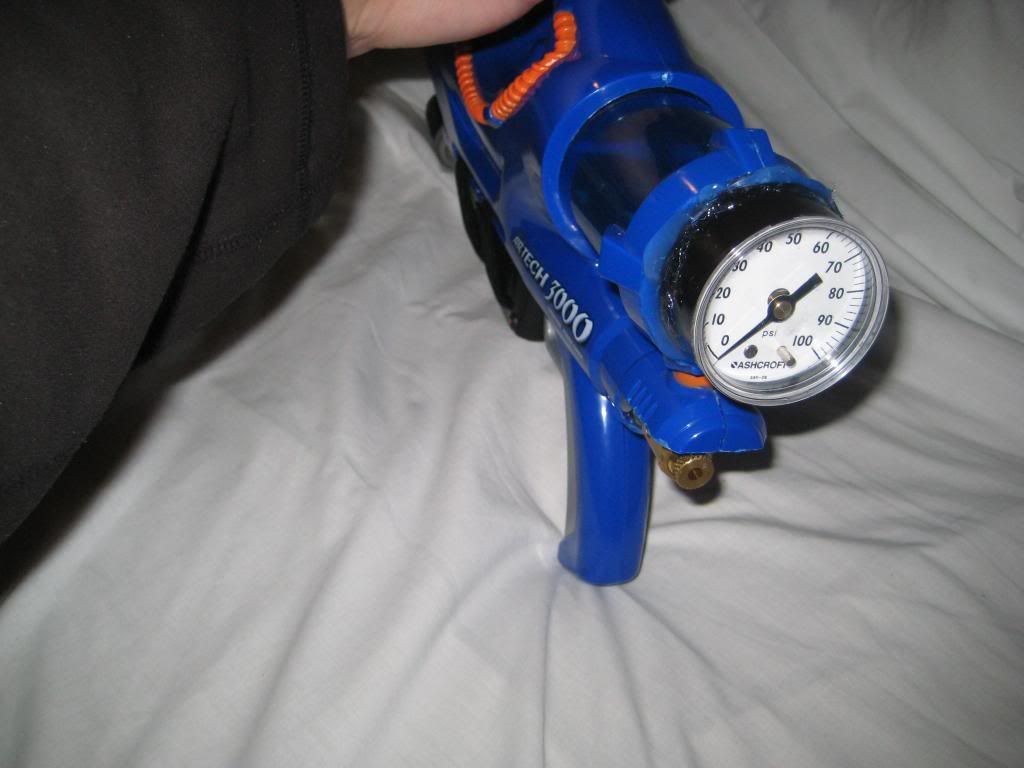
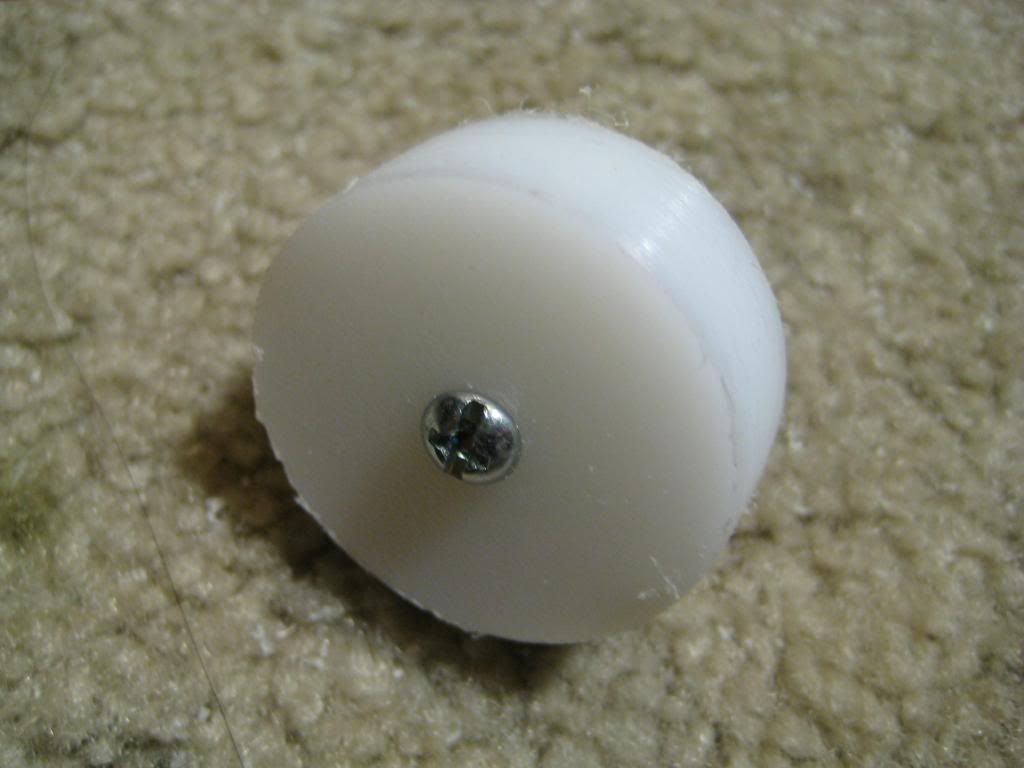
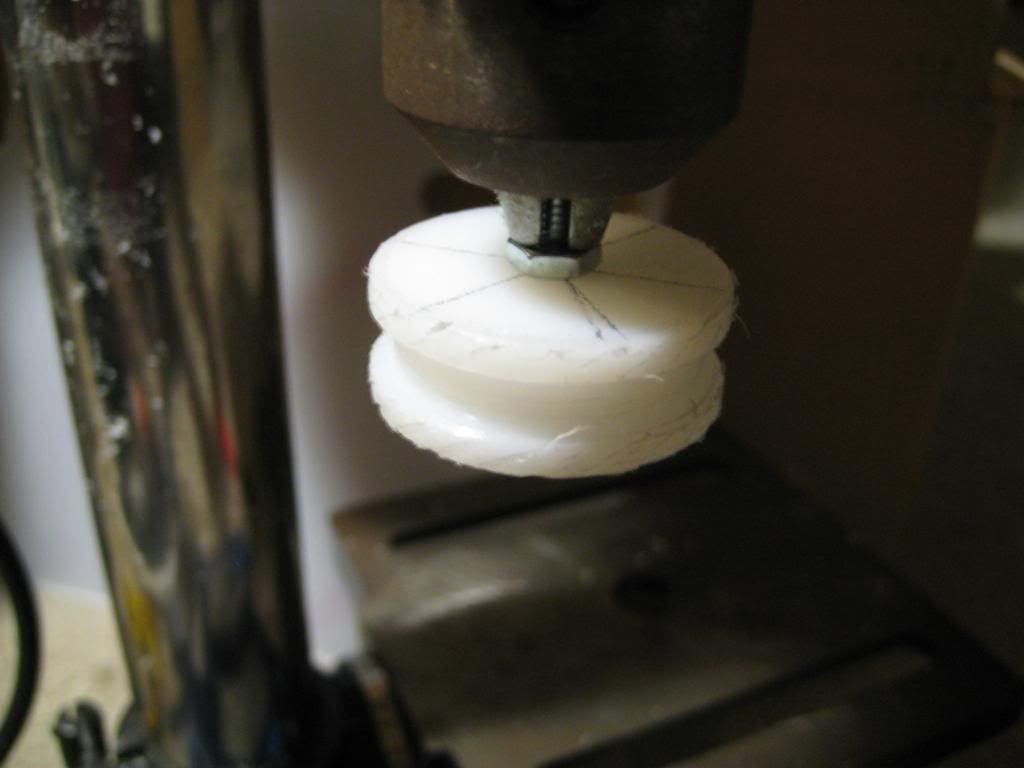
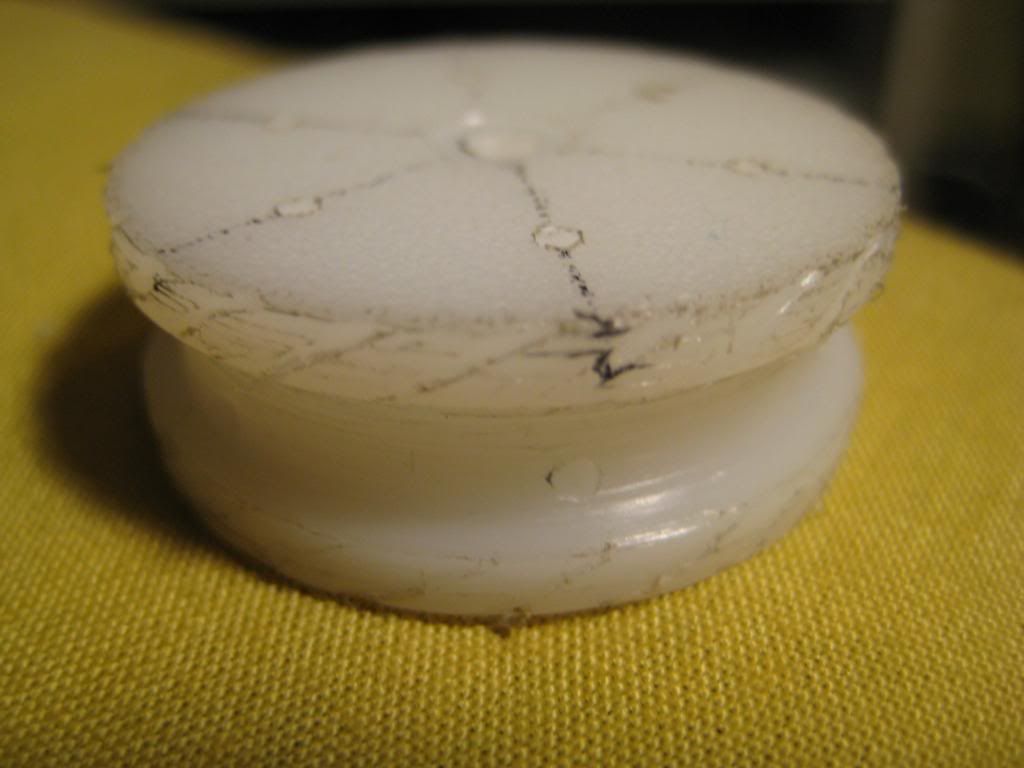
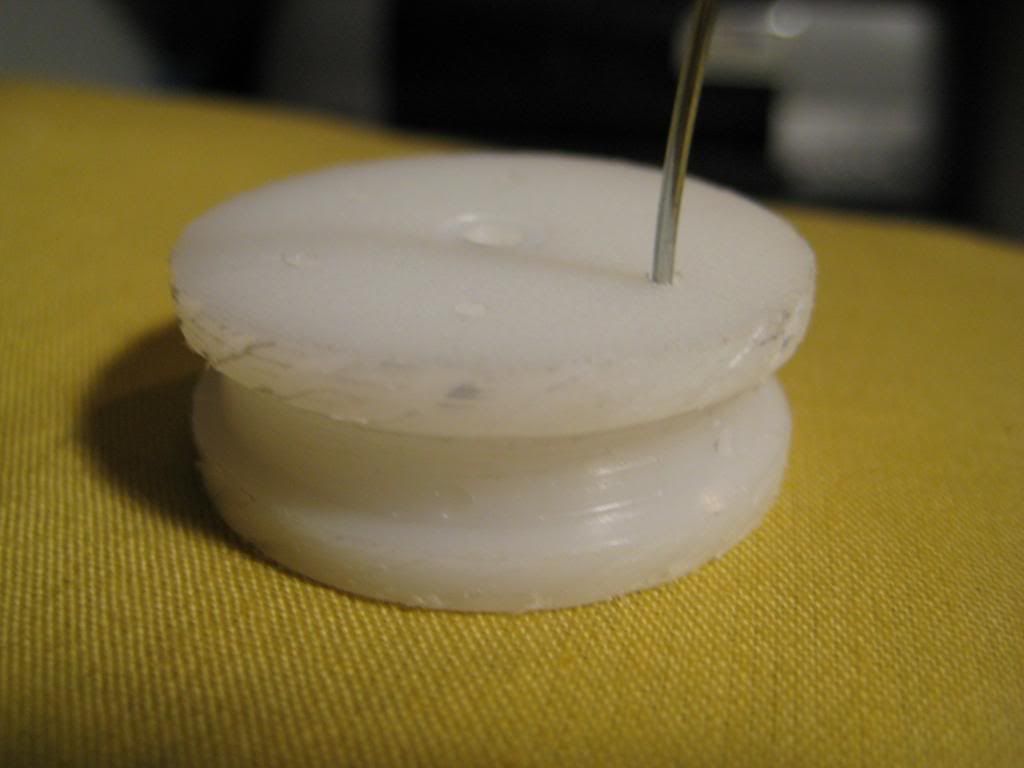
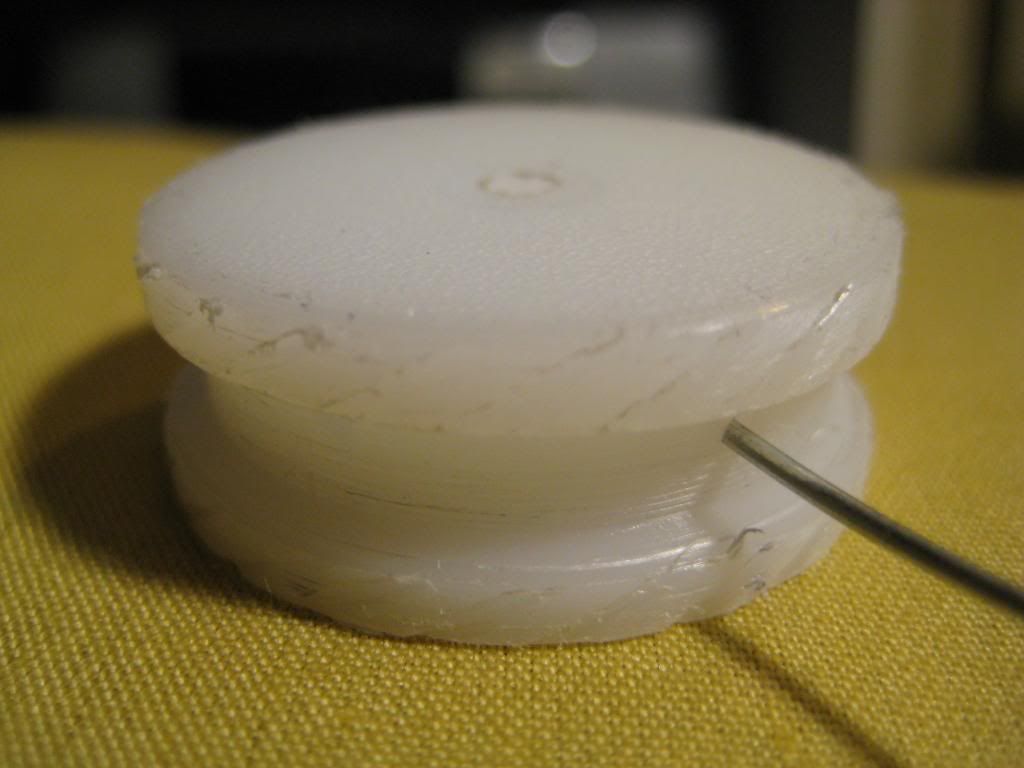
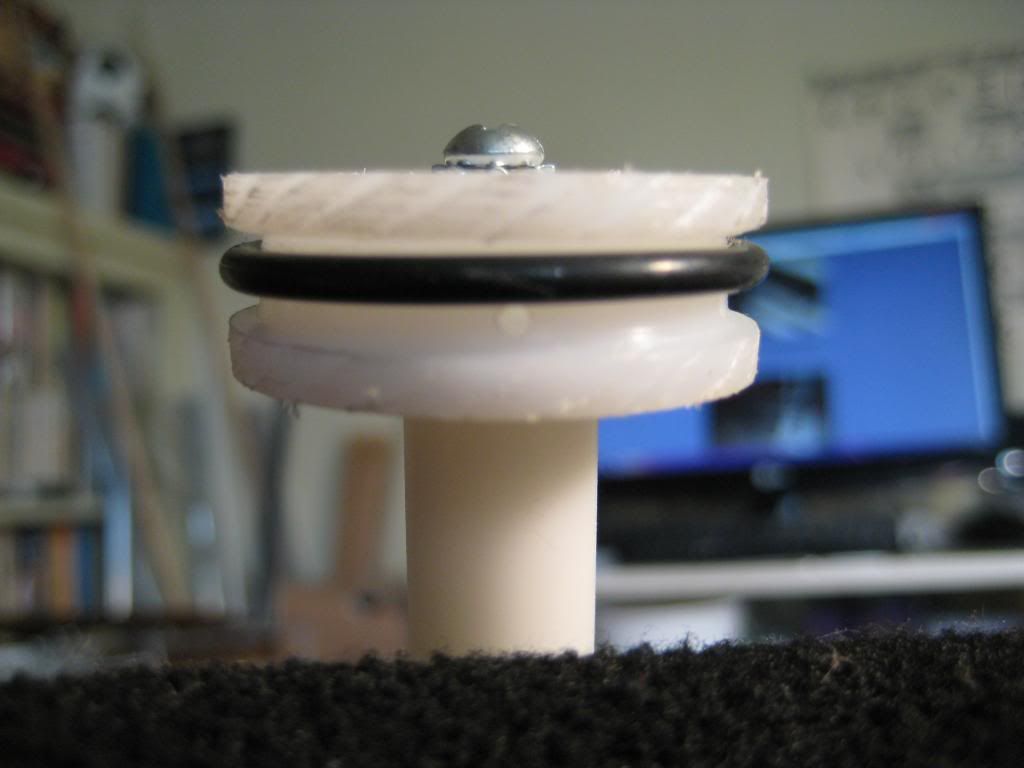
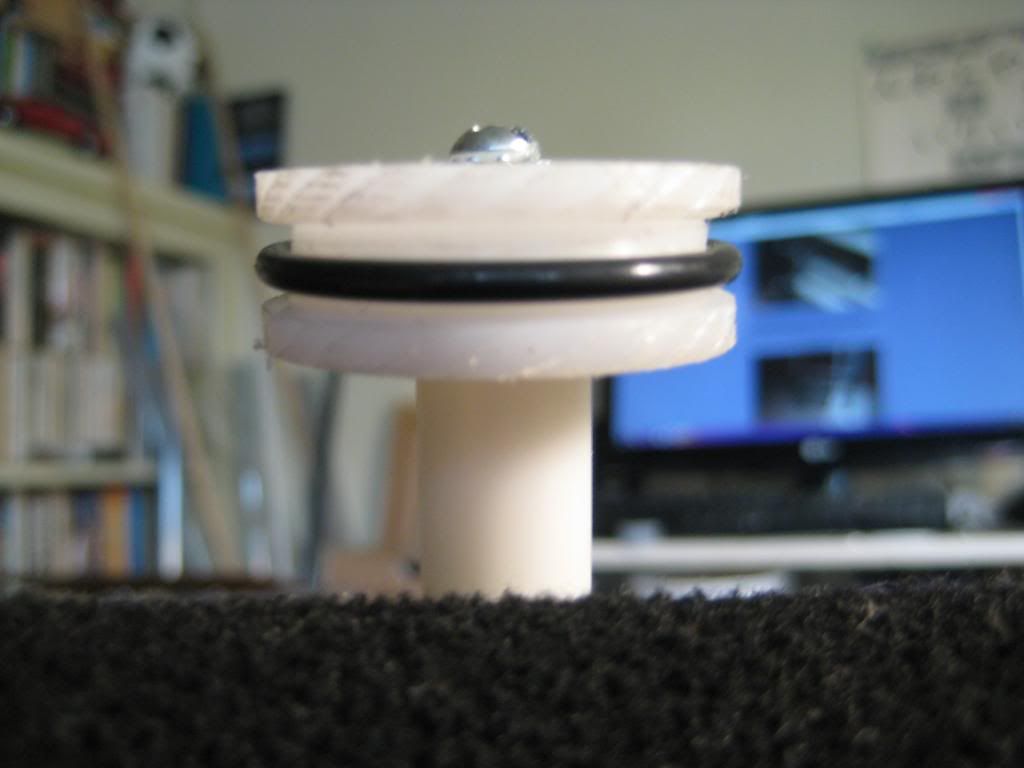
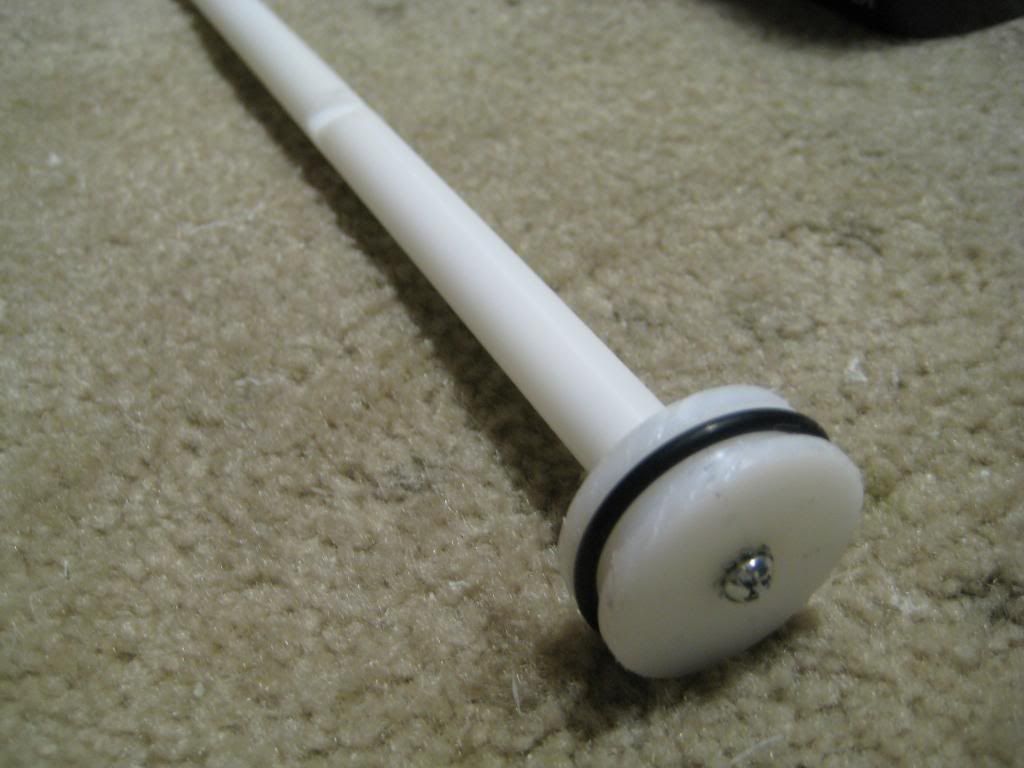
  • Plugged pump
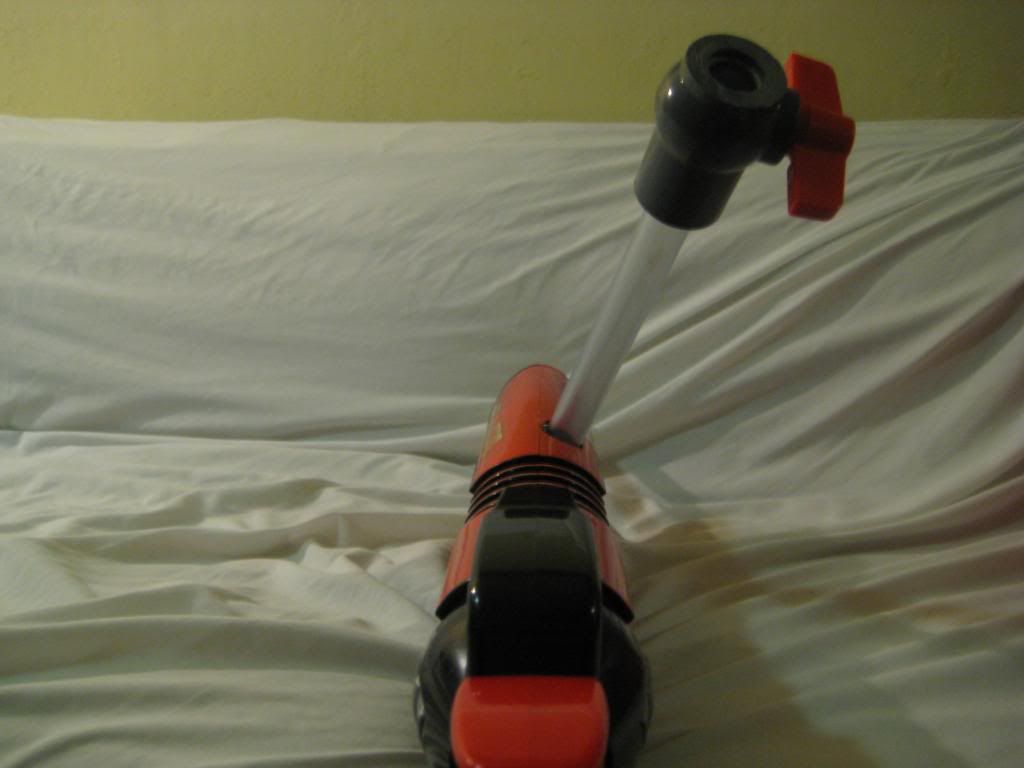
  • Skewed hopper for better visibility
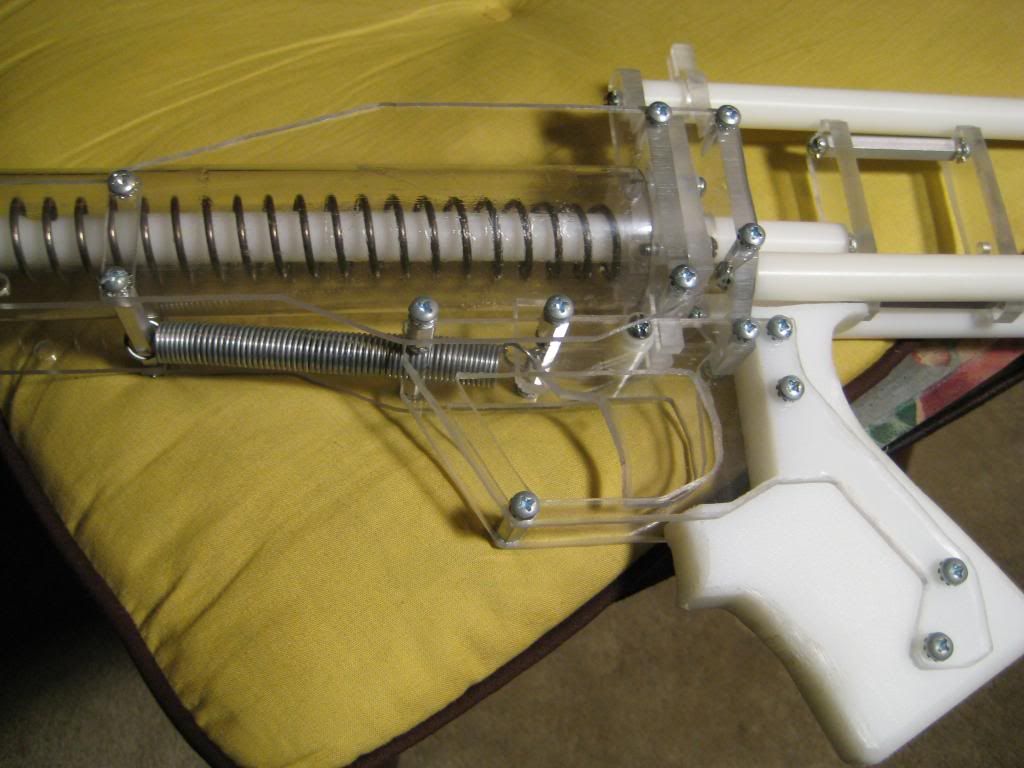
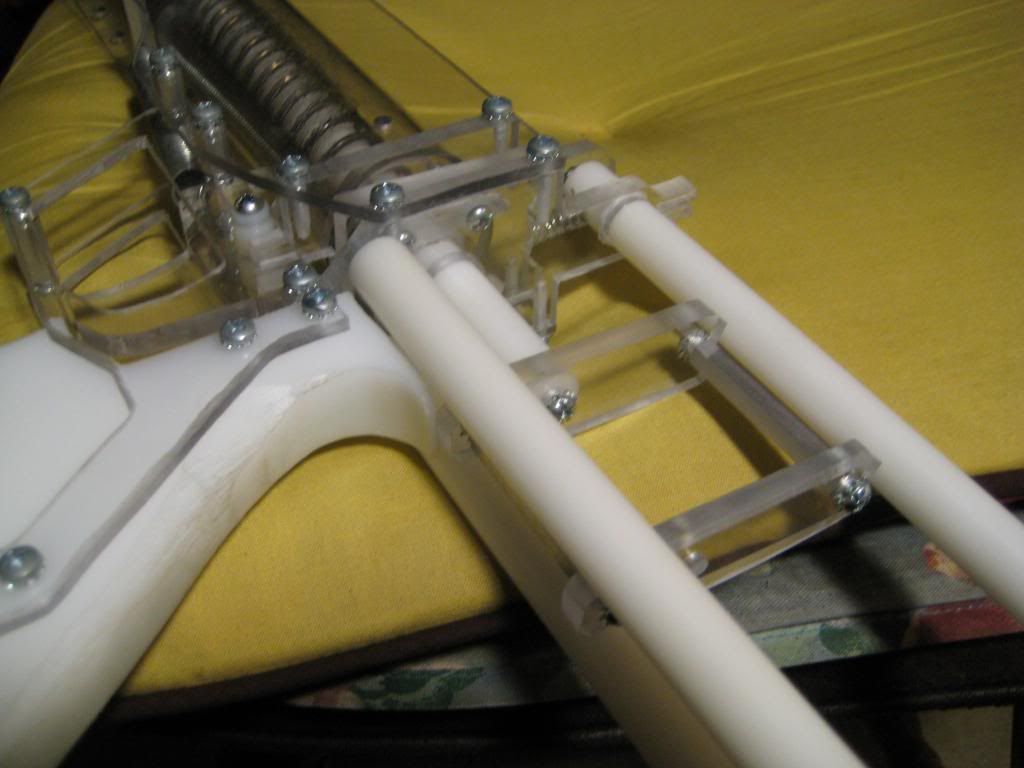
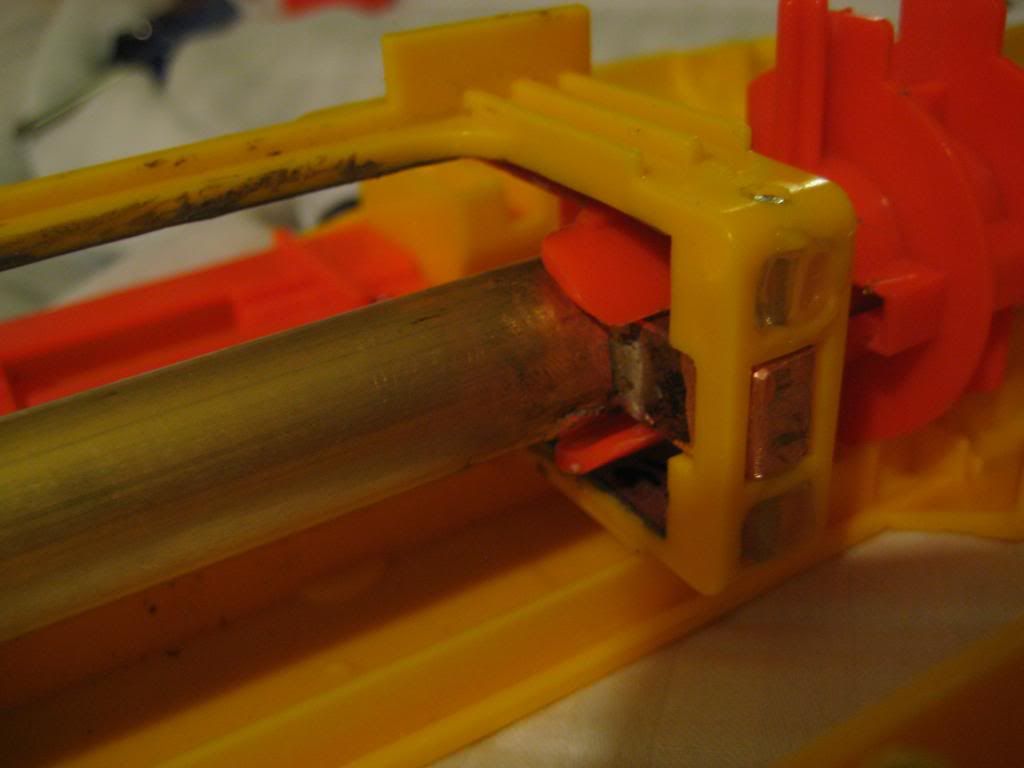
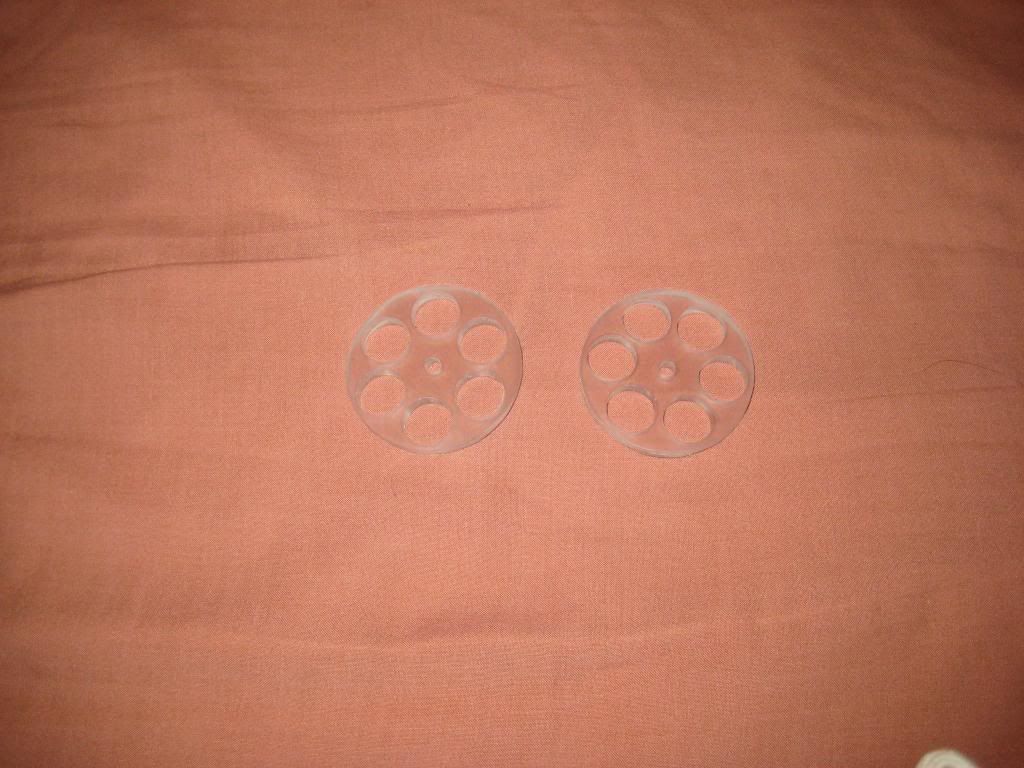
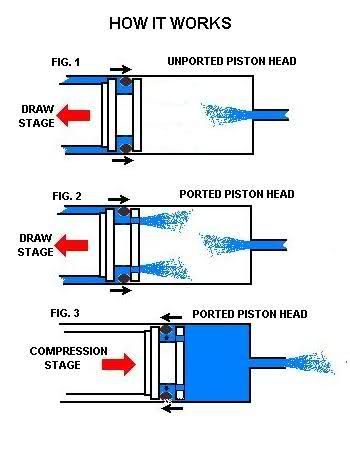
  • Only the wye is glued in place, allowing for interchangeable barrels and hoppers

Posted Image

Posted Image

Posted Image

Check out the full write-up at my blog: http://nerfbuff.blogspot.com

Cheers!
~T da B


#331359 Modification and Paintjob Pictures

Posted by T da B on 27 June 2013 - 11:44 PM in Modifications

I recently hit 10,000 views on my blog (a lot for me), so I decided to give away something special. I figured that it would be the perfect opportunity to try out my first paint job as well. Hell, if it ended up looking ugly at least it was getting sent off! I took a Tech Target and went a little crazy...

Posted Image

Posted Image

Posted Image

Posted Image

Posted Image

Posted Image

Posted Image

Posted Image

Posted Image

Posted Image

I used a combination of Dupli-color vinyl dye and Citadel Layer hand paints for the paint job. Internals are all homemade, aside from the trigger and trigger catch. Read the full write-up at my blog.
~T


#346467 Modification and Paintjob Pictures

Posted by T da B on 28 April 2015 - 10:30 PM in Modifications

Sup guys,

It's good to be browse these forums again after a long hiatus. I've shifted all my learning efforts over to the automotive world after putting a pause on my Nerf modding, but I forgot to share my old cubicle photos from work:

Posted Image

Posted Image

Posted Image

The mounts are all custom made from cardboard and T-shaped pushpins :D

For those that care about what my mods look like nowadays:

Posted Image

After wiring it up along with a new fuel pump and relay, I'll be throwing in a centrifugal supercharger--should be a fun learning experience, just like Nerf!

I"ll be back someday, my friends.
~T da B


#334438 Modification and Paintjob Pictures

Posted by T da B on 03 October 2013 - 01:45 AM in Modifications

Homemade Longshot shotgun grip. Simple, durable, and 100% clear!

Posted Image

Posted Image

Posted Image

It works. Read the write-up here.


#337944 Homemades Picture Thread

Posted by T da B on 01 April 2014 - 02:57 AM in Homemades

My first Plusbow! I call it the Ported Piston Plusbow, or PPP. For an explanation of the name, check out the plunger head.

Posted Image

Posted Image

Posted Image

Posted Image

Posted Image

My changes:
  • HDPE grip
  • Solvent welded front bushing
  • Longer screws for everything
  • Extension spring instead of ghetto rubber band
  • Ported Piston plunger head
  • Plunger padding
  • Smaller holes at the sideplate connection points

Velocity (max) measured with a 12'' slide breech and 1.25'' #6 slugs. Gonna try to Chrony with some other barrel setups and update with some Chrony pics.
~T


#341663 Homemades Picture Thread

Posted by T da B on 01 September 2014 - 04:01 PM in Homemades

Finished my first Bullpup recently and I'm super happy with the results. It's based off Drev's writeup but with a few changes:

  • Extension spring for better trigger feel
  • Extended shoulder stock
  • Simpler way to attach handle
  • HDPE handle instead of wood
  • Adjustable barrel spacer
  • Set screws
  • Clear everything!

Posted Image

Posted Image

Posted Image

Posted Image

Posted Image

Posted Image

Velocity was achieved with a 14'' barrel, 9-dart hopper, and 1.25'' slugs. You can read the full writeup here.

~T


#335558 Homemades Picture Thread

Posted by T da B on 20 November 2013 - 01:04 AM in Homemades

Finally finished my first homemade! It is a modified and shortened RainbowPump that shoots insanely hard. Here are some of the differences between mine and Ryan's original design:
  • 2'' shorter pump and plunger tube
  • 8 1/2'' [k26]
  • 1/4'' thick trigger
  • HDPE handle
  • Modified rear stock (no string stop)
Isn't she a beauty?
Posted Image

Posted Image

Posted Image

Posted Image

Posted Image

Posted Image

Posted Image

Read the full writeup here.


#325856 Question to all you modders

Posted by T da B on 26 January 2013 - 05:45 AM in General Nerf

I would like to see more electronics in blasters. Now that the cost of basic electronics is so low, why not incorporate some into blasters? Maybe an ammo counter, a range-finder, or how about some LEDs instead of a worthless laser sight?

Another thing I would love to see is foam obstacles, bunkers, and objects that can be placed in a Nerf battlefield.

I don't really care about bringing back any blasters from the past--Nerf should always be evolving!


#325715 BANO #4: Kicking off the season

Posted by T da B on 24 January 2013 - 03:48 PM in Nerf Wars

I'll see you guys there! I'll be selling Airtechs and other blasters as well.

~T da B


#326497 BANO #4: Kicking off the season

Posted by T da B on 07 February 2013 - 07:11 PM in Nerf Wars

Dammit--I was really looking forward to my first Nerf war, but now it's just a pipe dream again. HOTH--lead the charge, buddy!


#325736 BANO #4: Kicking off the season

Posted by T da B on 24 January 2013 - 07:37 PM in Nerf Wars

9th works for me.


#327409 Nitefinder plunger head substitute?

Posted by T da B on 27 February 2013 - 06:08 PM in General Nerf

The "washer sandwich" is nice because it is cheap, easy, and takes up very little overall length. Make sure to make your fender washer on top as small as possible--this will prevent the creation of a vacuum between the dart and plunger head if you load before you prime. In addition, make your lower fender washer as big as possible in order to prevent open-ended springs from hooking over the rubber washer and also to allow the rubber washer to seal well on the forward stroke. My plunger heads are usually as follows (from top to bottom): 6-32 bolt, #6 washer (metal or neoprene), small fender washer, neoprene washer, biggest possible fender washer.

P.S. If your open-ended spring keeps hooking over the neoprene washer, you may need to add a "spring spacer," which is a piece of something that fits over the plunger rod and under the spring to keep it centered near the plunger head.


#329678 Solving the #1 Angel Breech Problem

Posted by T da B on 11 May 2013 - 06:27 PM in Modifications

It surprises me a bit, but I've encountered some push back and fear when I have suggested soldering in some of the mods I've done. I had a nut soldered to a brass breech in front of a pas. As the pas was primed an attached bar would also open the breech to accept a chambered round from a clip and then close it again as the handle was returned to the forward position. I eventually abandoned it due to clip stability issues, but the breech - and the soldered attachment was solid.

The only worry I see is that the smaller surface area might tend to bend or distort the brass tube as it's placed under load of the [k26]. It's still pretty early on, but after you get a few hundred rounds through it would you mind posting an update about durability? That really does look like a good long term option though. And like you said - that soldered joint is stronger than the materials it's joined to.

Another thought - copper is insanely expensive. Are brass square tubes of that size available? Perhaps a square tube can be soldered in place and then back filled with epoxy or epoxy putty? There might be some loss to durability, but it would be cheaper. A solid steel bar stock might also be more economical.


I see what you're saying about the brass distorting--I highly doubt it will bend, but I'll post an update after warring with the LS.

As far as replacements for copper, I was unable to find anything cheaper on Mcmaster than the rod I used. Initially I wanted to just stick to brass, but K&S only makes hollow brass tubing in the desired size and I didn't want to risk the integrity of the nub. Solid steel would definitely work, but would be much harder to machine.


#329691 Solving the #1 Angel Breech Problem

Posted by T da B on 11 May 2013 - 09:08 PM in Modifications

@koree: Good point--I will make note of this in my write-up. I thought #6 slugs were around 1 gram but maybe not.

@Kronos: Correct. Electrical solder for wires usually has a rosin core, meaning the flux is built into the solder itself. For this application you want the flux to be separate in order to designate the area you want the solder to stick to.


#329791 Solving the #1 Angel Breech Problem

Posted by T da B on 14 May 2013 - 12:07 AM in Modifications

Which isn't soldering.
Look at all the filler metals listed, and then look at solder. It's made of lead/tin, usually. He says he's using silver solder, which usually contains maybe 3% silver.

Solder requires more of a mechanical connection/joint for it to be anything close to trustworthy for putting pressure on.


From the product description of the silver solder I used:
"Five times stronger than ordinary solder with tensile strength of 10,000-25,000 pounds per square inch. Will stretch under high pressure, but not break under constant stress and is vibration-resistant."

For comparison, J.B. Weld has a tensile strength of 3960 psi and polycarbonate has a tensile strength of 8,000 to 16,000 psi.

~T


#329806 Solving the #1 Angel Breech Problem

Posted by T da B on 14 May 2013 - 02:20 PM in Modifications

What's the composition? I don't deny that there are legit hard solders out there, but it's important note exactly what you used if others are to use this as a guide.


Chemical Composition:
Sn - 94%
Ag - 6%

Solidus:
430°F (221°C)

Liquidus:
535°F (279°C)

Recommended Joint Clearance:
0.002"-0.007"

NSF:
51

ASTM:
B32 Grade Sn95

I went the soft solder route, since it was incredibly cheap. This type of solder is mainly used for high temperature, high reliability interconnect applications, and is more than enough for a [k26] as indicated by the tensile strength. Hard solder isn't the only solder that can handle a lot of stress!

~T


#329670 Solving the #1 Angel Breech Problem

Posted by T da B on 11 May 2013 - 05:34 PM in Modifications

Posted Image

Sup lady and gentlemen,

This little orange piece has been the bane of my existence since I first decided to make an Angel Breech for my Longshot. For those of you that don't know, this little orange guy is the attachment point between the bolt sled and breech--the #1 point of failure. Pretty much every brass breech mod that I've read calls for gluing this piece to your brass breech. I have tried many types of epoxy, including the one from the original breech created by ForsakenAngel24, but none of them have had enough strength to withstand my [k26] spring. In typical T da B fashion, I set out to solve this annoyance once and for all. This time, it involves fire!

This mod was actually influenced by the RC car modding community. They use K&S brass tubing to make their own homemade front bumpers, Nerf bars (hehe), etc. I did my research on soldering, brazing, and welding in addition to watching Youtube clips of people joining metals to prepare for this mod. Here is what you guys will be needing to make a bond that can withstand the [k26]:
Posted Image

Top left: Butane torch that can produce a flame reaching 2500 degrees Fahrenheit! This will be the heat source used to prepare the metals for joining. I went with the Blazer Stingray GB4001 and I'm very pleased with it.

Top center: Stay-Brite Silver Solder that will be used to fill in the spaces between the two metals to be joined. It is composed of a few metals, and the silver allows the joint to be stronger than the actual metals themselves!

Top right: Stay-Clean Liquid Flux--really poisonous stuff. However, it is extremely necessary for soldering since it cleans the surfaces of all oxides and causes the solder to stick.

Bottom: 3/8'' x 3/8'' x 12'' copper rod (89275K461)

You will also need a Dremel with a cylindrical grinding bit, a drill press, and cutting oil for this job.

Write-up:
Cut a 19/32'' length piece off of your square copper rod and grind down one end of it with a cylindrical grinding bit on the Dremel.
Posted Image

Bust out the drill press and drill a 1/8'' hole 1/8'' from the flat side of the piece. Use cutting oil to lubricate the drill bit and prevent overheating. You should also grind down the top of the nub at this point to fit the bolt sled, but I forgot and did it later.
Posted Image

Now build yourself some sort of jig to hold everything in place. I also ended up wrapping a rag soaked in water around the end with the plunger tube to prevent melting. Ideally you would do this before gluing on the bottom of the old breech. Make some marks to designate where you want the nub to go and then rough up both surfaces and clean them with rubbing alcohol. Apply flux to the bottom of the copper nub and carefully put it into place. If you ground it down properly, it won't fall off. Now hit it with the flame from all sides for a minute, then touch the solder to the base of the nub and solder should flow into place due to "capillary action."
Posted Image

Finished product--not the prettiest but it gets the job done! Clean up any solder with the Dremel.
Posted Image

Here are some glamor shots with the new nub in place:
Posted Image

Posted Image

Posted Image

So there you have it! The greatest problem with the Angel Breech has finally been solved. The fact is, metal is just too slippery to be held with epoxy, even after roughing the bejeezus out of it. After soldering things into place, my breech will never be breaking in that spot ever again. A silver solder joint is actually stronger than the metals you are joining! Pretty legit, eh? If you guys want to read the full write-up for my Longshot, check it out at my blog. I modified SgNerf's design and managed to squeeze 300 fps out of it!

I hope you guys enjoyed this original write-up.
~T da B


#329674 Solving the #1 Angel Breech Problem

Posted by T da B on 11 May 2013 - 05:55 PM in Modifications

This is a pretty cool mod. Good job. I know of a few other users that did a metal welded nub, though no one actually took the time to do a write up.

However I doubt your claims of 300fps. I'd like to know exactly what you did. I know it is possible using certain setups, none of which would be war usable.


Thanks for the feedback! Check out the link to my blog to see exactly what I did.


#323705 Airtech 3000 Bling Internals

Posted by T da B on 18 November 2012 - 07:22 PM in Modifications

@SonReece: Modularity was a big thing for this project--the push-to-connect fittings make it extremely easy to disconnect and reconnect things. I only wish I figured out a more elegant way to attach the psi gauge and make it easily detachable! In any case, I'm glad to have been an inspiration.

@Elmo: Mod Man's foam is very good foam, one of the best I've used yet. It's very dense, but not as dense as Swift foam, and has a tight fit in my polyethylene tubing as well as 17/32'' brass and Flowguard Gold CPVC. It has a snug fit in 9/16'' brass. Combined with my green felt tips from Mcmaster, I'm ready for some yuletide Nerfing :)

@SgNerf: Thanks for the great feedback--it really means a lot coming from one of my modding heroes! I can't thank you enough for your help--I know I bombarded your blog with about a million questions about your TP3K. Right now I'm working on your brass slide breech and brass breeched SMG Stampede, so prepare for more questions from me in the near future!


In the future, I might do a budget version of this write-up, using barbed fittings rather than push-to-connect and trimming down some of the higher cost components.

~T


#323565 Airtech 3000 Bling Internals

Posted by T da B on 14 November 2012 - 02:21 PM in Modifications

Good call on the tank reinforcement, guys! I will be doing that from now and on.

@Zorn: Yup, the gauge and pop-safety valve are there for safety and monitoring. You can count on a hard tank coming in the future :)

~T


#323549 Airtech 3000 Bling Internals

Posted by T da B on 14 November 2012 - 02:46 AM in Modifications

@Mully: Thanks a lot for the great feedback! It really motivates me to do great work.

@quertyman: It takes me 3 easy pumps to reach 60 psi, since my pump is dual action. Unfortunately, I don't have a tape measure long enough to measure the range!

@therealnerfjunkies: Haha you're right--it's definitely not war legal! I underwent this project to try and mod an air blaster to the max, and I think I've succeeded :) Thanks for the feedback!

Another thing I didn't mention is that I'm using Mod Man's red FBR. It has a very tight fit in my polyethylene tubing, yet shoots much harder than my thinner grey FBR. Anybody know why? This seems to disprove the hypothesis that air guns like a looser dart fit.

~T


#323544 Airtech 3000 Bling Internals

Posted by T da B on 13 November 2012 - 11:46 PM in Modifications

Background:
This will be my first proper write-up! Let me start out by saying this mod is not for those on a tight budget. Should you choose to accept this quest, your components are going to run you $100+. You might think this is a little over-the-top, but you'll put those feelings aside when you see how well it performs. This will be the powerful thing that I have ever created, and it's all thanks to getting inspired by this writeup from SGNerf! I got the components from SGNerf, but I followed Ryan Mc#'s writeup for the modding. Without further adieu, let's create a monster!

Required Materials:
Posted Image

Clockwise from top left:

  • 3846K431 - Multipurpose Gauge, Steel Case, 2" Dial, 1/8 NPT Center Back, 0-100 PSI connected to 5779K129 - Nylon and Nickel-Plated Brass Tube Fitting, Adapter for 1/4" Tube OD X 1/8" NPT Female Pipe
  • 1096T2 - Nylon/Nickel-Plated Brass Check Valve with Fitting, 1/4" Tube OD X 1/4" Tube OD, Buna-N Seal
  • 50265K2 - Multirange Brass Pop-Safety Valve, 1/4 NPT Male, 25-200 PSI connected to
  • 5779K131 - Nylon and Nickel-Plated Brass Tube Fitting, Adapter for 1/4" Tube OD X 1/4" NPT Female Pipe
  • 2x 5779K34 - Nylon Tee for 1/4'' Tube OD
  • Schrader to 1/4'' Push-to-Connect adapter from This ebay listing (might be gone)
  • Topeak Mini G dual action bike pump from http://bikes.oversto...ouseonline.com/
  • 5181K231 - Crack-Resistant Polyethylene Tubing, .170" ID, 1/4" OD, .04" Wall Thickness, Red, 50' L

Posted Image

For my barrel material, I went with 2044T43 - Cut-to-Length Round Plastic Tube, .53" Inside Diameter, 4' Length. This tubing is made of polyethylene and is WAY cheaper than Mcmaster's PETG tubing. It is moderately strong when all six barrels are glued to a couple of turret spacers. I will be using 13'' barrels for this blaster.

Posted Image

This is a pair of barrel spacers made by Venom213 of Nerfhaven. His sales page for these is here. They serve to keep the barrels perfectly aligned as well as adding structural integrity to the entire turret. I went with 19/32'' holes to fit the Mcmaster polyethylene tubing perfectly.

Posted Image

On the left is 1/8'' oil-resistant Buna-N rubber, Mcmaster part # 8635K164. This is what I use for my air tank to turret seals these days. It works magnificently! On the right is some Vinyl (PVC) tubing that I got at Orchard Supply Hardware. I decided that the 25 feet of polyethylene tubing I bought is too rigid. Yeah, I know--I'm an idiot for buying 25 feet of it. The problem with this project is that you have to cram a lot of components into a relatively small space. Inside the AT3K shell a lot of the space is taken up by the trigger, firing pin, and air tank. I needed flexible tubing to do the job, so that's the explanation for that one.

Write-up:
  • Start by taking the blaster apart. Don't worry--there aren't any glued on pieces that require boiling water on this blaster! However, there are very small nubs along the rim of the shell that fit into very small holes in the other half. If you bend the shell too much getting the two halves apart, you risk snapping off some if these nubs. I don't think they're essential, since there are enough screws to hold everything together.
  • Remove the turret by unscrewing the screw at the rear end of the rotation mechanism. When disassembled, it should look like this:
    Posted Image
  • Drill 1/2'' holes into the back of the turret and chop down the barrels. It should look like this:
    Posted Image
  • Cut 6 pieces of polyethylene tubing (or whatever barrel material you use) into equal lengths. I went with 13'' barrels--the rationale behind this was that a proper Supermaxx 1500 takes 12'' barrels and the AT3K has a bigger air tank. Insert your barrels into the orange turret; they should slide in perfectly with no dremeling! Then slide your barrel spacers over the barrels into the spots you want them to occupy. Move them slightly, then mark a dot with a sharpie on each barrel at equal lengths away from the spacer. This will mark the spot where you will glue. Slide the spacers back into position over the black dots. Now you will go one at a time--pulling a barrel out slightly, applying glue at the base and at your black dots, then twisting it into position. When complete, it should look like this:
    Posted Image
  • Now it's time to dremel down the shells. I dremeled behind the handle--this opening will house my pop-safety valve. Cut a hole in the top half of the shell for rear loading. I agree with Ryan McNumbers's statement that any air blaster that isn't rear loading sucks to use. You will also need to dremel a slot on both sides of the shell in front of the trigger guard to house the bike pump. Dremel out a hole in the back of the blaster for the PSI gauge--I basically just got rid of the "bump" that stick out of the rear of the blaster. It should look like this:
    Posted Image
  • Now it's time to prepare the air tank. Take everything out except the air tank unit itself. The rotation mechanism will be discarded for this mod guide, since the Topeak bike pump isn't compatible with the rotation mech. I used two pieces of 1/8'' Oil-resistant Buna-N rubber and epoxied them onto the air outlet. This will allow for a perfect seal with the turret! After the epoxy cures, I am going to hot glue a "half-pipe" piece of CPVC onto the side of the air tank to act as a dart-loading guide. Your air tank should look like this:
    Posted Image
  • Now it's time to reassemble the turret. Lube up the rubber and the entire back of the turret so you can minimize the friction between the plastic and rubber. I also sanded down the back of the turret with fine sandpaper to eliminate any sharp edges that might file down the rubber. I took a piece of CPVC and cut it in half length-wise to act as sort of a "dart-loading guide." Hot glue it to the air tank. You'll notice that if you rotate the turret, the back of the metal turret shaft spins freely and gets kind of stuck. You will need to glue something to either the air tank or the inside of the blaster's shell to keep the rotation mech in place. I used a piece of CPVC. To secure my bike pump to the shell, I will be using velcro straps. I took a piece of clear PVC and glued it near the bottom of the shell to keep my front velcro strap from sliding back. After that, it's finally time to screw down the air tank assembly! Here's what everything should look like:
    Posted Image
  • I can't believe it's finally time for the bling! Time to turn the AT3K into a pneumatic uber blaster that would make any pimp proud. The trick is to get everything to fit without interfering with the trigger. Years of Tetris have made me an expert as saving space, so study the picture carefully. I decided to attach the PSI gauge with hot glue instead of brackets--I think it looks a lot cleaner this way. Also notice the piece of 3/4'' PVC behind the trigger--this was essential in preventing the trigger from riding upwards. If you remove the stock pump, there is nothing to guide the trigger smoothly and straight backwards. I hot glued a cylinder of 3/4'' PVC onto a small piece of 3/4'' PVC as a riser. Hot glue is good because you get infinite tries--it took me quite a few to get my alignment perfect. The pop-safety valve is hot glued into place as well. I glued my firing pin spring because I didn't have any small, super-strong springs that could handle 70 psi, which is what I intend to operate this blaster at. Tetris FTW!
    Posted Image
  • Finally, it's almost that time. The moment that took so much blood, sweat, and tears to reach--victory is near! It's time to put together both halves of the shell--I had to dremel down a little nub on the top half of the shell to get things to sit correctly. I used a couple strips of Velcro to hold my air tank snug against the shell. you can see the piece of clear PVC that serves as a Velcro spacer in the first picture. The gap I dremeled fit the Topeak pump almost perfectly! I hot glued the PSI gauge to the back of the shell as the final step and it seems to be holding pretty well. Isn't she beautiful? I'll have fps data coming soon!
    Posted Image
    Posted Image

Performance:
Fellas, the Chrony results are in! The numbers are, as they should be, staggering! 2 pumps gets me slightly higher that 200 feet per second, and 3 pumps got me up to a maximum velocity of 341.5 feet per second! That was at 62 psi with #6 slug darts. This AT3K is officially banned in American paintball arenas :lol:

Cheers!

~T da B


#334833 Question about u-cup seals

Posted by T da B on 16 October 2013 - 03:14 AM in Modifications

I have not tried it, but here's my experience: I tried the 1 1/2'' OD U-cup in 1 1/2'' PVC (~1.6'' ID) and the difference of .1'' was enough to make the U-cup require tweaking to seal properly. The K51 U-cup has a 3/4'' (.75'') OD, and we're trying to fit it into a 7/8'' (.875'') ID. In this case: .875'' - .75'' = .125'' > .1'' so I'm pretty confident it will be too small. Basically, the ID of your plunger tube has to be barely bigger than the OD of the U-cup--I'd say around 1/16''. I came to this number by measuring how far the lip of the U-cup juts out from the Mcmaster OD. In this case it's a little more than 1/32''. There's definitely a lot less wiggle room than a washer sandwich, and I've found that none of the sizes are really compatible with any of our commonly used pipes :(


#334818 Question about u-cup seals

Posted by T da B on 15 October 2013 - 03:15 PM in Modifications

I fear you may be screwed, Gregory. Assuming that you're using 1'' OD tubing with a 1/16'' wall, 9691K52 and 9691K53 will be too fat and 9691K51 will be too small.

~T


#333062 Stampede voltage upgrade issue

Posted by T da B on 15 August 2013 - 02:34 AM in Modifications

When you add those springs, you end up putting a tremendous amount of friction on the plunger tube from the white piece. I suspect what's happening in your situation is that the friction from the white piece is slowing down the plunger tube from retracting fast enough, failing to reset the firing cycle in time. Does the plunger retract at all after the first shot? If not, the plunger is not returning fast enough. Lube always helps as well.

Other things to check:
1. Trigger catch activator spring
2. Make sure black return spring isn't caught somewhere
3. Make sure the breech isn't getting stuck in the receiver (caused my brass breeched Stampede to bump fire)
4. If you can hear the gears spinning, but the plunger isn't being pulled then your gearbox may be F-ed in the A
5. Make sure the trigger catch is in the right way


#325301 AT3K help

Posted by T da B on 14 January 2013 - 02:14 PM in Modifications

Like DICE said, you are going to need a check valve connected right after your pump. Nerf pump housings have a built-in check valve, so if you replace the pump you will need to provide your own check valve. Also, each pump has its own max psi rating, so make sure you aren't exceeding it. If it is just a leak that needs to be patched, the other Nerfers have plenty of good suggestions.

~T da B


#325400 AT3K help

Posted by T da B on 17 January 2013 - 03:10 AM in Modifications

Hmmm, I mixed it enough I know. And I didn't crack it. What its standard procedure for vinyl tubing. And wouldn't pvc glue not adhere to the nylon?


PVC cement adheres PVC to PVC. I have tried it on other plastics and it simply doesn't work, most likely because the proper chemical reactions aren't taking place. Use something designed for general plastics. From my experience, JB Weld is not the greatest adhesive for plastic to plastic or things that flex.


#337992 The Ported Piston plunger head

Posted by T da B on 02 April 2014 - 03:02 PM in Homemades

You invented this independently. That's NOT a bad thing. It just means you could improve your powers of observation.


Thanks for the feedback, Just Smug Bob. So Nerf ports their plunger heads. That's wonderful--if you actually use stock plunger heads. What separates this design from anything Nerf has ever put out is the fact that multiple ports along the perimeter expand the seal in all directions while firing.


#338066 The Ported Piston plunger head

Posted by T da B on 05 April 2014 - 11:54 PM in Homemades

Nice! Glad to see it's working well for you, too.


#337960 The Ported Piston plunger head

Posted by T da B on 01 April 2014 - 01:56 PM in Homemades

I've never seen a Nerf gun ported in this manner. I've seen plunger heads with a hole from top to bottom (Stampede) and plunger tubes with holes or slits (Longshot), but those designs all sacrifice power on the forward stroke to eliminate vacuum loading. I'd be very surprised if Nerf went through the trouble of making a top-to-side ported plunger head.


#337942 The Ported Piston plunger head

Posted by T da B on 01 April 2014 - 01:56 AM in Homemades

Hello lady and gentlemen,

After finally getting around to thoroughly testing this prototype, I'm very excited to present you all with some dope new technology that you may not have seen before! The idea is not mine, but I'm "porting" it over from our sister sport--Airsoft! First of all, let's quickly go over the advantages and disadvantages of regular old O-ring plunger heads:

Advantages:

  • Incredibly cheap
  • Take up very little real estate
  • Easy to maintain
  • Long-term reliability
  • Low friction

Disadvantages:

  • Sealed breeches don't allow air into the plunger (vacuum loading)
  • More machining required
  • Tight tolerances to get a working plunger head

The Ported Piston, or PP is a modified O-ring plunger head that eliminates the first disadvantage off the list. Here is a picture to illustrate:
pp_zpsffebf996.jpg
Of course, you have to imagine a dart plugging up the right side of each plunger to understand the real benefits!

Writeup:
For this write-up, I'm building a plunger head for 1 1/2'' OD polycarbonate tubing out of 1/2'' HDPE (cutting board). Start by cutting out a disc of HDPE with a diameter about equal to the ID of your tubing. Mark the center and draw 3 lines through the middle (or more if you want more than 6 ports). Try to keep the lines equidistant from each other.
IMG_2396_zpsf212013b.jpg

Drill a 1/8'' hole through the center and tighten on a 1 1/2'' 6-32 bolt. Chuck in it in the drill press (if you don't have the luxury of a lathe) and file/Dremel it down until it slides into your tubing nicely:
IMG_2370_zpsf073b38b.jpg

Now use a rough file and a small square one to get a nice hamburger shape. Make sure the track is wide enough to allow the O-ring to slide up and down a little. Test the fit in your tubing constantly!
IMG_2397_zps615fd322.jpg

Now mark the holes on top--mine were 1/4'' from the edge. Mark the holes around the perimeter that will meet up with the ports on top--they should be lined up with the O-ring when it is slid downwards all the way:
IMG_2400_zps3a69552e.jpg

Now drill the holes in the top to a depth of around 11/32'' with a 1/16'' drill bit:
IMG_2402_zpsc4c95966.jpg

Now drill the holes along the perimeter to meet the previous ones. I centered the disc as best as I could in my small vise and used my drill press. I literally looked in through the upper hole until I saw the drill bit appear at the end of the small tunnel.
IMG_2407_zps4faee451.jpg

To see if your ports are functioning properly, blow through the hole on top of the disc. Clear out any swarf with a paper clip--it is imperative that the passages be clear of debris!
IMG_2415_zpsf2bdc43f.jpg

IMG_2414_zps01f6f2f6.jpg

Here you can see what the plunger head looks like when you prime the blaster--the O-ring slides upwards, exposing the ports, then fresh air can flow from behind the plunger up through the ports and into the plunger tube for the next shot. The O-ring is a 1 5/16'' OD O-ring from Ace.
IMG_2436_zps66c1f9e2.jpg

And when you fire, the O-ring slides backwards, covering the ports. As an added bonus, air rushing in through the top ports pushes the O-ring outwards, improving the seal!
IMG_2439_zps9a1758f6.jpg

Slapped on a plunger rod:
IMG_2422_zps00f8129d.jpg

And into my Ported Piston Plusbow (PPP):
IMG_2441_zps647a5993.jpg

Final Thoughts:
After hundreds of shots worth of testing with various barrels, I'm getting the same performance out of my PPP as my skirt seal RainbowPump! Even with sealed breeches and rapid firing, there is no drop in velocity. Though this plunger head design required a lot of effort, the result is well worth it.
IMG_2458_zpsbbe545fd.jpg

This was the max fps--the average was 260-270. It was achieved with a 12'' slide breech and 1.25'' #6 slugs. I hope you guys found this as awesome and intriguing as I did. No go forth and make yourselves a PP!
~T


#326191 Log Home Help Foam questions

Posted by T da B on 31 January 2013 - 03:41 PM in Darts and Barrels

Throw out the misconception that there's such a thing as general springer fit in CPVC. CPVC has an incredibly variable ID.


Right--I totally forgot to mention that I'm using "Flowguard Gold" CPVC.

^ Not looking hard enough or too lazy to heat and stretch. Post again in like 5 years and you'll have barrels for everything you need, or take the time to get the results you want today.


Too lazy would be accurate. Also, I'm moving away from CPVC--all my hoppers and slide breeches are PVC-based and none of my good darts fit Flowguard Gold CPVC anyways.

I use cheap, trashy gray foam (mixed sources) most of the time and it brings in hits. Especially in this era of slugs and metal-free alternatives, the type of foam you are using does not matter as much as it did in the era of slingshot domes.


Totally disagree. Low-quality foam will deform very quickly and lose its accuracy and fit. Also, my stronger blasters often destroy shitty grey foam darts in one shot--quality blasters need quality foam. Besides longevity, I've also gotten significant range increases by using better foam.


Now I must ask--where does one get this "Pink MHA?"


#326170 Log Home Help Foam questions

Posted by T da B on 30 January 2013 - 10:52 PM in Darts and Barrels

Both the LogHomeStore and Mod Man's red foam are an unusably tight fit in CPVC. I have yet to find a smaller diameter foam of high quality to fit CPVC. From my experience, the LogHomeStore foam is excellent, although very expensive (50 cents/foot). I did a foam review on my blog recently if you want to check out my comparison of 5 types of common foam.

~T da B


#338014 The Ported Piston plunger head

Posted by T da B on 02 April 2014 - 11:19 PM in Homemades

My imperfect filing left a little taper in there and the results are indeed beautiful. Chrony results have been posted!


#328204 BANO #4: Revamped

Posted by T da B on 19 March 2013 - 03:02 PM in Nerf Wars

I have never attended a war, and I am totally down to check one out.


#327474 BANO #4: Revamped

Posted by T da B on 01 March 2013 - 02:13 PM in Nerf Wars

Yea, I think things have died out for now. Oh well :/

There's always 'Geddon.


Maybe we can get together and mod sometime--I live in west San Jose and all my friends are too busy or don't care to mod.


#336200 I reproduced Stampede ECS gears, and "hello"

Posted by T da B on 31 December 2013 - 05:04 PM in Modifications

It makes me glad to see someone else attempting to solve the infamous Stampede gear problem. Your materials choice seems fine, but you could make a huge structural improvement--the gear with the square end that fits in the square hole should be permanently attached to its partner. That's the main point of failure in the Stampede gear system.

~T


#334144 K9 Kannon

Posted by T da B on 19 September 2013 - 02:07 PM in Modifications

Awesome! Reminds me of a modded golf ball shooter I had to dodge at my last war. It warms the cockles of my heart seeing random blasters made into beasts. Seems like it would be pretty straightforward to make it pump-action as well, depending on the prime. Is it accurate?


#329033 PETG Sellers

Posted by T da B on 25 April 2013 - 05:16 PM in Off Topic


2044T43


It's PE, not PETG, so it's slightly weaker. However, this fits darts that have a diameter slightly greater than 1/2'' perfectly. It's also dirt cheap at $1.41 for 4 feet of it. In addition, it fits the turret holes in all Airtechs perfectly with no Dremeling or e-taping. Hope this helps!

~T


#327408 BANO #4: Revamped

Posted by T da B on 27 February 2013 - 05:52 PM in Nerf Wars

I am down, but it doesn't seem like too many Nerfers are active around the bay area. Some day I'll go to a war!