 Find content


 Posted by
 Materials:

Option A (Using IMR's):
Soldering iron
Solder
2 Micro-switches (I used these:
http://www.amazon.co...ds=microswitch)
Hobby knife or drill with 3/8" bit
Superglue
Option B (Using LiPo)(Preferred):
All Option A materials
Battery connector
2 Cell LiPo (I use a 100mah pack)
Heatshrink
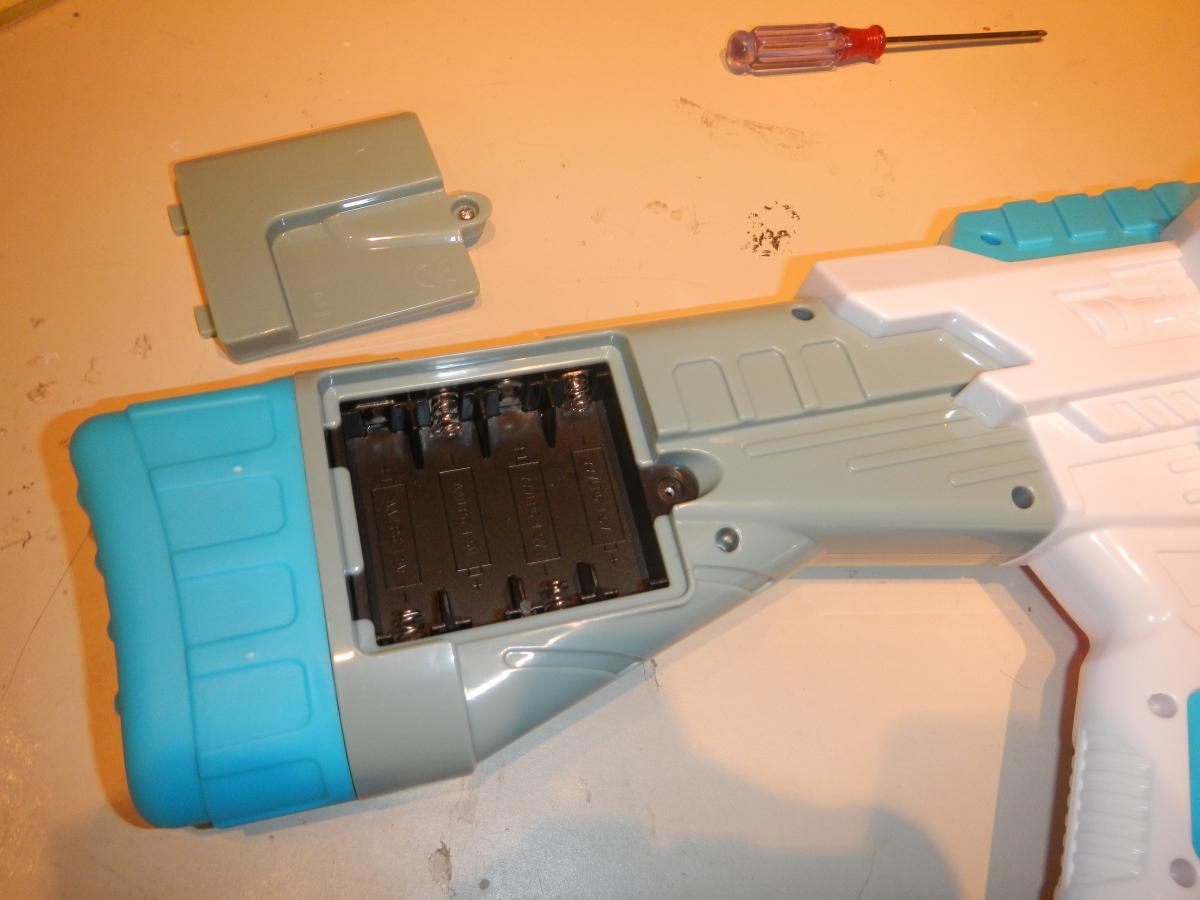
The blaster runs on 4 AA batteries, so using IMR's is actually as simple as installing them like normal AA batteries. There are NO LOCKS either electronic or mechanical in the brute. I recommend following my switch replacement however, it will add performance and reliability. Opening the brute is a pain. I recommend removing all the screws, then using a flat head screwdriver as a pry bar. Be careful and go slow, but because the plastic is flexible you should be able to open the blaster without damaging anything. Remove the stock first, then the blue piece on the handle, and then the blaster should open freely.
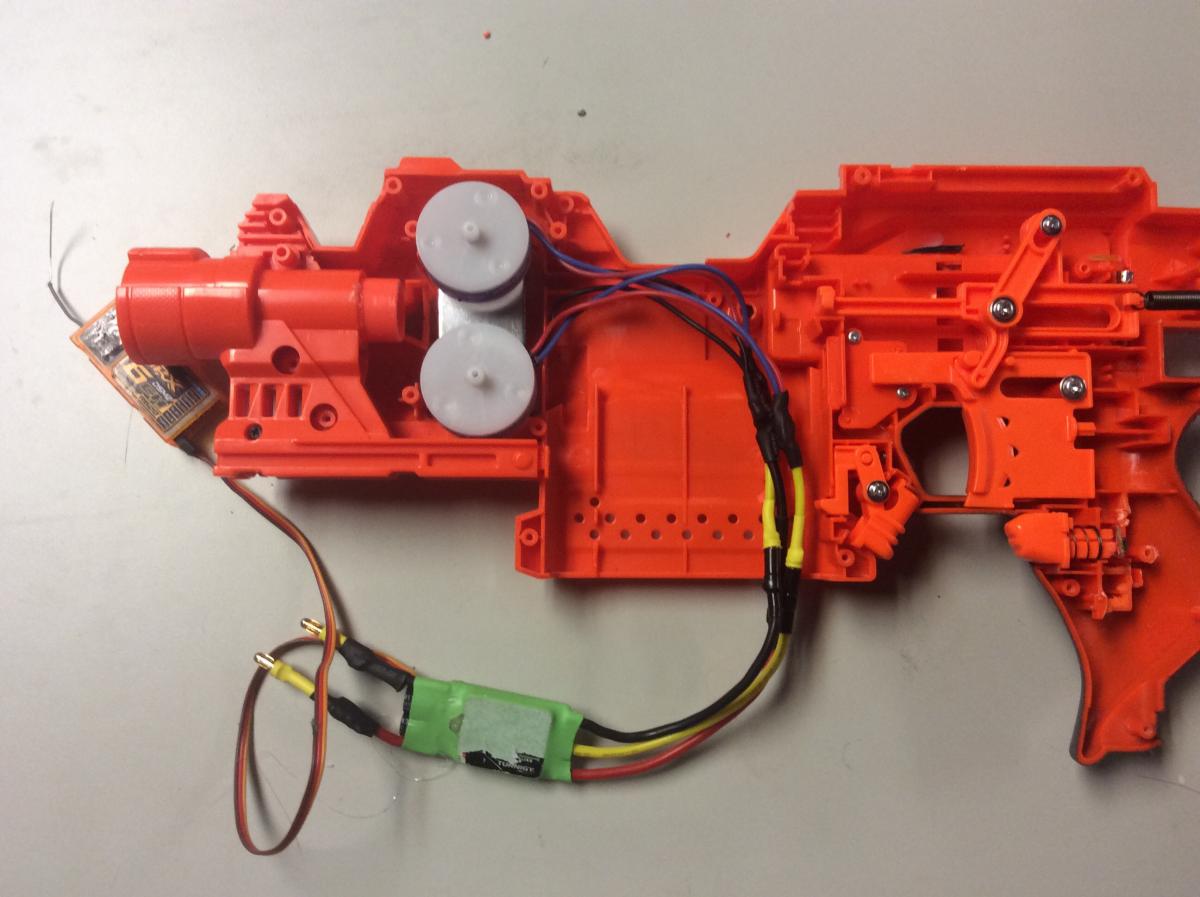
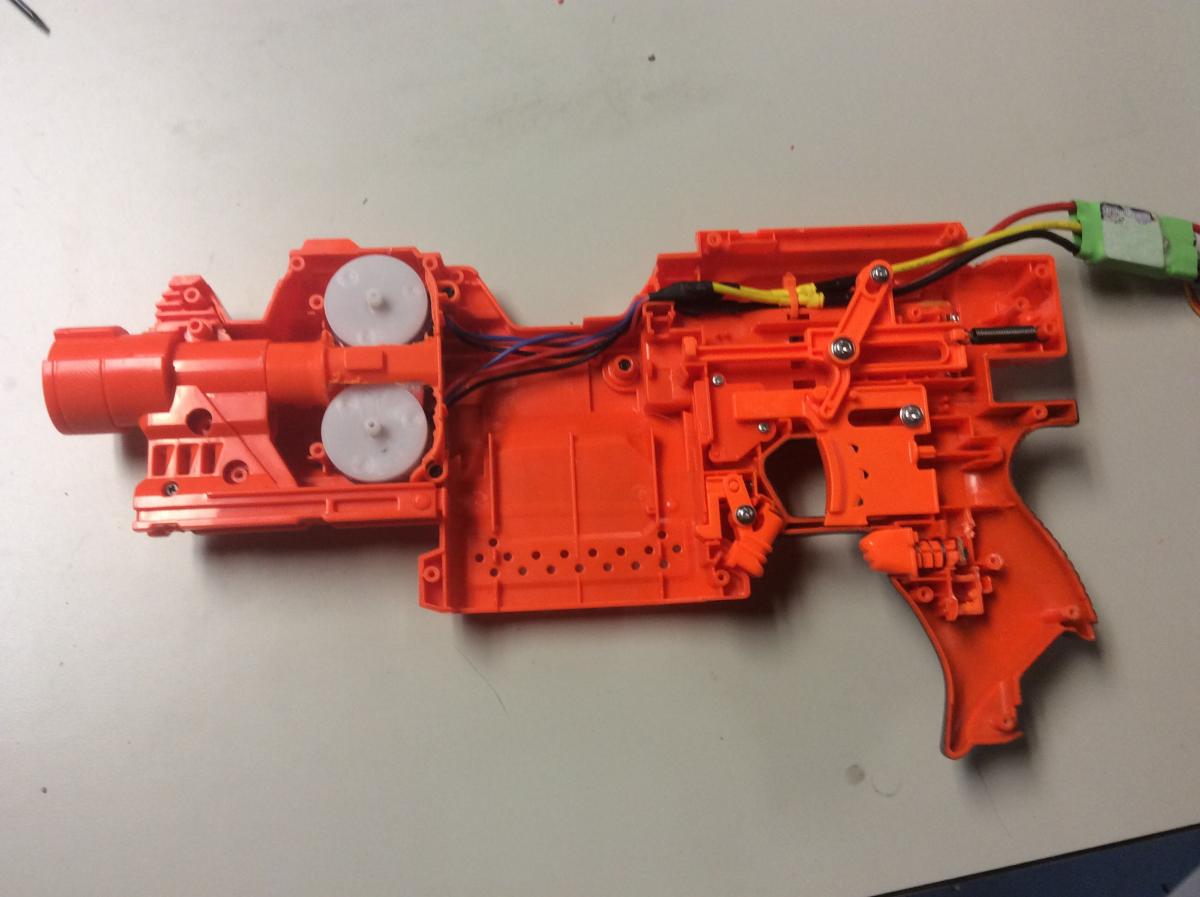
These are the internals, the wire gauge is acceptable, but definitely only for the stock motors. If you replace the motors definitely replace the wire. As I stated earlier there are no locks in the blaster and you don't actually need to add any wire to the blaster.
Overview:

Flywheel Closeup:

Stock and battery door pieces:

Mag release picture to help with reassembly.

The brute has a dart guide, which is a nice feature for reliability, especially with no jam door on the blaster.

The flywheels are horrible. Look at the holes, or lack thereof. Buzzbee tried to add lightening holes, but ruined the balance of the flywheels. That's why you have the drill and/or hobby knife. Fix the holes so the wheels are symmetrical.

I used a drill with a 3/8" bit at low rpm.

The motors have no thermistors or resistors.

The pusher motor has none either.

The stock switches need to go. They are simply two flexible metal tabs, which have high resistance and poor reliability.
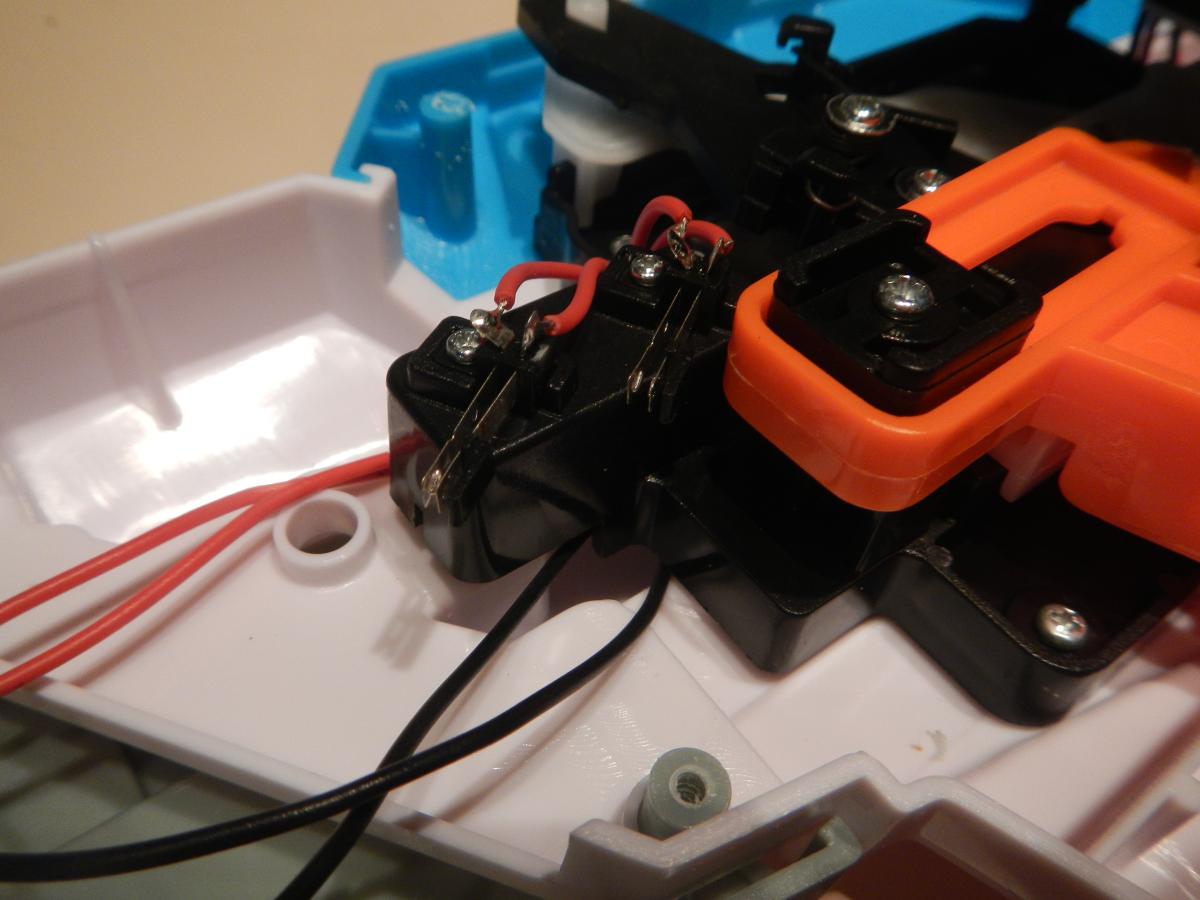
Desolder them from the circuit and unscrew their mounting point.
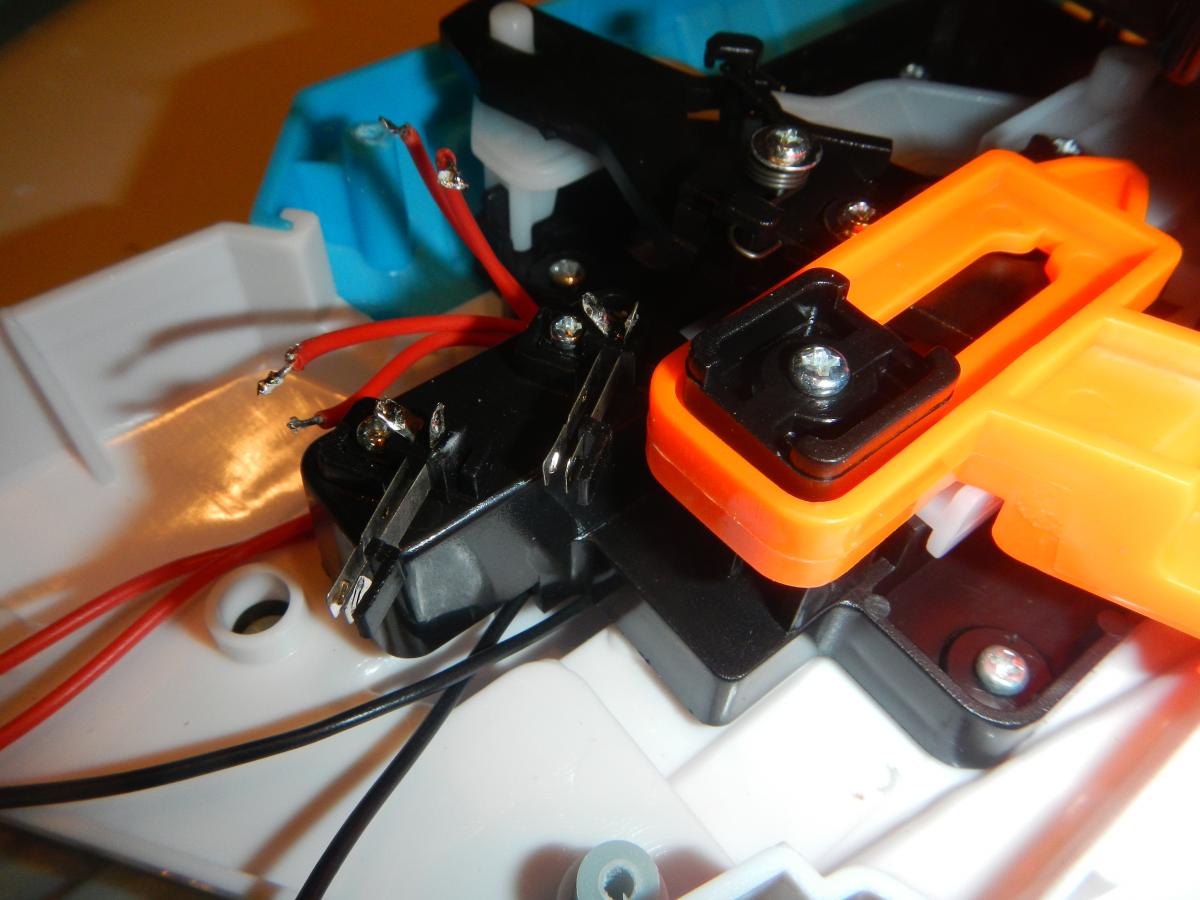
The switches need to be replaced with a microswitch. The ones I used are in the materials list at the top. Remove the roller if your switch has one and tin the tabs.

Solder your new switches onto the stock leads, then mount them with superglue. It is very important that you mount the switches in a way in which the switch is moved to the on position when the trigger is pulled, but also in a way in which it does not impede the trigger movement. The way to do this will vary from switch to switch but always test fit the switches before you glue them in. Test your circuit and make sure everything is functional.

Now that the switches are squared away you need to solder the battery leads. If you are using IMR's then just remove the two yellow components (PTCs) and resolver the wires. I recommend using two IMR cells. If you are using a battery pack you need to remove the stock battery tray to fit your pack.

Desolder the wires and cut them to an even length.

Solder on the connector of your choice with heatshrink to insulate the contacts.

Reassemble the blaster and you are done!

Three cells will burn darts, cause major slippage, and decrease range. Use a maximum of 9 volts.
Assuming all went well your brute should be shooting 90-100 fps. The motors that come with the brute are pretty good, the flywheels however are not. Aftermarket flywheels are certainly an option, but spacing will become an issue. If you are trying to be extremely game effective go buy a Stryfe or Rapidstrike, they can achieve much higher velocities than the brute is capable of. Rev times with a LiPo should be lightning fast and the fire rate will have much more get up and go.