Find content
Cap'n Whitebeard, the E&C nerfer back again, showing off the project I have been working on since I traded for a Centurion at APOC... 16? Anyway, here goes. For those of you that were there, the monster we discussed has been born.I am not going to make this a tutorial Ok that was the plan but it's almost there now. BUT STILL- the total cost of parts is some where around $200, and I don't expect anyone else to make one-it requires a 3D printer and a lathe. It's also not really war legal for several reasons. If you are feeling lucky (punk), then message me and I can help out with the 3D printed files. There are 6, and they took me around 25 or 30 hours total to draw up.
The goal of this project was to create a sleeper of sorts- as stock looking as possible with ridiculous amounts of power under the hood. So forget war-legal, that always means singled titan. Which I have plenty of parts for. Don't judge, it was a phase. I bought every titan I could get my hands on.
So, listed in no particular order, with pics at the end:
BATTERIES
The batteries are in a 3D printed box (the black one in front of the trigger), installed in a battery tray I bought online. It has a clip that keeps the tray in, but bends for tray removal. There is enough wire at the top to pull it out a couple inches. The batteries are 26650's, so... 7.2v @3500 mAh? Something like that. The install of the box required a lot of cutting, and then rebuilding the interior of the shell to a shelf that i could glue the box to. Enter epoxy putty and 2 part epoxy.
In the picture below, ignore the hose, gauge, and ducttape. That all got changed in a redesign. The ducttape was wrapped around a hose clamp because it kept trying to cut me.

PUMP
This was bought at the Mart of Walls for around $15. Cheapest one on the shelf. Pulled apart, fits almost perfectly in the stock, minimal shell cutting. Made me very happy.

PRESSURE STUFF
The NC pressure switch and the new gauge were purchased from McMaster. Switch is adjustable, with lowest setting around 35 psi, which is plenty of power for drywall not expecting a shot (more on that later). Max is beyond what I would ever set it at. Most of the tubing is repurposed from the pump. The hose to the gauge is different for more flexibility. The barbed T fittings are also from McMaster, and were trimmed to the first barb because space and then hose clamped because safety and leaks.
BUSINESS MIDDLE
The connection and slide from the tank forward is 1 inch schd 40 pvc. I know this ends up killing some power, but come on, its a singled titan. The only way around this is to have the tank slide back and forth and be directly connected to the dart chamber. Too much work.
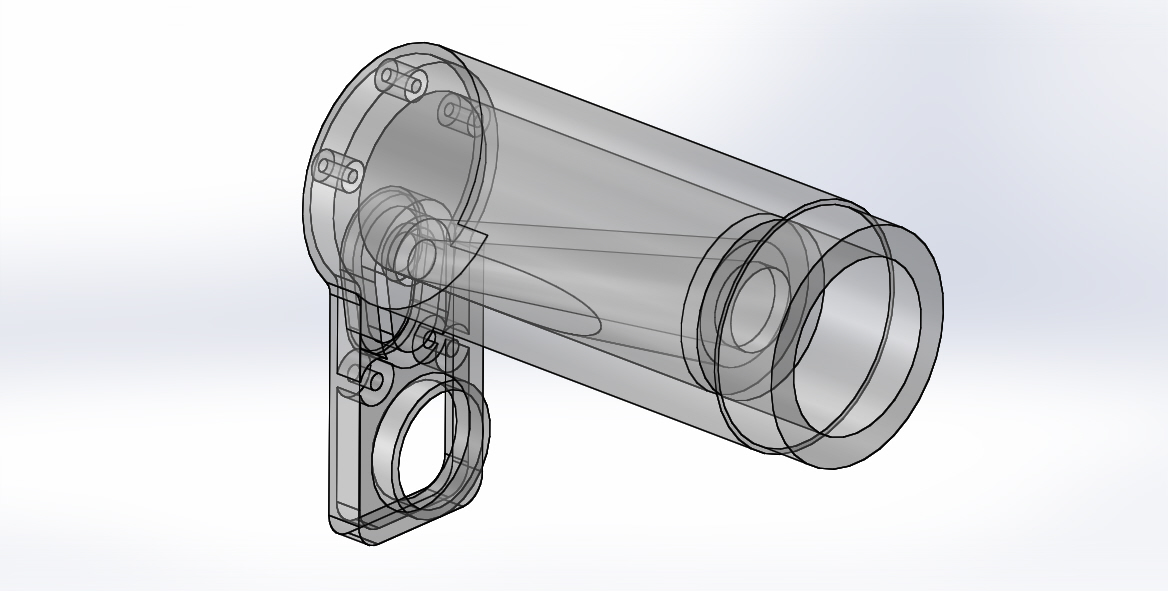
The dart chamber and sled are 3D printed, then welded together. I will probably put a pin in it at some point for piece of mind on the connection. The two parts took most of the CAD time listed above.
The new trigger pull attaches to the original trigger in the same way, then goes up to hook on the firing pin of the tank. It uses the original slide pins to operate, though the shell around them was reinforced due to twisting from forces.
BUSINESS END
The original barrel is way too big, so I simply put some 3/4 pvc down it. It has some wrapped ducttape spacers to keep it centered and is glued in place. It actually extends all the way into the blaster to sit right up against the short section that houses the dart tooth. Final length to be determined, it was just something I had laying around and I didn't feel like cutting it down at the time. I will probably cut it to match the length of the stock blaster to hide it.
SO... SPECS?
Yeah I have no idea. I don't have a chrony, but from 15 or so feet at 35psi the trigger gets pulled and there is a flash of red and then there is a dent in the drywall. It was pretty much instant. I'm betting on 250 plus/minus 10 because of my paintball experience. I have not pumped the gun any higher than the 35ish psi, I only got it done last night. I will be testing it more thoroughly at some point soon (like probably tomorrow). I expect decent ranges. AKA I'll wreck North Korea's shit from my back porch.
OTHER STUFF (and answering questions before they come up)
The stock ammo is modified so I can reuse it.
No, it's not weighted, just filled.
Yes, I will bring it to wars. Probably won't be allowed to use it.
No, I don't plan on posting the 3D printed files. I don't trust the Great American Public.
Yes, I plan on shooting more drywall and other shit laying around to measure destructive capability.
Yes, I plan on privately testing more dangerous ammo.
No, you may not come watch or take part. I mean, alright yeah. Message me if you live nearby. Don't tell anyone.
No, it's not for sale.
No, I wont make you one. See point 4.
Thanks for reading, and I'll see you all at the next E or C event I get to.