Nite Finder Plunger Head Reinforcement
#1

Posted 27 June 2007 - 03:04 AM
Anyway, I've been working slowly but steadily on my first mod, which is, quite obviously, a Nite Finder. Like everyone says, it's easy as pie, nothing's gone wrong, and it's working great. Removed the air restrictors, replaced the barrel with brass, and PPKed it. Now the time has come to replace the spring. And I'm planning on putting a real motherfucker of a spring in there. It's from Home Depot. Not sure the number, but it's at least an inch longer than the stock NF spring.
I already tested it, and the gun DOES cock with it in. However, I just know that if I throw the spring in there and go, it will blow the head of my plunger off. I'm not too worried about the top of the plunger assembly, as I used a metric fuckton of Plumber's Goop on it. So since I can't find a thread with this information, what should I do to the plunger head assembly to assure that my gun won't explode?
#2

Posted 27 June 2007 - 05:30 AM
EDIT: Upon reading more of that thread, I see you have posted in it, so it's probably something you already know about.
Edited by frost vectron, 27 June 2007 - 05:36 AM.
"I am a leaf on the wind--watch how I soar" - Hoban "Wash" Washburne, Serenity.
#3

Posted 27 June 2007 - 11:06 AM
Here's the pertinent section:
Part 2: Spring replacement and plunger reinforcement
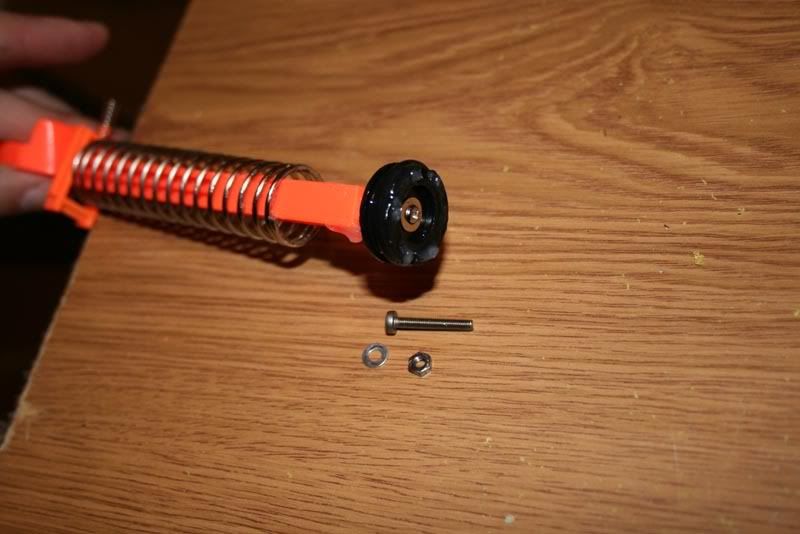
Taking care not to lose the latch spring (put it somewhere safe--i lost mine sometime after this picture was taken, as you can see it perched precariously), remove the spring and plunger assembly. Try to leave as much lubricant on it as you can. Take the phillips head screw out of the plunger head, but be careful to keep the plunger head together...it's actually two pieces and an o-ring.
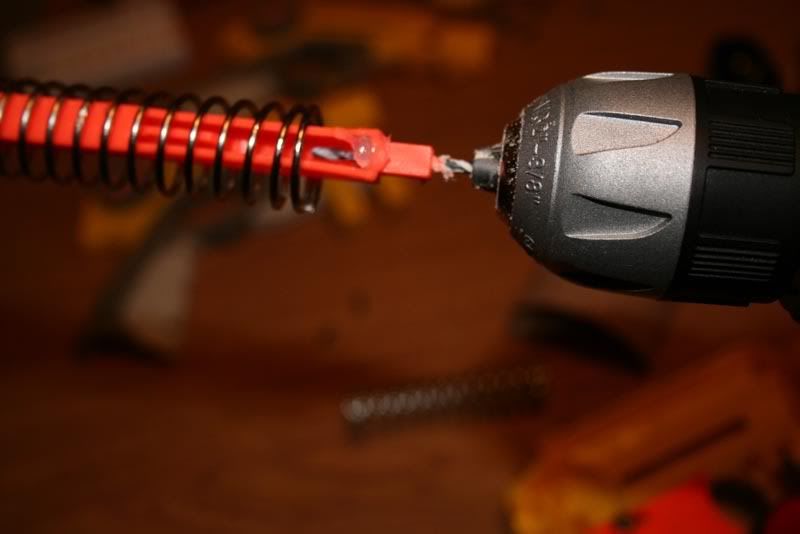
With your 3mm drill bit (or 1/8", whichever), enlarge the hole in the end of the plunger rod, as well as in the plunger head (forgot to take a picture of that, you guys are clever enough to figure it out)
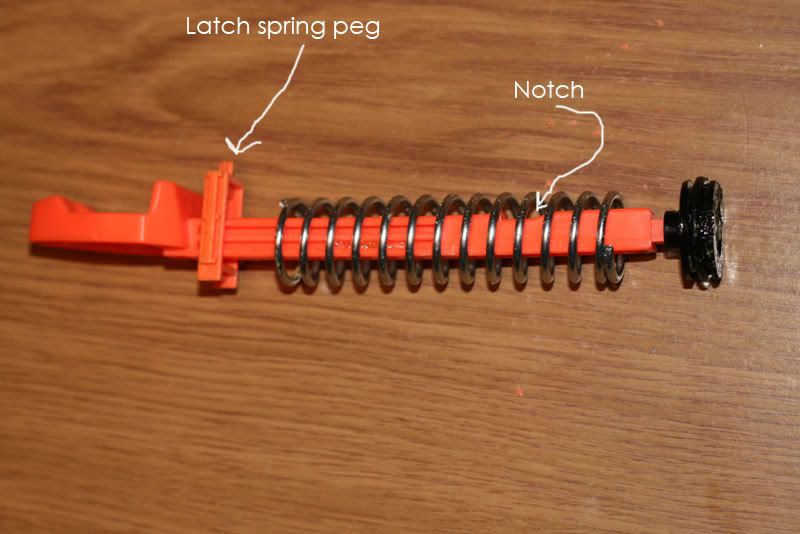
Once you've drilled the plunger shaft and head, reassemble the plunger assembly. Be sure you get the orientation of the latch spring peg and the notch in the shaft correct, and don't forget to swap in your new Ace Hardware #49 spring!
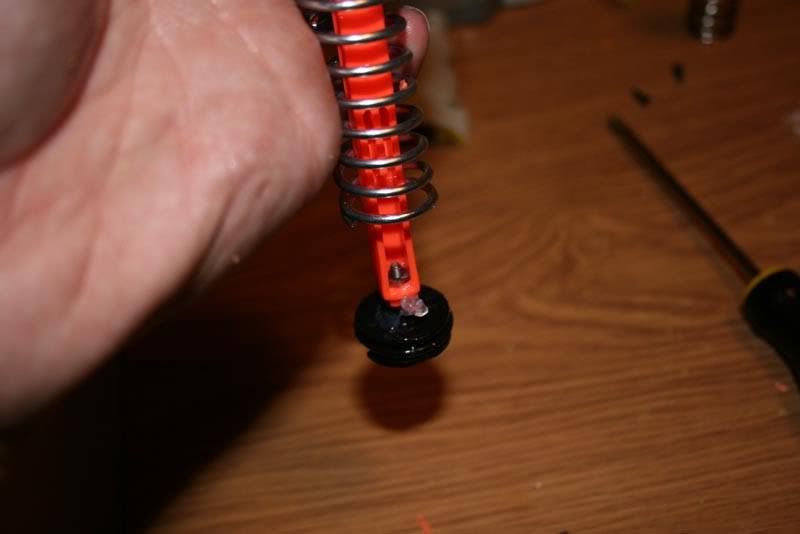
The 3mm nut is just the right size to fit in the groove, and let you thread the screw through the plunger head and shaft and into it. I recommend putting a washer under the screw head (before the plunger head), because, if you picture the forces at work when the gun is cocked, all of the force goes from the spring to the plunger head to the attachment screw--the whole reason we're replacing this screw to begin with! It can take a couple tries, or some tiny needle nose pliers, to get the nut lined up and threading correctly, so just be patient.
#4

Posted 27 June 2007 - 12:32 PM
Don't be sorry. Being sorry means you were wrong or you're trying to get fucked. Were you wrong? No. So why do you want to fuck Ted? I've met him; you're making a mistake.-VACC
#5

Posted 27 June 2007 - 01:42 PM
http://nerfhaven.com...l=reinforcement
EDIT: Upon reading more of that thread, I see you have posted in it, so it's probably something you already know about.
*facepalm*
Thank you. I must be searching retarded.
Also thanks to telekenetic.
0 user(s) are reading this topic
0 members, 0 guests, 0 anonymous users


