Jump to content


Photo

An Actual "nite Finder" Mod

Telescoping brass + Maglite integration

16 replies to this topic

#1 SpectreX

SpectreX

    Member

  • Members
  • 75 posts

Posted 19 January 2006 - 10:33 AM

Ok, this is my first mod. I have to admit, I'm one of those that saw the Penny-Arcade comic which sparked my interest in modding nerf weapons. My roommate and I at college already had a set of Mavericks that we had fun with, but I'd never thought of modding past cutting the dart tag darts to fit in the maverick (they work really well in it by the way). Anyway, after reading around on the site I decided to try my hand at modding. Because it's my first mod I figured I would start with what everyone seemed to agree upon as the easiest gun to mod, the NF.

This isn't exactly a write up because there are so many NF mods that you don't need to see the same things written over again, but I'll include the information that makes this mod different.

For starters do the standard air restrictor removal, and remove all of the components of the built in light, but save the plastic tube that the light mounts to.

For the barrel you want to follow the instructions for Cxwq's telescoping brass barrel which are at the bottom of this article. The only difference is you want your largest diameter brass to be 2" long, the medium diameter is 1 1/4", and the smallest brass is 1/4" long. Epoxy all of that inside 2" of 1/2" diameter PVC. The original write up makes a 10" barrel instead of a 2" one, but the NF doesn't push enough air to effectively use a 10" barrel, I tried that first. Here's a picture of the barrel installed in the gun and a picture where you can see down the barrel a bit.

Posted Image

Posted Image

The advantage of this barrel is that it can be front loaded like the stock barrel, but it also gets a nice increase in power, and distance as well. I'll have numbers once I can find a good place to measure distances. I don't know if anyone else has tried telescoping brass on a NF before, but I hadn't seen any posts about it.

The other thing about my NF that makes it an "actual" Nite Finder is that I integrated a maglite into the actual case. I've seen other mods where people have taped the tiny maglites to the bottom of the gun, but this is an actual integration. I noticed that mini maglites run on two AA batteries, which is what the built in "laser" is powered by. This gave me the idea to take the guts of a maglite and wire it in to use the built in battery compartment. Instead of using the regular maglite bulb I used a LED replacement kit so the light would be brighter and last longer. Sadly I don't have pictures from the inside of the lighting rig(*EDIT*Here are some pictures for building the lighting rig.), but on the back of the bulb there are two little pieces of metal, which you obviously connect to the battery compartment and the switch. The important thing to note is that the light won't work unless the positive side of the power flow is connected to the correct piece of metal. They aren't labeled so you'll have to test to see which is the positive side. The positive side of the battery compartment is the one to the back of the gun, and this is also the connection you'll want to break with the switch so there won't be power in the light when you don't have it on. For a switch go to any electronics store and you should be able to buy switches, just make sure that they are On-Off(clicks on and off) switches and not momentary(you have to hold it down for the light to stay on). I chose a rocker switch for mine, but as long as you can get it to fit inside the case you can choose whatever style you want. I used epoxy to connect the top piece of a mini maglite, the clear lense, the reflector included with the LED replacement kit, and the LED bulb itself. The next step is to solder the wires onto the bulb connectors, making sure not to let any solder connect them together, I used a piece of paper to keep them separate during the soldering process. I know that sounds complicated without pictures, but if you have the things infront of you it's not hard. Next is where the mounting plastic you saved from before comes into play. You'll want to trim it down a bit so your light/lens component will fit(see next picture). Also the hole in the gun case needs to be dremeled out a bit so that the maglite piece fits. While you're at it you might want to take the time to cut a hole for your switch. Here's a picture so you can get an idea of how it's all supposed to work. I think the picture is easier to use than the words:

Posted Image

Once you have all of your parts installed and the wires soldered in, just assemble the case and you're good to go with an actual flashlight integration for your NF. If you aren't going to nerf in darker lighting conditions there's not too much use for it, but it's always fun to shine in your opponent's eyes, and it's useful for finding stephans if you haven't painted them. Plus it looks cool having a switch built into the case.

Posted Image

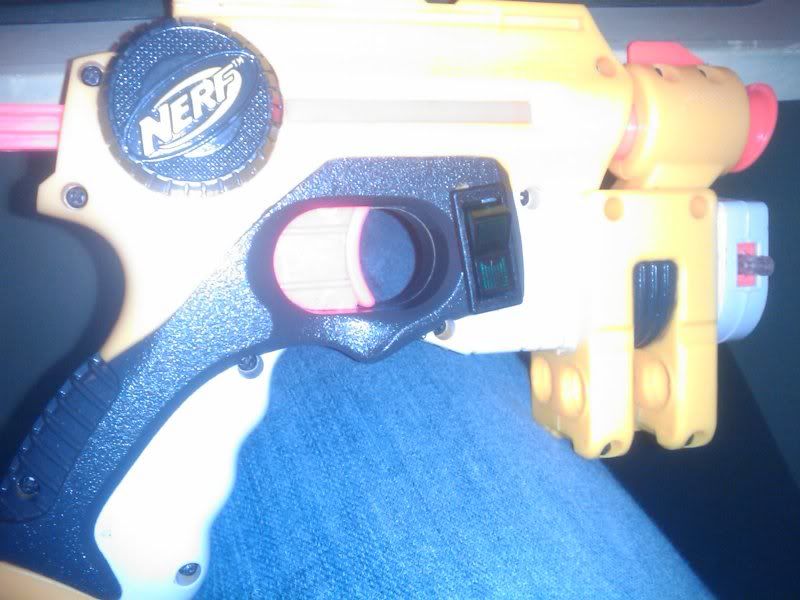
And tada finished mod:

Posted Image

I cut off the ammo holders but it's really not necessary for the mod. This is my first write up so if I left anything out or something is unclear I'll answer any questions. Hope you like it.

*EDIT*Linked to my other post with the extra pictures for building the lighting rig.

Edited by SpectreX, 23 January 2006 - 12:11 AM.

  • 0

#2 Pineapple

Pineapple

    Old-school Admin

  • Contributors
  • 1,377 posts

Posted 19 January 2006 - 12:10 PM

Hey there, nice flashlight integration. I really like the way you placed the rocker switch under the light unit, so you have control of the light without using the half-pull of the trigger.

For a new member, you've got a great mod going with your NF. Of course, the pictures speak a thousand words. You might be hearing folks telling you to add rubber bands for more range. I usually don't add bands only because I figure these to be sidearms or back-ups to blasters more suited to better ranges.

I sure hope other new members follow your example! Keep on fixin' em up!


-Piney-
  • 0
-Piney- of White Dog Hobbies Armory


<!--quoteo(post=209846:date=Feb 5 2009, 06:27 PM:name=boom)--><div class='quotetop'>QUOTE(boom @ Feb 5 2009, 06:27 PM) View Post</div><div class='quotemain'><!--quotec-->
It's to bad you live in hawaii I bet there are not many wars there.Wait what am I saying<b> you live in hawaii you lucky bastard.</b>
<!--QuoteEnd--></div><!--QuoteEEnd-->

#3 Paloose

Paloose

    Member

  • Members
  • 143 posts

Posted 19 January 2006 - 12:36 PM

That, is clean.

I almost like as much as OMC's blue light nite finder.
  • 0

#4 SpectreX

SpectreX

    Member

  • Members
  • 75 posts

Posted 19 January 2006 - 12:38 PM

Thanks for the compliment. Yeah the reason I added the switch was because I found the half trigger pull annoying, so I wanted to make a light attachment that could actually be useful. I have to say that cutting the hole for the switch was a really tricky task even with the dremel. Luckily on the package for the switch it gave the dimensions for the mounting hole, but cutting was a pain. The way I ended up doing it was with the halves of the case separate and using one of the cutting disk attachments to carefully cut away the square bit by bit so I didn't put too much stress on the plastic. It took longer, but it fits perfectly.
  • 0

#5 Anima

Anima

    Member

  • Members
  • 92 posts

Posted 19 January 2006 - 02:43 PM

I love the maglite integration, but the e-tape ruins all the wonderful clean work you did. I suggest buying some styrene sheet, (the cheapest route is to buy a plastic sign from Home Depot/Lowe's, which are usually styrene) and build a sort of box around it. You needn't remove the e-tape, just hide it with the styrene. Then give the gun a nice paint job, and you'll have the nicest NF I've seen yet on the boards.
  • 0
On the web, your language skills are your appearance and odor. Don't be a smelly elephant man.

#6 Rip32

Rip32

    Member

  • Members
  • 177 posts

Posted 19 January 2006 - 04:33 PM

Wow, that is a realy nice mod. I also like the maglite, and how cleanly you were able to pop it on. It reminds me of Hunters nf, because he had a maglite, that had the switch in the exact same spot.
  • 0
http://www.break.com...iencechild.html
Funniest video ever. This kid needs some serious help

#7 SpectreX

SpectreX

    Member

  • Members
  • 75 posts

Posted 19 January 2006 - 05:38 PM

I love the maglite integration, but the e-tape ruins all the wonderful clean work you did. I suggest buying some styrene sheet, (the cheapest route is to buy a plastic sign from Home Depot/Lowe's, which are usually styrene) and build a sort of box around it. You needn't remove the e-tape, just hide it with the styrene. Then give the gun a nice paint job, and you'll have the nicest NF I've seen yet on the boards.

Thanks for the info. The reason the e-tape was on there was to cover up the ugly holes left from taking off the ammo holders. I wanted to make it cleaner looking, but I wasn't sure how. Once I get the chance I'll use the styrene like you said to fix it up.
  • 0

#8 CheeseNerfer

CheeseNerfer

    Member

  • Members
  • 246 posts

Posted 19 January 2006 - 05:48 PM

Bondo is also a great tool for fixing holes, changing shapes, and filling stuff. For those of you who don't know what it is: it's used for autobody repair and can be found at any hardware shop, don't forget to buy the hardener though. It's a great way to make your mods look professional and just requires sandpaper a mixer and a ventilated room. It takes a little while to get good at it but once you do it looks absolutely amazing.

edit: all the materials can usually be found for 6 bucks (us) and can be used on at least 3 different gun mods. I do recommend buying 2 hardener packages though because you will often run out of that quicker than the actual bondo.

Edited by CheeseNerfer, 19 January 2006 - 05:50 PM.

  • 0
"Ahh The Power Of Cheese"


#9 Jakethesnake

Jakethesnake

    Member

  • Members
  • 176 posts

Posted 19 January 2006 - 08:54 PM

I love the maglite integration, but the e-tape ruins all the wonderful clean work you did.  I suggest buying some styrene sheet, (the cheapest route is to buy a plastic sign from Home Depot/Lowe's, which are usually styrene)  and build a sort of box around it.  You needn't remove the e-tape, just hide it with the styrene.  Then give the gun a nice paint job, and you'll have the nicest NF I've seen yet on the boards.

Anima, I'm posting this with the utmost respect to your work and this is by no means a flame, but why the hell would you do something like you're suggesting? His mod provides all the ingredients of a fully functionable gun if you were to take it in a war, doing all that extra crap reminds me of these cheap riced out cars I'm seeing taking over this country. Keep up the good work spectre and very nice writeup, the pics are worth so much when posting a mod.

Edited by Jakethesnake, 19 January 2006 - 08:54 PM.

  • 0

#10 KirbySaysHi

KirbySaysHi

    Member

  • Members
  • 100 posts

Posted 20 January 2006 - 01:14 AM

Wow, that's nice. It REALLY needs pictures for the installation of the light though, to really be a kickass write-up.

It goes in the directory, just because it's cool. But it would have even a higher awesomeness factor if there were pictures to accompany the light (and by "IT" I mean the write-up; the gun is awesome regardless!).

Copy!
  • 0
Kids in the backseat cause accidents... Accidents in the backseat cause kids.

#11 pinhead52

pinhead52

    Member

  • Members
  • 193 posts

Posted 20 January 2006 - 05:29 AM

That is probably the most thorough mod I've read in a long time. It's nice to see other people thinking about electronics, too. I'm working on a few tricks for my NF and SSII that I'll probably speed up with now.

It's also nice to see someone who puts function over fashion. That's not by any means my priority list, but I've never claimed to be productive for the community.
  • 0

#12 SpectreX

SpectreX

    Member

  • Members
  • 75 posts

Posted 23 January 2006 - 12:07 AM

Well, ask and ye shall recieve. I did the best I could without access to my materials at home, but I got some more pictures that should help with assembly of the light rig.

Here's your standard Mini Maglite:
Posted Image

Here's the light in pieces, I circled the one you care about:
Posted Image

Here's the next level of disassembly already labeled:
Posted Image

The top with the lens removed:
Posted Image

Here's a picture of the top piece face down and the red shows where to put the epoxy on the lip where the lens will rest:
Posted Image

Once you've gotten the lens epoxied into the top piece, you have to epoxy the reflector to the lens. Here are pictures of the reflector and where to glue, as well as the reflector placed into the assembly(Note: This is the stock reflector, the one that comes with the LED kit has a bigger hole, but the epoxy area is the same.):
Posted Image
Posted Image

I was able to find pictures online of an LED bulb, slightly different from the one I used, but you get the idea. On the top I have the bulb piece and then where to put the epoxy, but really you want epoxy wherever the LED piece touches the reflector to maximize the strength of the full assembly. Also on this picture you can see the wires I mentioned:
Posted Image

I wish I could put up more, but without another LED kit and all of my soldering gear I can't give images to the other steps, however they are pretty straight forward if you follow the text directions. If I make another one of these NFs I'll take pictures along the way to further improve the write up.
  • 0

#13 KirbySaysHi

KirbySaysHi

    Member

  • Members
  • 100 posts

Posted 23 January 2006 - 03:09 PM

Hey, that's great. I think the next steps are pretty clear from here, since it's just soldering, right? Good work!

Copy!
  • 0
Kids in the backseat cause accidents... Accidents in the backseat cause kids.

#14 malekith

malekith

    Member

  • Banned
  • 25 posts

Posted 23 January 2006 - 10:11 PM

:o Excellent job on that mod!! I was thinking of doing that same identical thing on my NF!!

#15 Falcon

Falcon

    Velcro'd Beanpole

  • Members
  • 1,375 posts

Posted 24 January 2006 - 07:20 PM

Very Nice Job.

It’s been said before, but it’s great to see a new member being a good contribution to the community, especially on their first post. Thank you.

Now on the subject of your mod... When you said Cx’s mod made a 10” barrel, I understand why. However, that is not true. When he specifies lengths for pieces of brass, these pieces are put one inside the other. So his barrel actually is only as long as the longest piece he used. The largest brass acts as a main barrel, while the smaller pieces of brass act as constriction. They hold the dart in the barrel a slightly longer amount of time than the larger brass because of the tighter fit. This gives the plunger a little more time to compress air before the dart starts to move, giving it more power.

What you’ve done is excellent. Frankly, you probably saved some brass by putting the pieces basically end to end. Just remember when we refer to “nesting” brass or any other materials, the smaller materials literally go completely inside the larger, thus making the largest diameter barrel material you use the actual length of your barrel.

Welcome to the forums! Enjoy your stay!
  • 0
----------||||||||)
QUOTE(Ilùvatar @ 0000) View Post
Of the theme that I have declared to you, I will now that ye make in harmony together a Great Music.

#16 SpectreX

SpectreX

    Member

  • Members
  • 75 posts

Posted 24 January 2006 - 10:05 PM

Now on the subject of your mod... When you said Cx’s mod made a 10” barrel, I understand why. However, that is not true. When he specifies lengths for pieces of brass, these pieces are put one inside the other. So his barrel actually is only as long as the longest piece he used. The largest brass acts as a main barrel, while the smaller pieces of brass act as constriction. They hold the dart in the barrel a slightly longer amount of time than the larger brass because of the tighter fit. This gives the plunger a little more time to compress air before the dart starts to move, giving it more power.

Actually you're exactly right. However in his mod the longest piece of brass is 10", which is then cased in 10" of PVC, thus the 10" long barrel. When I first made the gun I made a barrel exactly to Cx's specs. I'd put the dart into the tight end and then attach that to the PVC coupler just like his directions say. The only problem I encountered was the the NF doesn't push enough air to get the dart out of the tightest part of the brass on the first shot. If I continued to pull back the plunger and fire it would eventually shoot the dart out the top, but without any power what-so-ever. I should have included that information in the original write up.

For my modified version of the design I first too a dart and pushed it into the smallest diameter brass to see how far in it would go before I had to force it. I measured that length for the smallest diameter brass and telescoped it out proportionally. I might have made the larger diameters a little longer, but I only had 2" of the largest brass left over from making the long barrel so my design was restricted to what I had on hand. If someone wants to try making a slightly larger one I'd love to hear how well it performs. If longer in the wider sections will improve distance or accuracy at all. I'd just recommend not getting too much longer in the small diameter, because then the NF won't be able to fire the dart correctly.
  • 0

#17 puky

puky

    Member

  • Members
  • 22 posts

Posted 16 December 2009 - 12:11 AM

I did something similar to SpectreX but wanted to go for a one-hand friendly design. So I put the toggle on the side so I could flick it on or off with my index finger. The position is great but I had to do a number on the toggle switch in order to get it to fit.

Posted Image

I can't open it back up for some internal shots because the wiring job was pretty tight (I didn't have any spare wire lying around so I had to use what was already in the gun), but I'll entertain questions if you have them
  • 0


0 user(s) are reading this topic

0 members, 0 guests, 0 anonymous users