
Let me start out by saying that I'll write these instructions exactly how I make them. While you should feel free to experiment with different designs, understand that it took me several tries to make these work well, so I'd be hesitant about deviating too much.
COST PER ARROW = 1 cent of glue + 7.7cents for foam + 1.4 cents for fishing weight + 1.3 cents for FBR + 1.8 cents for craft foam sheet = 13.2 cents
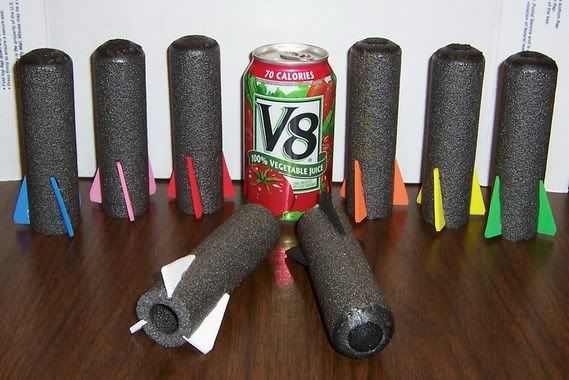
For the actual arrows you'll need 5 materials:
Armacell pipe insulation -------------------------- Home Depot
(The size that fits 1/2" Copper or 3/8" Iron)
3/4" backer rod ------------------------------------ aloghomestore.com
glue sticks ------------------------------------------ Hobby Lobby
3mm craft foam sheets --------------------------- Hobby Lobby
round split shot fishing weights (735-BB) ---- Walmart
http://img.photobuck...on/000_0293.jpg
To make them how I did you'll also need:
Weller soldering iron with special tip ------------------ Ace Hardware
http://img.photobuck...on/000_0277.jpg
COOL melt glue gun -------------------------------------- Hobby Lobby
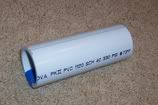
8 inches of 1&1/2" SCH 40 PVC piping ---------------- Home Depot
2mm craft foam sheet ------------------------------------ Hobby Lobby
clay ---------------------------------------------------------- Hobby Lobby
old cookie sheet
scissors
tape
sharp knife
various types of saws
Nerf ball
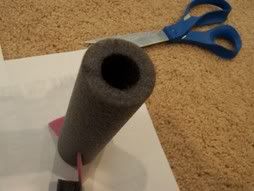
First you’ll have to build the cutter. Don’t skip this step because if you chop this stuff up with scissors, they won’t shoot as well. Consistency is key and the cutter will let your arrows all come out the exact same length. Take your 1&1/2" SCH 40 PVC piping and cut it exactly 13cm long. Make a nice cut (I used a miter saw) because you’ll use the surface to cut the foam with, and you want the foam to be cut straight. Take a 1.5cm by 13cm strip of your 2mm craft foam sheet and tape it inside and down the length of the pvc pipe.
This will give the pipe insulation a snug fit and help keep it from moving around as you’re cutting.
Feed your 6ft of foam all the way into your cutter so it stops right at the other end. Take your sharp knife and make a clean cut, using the end of the pvc piping to brace the knife. Continue to feed your foam into your cutter until you have 14 nicely cut pieces of foam.
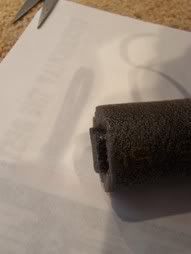
Now you’ll build the “arrow fin burner.”
Take your 1&1/2" SCH 40 PVC piping and cut a 6.2cm long piece. This next part I just eyeballed. I fed my 6.2cm piece of pvc into my scroll saw diagonally (to give it the slant), and cut out about a 1/8” crack. Use the pictures for reference to see how slanted to make it. It’s easy to make it too slanted. I cut all the way through the pipe so it wasn’t a pipe anymore. The pipe had a tendency to close back together so in order to keep is separated, I cut a ¼” length piece of a titan barrels, wrapped some masking tape twice around the outside of it, and shoved it into the end of my 6.2cm piece of pvc. Then to keep the other side separated, I found a stray piece of hard hot glue that was the right size and fit it into the other side of the crack. Make sure that the crack stays the same width. Take some tape and secure whatever you used to keep the crack open. Finally take three 6cm long strips of the 2mm craft foam sheet and tape/glue each to the inside of the pipe as indicated by the green arrows. This will give your foam a snug fit while it’s being burned. Tape it up so that the slot/crack is 4.5cm long, about a third of the length of the arrows.
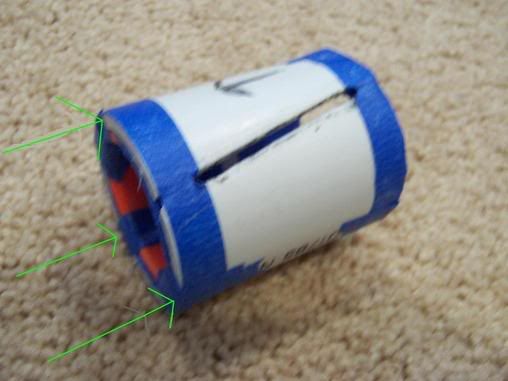
Here's an additional view.
http://img.photobuck...on/000_0275.jpg
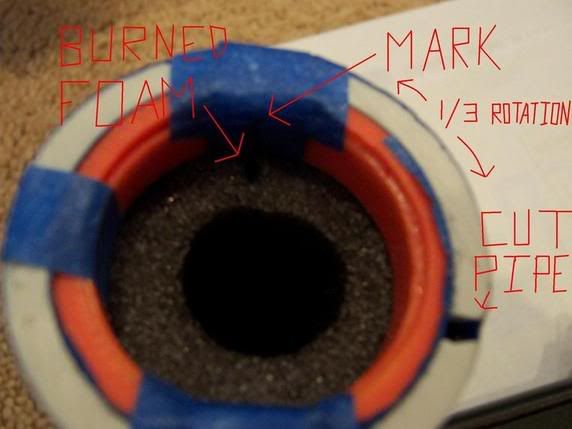
Make a mark EXACTLY 1/3 of the way around from the crack, or cut pipe. If your mark is off a little, than you've already got bad arrows. You'll use this mark to rotate your foam.
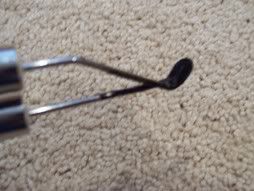
You’re now ready to begin making the arrows. Feed one of your foam pieces into your “arrow fin burner.”
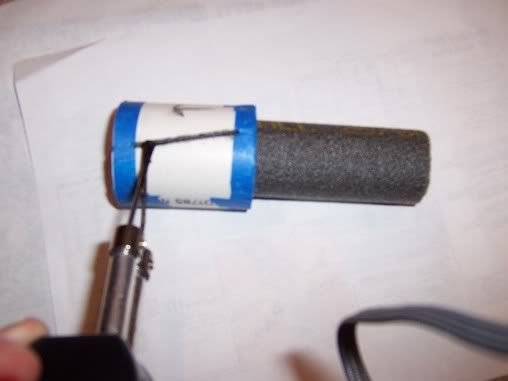
Turn your soldering iron on, but watch its temperature. Don’t let it get too hot or it’ll start to melt the pvc plastic. Burn thoroughly inside the crack. Remove foam piece. Rotate and put it back in so the newly burned foam line lines up with the mark you made (see large picture above). Burn a total of 3 lines per arrow.
Take your scissors and your 3mm craft foam sheet.
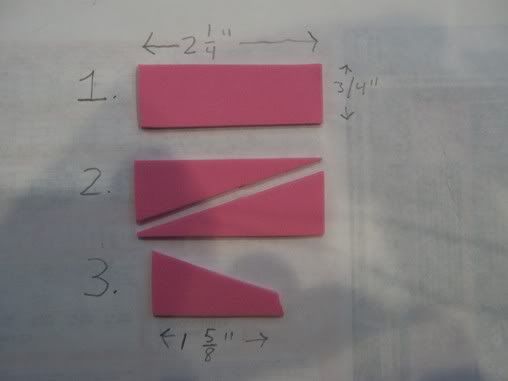
Put a small amount of hot glue on the bottom of a fin and insert it into one of your burned foam cracks. Do the same for the other two fins. They should fit nicely, meaning you won't have to hold them as they dry. Leave about a 2mm gap between the back of the pipe insulation and the back of the fin. This is done solely for the Arrow Storm.
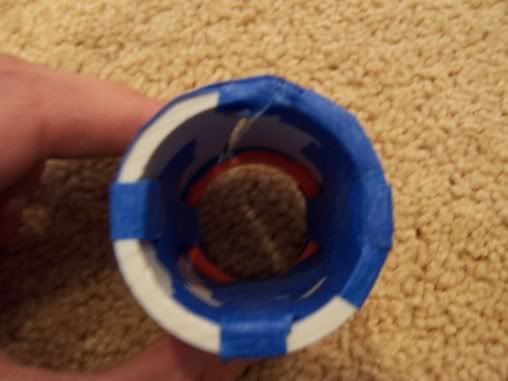
Cut two-½” long pieces of your ¾” backer rod. Take the first piece and shove it into your arrow so it’s about 3/8” from the top of the pipe insulation.
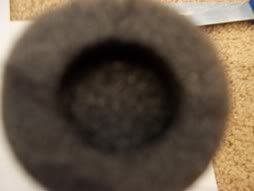
Pour in a nice 1/16” layer of hot glue and be sure to make sure you completely cover the FBR, so it’s airtight. Drop a fishing weight in and center it.
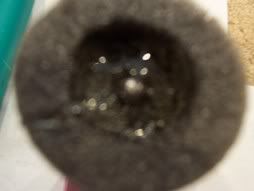
Put your other ½” long piece of backer rod over the glue/fishing weight and push it in until there’s only about an eighth of an inch showing above your pipe insulation.
To give my arrows the finishing touch, I made a mold out of clay with a Nerf ball.
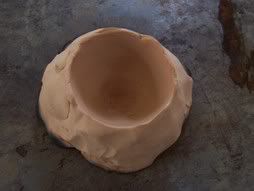
Put the clay on an old cookie sheet and heat it up for however long the directions say to, and then remove the cookie sheet when it’s done. When it’s cool, it’ll be all hard. Put the cookie sheet back into the oven again and heat it to 375 degrees Fahrenheit. Be careful here. If you let it sit in there too long your mold will greatly expand and turn into a weird black substance, and also stink up the house. Watch it carefully. When it’s reached its temperature just take it out and quickly push the front of every arrow into it, to give them the dome shape.
I've reached the max amount of pictures I can post. If you want to see what the final arrows look like, than go here.
http://img.photobuck...emadeArrows.jpg
The last step is to snip off the corners of the fins, because corners don’t last long. You'll have to experiment with how much weight you like in the front. I generally like my arrows to balance on a pencil that's 6cm from the tip of the arrows, meaning they're only a little front heavy.
And there you have it. It’s a fair amount of work to get it set up, but when you do, you’ll be able to make lots of arrows for 1/7 the cost of buying them from Nerf. These arrows have to be “broken in,” especially if you’re using them on the Arrow Storm. After a few shot’s they’ll be shooting at peak performance.
If you have any questions, then let me know. If you make some and find out better ways to do things then I did, than let me know as well. Enjoy.


