Jump to content


Photo

Infinus Inspired by TR-27 Gryphon/RS Mod


14 replies to this topic

#1 limmers2015

limmers2015

    Member

  • Members
  • 12 posts

Posted 03 October 2018 - 09:46 AM

     One of the first posts I saw on NerfHaven was Technician Gimmick's TR-27 Gryphon. I thought it was the coolest thing on planet Earth! And so, when a mod on my Infinus didn't quite work out, I decided to emulate the Gryphon. And I have! Sort of...


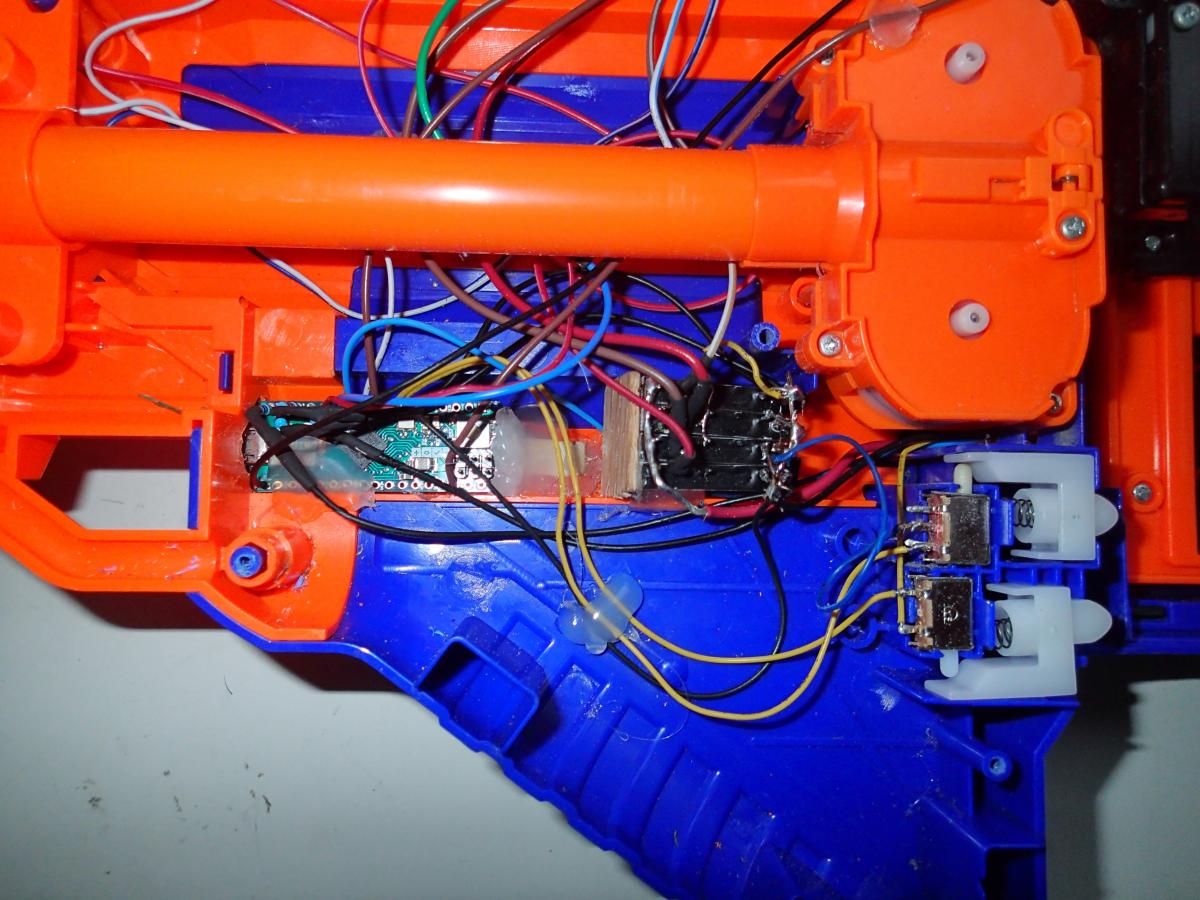
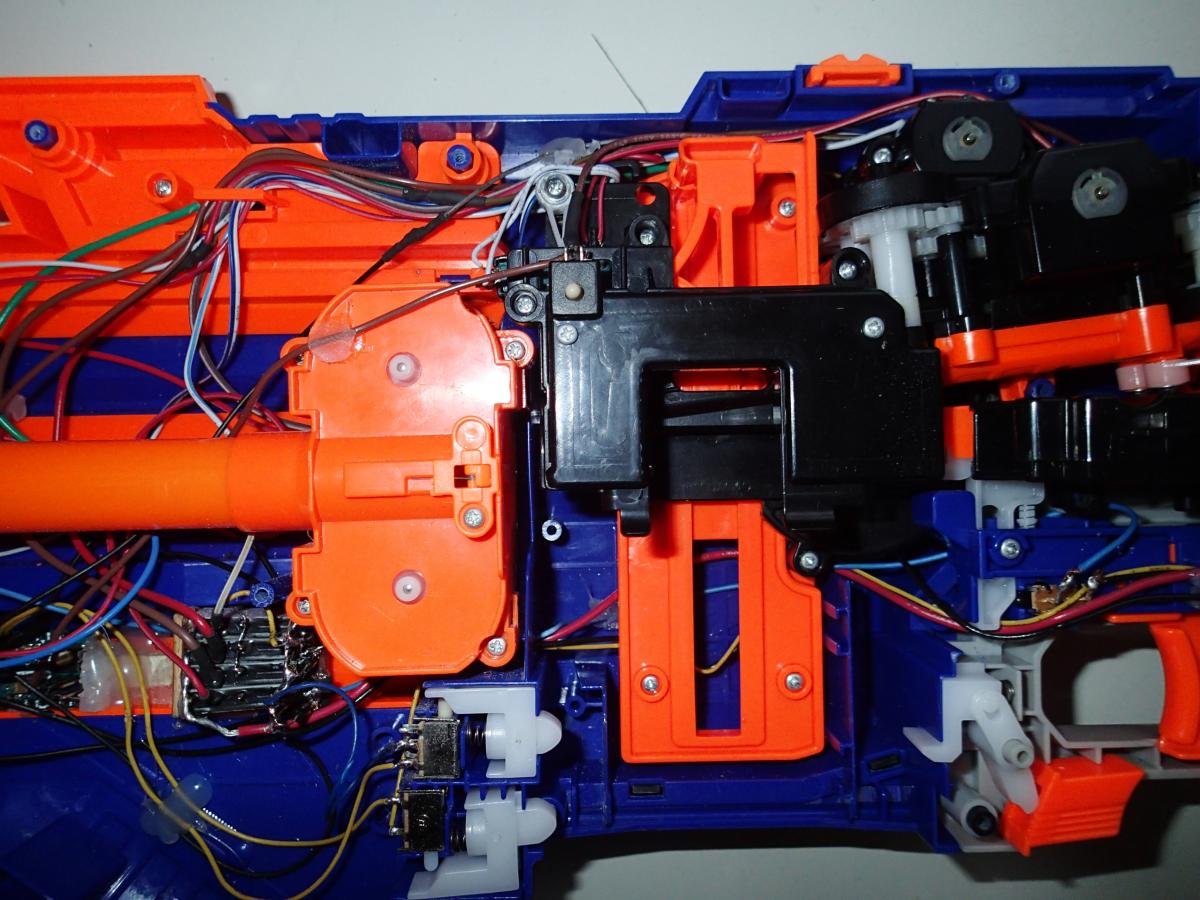
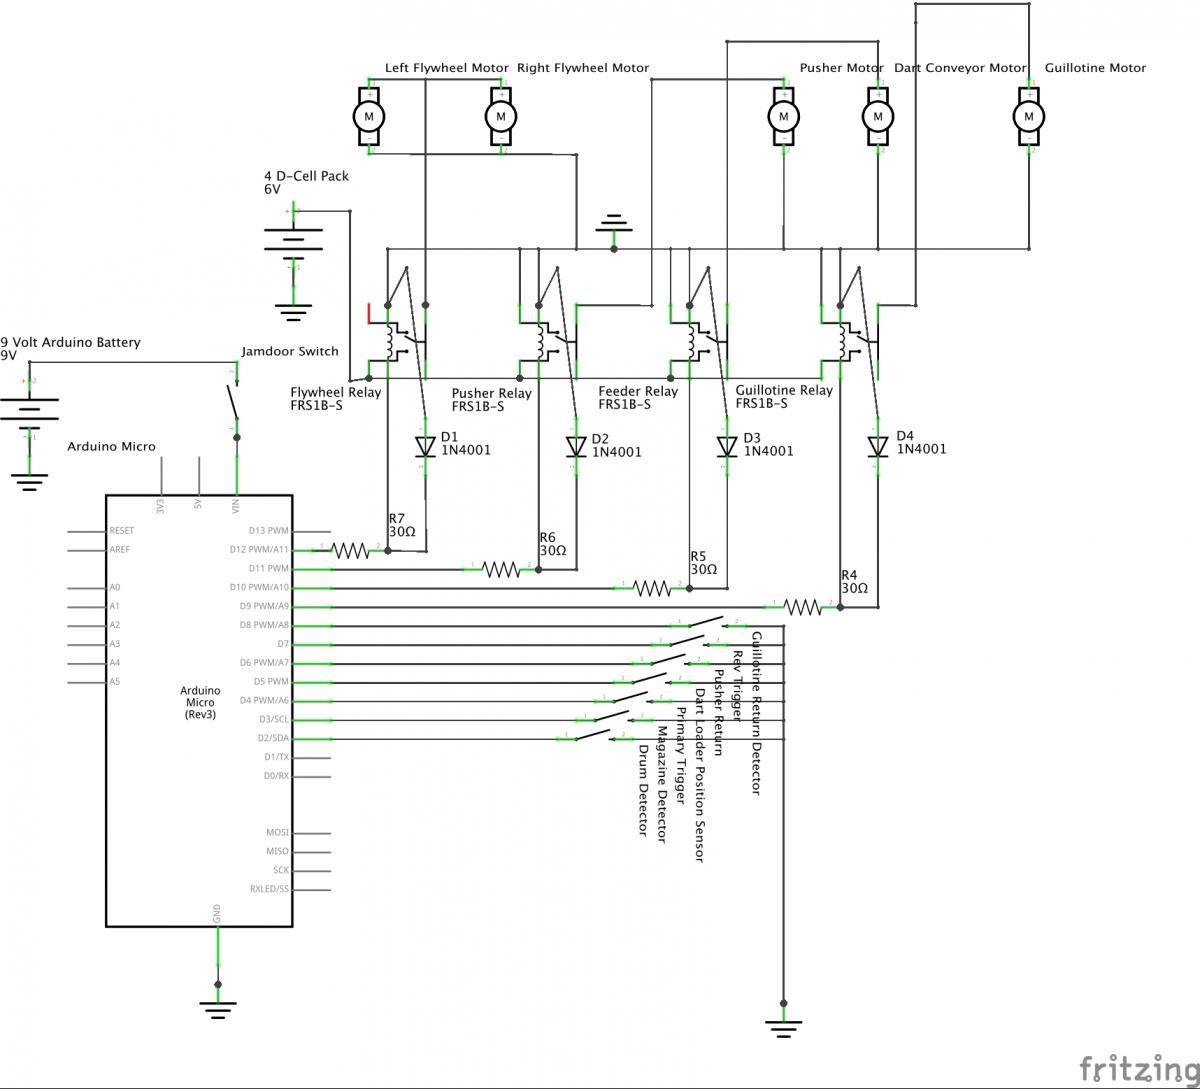
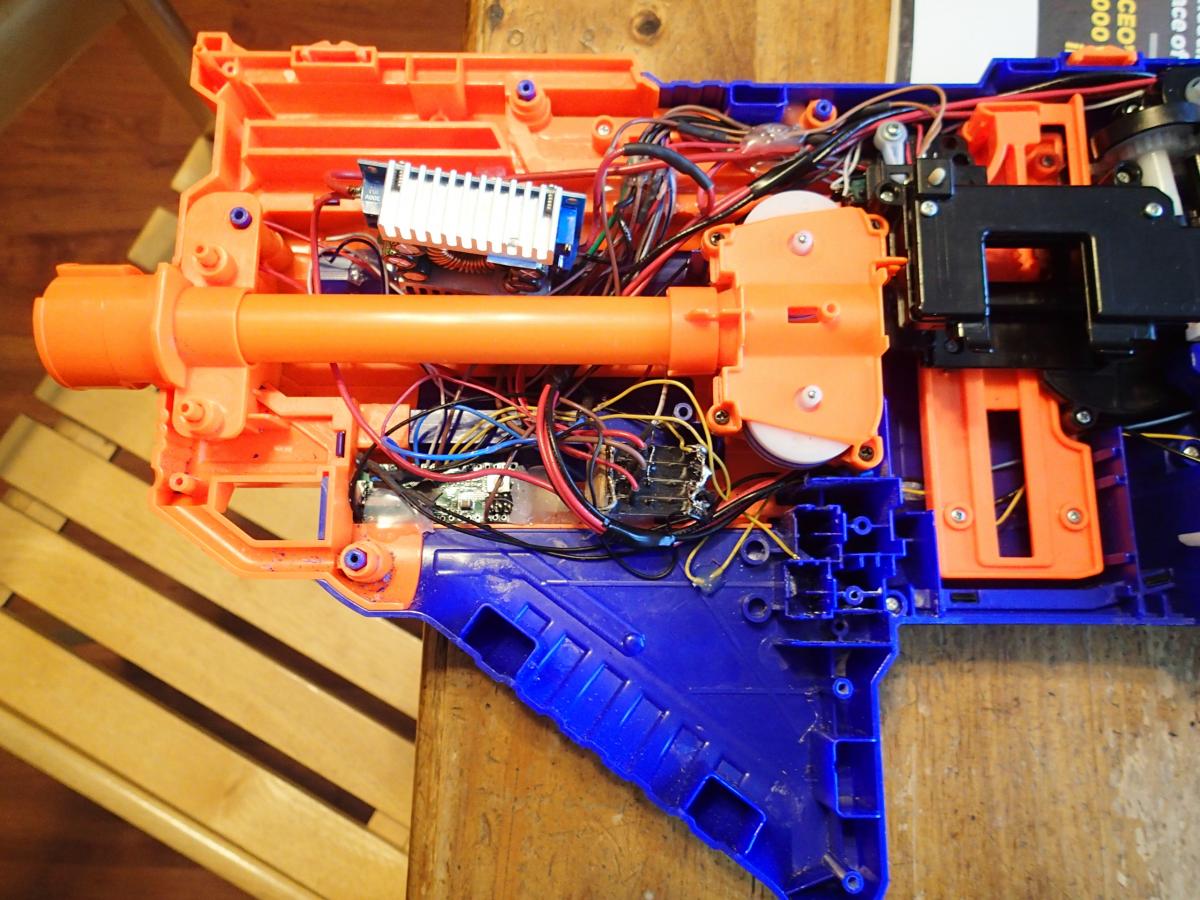
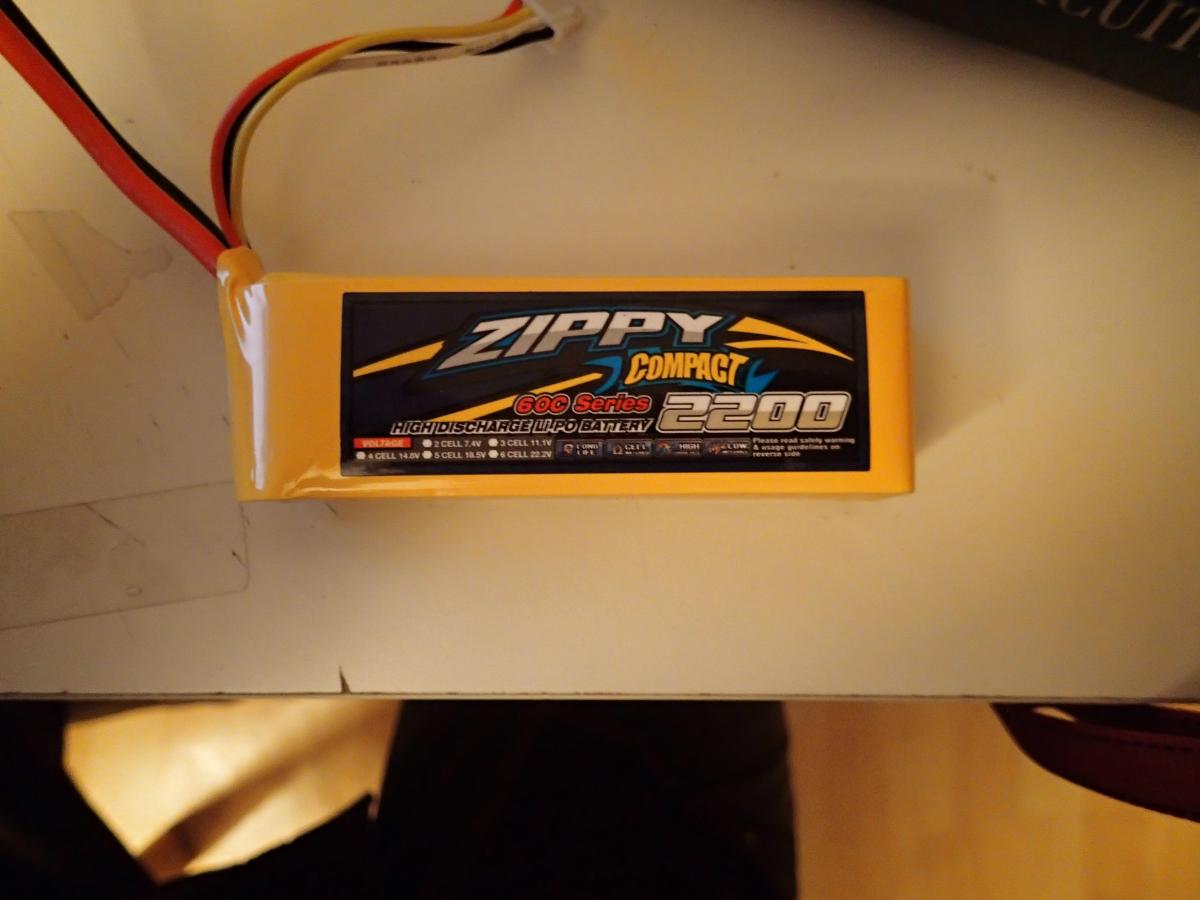
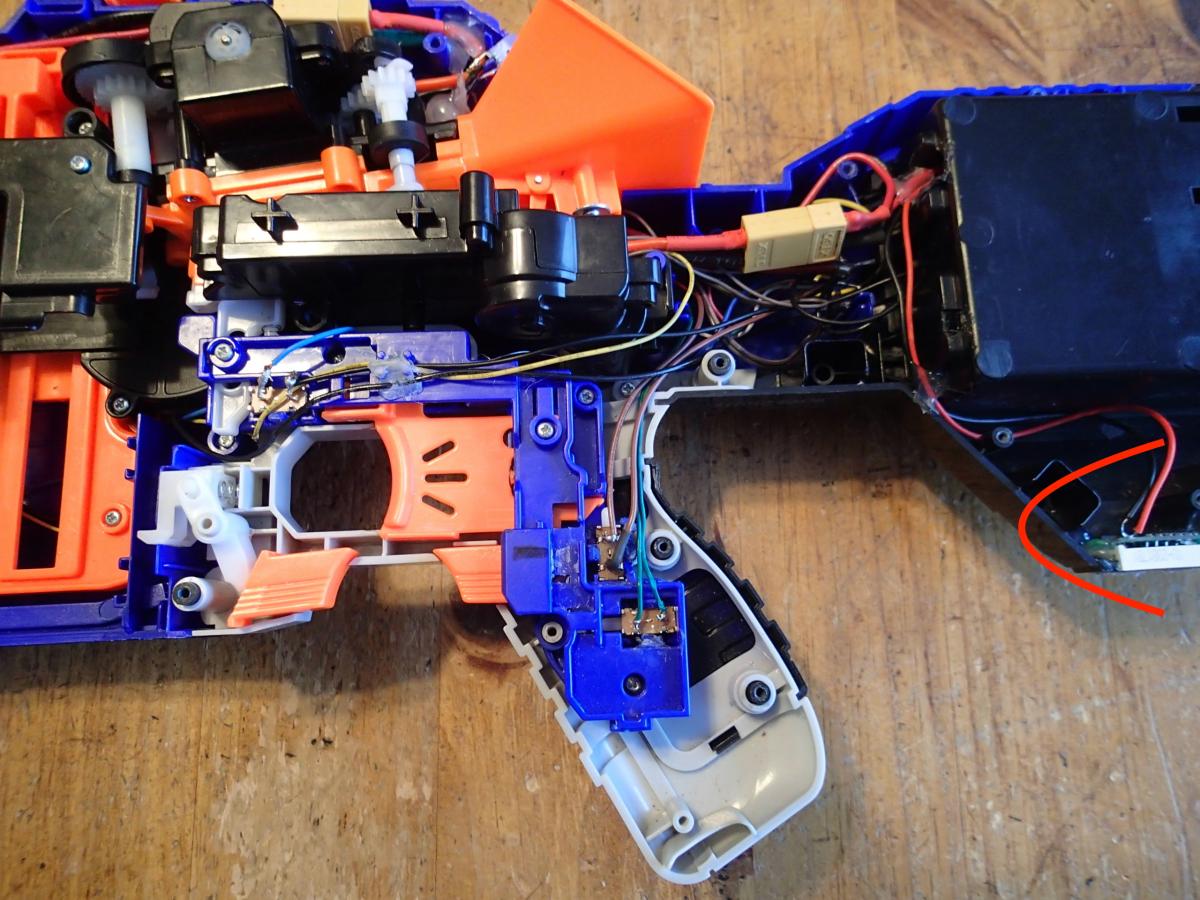
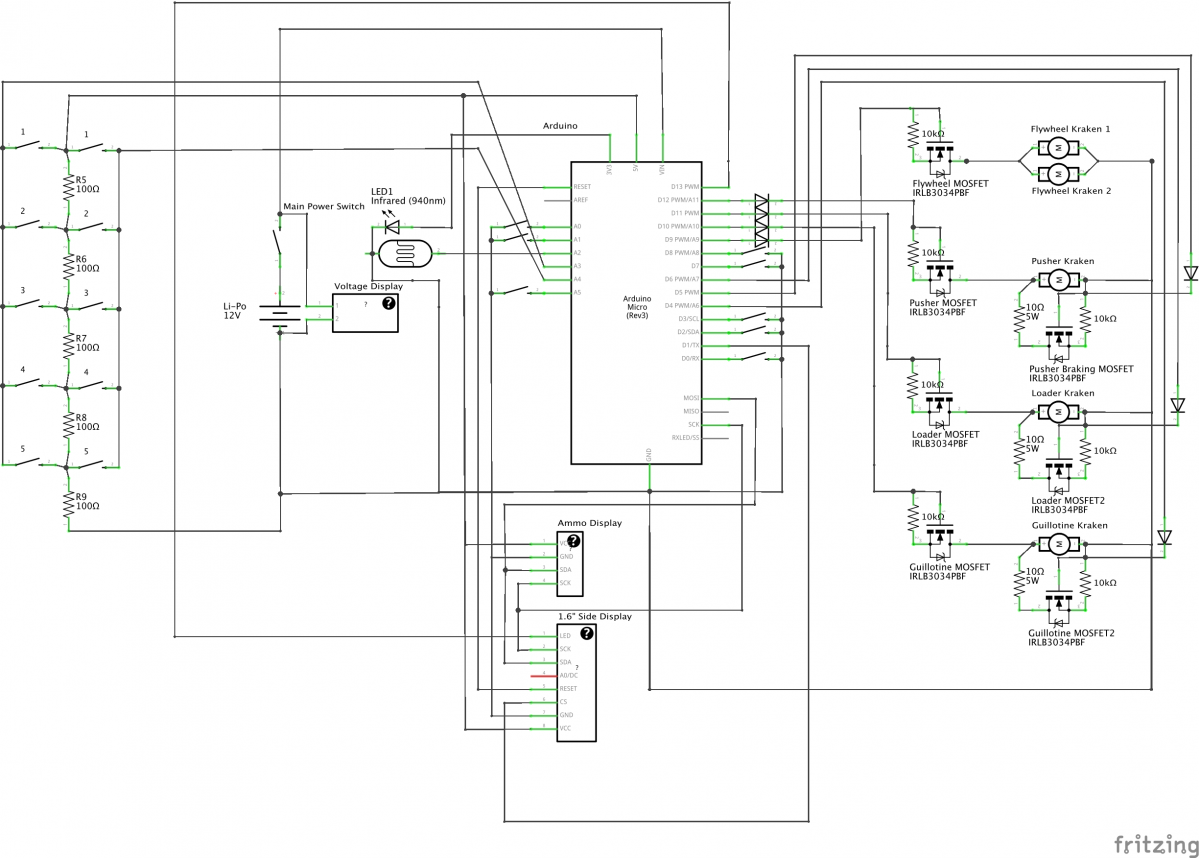
Here's the scoop: I used an Arduino Micro driving some EM relays and reading pulled-up inputs from all of the stock switches. I will be switching from a 9 Volt battery for the Arduino and the stock 4D Alkaline tray for the motors (which is my setup as of this moment) to a 3s Lipo, a voltage regulator for the Arduino, pusher, and loading mechanism, and a MOSFET for the flywheels. I will also be upgrading to OOD Krakens for the flywheel motors.


Here's the code I am using: https://create.ardui...a343c42/preview


Any questions, ask away! Any advice, PLEASE send it over! I would love some external input to the project.


To Technician Gimmick:


     Your project was the primary inspiration for my attempt! Thank you! This project is amazing! It has been, and continues to be, a tremendous source of fun, and a great learning experience!


Edited by limmers2015, 18 October 2018 - 04:16 PM.

  • 0

#2 Meaker VI

Meaker VI

    Member

  • Moderators
  • 1,192 posts

Posted 03 October 2018 - 05:31 PM

Link to previous post


Limmers, I approved and split your post into it's own topic. That other topic was from three years ago, and while I'm not sure you're adding anything to that topic, I appreciate that you've shared code you've written. If you can elaborate more on your build (picts etc.) we'd appreciate it.


Welcome to Nerfhaven


Edited by Meaker VI, 03 October 2018 - 05:33 PM.

  • 0

#3 Technician Gimmick

Technician Gimmick

    Member

  • Members
  • 28 posts

Posted 04 October 2018 - 03:23 PM

Thank you Limmers. It was really a fun project when I had worked on it. I'm glad it served as some inspiration for your project!


I will be following your project to see how it goes for you.


Have Fun!


- Technician Gimmick


  • 0

#4 limmers2015

limmers2015

    Member

  • Members
  • 12 posts

Posted 04 October 2018 - 07:25 PM

*
POPULAR

When I open the blaster next, I'll take some pictures.


If anyone has any suggestions about the code, I'd love them. I am still plodding along on it, but am having a little bit of trouble.


I'll make and post a wiring diagram as soon as I get a chance.


Thank you for your interest!


And I'm glad to join the community!


- limmers2015


  • 1

#5 limmers2015

limmers2015

    Member

  • Members
  • 12 posts

Posted 11 October 2018 - 04:09 PM

I opened it up today, and here are the pictures.


I know that it is messy, but I was in a hurry to get it done in time for my local war, and will re-do the wiring when I do a major upgrade. 


If there are any questions, fire away (love those puns!). Wiring diagram with component specs and identification will be soon... Not sure exactly how soon though...


     Photos:


Exterior (Right Side): PA111198.JPG


Exterior (Left Side): PA111197.JPG


Exterior (Arduino Access Detail): PA111199.JPG


     Internal Photos:


Overview: PA111200.JPG


Arduino and Relay Detail: PA111201.JPG


Mechanisms Detail: PA111202.JPG


Fire Control Cluster Detail: PA111203.JPG


Battery Detail: PA111204.JPG


FYI, that is a Stryfe cage. No, you're not going crazy. I busted the Infinus's motors on a 3s lipo (and by trying to cut off the circuit boards attached to them), so it's currently awaiting OOD Krakens. Then the Stryfe will get its cage back, and the Infinus will finally shoot more than 20ft in full-auto, and 30 in semi-auto!


  • 0

#6 limmers2015

limmers2015

    Member

  • Members
  • 12 posts

Posted 17 October 2018 - 12:31 PM

*
POPULAR

And here's a current wiring diagram:

Infinus Sketch_schem.jpg

Hope that works! If you have any questions, please, ask away!


I will be making a major upgrade soon, and will update the images and diagram with the results. I am going to use a MOSFET on the flywheel motors, which will be OOD Krakens, and will be replacing the battery pack(s) with a 65C 2200 mAh lipo. I will use a voltage regulator to give the other motors 6V for the moment, until they too are upgraded with MOSFETS and Krakens.


There is more fun to be had with this blaster!


We will have a better mousetrap!


Edit: None of the part numbers are accurate in the above diagram. I just wanted to get it done, and didn't worry about the numbers. The resistance values and voltages are all correct though.


Edited by limmers2015, 18 October 2018 - 03:51 PM.

  • 1

#7 limmers2015

limmers2015

    Member

  • Members
  • 12 posts

Posted 24 November 2018 - 09:05 PM

Did the upgrade. Will post fully in morning.


  • 0

#8 limmers2015

limmers2015

    Member

  • Members
  • 12 posts

Posted 25 November 2018 - 09:44 AM

Here are the updated pictures:


Front-end:

PB251216.JPG


Middle:

PB251217.JPG


Back-end:

PB251218.JPG


Battery Tray:

PB241214.JPG


Battery Cover:

PB241215.JPG


Battery:

PB241213.JPG


Here's the wiring diagram (with all of the part numbers correct now, I hope!):

Infinus Sketch Updated.jpg


And here's the code I'm running:


https://create.ardui...75a72a7/preview


I have a custom-designed flywheel cage on order from /u/Jack-Dapper on Reddit. See here for more details.


As usual, bring on the questions! I honestly enjoy answering them!


~limmers2015


Edited by limmers2015, 25 November 2018 - 08:19 PM.

  • 0

#9 limmers2015

limmers2015

    Member

  • Members
  • 12 posts

Posted 10 December 2018 - 01:11 PM

As of now, with the stock cage, I am getting ~130 FPS at maximum efficiency settings. I have set the value down in my test program to 30 / 255, or 1.41V, to get 70FPS. The motors get hit with 1/20 sec of 6V every time the pusher returns to keep them from lagging.


I am thinking of two press switches on the right side of the AFG for mid-battle fire-mode and velocity selection. If that happens, I'll be adding a 1.6 in x 1.6 in OLED display to the left side, above the trigger guard, so I can have the blaster relay information to me.


I have 2000 EKIND waffle head darts on my christmas list, so I can actually use this to it's full potential without welting people! The on-field velocity selection would allow me to crank it up with waffles, and drop it back down with vinyl tipped darts to keep the blaster "safe". That, and the ability to suddenly engage at unexpected ranges, are more than enough reasoning for me!


Anyone else starting to get the feeling of an FDL, just with brushed motors, and the dart-loading feature?


  • 0

#10 Technician Gimmick

Technician Gimmick

    Member

  • Members
  • 28 posts

Posted 12 December 2018 - 05:52 PM

Looking really cool! Do you have any video of it in action?


Also, do you have any kind of safety preventing your Lipo from being drained too far, or do you just re-charge regularly enough that you don't run into that issue?

I'm looking into continuing the Gryphon over the next couple months. When I have something note worthy accomplished, I'll be sure to post onto my old Gryphon post.

Have fun Nerfing!

- Technician Gimmick


  • 0

#11 limmers2015

limmers2015

    Member

  • Members
  • 12 posts

Posted 12 December 2018 - 07:06 PM

Technician Gimmick:


I've got this to monitor the voltage:


PC121212.JPG


PB251218.JPG


It's a voltmeter from OOD, that I just look at in between rounds. So far, I've only gotten down to 87% charge (according to the Accucell S60), even after a full hour of warring, so I think it's pretty good in that regard.


Here's how the battery fits in:

PC121211.JPG

I didn't even know when I bought it!


As for the video:

Attached File  Infinus Firing 480P.mov   32.39MB   326 downloads


Hope that works!


Thanks for taking the time to read my posts!


Edit: I'm still working out some of the bugs produced by my upgrade, as I've been rather busy with finals coming up. The loader isn't operational at the moment, pending a code upgrade, and the velocity is a WIP.

Pretend that you don't see those!


- limmers2015

Attached Thumbnails

  • PC121207.JPG

Edited by limmers2015, 12 December 2018 - 07:08 PM.

  • 0

#12 Technician Gimmick

Technician Gimmick

    Member

  • Members
  • 28 posts

Posted 12 December 2018 - 08:46 PM

That's really cool. Now that I think about it, I had never really tested to see what level I had discharged the LiPo batteries to. Instead, I installed a limit module that was pre-made for lipo batteries. It automatically shuts off power before the battery is damaged.

I like the sensor you got for measuring speed and ammo count. I didn't know they even made those.


 - TG


  • 0

#13 limmers2015

limmers2015

    Member

  • Members
  • 12 posts

Posted 12 December 2018 - 09:25 PM

TG:


Here is a link to the chronobarrel if you want one:


https://nerf.hasbro....0D-6731A552CD2B


It would run you $14.99 + tax & shipping.


I saw it in the release news, and then the video review by coop772, and was instantly sold. I used it to test all my other blasters, in addition to calibrating the Infinus. It's a very good, cheap, non-external-light-dependent chronograph, with the bonus ammo-counter (count up and down modes!). I usually leave it just on in count-up mode for an entire game, and then look at it when I'm done. It's usually up around 1100 rounds or so. Highest I've ever seen is 1357.


The one problem with the current voltmeter wiring, though, is that it is always on! It alone will drain the battery in about 2 days! (based on its current draw and the capacity of the battery) I'll be adding an external switch to the main power loop when I do my next upgrade round, to curb the draw when it's not in use. It will also make it easier to upload new code, as I used pin 13 (led_pin on this board!) for the mosfet gate, which flashes when uploading, leading to some annoying revving when changing code settings!


Edit (2/4/19): Did the power-loop mod. It now has a switch on the cosmetic side of the stock, below the battery compartment.


- limmers2015


Edited by limmers2015, 04 February 2019 - 07:47 PM.

  • 0

#14 limmers2015

limmers2015

    Member

  • Members
  • 12 posts

Posted 07 May 2019 - 04:01 PM

Hello all:

I am in the process of doing the "final" round of modding on the Infinus.

I am using:
- OutOfDarts Krakens for all motors, driven by (and, except for the flywheels, braked by!) IRLB3034PBF N-channel MOSFETS.
- 3 buttons on the foregrip and 2 above those for quick mode changes.
- 5 more buttons on the left side, below a 1.6" LCD display, to support GUI menu-based setting changes.
- And a small OLED display in the place of the stock Red/Yellow/Green LED to give on-the-fly info, including ammo capacity.

I am expecting 10DPS at 100FPS with the stock flywheel cage. Once I print my custom cage at the local library, that should go up to ~200FPS.

Here's my WIP "Final Version" of the code:

https://create.ardui...91c2ab6/preview

Here's my pin assignment spreadsheet:
Attached File  Arduino Micro Pin Assignments.pdf   35.36KB   288 downloads

And here's the wiring diagram:
Infinus Finalized_schem.png

Anyone spot something I missed? As far as I can tell, it will work fine.

If anyone has any suggestions as to the most memory-efficient way to write the code, please let me know.

- limmers2015

Edited by limmers2015, 07 May 2019 - 04:06 PM.

  • 0

#15 Ruphkinutz

Ruphkinutz

    Member

  • FNG1 
  • 1 posts

Posted 21 June 2019 - 10:30 AM

I am currently attempting your Infinus mod for my 2nd Nerf mod. (I decided to go big or go home). I was hoping you could show some pics of the LCD and buttons placements on your Infinus, and maybe drop some pointers. I have been reading over your build process and it sounds super fun.


  • 0


0 user(s) are reading this topic

0 members, 0 guests, 0 anonymous users