Jump to content


Photo

A Noob's Guide to the Nerf Hammershot


8 replies to this topic

#1 Golf0ned

Golf0ned

    Member

  • Members
  • 10 posts

Posted 22 August 2017 - 05:11 PM

Hey there! This is a mod writeup for the Nerf hammershot.
After going through the performance half of the writeup, you should be able to modify a nerf hammershot to hit slightly harder without power tools. It wont be hitting over 100 FPS or anything, but is very simple to do. With the latter half of this writeup, you will know how to use soap masking to make an Effeminate blaster, and have it fire over 9000 feet (not really, but still...) and makes you look awesome when flinging foam.


Part 1: Performance


Disassembly and OMW 8KG spring installation

Difficulty: A monkey could do it


You will need a hammershot, a bag and location for small parts, an OMW 8KG spring, and a screwdriver.

Remove all the screws in the hammershot. The screws are simple; one size fits all. Leave the screws in the bag for safekeeping.

HS_mod_1.jpg


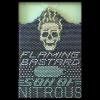
Butterfly the shell open.

HS_mod_2.jpg


We will not be dealing with the turret yet, and will not be messing with the tactical rail tooth, sling point, and the orange sight piece. Get your OMW spring.

HS_mod_3.jpg


Pry the spring out of its place in the primary plastic piece. Yes, I just used 3 words that start with P in a row.

HS_mod_4.jpg


Pull or "untwist" (Unscrew?) the spring out entirely, and throw it at someone across the room. Do not actually do that.

HS_mod_5.jpg


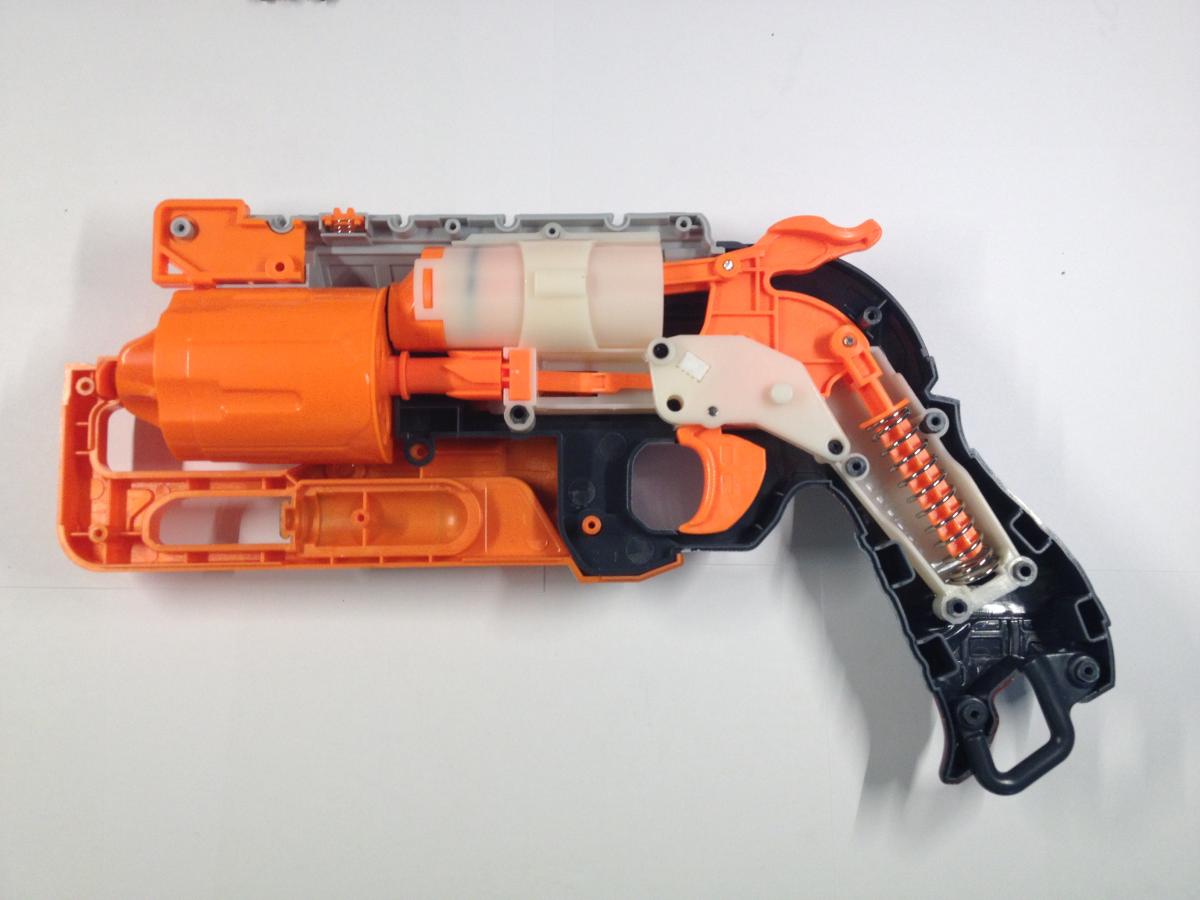
Twist the replacement spring onto the blaster, wide end away from hammer.

EDIT: Put it on the other way. I did it wrong. Wide end away, not towards.

HS_mod_6.jpg

HS_mod_7.jpg


This part was a little troublesome for me. Push the spring in the rest of the way.

HS_mod_8.jpg


Barrel Post Removal

Difficulty: A monkey with snips could do it


You will need the turret, sandpaper, and snips. Mine are a little rusty...

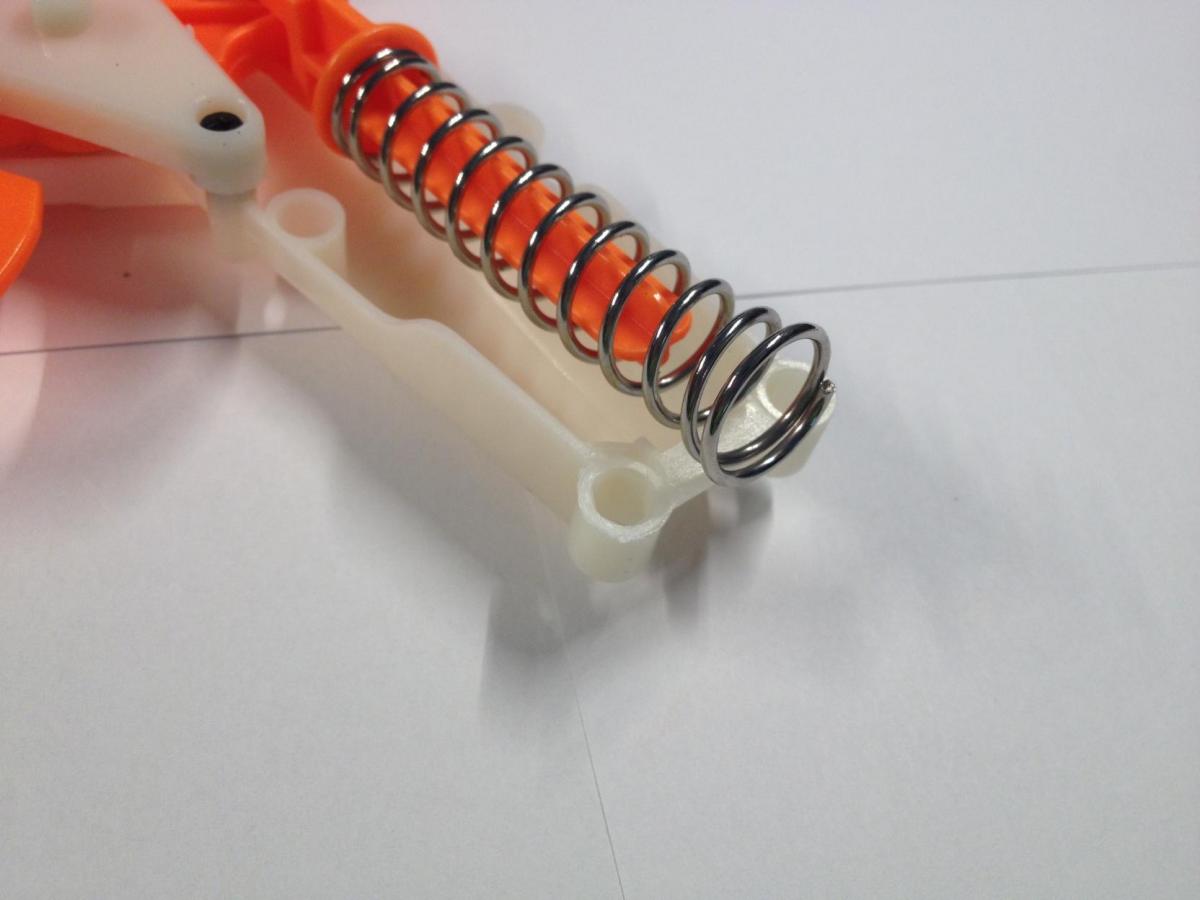
Look through the back of the turret. See the little segments of the plastic spanning the barrels? Those will be mostly removed.

HS_Posts_1.jpg


Snip the edges of the posts like so.

HS_Posts_2.jpg


Mine looked like this when I finished snipping everything. Some people keep the posts for their own purposes.

HS_Posts_3.jpg

Take your sandpaper, and rub the nubs of the posts down as to not destroy the foam seal around the AR which makes contact with the turret.HS_Posts_4.jpg


Mine looked like this when finished.

HS_Posts_5.jpg


Now, you could reassemble right now, buuut that's a bit boring. So, read on if you want to make the hammershot look Effeminate on the outside!


Part 2: Paint!


Prep Work

Difficulty: A monkey could do it, but it had to have practice to do it well


Honestly, not much to say. Tape off what you want to stay the same and sand everything else down. I taped the handle and front of turret off.

HS_Ppaint_1.jpg


Le Paint!

Difficulty: It gets harder here ( ͡° ͜ʖ ͡°)


Paint everything with a white primer/base coat or whatever it's called. No picture cause I am a lazy idiot, and nobody wants to see a white blaster.

I could add paint application instructions, but instead of reinventing the wheel, I will just say that other people have tutorials which explain how to use aerosol spray paint cans better than I would be able to.


Afterwards, paint over everything with a brightly colored paint. The white underneath was to make the fluorescent paints a little brighter in color.

HS_Ppaint_2.jpg


Be careful of overspray, or you will become me and get paint on your arm and the ground.

HS_Ppaint_3.jpg


Now, go into the kitchen and steal mom's dish soap. Sort of drizzle it over the plastic. Wherever the soap is, paint will not adhere to the plastic. It's hard to explain, but you can always wash the soap off and try again.

Afterwards, paint everything black, with the soap on.

HS_Ppaint_4.jpg


While you're at it, get yourself covered in overspray again and entirely ignore your own advice.

HS_Ppaint_5.jpg


Once the paint has dried, wash the dish soap off the blaster, as well as any hope of anything looking good too.

HS_Ppaint_6.jpg


Mine looked like this.

HS_Ppaint_7.jpg


Remove tape, add hand paint touches, and clear coat. I painted the rest of the turret and the sling mount, and it ended up like this.

FINAL.jpg


This was my first post on here ever, and any feedback, nice or not, is well appreciated. Questions?


Edited by Golf0ned, 23 August 2017 - 04:53 PM.

  • 0

It's pronounced "golf oned"...


#2 Silly

Silly

    Member

  • Members
  • 244 posts

Posted 22 August 2017 - 06:25 PM

Quite, quite nice to see a new member make a incredibly good mod guide on their first post!
  • 0

Co-Owner of the History of Nerf Modding research project, moderator of r/Nerf, owner of BlasterWiki, maker of 3d printed blasters (GitHub/Thingi) and Nerfy art.


#3 ToadBrews

ToadBrews

    Member

  • Members
  • 140 posts

Posted 23 August 2017 - 01:41 AM

It's also nice to see a well-done black-based paint job that doesn't look like a real firearm.


  • 0

#4 Vim Fuego

Vim Fuego

    Member

  • Members
  • 64 posts

Posted 23 August 2017 - 04:37 PM

Only one problem - you put the spring in upside-down.

Look at your 'before' shot (photo 4) to see the factory spring orientation.

Other than that, great guide and a novel paint job (I might have to steal that one) ;)
  • 0

#5 Golf0ned

Golf0ned

    Member

  • Members
  • 10 posts

Posted 23 August 2017 - 04:51 PM

Only one problem - you put the spring in upside-down.

Look at your 'before' shot (photo 4) to see the factory spring orientation.

Other than that, great guide and a novel paint job (I might have to steal that one) ;)

...whoops. I guess I'll fix that...


  • 0

It's pronounced "golf oned"...


#6 Bubba Longshot

Bubba Longshot

    Member

  • Members
  • 191 posts

Posted 23 August 2017 - 05:20 PM

I'm no expert on hammershots (don't even own one), so I have some questions. Do you need to upgrade the catch spring to handle the 8kg spring? After some use, have you noticed any damage or stress on the stock parts? Are there any components worth reinforcing?
Other then that, great mod guide! It was really easy to understand, and although a monkey couldn't do it, any inexperienced modder could.
EDIT: After removing the barrel posts, have you encountered any rotational issues?

Edited by Bubba Longshot, 23 August 2017 - 05:23 PM.

  • 0
"The only thing that sucks about Nerf modification is the anxiety that something will break... That's why we reinforce a whole lot!" -Me

#7 Golf0ned

Golf0ned

    Member

  • Members
  • 10 posts

Posted 23 August 2017 - 06:03 PM

I'm no expert on hammershots (don't even own one), so I have some questions. Do you need to upgrade the catch spring to handle the 8kg spring? After some use, have you noticed any damage or stress on the stock parts? Are there any components worth reinforcing?
Other then that, great mod guide! It was really easy to understand, and although a monkey couldn't do it, any inexperienced modder could.
EDIT: After removing the barrel posts, have you encountered any rotational issues?

No stress on any parts quite yet. I did not upgrade the catch spring. I have a feeling that the hammer might be worth upgrading, but as the blasterparts.de hammer has reports of self-destructing, I'm not sure.


No rotation issues yet. One of the 2 I made that are basically identical has a slightly stiffer rotation, but that's probably because I messed up on the paint and got some on the back.


  • 0

It's pronounced "golf oned"...


#8 modsRus34

modsRus34

    Member

  • Members
  • 98 posts

Posted 04 September 2017 - 08:42 AM

Awesome guide! Would the steps for the barrel post removal and such be any different if you added an upgraded capacity cylinder?


Edited by modsRus34, 04 September 2017 - 08:43 AM.

  • 0

#9 Vim Fuego

Vim Fuego

    Member

  • Members
  • 64 posts

Posted 04 September 2017 - 04:18 PM

Awesome guide! Would the steps for the barrel post removal and such be any different if you added an upgraded capacity cylinder?


The OMW 6-barrel didn't come with any posts - that's the only one I can speak of with any actual experience - but since they're pretty much the first thing cut away from any blaster, I would think there wouldn't be too many after-market parts designers putting them in their upgrades...

...but if they did, then yes - you would cut them away just the same.

Edited by Vim Fuego, 04 September 2017 - 04:20 PM.

  • 0


0 user(s) are reading this topic

0 members, 0 guests, 0 anonymous users