Jump to content


Photo

Machined PCSR Write-Up

Write-up Pump-Action Springer Homemade

5 replies to this topic

#1 CaptainSlug

CaptainSlug

    Resident Mad Scientist

  • Administrators
  • 4,763 posts

Posted 20 September 2016 - 08:04 AM

pcsr_c44.jpg

Write-Up: http://captainslug.com/pcsr.html

Template Set: http://www.captainsl...r_templates.doc

Partlist: http://captainslug.c...sr_partlist.xls

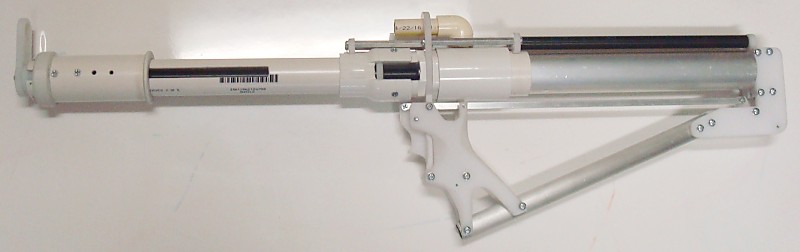
I've made three of these so far. I'm pleased with the ability to break these down without tools, though if I were to make more in the future I would probably advise that the front half be attached with at least one or two screws. Slamming the foregrip back and forth a bunch over a weekend will eventually walk the pipe out of the reducing coupler.


Special Thanks to Aeromech (original design) and snakerbot (redirect)


  • 0
The little critters of nature, they don't know that they're ugly. That's very funny, a fly marrying a bumble bee. I told you I'd shoot, but you didn't believe me. Why didn't you believe me?

#2 xXD3V1LXx

xXD3V1LXx

    Member

  • Members
  • 258 posts

Posted 20 September 2016 - 10:22 AM

So i have messed around with my machined pcsr a bunch and i have found some very problematic issues with it in the catch area. This can be blaster-breaking if not properly taken care of and can be quite hard to find the problem if you are not aware of it. So i hope the mods let me post this... so first off the screw that connects the fulcrum that pushes the catch up and the aluminum rod that is what connects the trigger and catch realease has to be loosened after every few hundred shots as it tightens up and doesnt let you release the catch. Another way to fix it is put a heavier spring on it. Another problem is having the catch spring get caught in the catch allignment plate. To fix this put the spring at the top of the screw every few hundred shots or put a locking washer to stop it from going down.
  • 0
A quote from Ice Nine
"Use the golden rule: Don't be a dick."

NERF On
-Devil

#3 CaptainSlug

CaptainSlug

    Resident Mad Scientist

  • Administrators
  • 4,763 posts

Posted 20 September 2016 - 10:40 AM

You can use thread-locking compound to keep the screws from loosening or tightening. Many adhesives work fine for this purpose.
The alternative is to only partially tap the holes so they they fit the screws much tighter.

As for the spring getting caught that cutout should have been done at an angle and I apologize for that.
  • 0
The little critters of nature, they don't know that they're ugly. That's very funny, a fly marrying a bumble bee. I told you I'd shoot, but you didn't believe me. Why didn't you believe me?

#4 Aeromech

Aeromech

    Member

  • Moderators
  • 434 posts

Posted 20 September 2016 - 12:42 PM

I'm in tears. This is wonderful and I love that I have inspired someone to take this in different directions. I would love to compare this to the V3 when I have it finished up.


  • 0
Watch my shitty videos

This is so ghetto but so awesome.


#5 Snoop Doggy doge

Snoop Doggy doge

    Fig you, Van

  • Members
  • 501 posts

Posted 20 September 2016 - 05:56 PM

I'm in tears. This is wonderful and I love that I have inspired someone to take this in different directions. I would love to compare this to the V3 when I have it finished up.

Wow thanks for the compliments for when I improved your sear

All jokes + salt aside, how well has this been able to hold up against larger springloads? FPS/chrono readings? I love that it's easily foldable for transport but  I am curious, since nothing secured the front and the rear, wouldn't it be easy to slam forward and take it off? 
Anyway, I'll probably see this at a future war and try it out. Great work as always!


  • 0

#6 CaptainSlug

CaptainSlug

    Resident Mad Scientist

  • Administrators
  • 4,763 posts

Posted 20 September 2016 - 07:04 PM

1. how well has this been able to hold up against larger springloads?

2. FPS/chrono readings?

3. I love that it's easily foldable for transport but  I am curious, since nothing secured the front and the rear, wouldn't it be easy to slam forward and take it off?

1. If the plunger tube itself is aluminum or SCH40 pipe and is secured with screws you should be able to easily upgrade this to whatever spring you can prime. Bog standard the plunger tube is just left floating and the load is carried by the frame instead. This allows for the plunger tube to be made out of aluminum, polycarbonate, or SCH40 pipe.

2. I don't have one

3. Yes, that can happen. Adding two screws (regular or thumbscrews) helps to prevent that.


  • 0
The little critters of nature, they don't know that they're ugly. That's very funny, a fly marrying a bumble bee. I told you I'd shoot, but you didn't believe me. Why didn't you believe me?


Also tagged with one or more of these keywords: Write-up, Pump-Action, Springer, Homemade

0 user(s) are reading this topic

0 members, 0 guests, 0 anonymous users