

Make Your Own Melee

I know many nerfers enjoy the use of melee weapons or “boffers” in our wars. And there are several companies including Hasbro that are happy to provide you with one for a fee. Players have also been making them out of pool noodles and duct tape for years. Homemade boffers have never appealed to me aesthetically, so I set out to change that. What follows is the step-by-step guide to how I make foam melee weapons that are a bit more appealing to the eye, yet still completely safe for play. All of the supplies for this build can be found in a single trip to your average local Home Depot. I have also included links to the exact products that I used.
Hot glue
Aluminum Can
Long disposable razor blades
Make a Pattern
- First you must decide what you would like your boffer to look like, how big you would like it to be and then transfer that onto the EVA foam mats. This could be as simple as a freehand drawing. What I did was find a picture of what I wanted and printed it in the size that I wanted. I then made a reusable pattern by cutting out the design and covering it in packing tape.
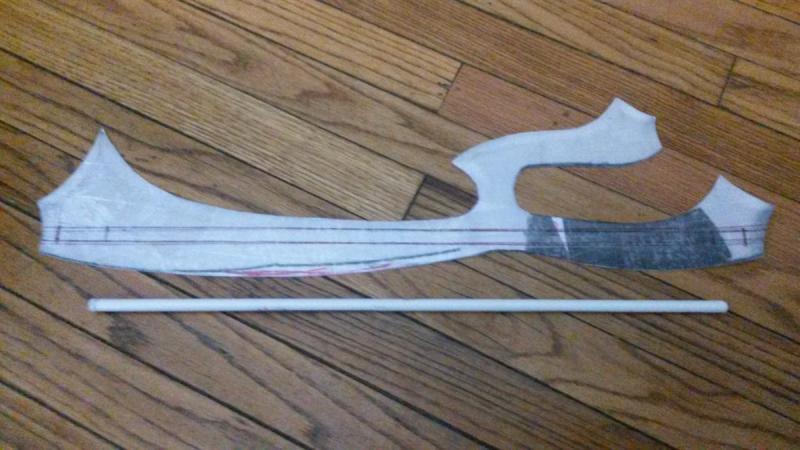
- Place the pattern on the textured side of the EVA and trace the edges. Then flip the pattern over and trace the other side so that you end up with what will be the two halves of your boffer.

Make the Core
- Place your polycarbonate rod on the pattern and trace its outline. Make sure there is at least a half inch of foam clearance on all sides, including the ends.
- Measure the distance between the ends that you traced and subtract 1.5 in. from the result. Cut your polycarbonate rod to that length.
- Use a rotary tool to hollow out a section about .5 inches deep and .25 inches wide. Do this on both ends.

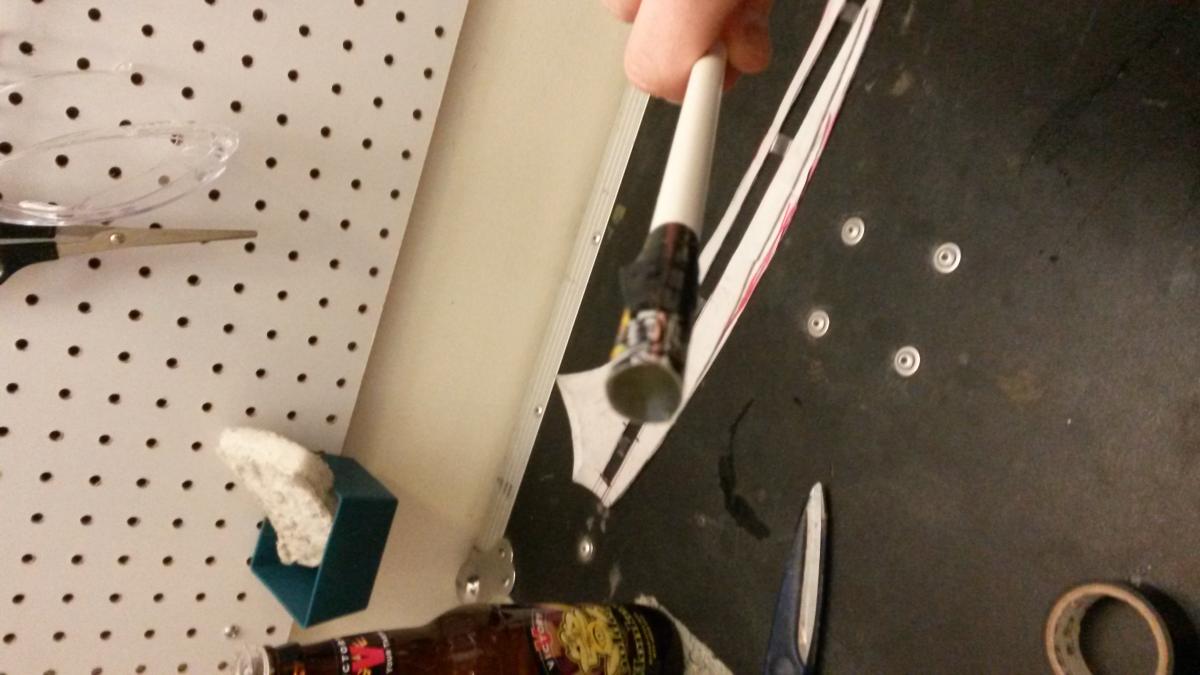
- Cut two sections from your aluminum can that are about 2 inches wide and 4-6 inches long. Lubricate the inside of both pieces of can. Wrap them around the ends of your rod, leaving an overlap of .5 inches on one end and 1 inch on the other. Use several wraps of tape to secure them in place.


- With your glue gun on its highest setting, very slowly begin to fill the cavity that you have created. Be patient while doing this, any air bubbles in the cavity will make the hot glue very weak and you will have to do this step over again.
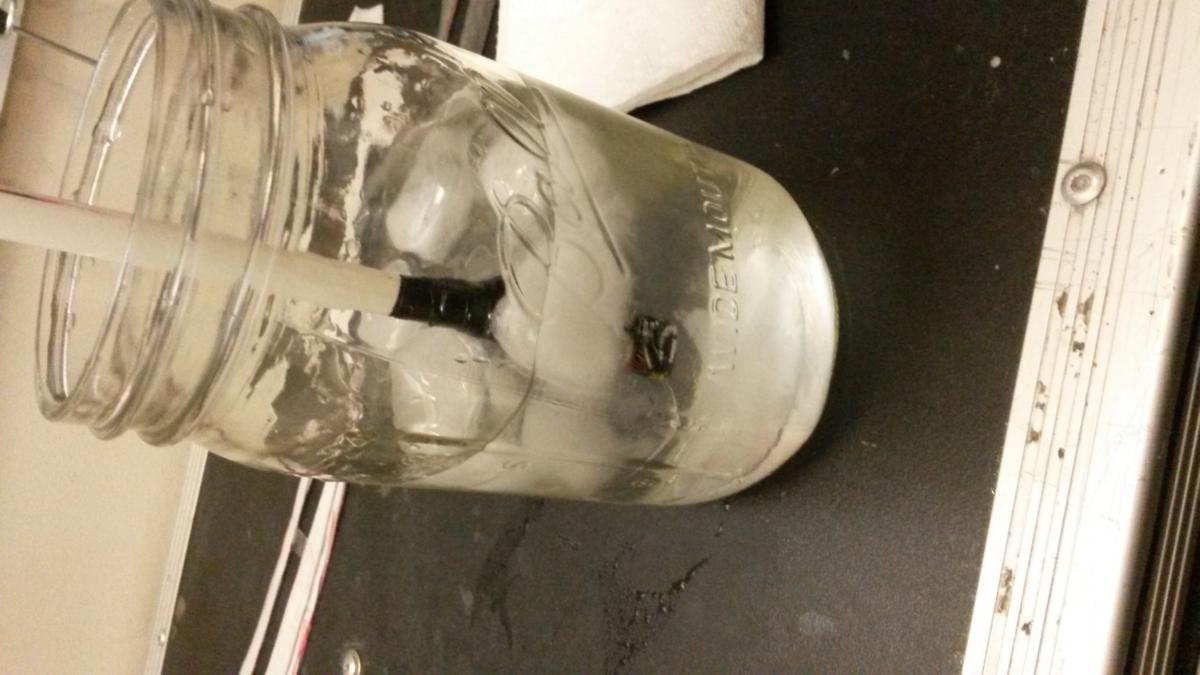
- When you are sure that you have gotten all of the air bubbles out of the glue and it has cooled thoroughly remove the tape and the aluminum. You will be left with two ends that are very durable and also quite soft and flexible such that they will be unlikely to poke through your foam. It will take 15-20 minutes for your glue to cool. I you are impatient like I am you can speed the process quite a bit by filling a large glass with ice water and swirling the molten ends in it until they have solidified. This should only take a minute or two. The end with the longer hot glue tip will go toward the point of your blade, while the shorter tip goes on the end where your hand will be.


Prepare Your Foam
- Place the finished core on your pattern where it was marked from the earlier to make sure you have gotten the length right. Cut the inner section out of your pattern.

- Place your pattern back onto the foam. Trace the hole you cut out for the rod.

- Now we can start cutting foam. Using your razor knife cut the form out of the foam (one side at a time) as evenly as you can. Try to keep the knife at a right angle to the EVA the entire time. Any place where the angle changes will have to be sanded out later and may lead to the halves of your boffer being uneven.
- Use your rotary tool to carve out the channel marked for the core to about .25 inches deep on each piece of the foam. I used an old piece of tubing to create a plunge guide for my rotary tools hand piece, but you could use a tiny router or just free hand it.

- With soap and hot water wash all of the dust off of your foam halves.
Glue Your Foam Sandwich Together
- When your halves have dried follow the instructions for your contact cement to first glue the core into the channel on one piece of your foam. Then glue the two pieces of foam together. Contact cement is pretty smelly and toxic stuff, so make sure to use it in a well ventilated area and to always wear a respirator when working with it.

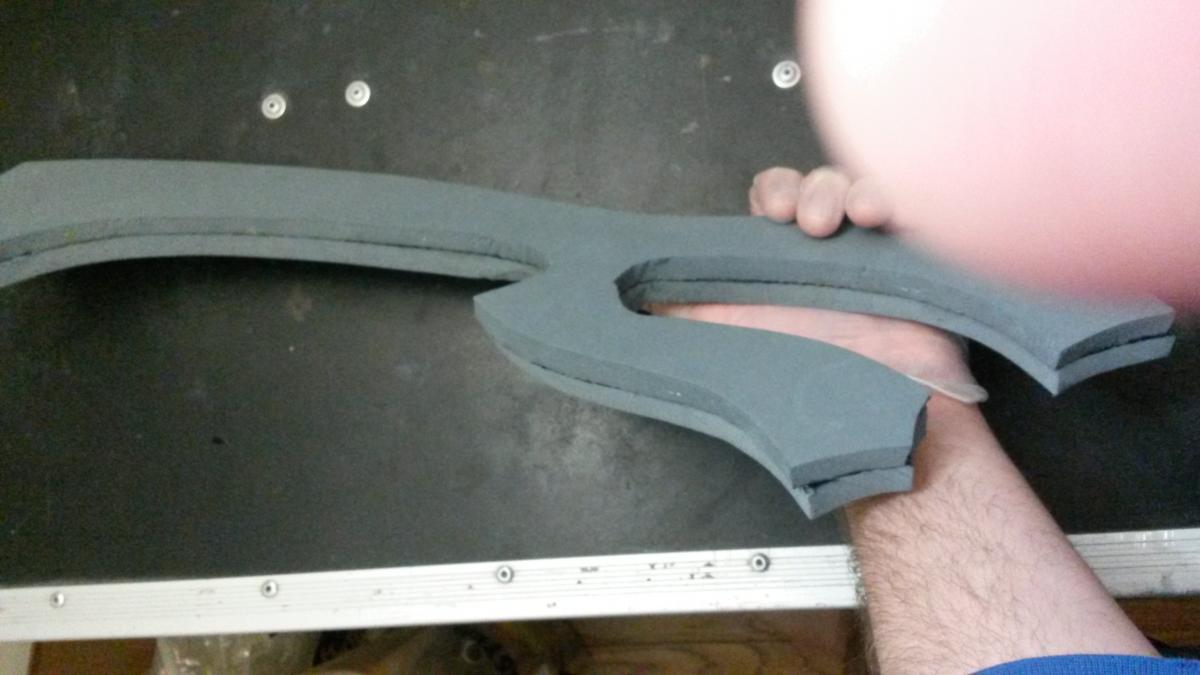
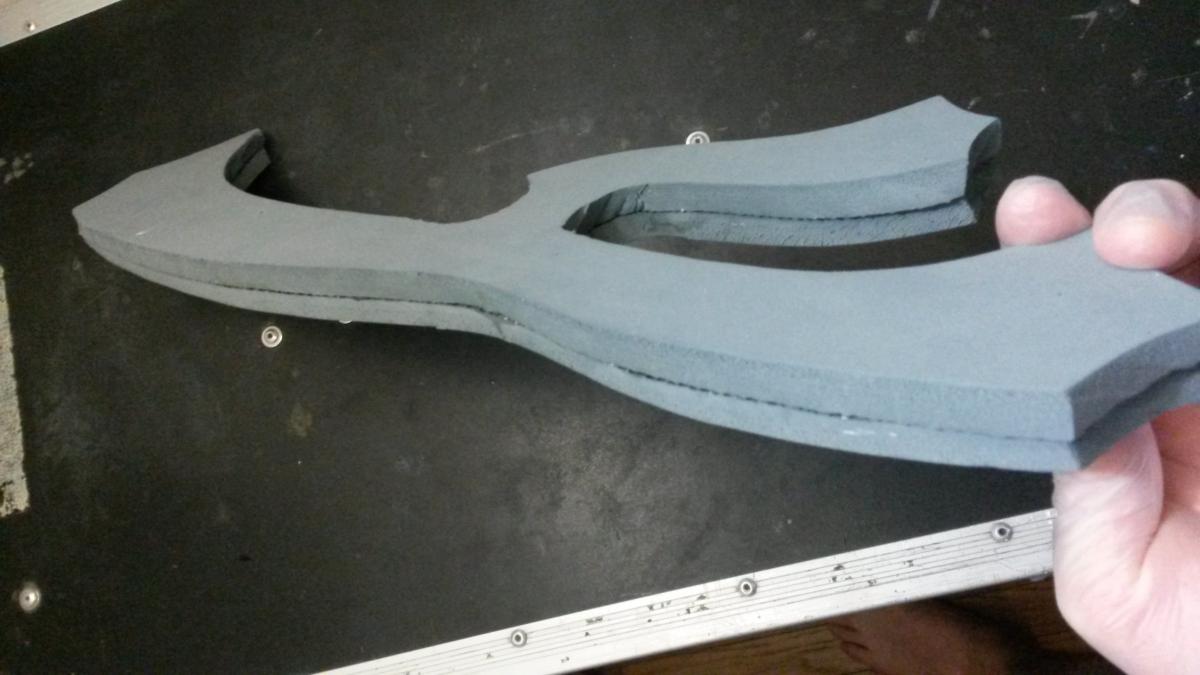
Carve your shape
- It’s time to get artistic. Use your razor knife and a drum sander on your rotary tool to create the final shape of your boffer. You could also use a belt sander if you have one. This process is pretty messy and dusty and your lungs won’t like it so remember to wear your respirator the whole time.


Seal it
- Eva mats typically will have some air bubbles in the smooth side which will fill with Plasti-Dip when we try to seal it so we will have to smooth those out. If you wish to have random pitting all over your sword you can skip this step.
- Quick setting adhesive caulk will do a good job of filling the bubbles and the gaps along the edges left by the texturizing on the foam. Moisten your finger and spread caulk over the whole piece in really thin layers. The thinner you can spread it the quicker it will dry and the less shrinkage you will have. Let the caulk dry for 5-10 minutes between coats. When you are satisfied with the smoothness of your project we can move on to the next step.
- It’s time to coat the boffer in Plasti-dip. I use Plasti-Dip because it is cheap, very durable, adheres really well to EVA and accepts paint easily. I like to spray a few layers on the sides, then a few on the edges to build up thickness evenly over the entire piece. Remember to spray in very thin coats so that your dip will be as even and durable as possible. Repeat the process until the piece has an even coat of dip and you are happy with the results. I have found that it takes at least 3 coats to do the job.

Paint It
- I use acrylic paints from Citadels to get my final coats. They work very well with the Plasti-Dip and I have found them durable enough to use without any kind of clear protective layer on top. Plasti-Dip makes lots of different top coats that you can spray over your finished project if you wish to do so. Have fun with it, this is a great chance to express yourself and make something totally unique!

- When the paint is dry your boffer is finished and ready to go to war!


 )
)

