

*This is my first modguide type post, please excuse my lack of experience*
** WARNING, VERY PICTURE HEAVY **
The nitefinder rifle is one of the very first NIC level blasters I'd ever used. Although nitefinders can be found online and at thrift stores; both for very cheap, they are technically obsolete. So let's take the the Elite equivalent blaster, and create a new generation of pistol rifles
~materials~
-consumables-
-- Super Glue
-- JB Weld
-- Hot Glue
-- Epoxy Putty
-- Lube
-- E-tape
-- Teflon Tape
-- Rubbing Alcohol
-Parts-
-- PVC Coupler
-- CPVC Coupler
--Replacement O-ring
-- 3/8 inch Square rod (Mines delrin)
-- Plunger Tube replacement (Mines 1' Polycarb)
-- Main Spring Placement (Mines a [k26])
-- Catch Spring Replacement
-- Assortment of Springs (I don't know what spring sizes, I just used random ones I had around that worked)
*Optional* If you intend to use your own seal (I.g a skirt seal) you'll need to appropriate materials for that
-Tools-
-- Hacksaw
-- Drill (with drill bits appropriate to screw sizes)
-- Screw taps (obviously corrasponding to your screw choices)
-- Dremel
-- Sharpie
-- Ruler
*Any took that will achieve the same results/objectives as the listed above will work.*
~Now all the boring parts, lets get to the mod~
First take your FireStrike and disassemble. No hidden screws so nothing to worry about. the bottom battery cover doesn't need to be unscrewed, but can be done anyways.

If you do remove the cover, remember to just screw the nut onto the screw to keep track of it for the future

Next we will work with the plunger assembly. The plunger rod needs to be cut at two places. (only one is showed in this photo, forgot to photo graph the other)
This is what we will have left

And this is all we will use
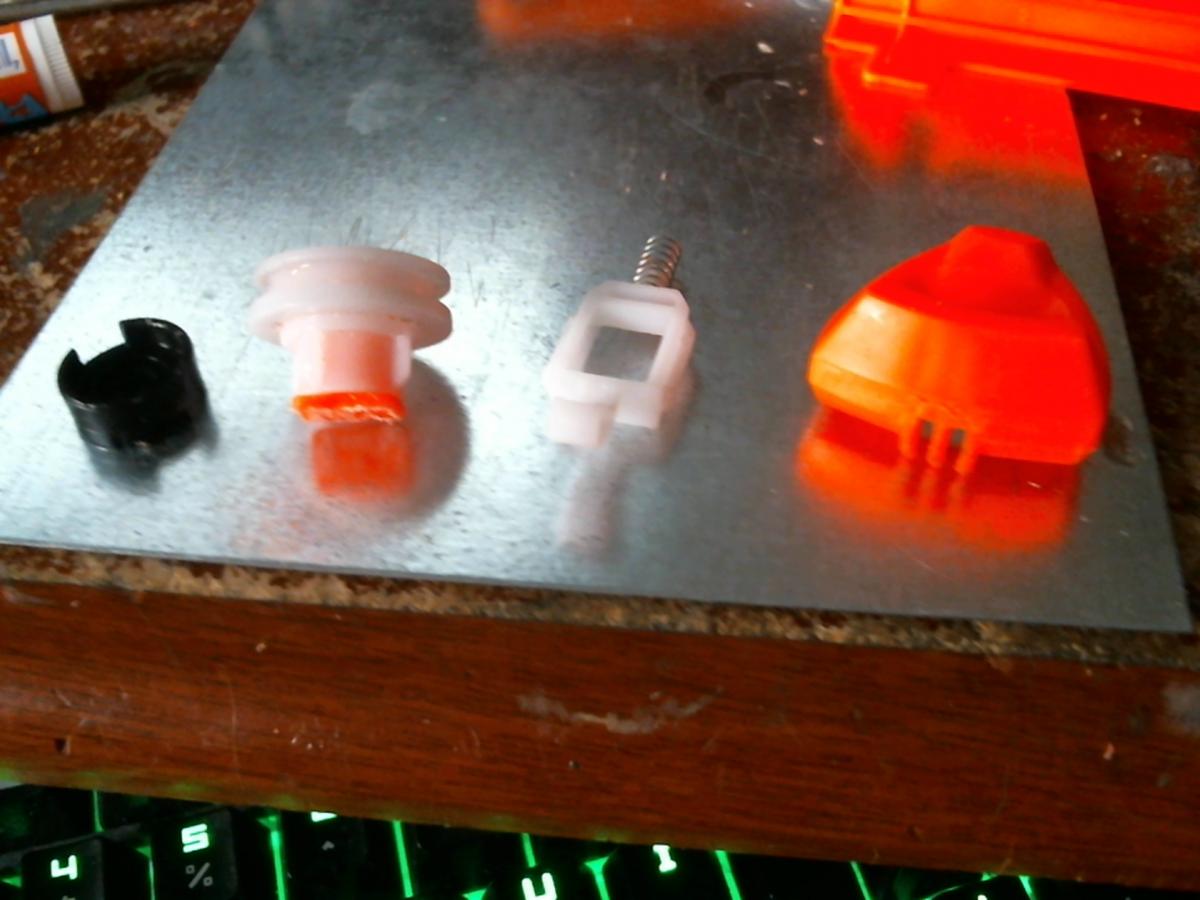
If you wish to use the first strike plunger head, the OD of the FS plunger head and ID of the 1" polycarb tube is only a few mm different, so the o-ring will be to big. You have to replace it with a thinner o-ring.
drill on the inside of the orange piece that the plunger head is attached too.

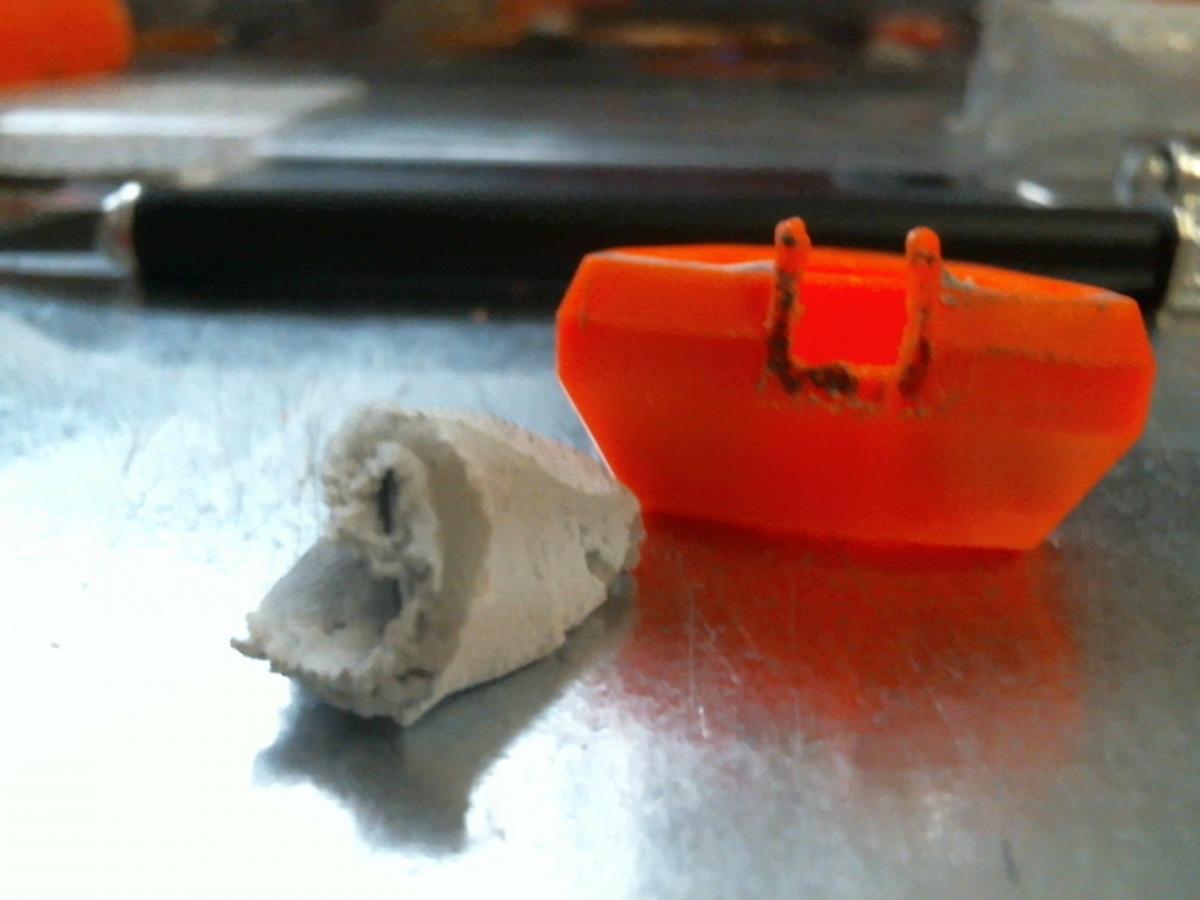
I will be using the original pull piece of the of the FS, but you can make your own with standoffs or poly carb. If you are like me, you'll need to do a few things.
It is wise to remove the middle bar as it will make drilling the hole after better.


Next we reinforce it

You will need to start on your plunger tube assembly now. My polycarb plunger tube is roughly 9".

CPVC couplers fit perfectly inside PVC couplers. so using a bit of super glue, seat them together, wrap some e-tape around the remaining bit of CPVC and seat it into the polycarb tube. Glue it in place (I used JB weld).

Drill a hole, put a screw through it at the end with the e-tape, and wrap some e-tape around it to look pretty (I coated the screw opening, screw threads, and screw head and bolt with JB weld to make sure there was no leaks).

Voilà, you now have a universal couplered plunger tube.
Next measure out your plunger rod to desired length. Mine is 9" long.
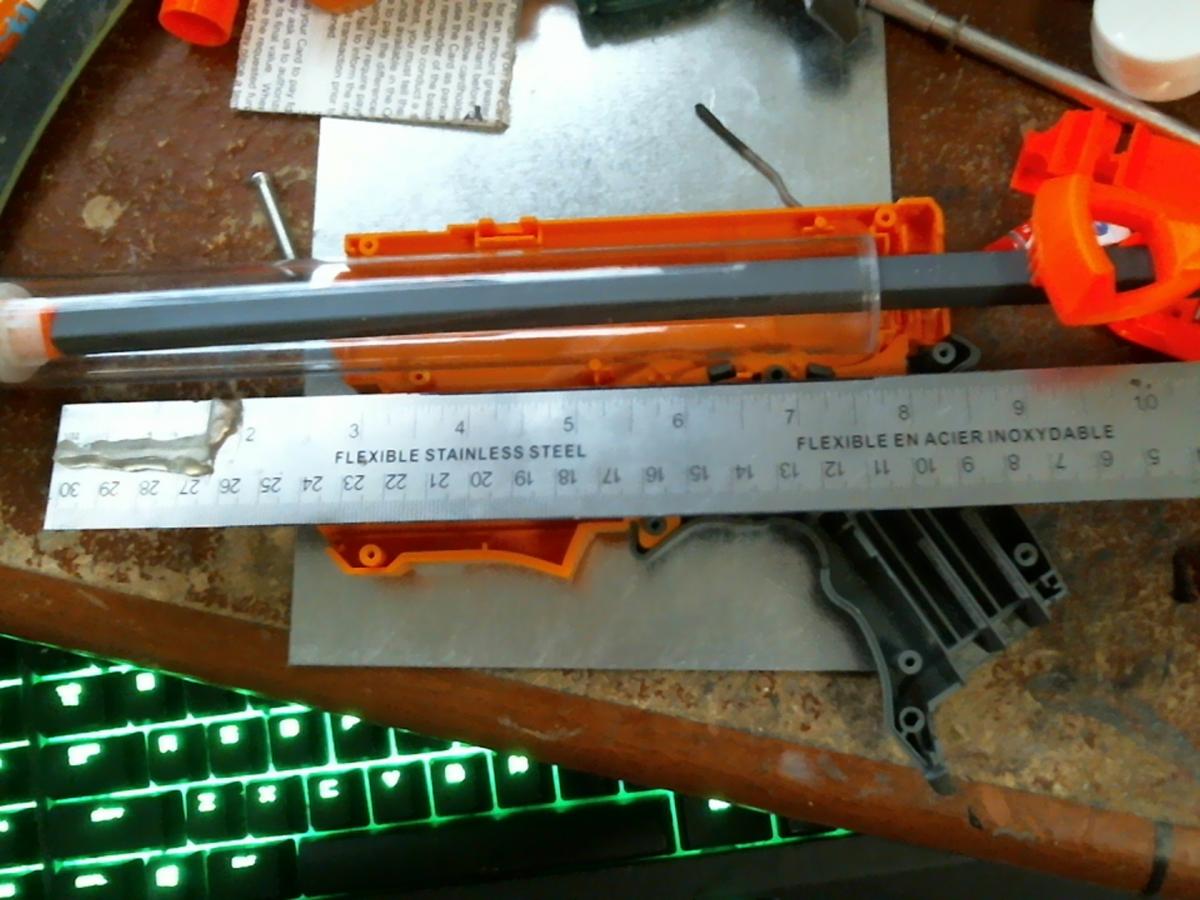
For the main Spring cut it to the desired length with a little bit on pre-compression.Mine is roughly 8 1/2" long.

You'll have to cut your catch groove. (I didn't take a picture before I started but yeah) Remember to cut the flat part facing the plunger head.

Mine catch groove (the flat part) is 2 and 7/8" from the front. The slant portion can be how ever long you want it to be.

My catch groove is no more then 3/16" deep/down.

The stock FS shell cant actually fit the 3/8" square rod because the FS rod isn't square, it's rectangular, not square, so youll need to sand the outside bits just a little. I've already done it in this photo which is why it looks square.

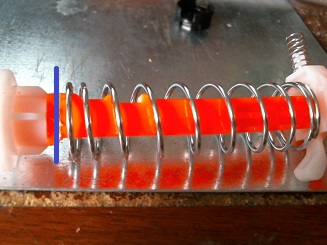
When you place it into the shell, you'll see/notice a few things
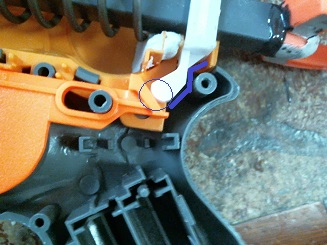
The blue lines show the stress point of the catch when you upgrade the catch spring. that will break if you do not reinforce it. you can do so by reinforcing the space behind it

The blue circle shows that the blaster wont catch since the old plunger rod had ramps going up to catch. With the new plunger rod, the groove is down into the catch (sadly forgot to take a photo of this), so you'll need to give the catch some room to move down. you can do this by sanding the trigger ramp a little.

Time to work with the shell
The plunger tube will not fit, so some sanding needs to be done


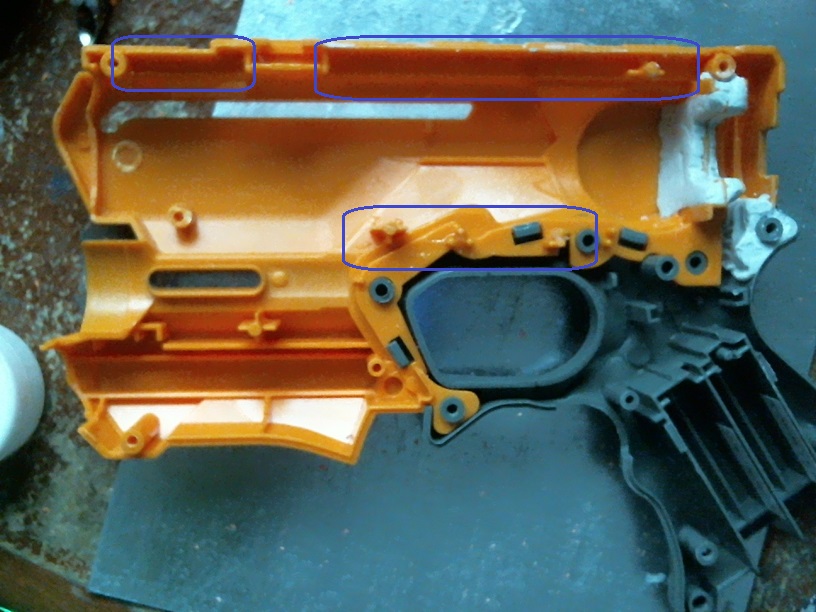
You will need to do some shell reinforcing for the new spring
On the right side half of the shell, reinforce the front bit so it's flat for the spring to press against, and the back part to reinforce the spring rest before the catch
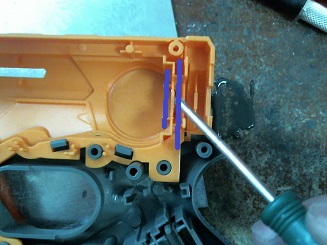
On the left side, don't go past the blue line or you'll interfere with the catch, but don't go higher then the post (being pointed at with the black arrow) or you'll interfere with the plunger rod.

It should look like this

Now let's get the plunger assembly to stay in the blaster when closed.
As you can see, with the plunger tube in, there is a giant gaping hold where the light is.
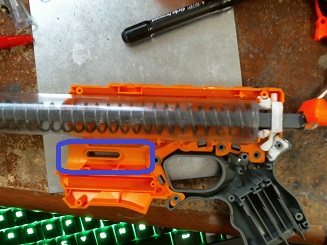
So use the original light housing to support the plunger tube up.


Next lube up these parts of the shell
Rough up the plunger Tube around those areas, place it into the shell, and fill those sections with epoxy putty. (I also placed the light housing back in and used that as a place for the e-putty to stick too)

You can take the extra precaution like I did, and go over the seem lines where the e-putty and polycarb tubes meet, with JB weld. (Not photo graphed)
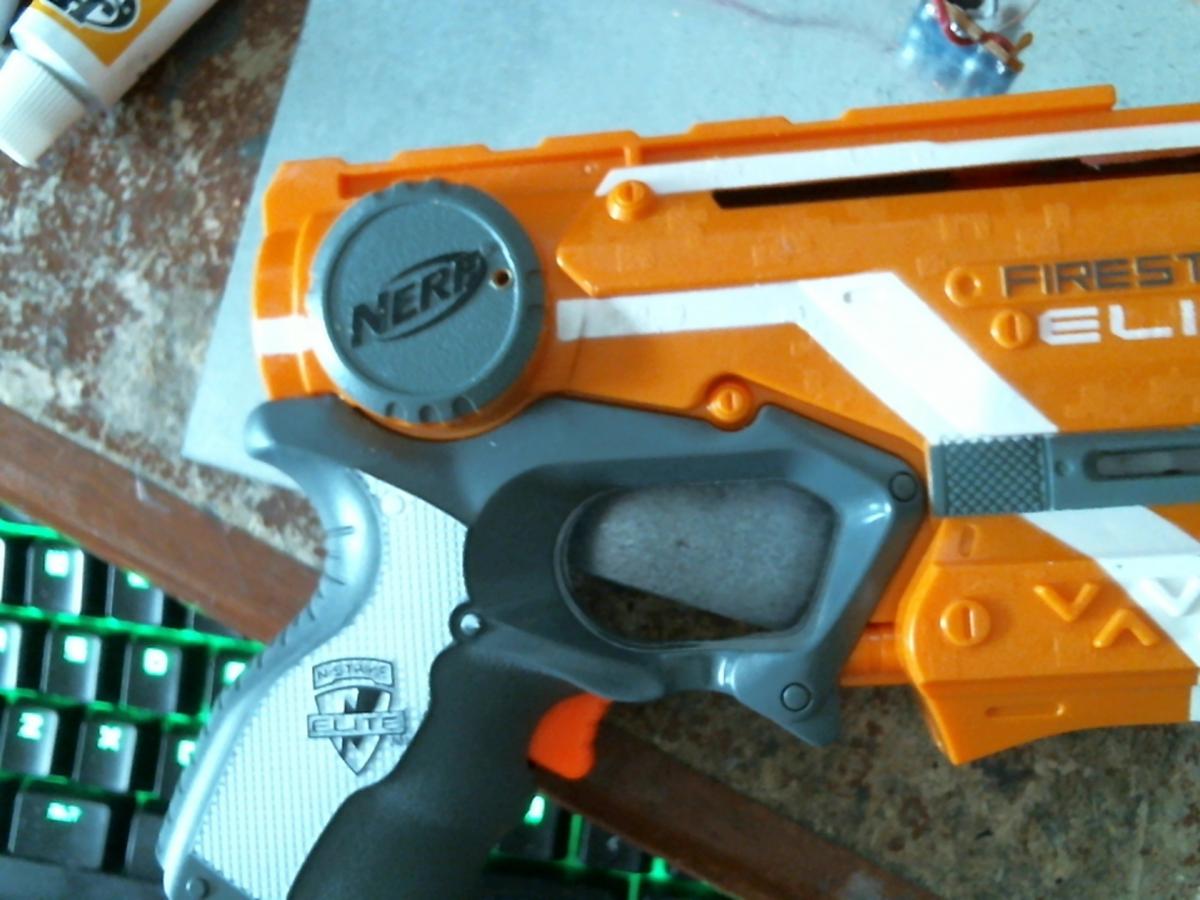
Next we take it one step further, and close the shell with only the plunger tube inside. Drill two holes at the nerf logo for screws. Dont drill them to far back orelse they will be useless. Drill them towards the front of the circle. Make sure the screws you use arent to long as you dont want them to interfere with the spring. (The washer screws inside titans used to hold the lever trigger in place are really good sizing for this)

Now assemble your blaster, make sure to screw everything in, and add your screws to help keep the plunger tube in place.

~Results!~
All shots are fire with as new darts as possible darts. As parallel to the ground as possible roughly 4' 6" from the ground. (my shoulder height)
Stock FS - Elite Darts-code "K" came from a XD Retaliator (12 dart package).
~52'
~57'
~59'
~59'
~64'
FS Rifle - 16" CPVC Barrel. Twist fit on darts. Elite Darts-code "K" came from the same XD Retaliator (12 dart package). All darts fishtailed cause elites
~40'
~Forgot to take a look at the tape... opps..
~85'
~110' (estimated)
~110' (estimated)
Fs Rifle - 16" CPVC Barrel. Push fit on darts. Shmmee's Precut Hot Rod XL Foam blanks, 3/0 Fishing weights, Green mcmaster felt tips. Account that some dark skipping may happens. (besides last dart. that one landed in grass)
~84'
~93'
~95'
~99'
~120'
Nothing goes to say that 16" of CPVC is optimal, just what I had around. but overall, you can see that it is already a major improvement over stock, and a nice fun rainy day mod.
It was fun to recreate one of my first blaster.
Edited by charlie156, 08 May 2016 - 06:06 PM.