The purpose of this build was to attempt to create a brass breech that looked nearly nothing like a brass breech and almost entirely like a stock breech; rocking one at an NIC war, if inspected, would raise some eyebrows... right up until they pulled the trigger.
Money shot:
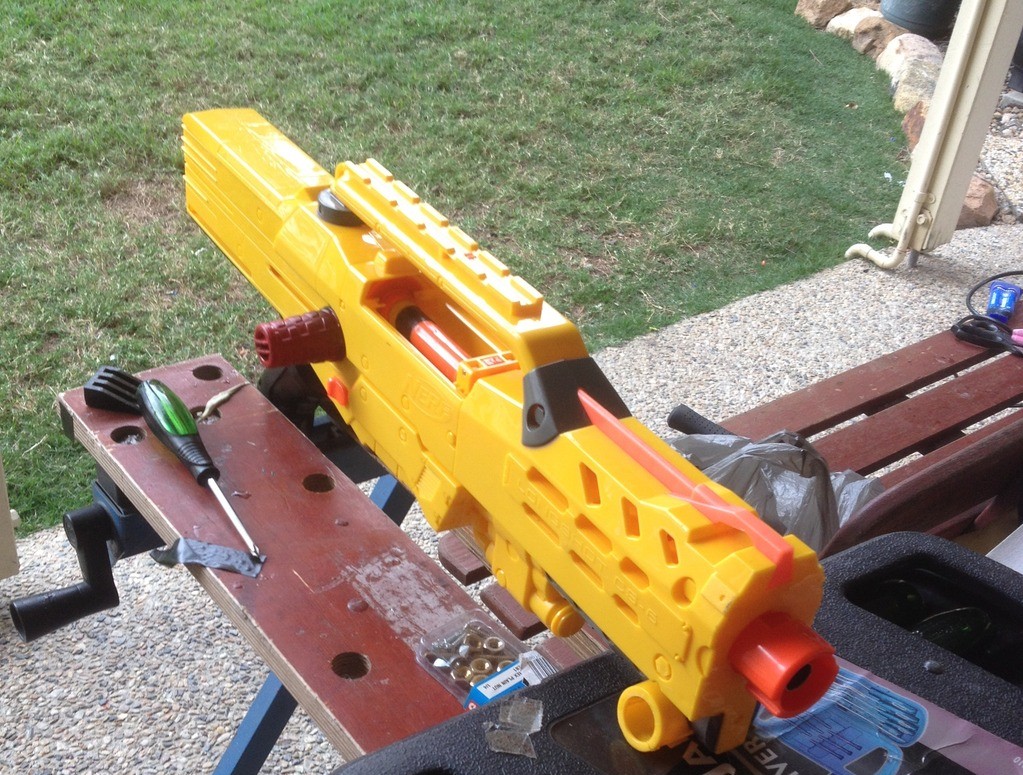
Finished pic of Sleeper breech inside the Longshot.
This warrants a writeup as it’s quite a deviation from the conventional Forsaken Angel brass breech and variants; this breech in itself has two main variants which will be covered at the points where the build process differs.
For this build I required an expensive drill bit; this has been since justified as I’ve built countless as commissions and the drill bit essentially paid for itself thrice over. If you’re able to find a cheaper alternative to the one I bought, I congratulate you, but warn you that it may not last too long, especially if it’s made from Chinesium.
You will need:
-1 foot length of 9/16” brass
-1 foot length of 17/32” brass
-a Longshot (duh)
-9/16” drill bit (mine is reduced shank and cost $40)
-3-day epoxy glue
-rotating pipe cutters
-Rotary tool and cutting wheel
-Good precision with said cutting wheel and a fair bit of patience.
The two designs are known as Conventional and Hybrid. For Conventional sleeper, you will need a hot glue gun and hot glue. For Hybrid Sleeper, you will need a Spenceworkz (or other) 3D printed Deadspace remover. I have yet to completely document the differences in performance, but that will come from my own testing as I am currently rebuilding a Hybrid Sleeper for myself, after building a few prior to this for commissions.
Here's what figures I do know from the year-and-a-half of various spring testing that the general community and I have done.
Turf Blaster Springs:
8kg - 180-200fps with full lengths, 200-210fps with half lengths.
10kg - 200-220fps with full lengths, 220-230fps with half lengths.
10kg + stock spring - 230-250fps with full lengths, 240-255fps with half lengths.
16kg - 220-240fps with full lengths, 240-260fps with half lengths
Hobby Mods 14kg spring - 180-200fps with full lengths, 190-220fps with half lengths.
Orange Mod Works springs:
8kg and 10kg - see Turf Blaster Springs values.
Let’s begin the meat and potatoes.
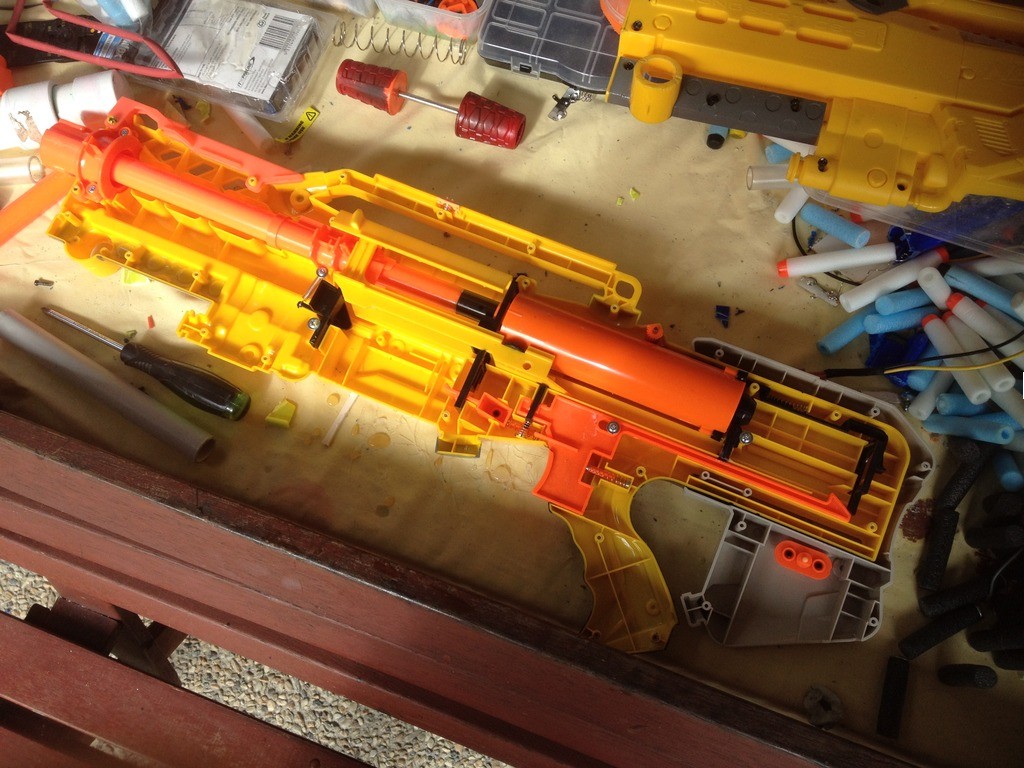
Starts stock, finishes looking stock. Let's do this.
Begin by removing the boltsled assembly from your Longshot and knocking out the ever-annoying pin that holds the sled to the breech.
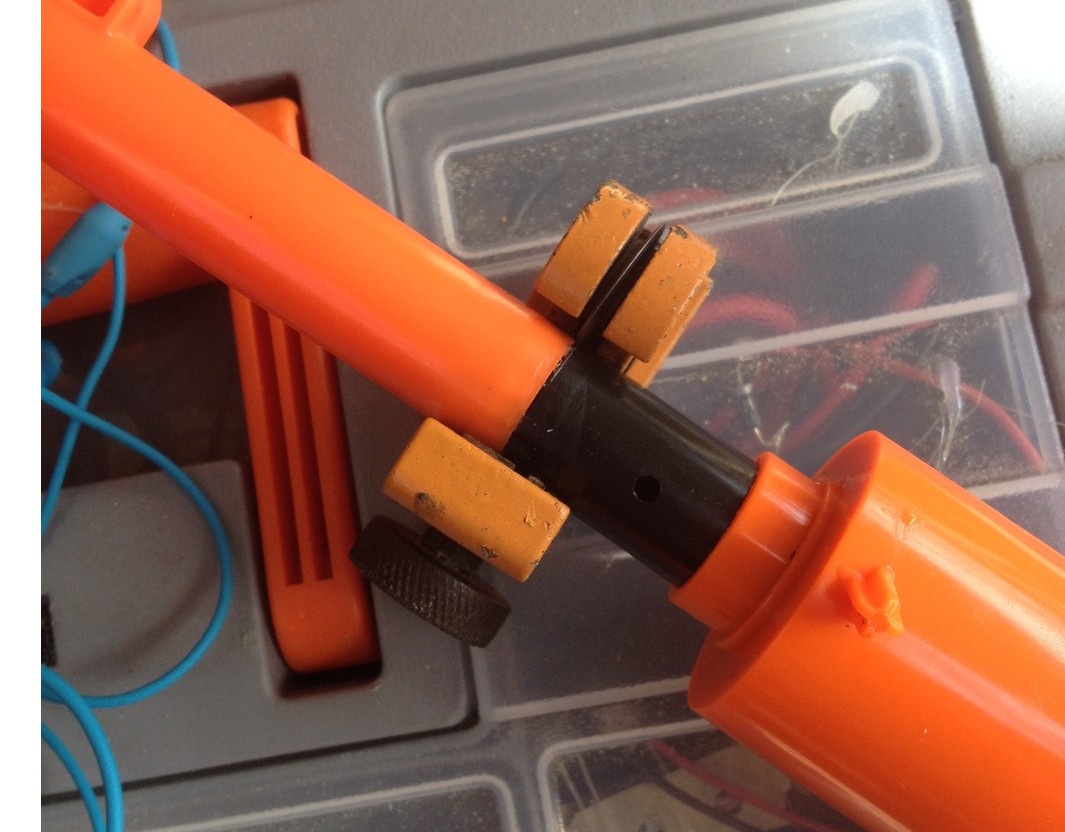
See the seam between the orange and the black? We’re gonna cut there with our rotating pipe cutters. Patience here. You need to be able to cut into it just enough to easily remove the orange piece from the black piece it’s glued to. If you’ve gone right through it and split it into two pieces, with the dart tooth still inside the orange piece, you went too far and this will make your life difficult. BE CAREFUL.
Once those two pieces are separated cleanly (if you fudged up as stated above, remove the black as much as possible from the orange piece by means of a grinding bit on your rotary tool), the most painstaking part begins: drilling.
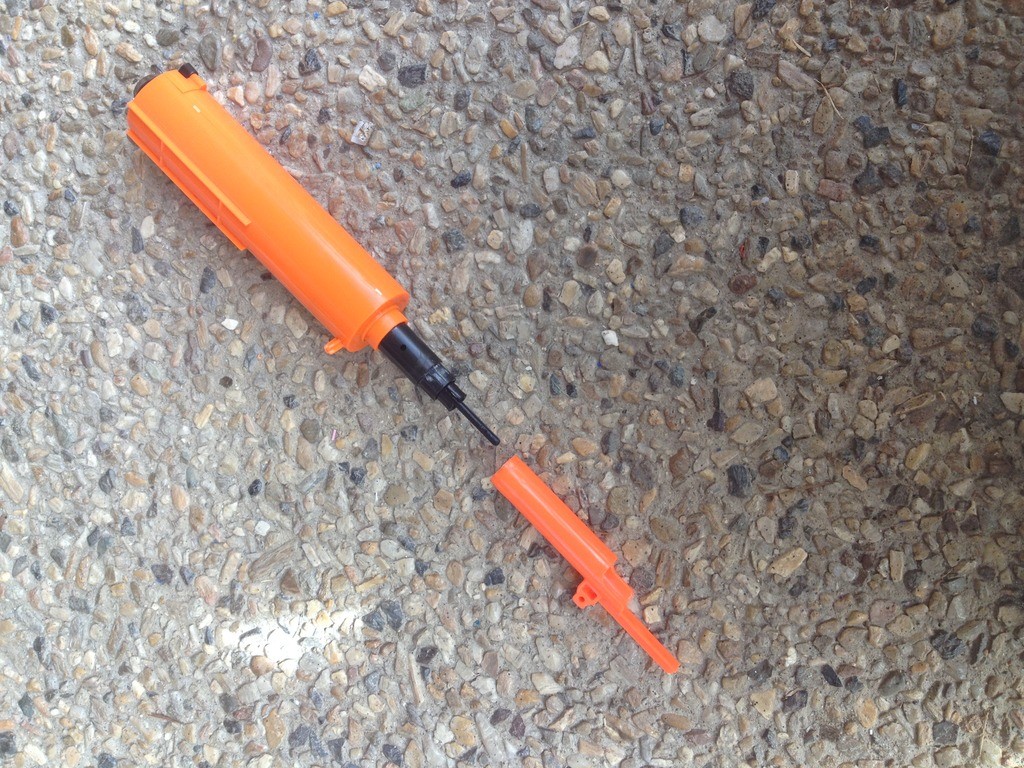
This is the most painstaking part because there are two parts to do and the orange part takes FOREVER to do properly. If you rush, you melt your orange piece, your breech is unsalvageable. Got it? Good. Now, read carefully. DRILL. SLOWLY. IN. REVERSE.
I didn’t stutter. REVERSE. Why? Because if you drill in forwards, you risk catching your drill bit inside the plastic, which will do one of two things: 1) tear it out of whatever you have it held in, or 2) grab and shred the plastic, and ruin the breech. Really, my method is counterintuitive but I’ve done this for several breeches now, so you can trust me on this.
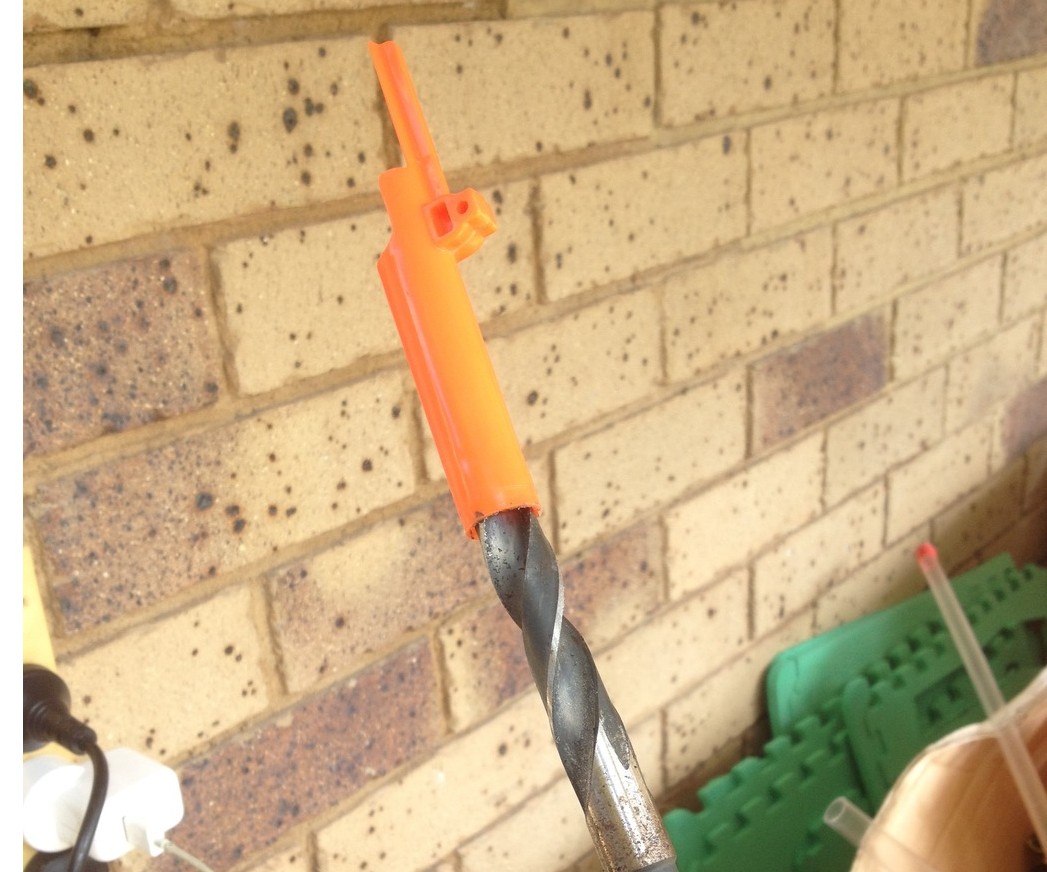
Whenever you’re ready to begin, get your 9/16” drill bit, fit it to your drill and begin. REVERSE. SLOWLY. Get it in as much as you can (giggity) while it’s still relatively cool, and then remove when it starts to feel warm (I drill in reverse with it in my hand; not best practice nor entirely safe but it allows me to gauge when it gets too hot quite easily). Again, too fast will melt your breech.
Keep going, slowly, steady, til your drill bit begins to poke out the front of your breech. You’re good to go when it’s able to move fairly freely back and forth through the full length of the breech. However, you’re not done yet. Take the drill out and start fitting your 9/16” brass to it. Tight fit? Take the brass out, drill back in, wiggle around a bit. GENTLY. You’ve gotta ream out the breech until the brass almost effortlessly slides on. This allows it to just slide over the epoxy when it comes to gluing. Rinse and repeat fitting brass and drilling out until you can push your brass through your breech section fairly smoothly.
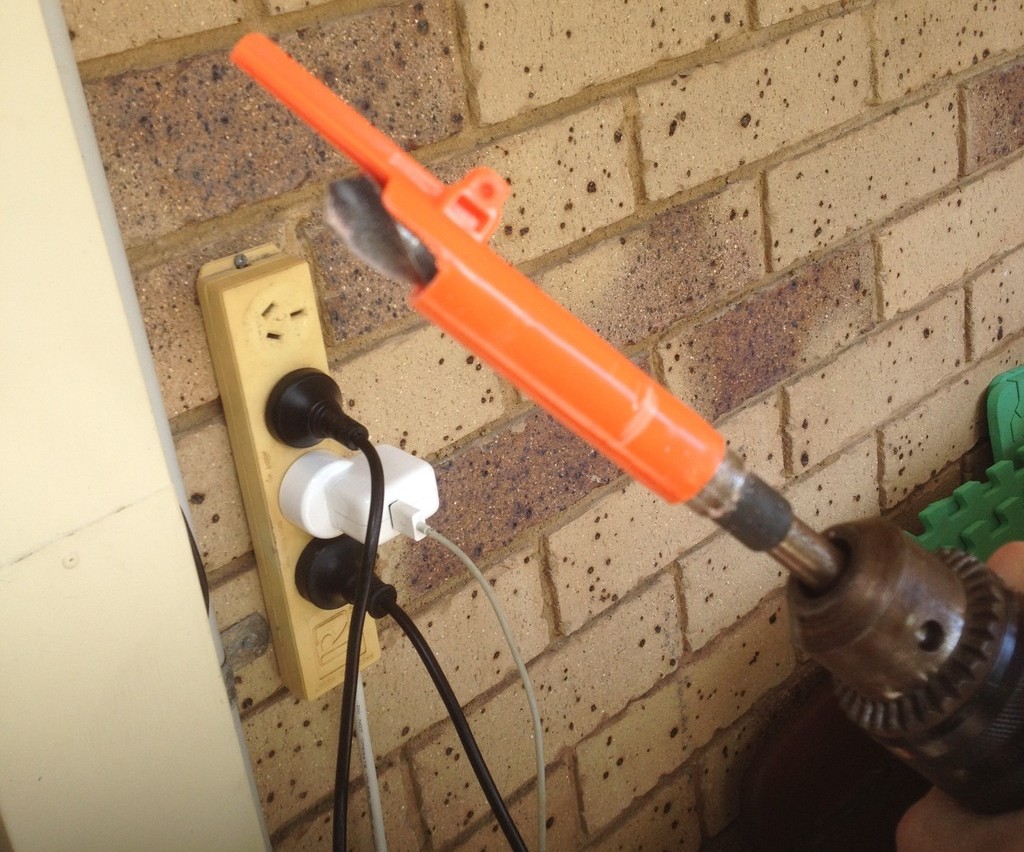
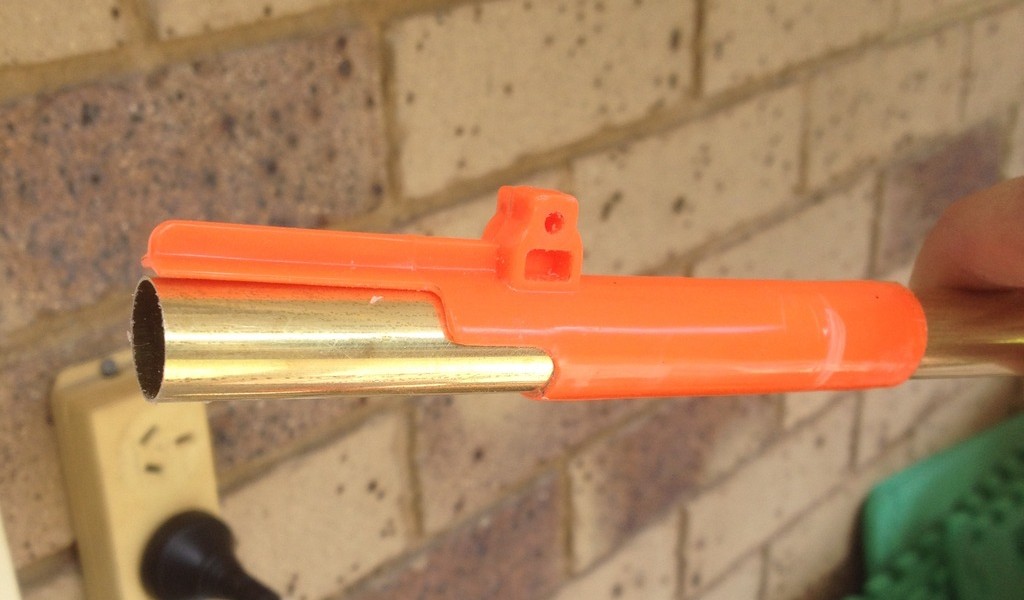
That’s the hardest part done, good job!
Next, there are two deviations on Sleeper breeches. This writeup will cover Hybrid Sleeper followed by Conventional Sleeper.Hybrid Sleeper has the Hobby Mods Longshot Deluxe kit installed along with the brass breech section, so my design has compensated accordingly. It’s literally a matter of just shortening your brass enough for the deadspace remover to fit inside the back black piece, which I will refer to as the plunger cup. Remember to cut your plunger cup with a hacksaw to the right length, followed by installing the deadspace remover and epoxying it in place. Refer to THIS VIDEO for more information and skip to 3:33 to see more.
Since this product has since become redundant and is no longer actively used, it has been replaced with the deadspace removers available from Spenceworkz and other Facebook-based retailers of 3D printed Nerf parts. This part follows the same method as before, minus the hacksawing. Pictures of this section are old, and no longer relevant, but the principles remain the same. Any text with strikethrough font should be ignored, but are being kept as part of the original writeup.
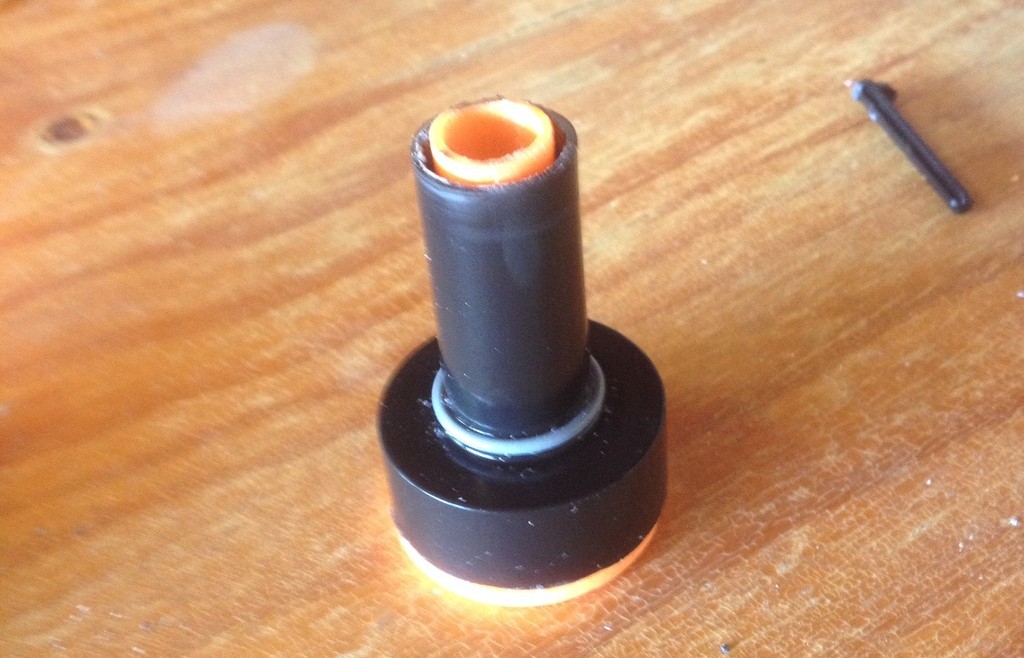
This cup has not been cut enough. Time to take it out and cut more!
Also, you will want to trim your Deadspace remover at the brass end, until your dart's head pokes out without the foam...
Like this. I did it with the cut breech as it hadn't been epoxied in yet; it's doable with the stock plastic breech as well.
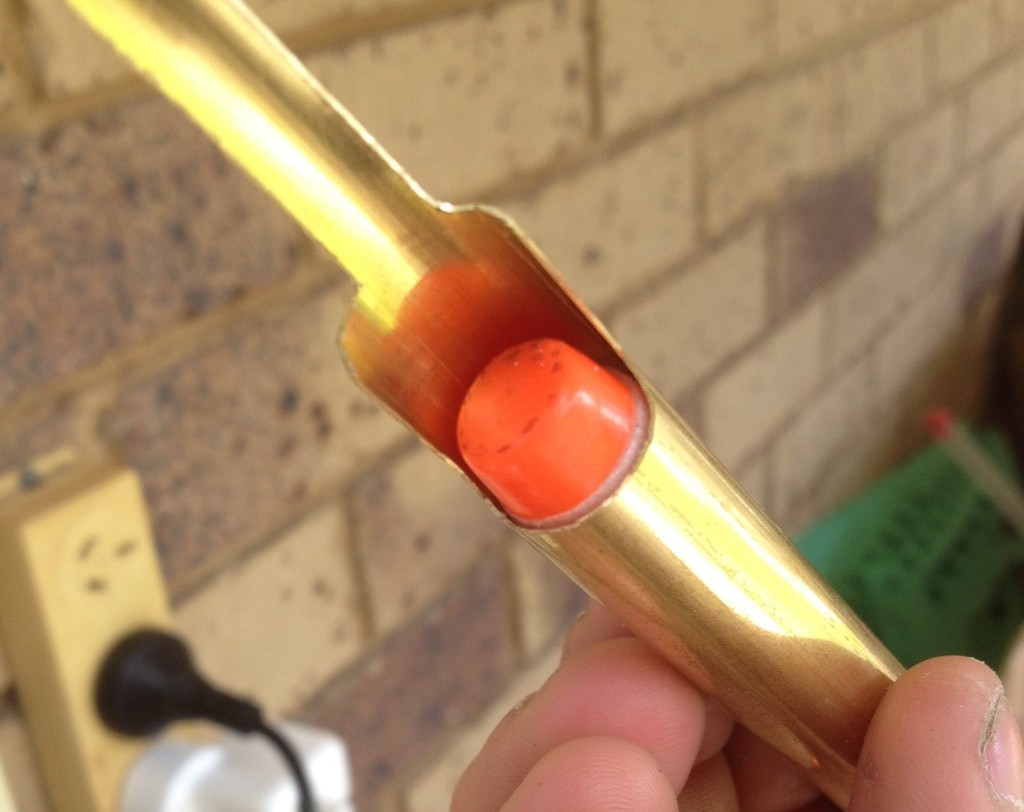
Once you have your deadspace remover epoxied in place, fit your 9/16” brass to the inside of the plunger cup so it’s right up against where the deadspace remover ends. Then fit your breech to the brass and mark where the breech tooth ends on the brass. Cut your brass to this length. Next, DO NOT REMOVE THE BREECH. Using your Dremel, cut away at the brass until it matches the shape of the stock breech. The more precisely you cut, the "sleepier" the breech. Once you've finished the breech shaping, remove the breech from the brass and sand the plunger cup end of the brass. Epoxy the brass into the plunger cup and allow it to cure. It is more structurally sound to add the epoxy to the inside of the plunger cup and to the outside of the brass as this seals it up and strengthens it from within as well as from outside.
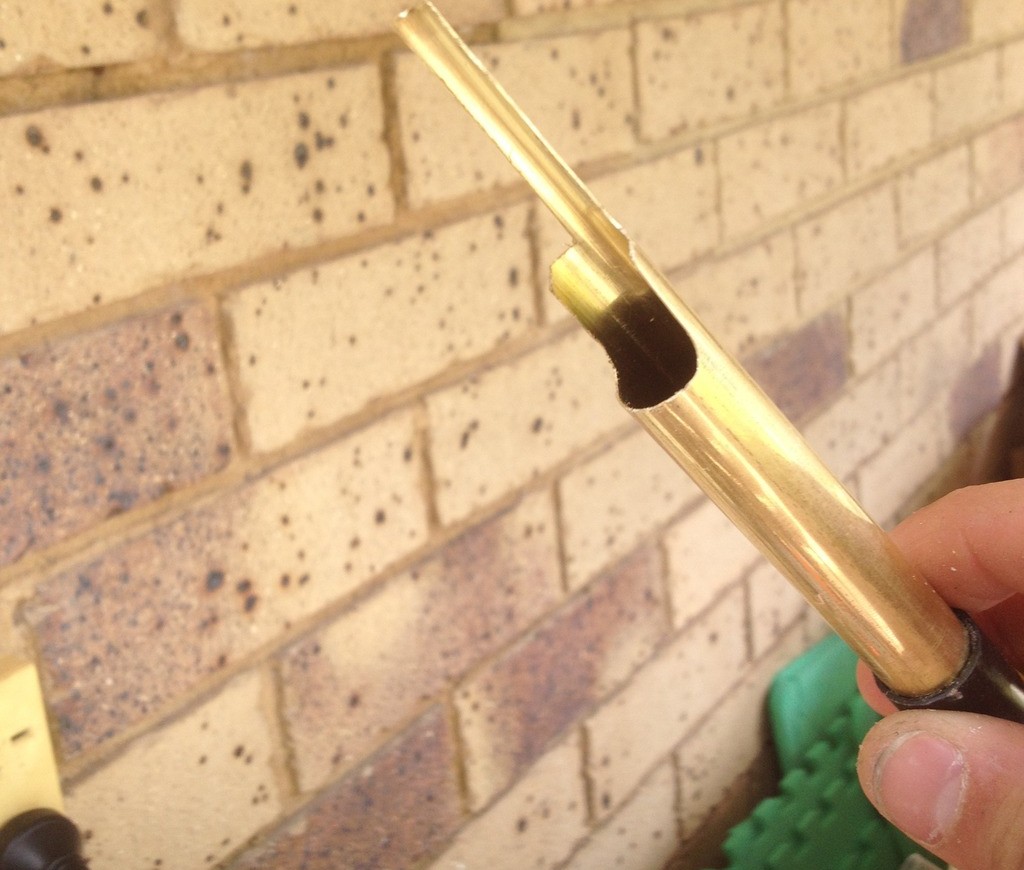
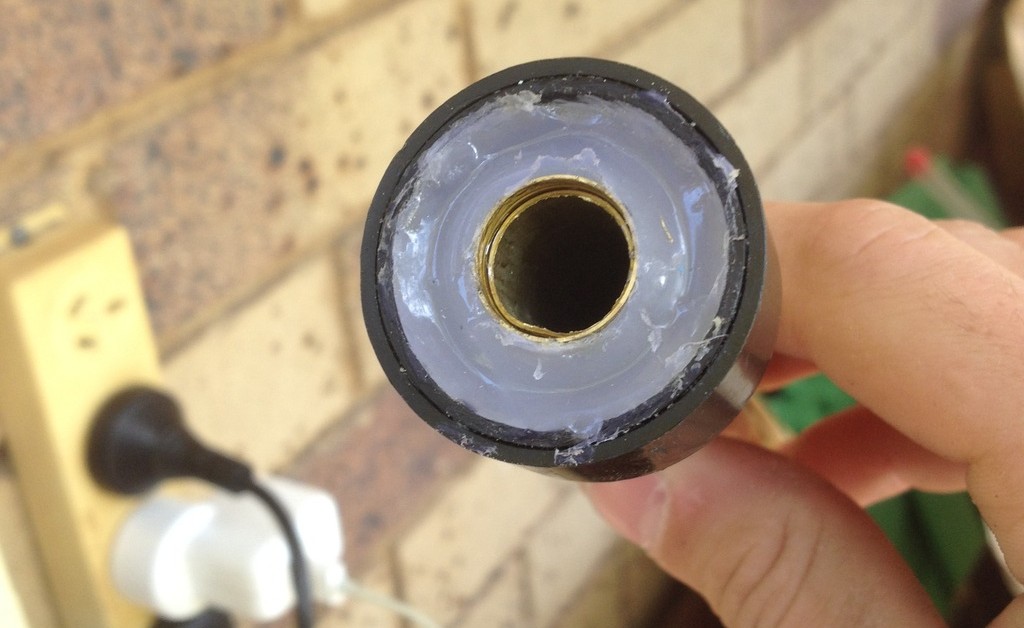
The Conventional Sleeper breech follows very much a similar method to Forsaken Angel’s design for deadspace removal; cut your 9/16” brass to the right length inside the plunger cup (the right length is determined by the length of your combined breech and plunger cup. This length is from the very tip of the breech to the back of the plunger cup). Once you have cut the length of 9/16” down to only what is necessary, make sure your breech is removed from your brass length and glue the back plunger cup to your length of brass. Epoxy, please. Once cured, fill in the dead space with hot glue.
For either Sleeper breech, now that your brass has cured to your plunger cup, fit your breech to it and using your rotary tool with a cutting wheel, cut your brass to the shape of the stock breech as carefully as possible. The closer the match, the better, as it helps make it look clean and if you were going for “completely stock” like I originally was, then you gotta pretty much nail your cuts. Edges can be cleaned up with a grinding bit (or deburring tool), as can burrs and swarf, and I thoroughly recommend both, as the best possible finish also improves your seal. Once you’re satisfied with this finish, remove your breech again from your brass and sand it once over with around 120 grit sand paper. This gives your epoxy glue some serious surface area to bond to when you apply it.
Before proceeding any further, PUT YOUR BRASS BREECH SECTION AND PLUNGER CUP THROUGH THE PLUNGER TUBE HOLE. If you don’t do this, putting your breech back together will be nigh impossible unless you go lipless, and I’m not covering that in my guide.
Now, mix your epoxy again and apply it to the following areas: the halfpipe at the front of the plastic breech, and the outside of the brass all the way around. Slide your plastic breech onto your brass and clean up any excess you might have with a tissue.
Wait for it to cure. While you do that, I thoroughly recommend making your barrel!
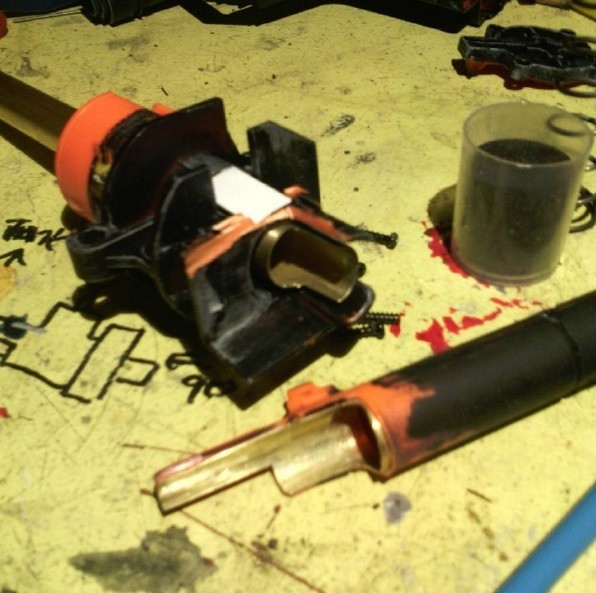
This picture is a bit blurry, I apologise, it's not mine; this is a pic taken by @frankenzilla_modds on Instagram who was replicating my design of Sleeper breech after I sent him one. Note the half pipe he has done in his breech.
Get your faux barrel and your dart gate out, and grab your 17/32” brass. You’ll want to fit the 17/32” loosely inside both. Line up the end of your brass with the end of the dart gate, so the “teeth” and the whole tube are almost perfectly in line. Then mark out a half pipe using a permanent marker. It should only be about 2 cm long, and no, before you ask, that doesn’t affect feeding at all by being shorter than Angel’s design; I have however attempted to do a breech without this halfpipe and the customer that received it has mentioned to me that his breech actually did have considerable feeding issues. So the halfpipe is a necessity. Cut it as smoothly as you can, round out the corners if you want. Then line it back up with your dart gate and hopefully it looks centred properly. Wrap your brass in electrical tape at points inside your faux barrel, until your brass fits firmly inside your faux barrel; I don't need to photograph that as it's been done too often to need it.
During curing time, I put my barrel inside my breech and cable tie it down, making sure no excess epoxy gets on the barrel; this allows the tooth on the breech to remain straight and centred during curing.
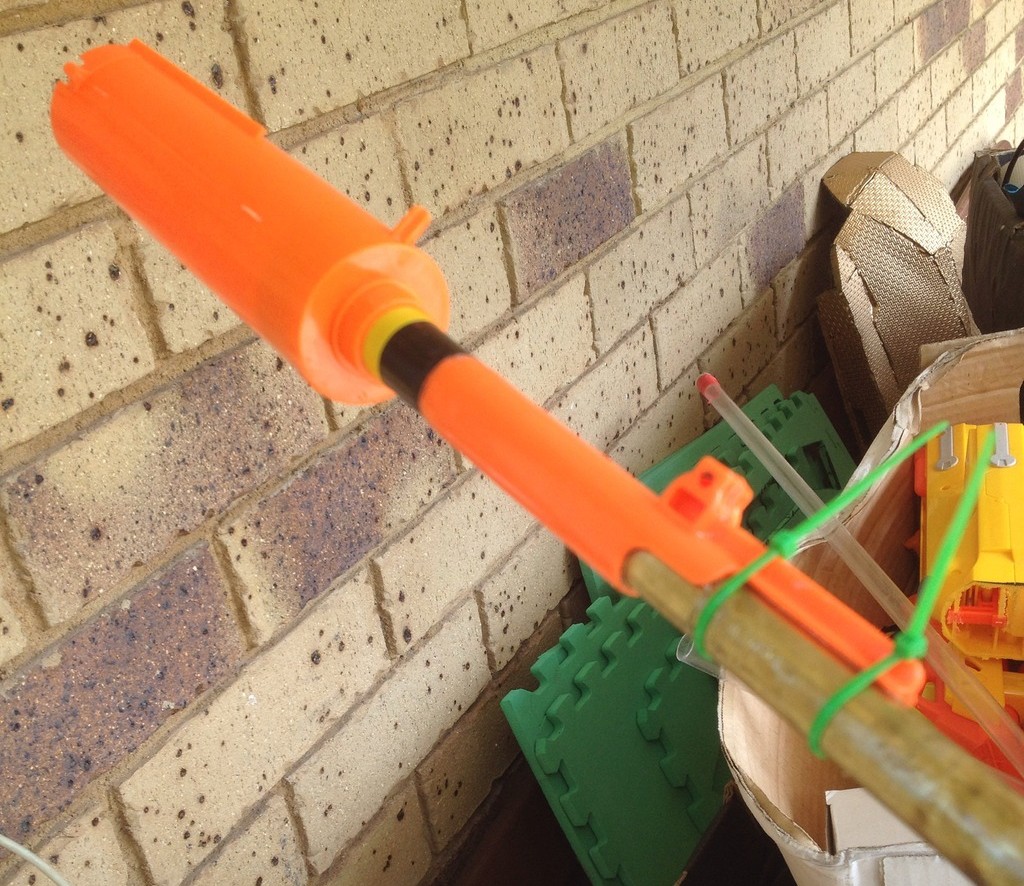
Once your epoxy has cured on your bolt/breech, you'll have your breech section ready to go. You'll need to assemble your plunger into your PT, and your bolt sled, once reinforced, back onto your breech. After that, you'll need to do your test fitting of the breech and make adjustment cuts as necessary to make sure your seals are ideal to the spec you want; believe it or not, some people need to do Longshots below a given velocity threshold, such as 220, which is the ideal maximum velocity at which FVJ darts are no longer able to consistently fly straight (This has been disproven as SCAR barrels make breeches with too-short barrels much more accurate). However, even below this velocity they can still have a tendency NOT to fly straight; however that's a digression I won't cover in this build.
That's really the gist of the build. There's more than one way to skin a cat with this build; you can epoxy the brass to the bolt section first and then epoxy it to the plunger cup after you're done, if doing a Hybrid Sleeper. This principle is also replicable in just about any magfed blaster, bar the Stampede for the reason that its stroke length when travelling is too short to seal the breech properly. If feeding half length darts, this is still possible.
I hope that covers everything people want to know. I'll post Chrony results of my Hybrid Sleeper of choice this weekend for comparison's sake to standard Longshot brass breeches of a similar kg rating. As it turns out, there's a lot more to account for than just spring force for a breech.
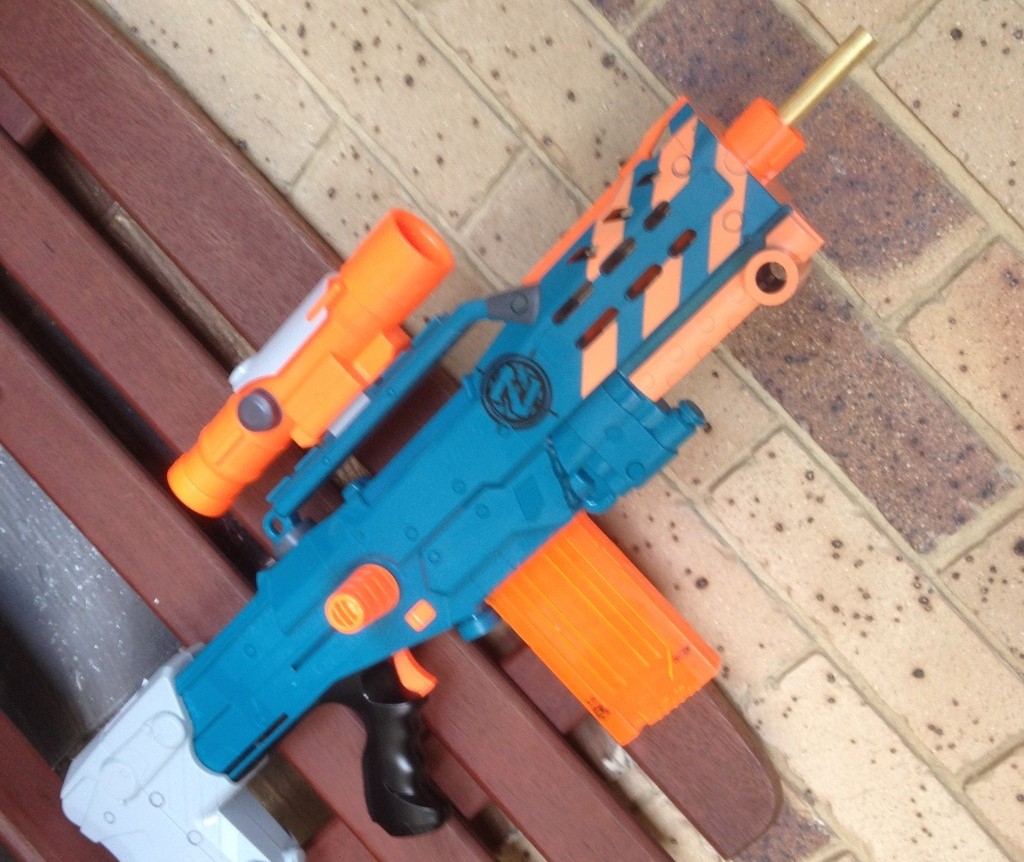
Bonus pic: ZSLS commission I did for a customer, who wanted a full foot of 17/32" brass barrel; I sheathed it in PETG for protection against the elements as well as to prevent core sampling people with the raw end of the brass.
Edited by OzNerf-Sarge, 05 November 2017 - 11:42 PM.
Image rehosting


