Preface
As a blaster manufacturer, it behooves me to make slots, quickly, efficiently, and accurately. As a poor college student, I need to perform these operations on the cheap. So this is my documented adventure at making a light-duty vertical mill for use on nonmetals. Such a machine could be useful for those in the hobby that make slots or make blasters as their main hobby/money pit. I am a tinkerer at heart, and I love this shit. If this belong more in off topic, feel free to move it/ ban me/ give me a good spanking daddy, but honestly I think this might not be a bad idea for fellow machineophiles and homemade builders on a budget.
Please keep in mind that an actual vertical mill would be better and safer, but this project coast approximately $250, whereas the least expensive bench mill was $650 at harbor freight, so the quality would be total shit anyway. Searching around, a good table mill will easily exceed $1000-$1500. This build was inpired by this article; (turn to page 180).
Disclaimer
My background is in mechanical engineering technologies and I have years of machining and woodworking experience. If you do not have a solid understanding of these concepts, find a friend that does and get help from them. This is not the best way to do this, and an actual vertical mill would do this job much better. I am not responsible for injuries sustained during the building, maintenance, or operation of this machine, or any damages caused to the machine or equipment. In short, Always use proper caution when working with tools. Only you are responsible for your safety and your property.
Tools you'll need
Drill and Bits (Decent bits, not the shitty dollar store ones.)
#8 Tap wrench
Vice (good thing you just bought one)
2 Wrenches
Big Strong Pliers
Screwdriver
Hacksaw if you're a STRONG MAN OR WOMAN (Dremel if you a little wimp)
Safety Goggles you dumb motherfucker, don't lose your eyes
Safety Gloves
Rubber Mallet
Coolant (I used WD-40)
Ruler
Sharpie
Items
Harbor Freight Drill Press (Usually $199, got it fo') $110
Harbor Freight 6" X-Y Vice: $70
Tax and Shipping: $25
Home Depot Hardware: $45 (If you do it right and don't fuck up lol)
Pack of Skateboard Bearings $10
Total: $260
Stuff I already had:
Wood (and lots of it)
Onto the Good Stuff:
(For this writeup, descriptions will be below their respective pictures.)
Assemble your Harbor Freight Drill Press. I won't insult your intelligence by rewriting the instructions for you, but I will say do not install the table supplied/any of the associated hardware because the table does not go low enough for the milling operations I want to do. If you got a bigger model, this may not be the case.
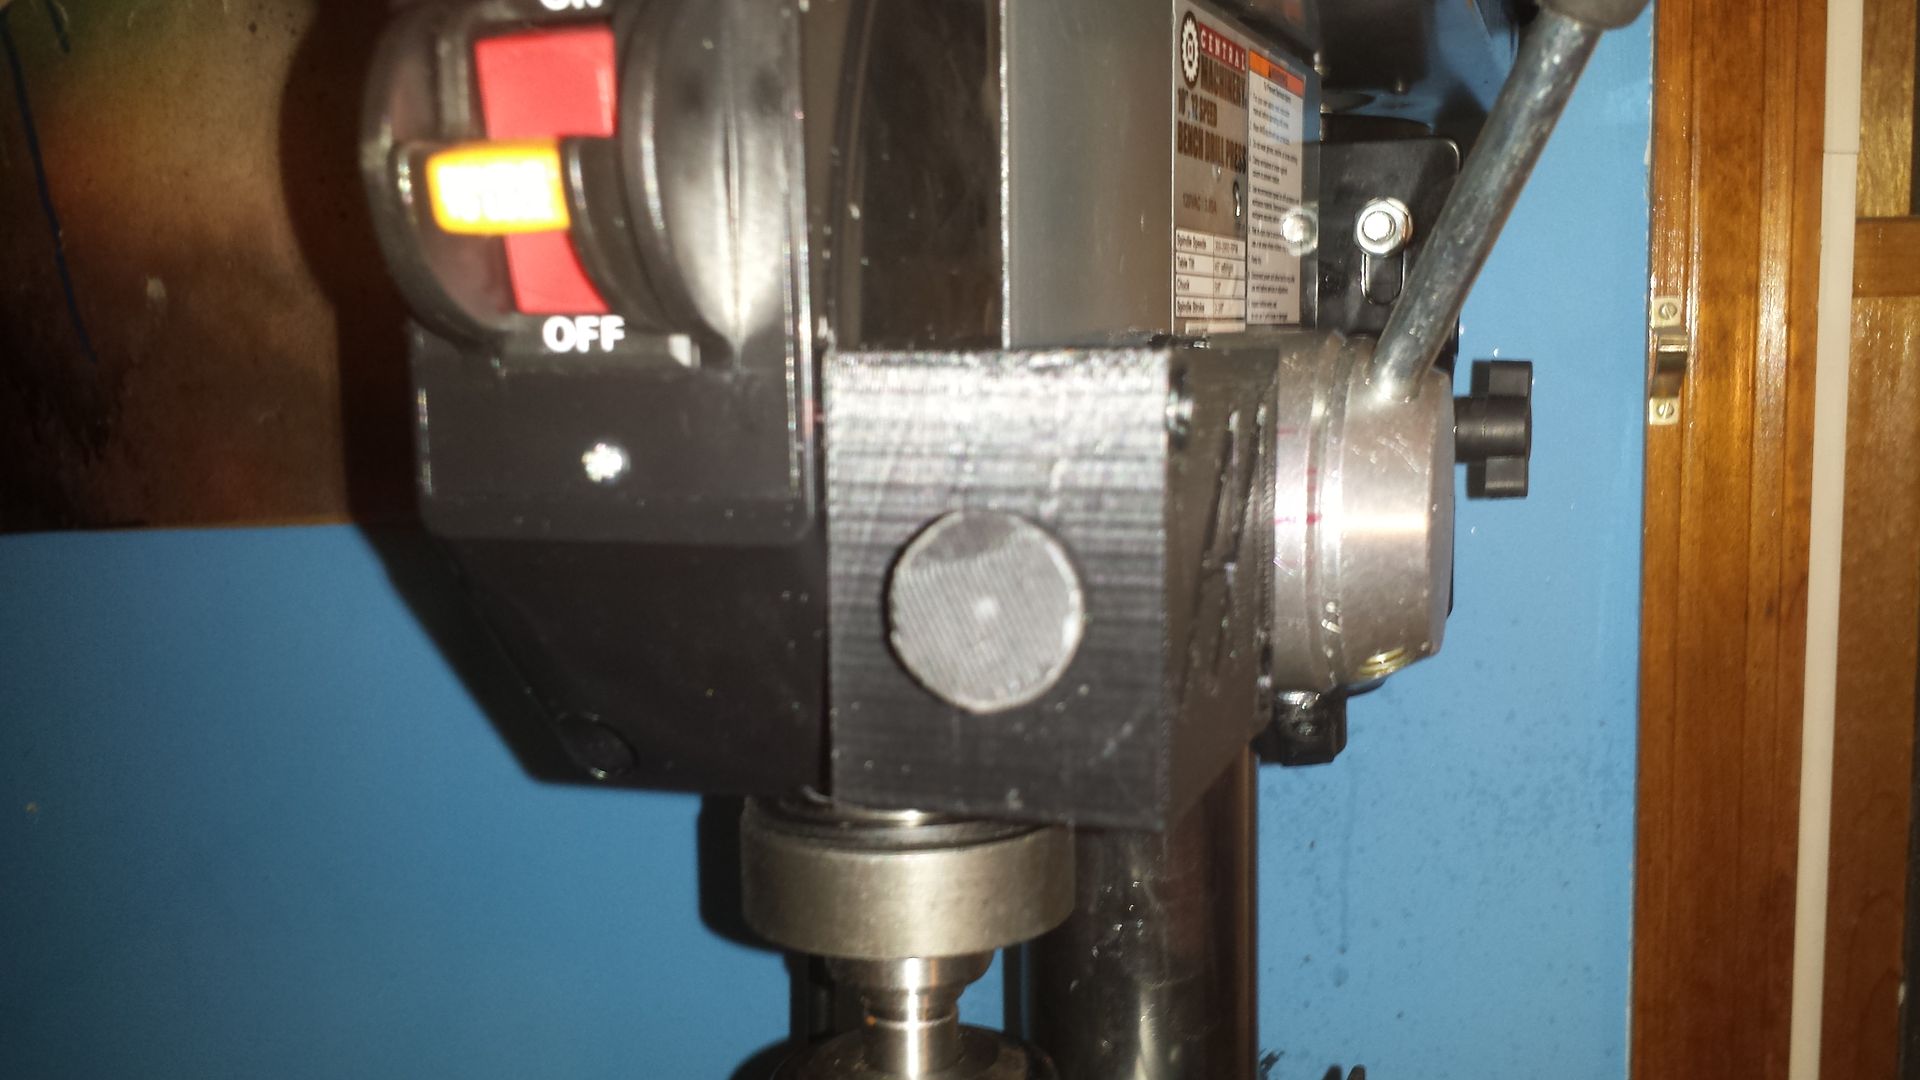
Nice head. Ten speed, double belt drive allows between 300 and 3,000 RPM
The only problem I ran into during assembly was installing the damn drill chuck onto the spindle. It has to be banged on with a rubber mallet. The problem was it went on crooked and rocked. This was because the crappy mild steel spindle actually compressed and peened out when the drill chuck was banged into place. To remedy this. I turned on the drill without the chuck, and used a piece of sandpaper backed by a wooden ruler to shave off the metal that had been pushed out. So the rotating spindle and stationary sanding tool acted as a lathe would. It sort of worked. I banged it into place after this correction, and It was sort of fixed. No more rocking, but it still wasn't totally perfect. Probably out of cylindricity by 0.010 inches. In short, do not buy this drill press. Buy the Home Depot one for $10 more that has the chuck pre-installed and cocentric with everything.
Blurry photos are artistic, I hear. Seen on the main tower is a 2-1/2 inch strap iron. I forget what Home Depot calls them, but they're near the PVC and copper pipe fittings, meant to hold pipes against walls I guess. This will wrap around the tower and support our lateral support fixture. They're kinda flimsy but It's only really needed to take tensile stress, so you're good.
Measure out where the holes are on your strap iron, and drill those respective holes in the steel right angle channel. (Whoa! drilling through steel, Aeromech?! I told you this was outside the scope of most builders. Just clamp the steel down in a good solid vice, and drill firmly, with authority, through the steel with hardened steel bits. Have a helper constantly apply coolant or oil while you're drilling, this is why the can of WD-40 is in frame.)
Bolt the steel angle onto the strap iron using appropriately sized bolts.
Seen from the side/back.
Here's the meat of it, yo. This is another piece of steel angle with the bearing supports attached. This consists of skateboard bearings attached on 5/16" bolts with the top section of the bolts unthreaded (to reduce wear on the insides of the bearings). I forgot what type of bolts these are exactly, but you get the idea. The bolts with the bearings are attached to the steel angle by two lock nuts. The top nut is tightened first, then the bolt is inserted into the hole drilled into the steel angle. Then the final nut is then tightened. This means that the two lock nuts provide the squeezing force against the steel angle, so excessive crushing force is not placed on the bearings.
The placement of the holes are largely dependent on your precise setup and drill press, so I cannot really give any good measurements here. But if you follow the procedure, you should be good to go. The hole drilled on the left side of the steel angle in the preceding photo will be met with the supporting fixture we placed on the tower earlier. Now make a mirror image copy of the arm you just made. Machining steel sure is fun, huh?
Tape the arms up against the bottom of the drill chuck tightly, this will ensure all four bearing supports are touching the drill chuck and providing support when the thing is finally assembled. Mark Where the holes in the back of your arms are on the tower support, and drill through each one. Secure each with a bolt and lock nut.
On the top left, you can see the nut and bolt supporting the arm. If you haven't done so already, drill and tap through three or four holes in the strap iron and tower, ensuring the arms are aligned correctly with the drill chuck before you actually drill. These screws sunk into the tapped holes ensure the support is held in place securely
At this point, the arms can still be adjusted, your margin is now just reduced to a few thousandths of an inch. Now is the time for fine adjustment. I found a set of big strong pliers to be very useful. The next step locks everything in place. Tape up the arms tightly against the head once again.
This is where the steel flat bar will be utilized. Cut a piece roughly the size of the distance between the two support arms. Then tape it against the bottom of the support arms very tightly. Now, drill two holes in each arm, through the steel flat bar. Tap these holes for whatever screws you have, I had #8s laying around.
Here you can see the purpose of this bar/plate. It prevents the support arms from rotating and locks it in place. To use the machine as a traditional drill press, the four screws can be removed, and the arms opened out of the way of the drill chuck.
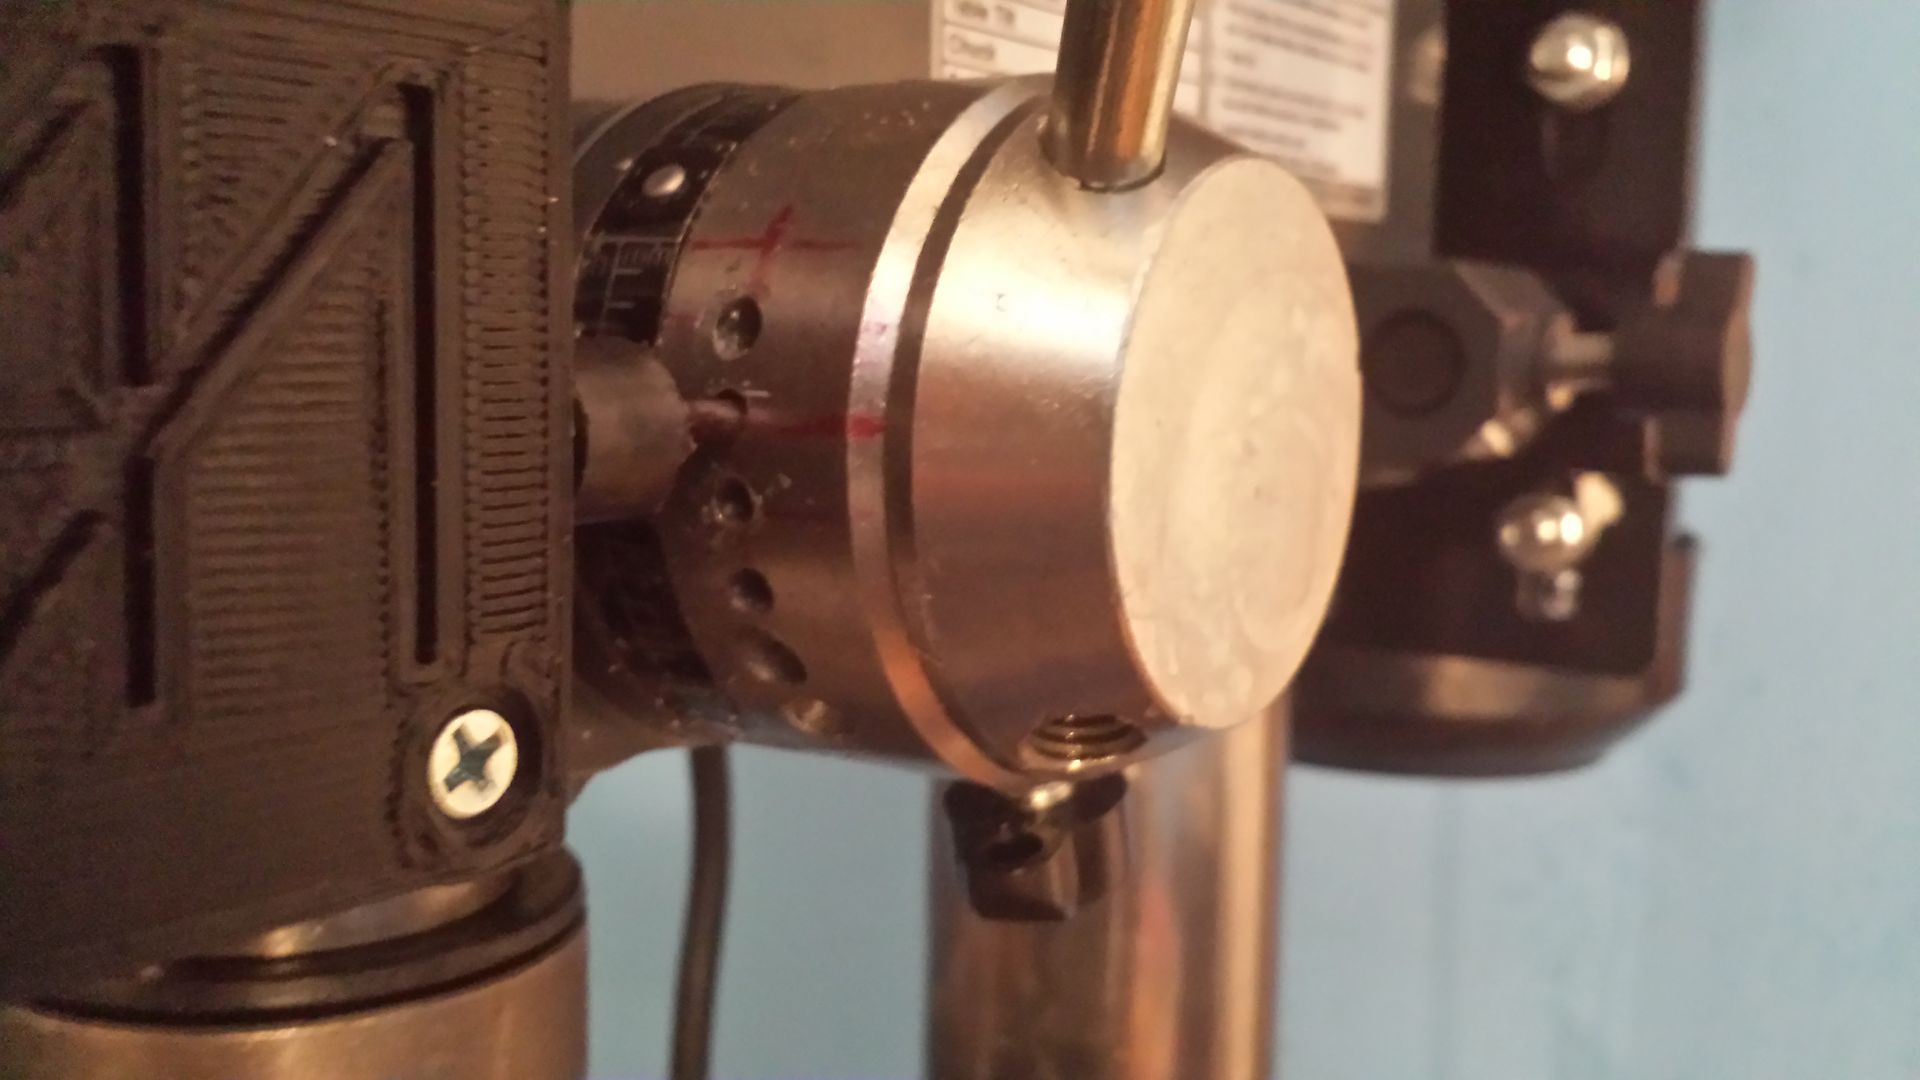
Here you can see the purpose of this modification. If an end mill setup was to be placed in the chuck, the lateral reaction force would be provided by the bearings instead of the spindle, or, in the case of my VERY shitty drill press, keeps the drill somewhat cocentric with the spindle. The other thing is, your depth is now limited to only about half an inch. Not a problem when cutting slots less than 1/4" thick, but not ideal for large milling operations. For such projects, simply prop up the part you are cutting in the vice itself with a piece of flat steel or plywood, to raise it up closer to the endmill or drill bit. It's not as easy as turning a dial on a traditional mill, but the $400 extra dollars in your bank account will more than make up for the 10 seconds it takes to prop up your part, if accuracy isn't too big of a deal.
All four bearing supports should rotate with the head. If they don't make contact, Try to bend the steel arm til it does, Or at least gets within maybe 0.002 inches.
The X-Y table vice is pretty sweet. Again, nothing groundbreakingly precise, but it'll do for its' intended use. It's currently too far away from the drill chuck, so we need to raise it up a bit.
Also, the Y traverse knob is getting in the way of the tower, So I'll have to saw that off too. It will be turned like a dial to move forward and back, instead of the traditional handle. Again, Not ideal, but good enough for the intended role.
Also, these holes didn't want to let in the bolts I bought.
I quickly convinced them. Next time, just measure the holes before you buy. Also, Take note of the four holes drilled in the base. These were drilled to fit in the bolt channels in the vice. I had to remove the tower to make these holes, but it made the hole process easier and only amounted to removing three little bolts.
This is the final mounted vice. I used wood because I have wood. Note the sub optimal bolt length. This will come into play later.
These holes allow the base to be secured to the table. Just measure and drill through the table, and then bolt everything down. Put the tower back on too.
If the bolts are too long, the shiim tightening screws will hit them and not allow the vice to traverse. This can easily be solved by getting the correct length of bolts, cutting the bolts, or cutting the adjustment screws. I opted for the latter option.
That's better.
Here's the final product. Still need to get an endmill for it. I hesitate putting an endmill directly into a drill chuck, and I would like to manufacture an aluminum sleeve for it so it's better supported in the drill chuck. Either way, this should probably work fine and when I test it I will give y'all updates.
Notes
Again, this is going to be used as a light-duty vertical mill for nonmetals/slot cutting machine for PVC pipes. It's not going to be taking high lateral forces anyway. I wouldn't even atempt to cut steel on this thing, and I hesitate to say I'd use it on aluminum. But not bad for a weekend project. There's no way I could afford even the $650 Harbor Freight mill/drill (which is just a reinforced drill press anyway,) so this allows me to perform the same operations on the cheap while scratching my inventor's itch at the same time. Try it out. But get the pre-assembled drill press first for a few extra bucks.
Future Tinkering/Improvements:
Add Polycarbonate Safety Shield
Craft a Y-traverse handle from threaded rodGive her a name I THINK I'LL CALL IT LUCY IN HONOR OF THE DUDE THAT SAID IT COULDN'T BE DONE.
Edited by Aeromech, 23 November 2015 - 12:46 AM.